

TL;DR: A proper interview transcription workflow (accuracy + speed + privacy)
Try TicNote Cloud for Free to capture audio, then follow this workflow to properly transcribe an interview: aim for accuracy (matches the audio), clarity (easy to read), traceability (timestamps plus versioning), confidentiality (consent plus secure handling), and usability (searchable, quotable, shareable).
60-second setup checklist:
- Name the file: YYYY-MM-DD, project, interviewee.
- Pick a style: verbatim, clean, or edited.
- Set speaker labels: names or roles.
- Choose timestamps: every 30 to 60 seconds, plus on topic shifts.
- Define an [inaudible] rule: mark it with a time, like [inaudible 03:14].
Manual is best for high-stakes nuance and legal risk. AI is best for speed on clean audio. Hybrid wins most of the time: AI draft, then human edit and QA.
If your notes live in five places, you lose quotes and decisions fast. That gets worse with long interviews and quick deadlines. A workspace like TicNote Cloud can keep recordings, transcripts, and summaries together, so you can start a secure transcription workspace and reuse the content later without rework.
How to properly transcribe an interview: the repeatable 8-step method
To learn how to properly transcribe an interview, use a set workflow you can repeat. It keeps your transcript accurate, clear, and safe to share. It also helps when you switch between research, HR, journalism, podcasts, and investigations.
Step 1: Confirm consent, purpose, and access
Before you start, confirm consent and what the transcript is for. Is it internal notes, a publication, or a legal record? Then set access rules now, not later.
Write down:
- Who approved the recording
- Who can read the transcript
- What "done" means (draft vs quote-ready vs court-ready)
Step 2: Prep audio and name files for traceability
Clean inputs save hours. Put your audio in one folder, and keep one naming rule across the team.
Use a simple pattern like:
- Project_Interviewee_YYYY-MM-DD_v01
Keep versions clear as you work:
- v01 (raw), v02 (edited), v03 (reviewed)
Step 3: Pick the transcript type before you type
Most transcription problems are style problems. Choose one style, then stick to it.
- Verbatim: every word, fillers, false starts
- Clean: keeps meaning, removes noise like "um"
- Edited: reads like a short written piece
If you skip this step, you'll over-transcribe (slow) or under-transcribe (not usable).
Step 4: Set format rules for speakers, timestamps, and tags
Decide your rules before the first line. This makes your work easy to audit.
At minimum, set:
- Speaker labels (Interviewer, Guest, or real names)
- Timestamp rule (every turn, or every 30 to 60 seconds)
- Notation tags like [inaudible 03:14] and [crosstalk]
This is also where AI diarization (speaker detection) can fail. Two people with similar voices, a noisy room, or fast back-and-forth can cause Speaker A and Speaker B to swap.
Step 5: Do a fast rough pass (capture meaning)
Your first pass is about speed. Get the core meaning down. Don't get stuck on one hard line.
Use markers so you can fix it later:
- [unclear]
- [check name]
- [confirm number]
Step 6: Do a second pass QA against the audio
Now you earn accuracy. Play the audio and fix what matters most:
- Speaker turns (who said what)
- Proper nouns (names, companies, places)
- Numbers (dates, prices, counts)
- Key quotes, especially for HR, research, and press
If you used AI first, this is where hybrid editing pays off. AI is fast, but it can miss short words, drop "not," or merge two speakers into one.
Step 7: Redact or anonymize sensitive data
Decide what must be removed before sharing. Replace sensitive info with consistent tags:
- [NAME], [ADDRESS], [PATIENT ID], [COMPANY]
If you must keep an unredacted copy, lock it down. Store it separately, and limit access to only people who need it.
Step 8: Finalize, export, and store with clear status labels
Save three states so everyone knows what is safe to use:
- Draft: rough pass done
- Reviewed: QA complete, ready for internal use
- Final: safe to quote and share (after redaction)
Store the transcript with the source audio, your notes, and a change log. If you need a broader workflow for other audio types, this step-by-step audio transcription guide maps the same process to meetings and podcasts.
Manual vs AI vs hybrid: pick the right approach
Use this quick matrix to choose the workflow that matches your risk level.
| Use case | Best approach | Why it fits | Watch-outs |
| Podcast | AI or Hybrid | Speed matters, "good enough" often works | Diarization swaps during jokes and overlap |
| Research | Hybrid | You need quotes you can trace to audio | Missed terms, wrong names, weak timestamps |
| HR | Hybrid | Clear records, fewer disputes | Privacy, redaction, access control |
| Legal or investigations | Manual or Hybrid | Highest accuracy, best audit trail | AI speaker errors, dropped negations, chain of custody |
Try TicNote Cloud for Free to record, transcribe, and organize interviews in one workspace.

What should you do before you hit record to get clean audio to transcribe?
To properly transcribe an interview, start by setting up clean audio. Small choices now prevent big fixes later. Your goal is simple: clear voices, low noise, and a file you can trust.
Set the room and mic for speech
Pick the quietest room you can. Turn off fans, AC, and loud computers if possible. Add soft stuff like curtains or a blanket nearby to cut echo.
Keep the mic close, about a fist away. Point it at the speaker's mouth, not the room. If you can't get close, move the speaker closer to the mic.
Build a backup plan before you need it
Record a backup on a second device, like a phone in the middle. If you have two mics, record separate tracks so voices don't blend. Before you start, check:
- Battery is above 30%
- Enough storage for the full session
- Airplane mode or Do Not Disturb is on
If you record on a phone, this guide on transcribing voice memos can help you pick a clean path.
Use speaking habits that boost accuracy
Ask for one person at a time. When a key name comes up, repeat it once. For rare names, spell it one time. It feels normal, and it saves you from guessing later.
Choose settings that keep words intact
If you can choose, use WAV or high-quality audio. Avoid very low bitrate MP3. Keep a consistent sample rate (like 44.1 kHz) across devices.
Record a 10-second slate for traceability
At the start, say the date, participants, and that consent was given. This makes editing and auditing much easier later.
Try TicNote Cloud for Free to capture clean recordings and turn them into searchable transcripts.
Which interview transcript style should you choose (verbatim, clean, or edited)?
Pick your transcript style based on what must be preserved: the exact delivery, the core meaning, or publish-ready readability. This choice affects how you handle fillers, grammar, and even whether a line can be audited back to audio. If you want to know how to properly transcribe an interview, start here, because the "right" style depends on the job.
Choose the style by what you must preserve
- Verbatim transcription preserves delivery. You keep filler words, false starts, repeats, stutters, and notable pauses. Use it for investigations, legal or HR matters, and quote-sensitive work where wording and speech patterns matter.
- Clean transcription (also called intelligent verbatim) preserves meaning with less noise. You remove most fillers and obvious stumbles, but you do not rewrite ideas. This is the default for business notes, research interviews, and internal review.
- Edited transcription preserves readability. You rewrite for clarity, fix grammar, tighten sentences, and sometimes reorder for flow. Use it for articles, reports, stakeholder briefs, and publishable summaries.
If you also transcribe video interviews, this clean transcript workflow for video helps you keep the same standards across formats.
Same excerpt in three styles (micro example)
Audio context: Two speakers discussing a missed launch date.
Verbatim
- Alex: So, um, I think we, we missed it because, like, the handoff was, uh, unclear.
- Priya: Right, and I, I said on Tuesday, you know, that QA wasn't ready.
- Alex: Yeah, but you didn't, uh, you didn't put it in the doc.
- Priya: I mean, I did, sort of, in Slack.
Clean (intelligent verbatim)
- Alex: I think we missed it because the handoff was unclear.
- Priya: I said on Tuesday that QA wasn't ready.
- Alex: Yes, but you didn't put it in the doc.
- Priya: I shared it in Slack.
Edited
- Alex said the launch slipped because the handoff was unclear.
- Priya noted on Tuesday that QA was not ready.
- Alex replied that the risk was not documented.
- Priya said she had shared the warning in Slack.
Notice the tradeoff: edited text reads best, but it adds interpretation. That can reduce auditability.
Important warning for edited transcripts
If accuracy matters, treat edited transcripts as a second layer, not a replacement. Keep timestamps in the underlying transcript, keep speaker labels, and save a reviewed version you can trace back to the audio.
How do you format an interview transcript so it's easy to read and easy to audit?
Good formatting makes your transcript readable now and provable later. The goal is simple: anyone should be able to scan it fast, then verify key quotes against the recording without guessing. When you learn how to properly transcribe an interview, format is the part that keeps your work usable across teams.
Label speakers the same way, every time (diarization)
Diarization means "who said what." If the speaker's labels drift, your transcript becomes hard to trust.
Use one label style per project:
- Full names: best for research, journalism, and long interviews (Example: "Jordan Lee:")
- Roles or titles: best for HR and business calls (Example: "Interviewer:" "Candidate:")
- Initials: best when space matters, but keep a key at the top (Example: "JL:" "AR:")
Rules that prevent confusion:
- Put the speaker label on its own line, then the text after it.
- Start a new paragraph for each speaker's turn.
- If you're not sure who spoke, use "Unknown:" or "Speaker 3:" and keep it consistent.
- If you later confirm the speaker, update all their labels together.
Choose timestamps based on how "auditable" it must be
Timestamps are your audit trail. Add more when accuracy matters more than speed.
- Audit heavy work (legal, investigations, compliance): timestamp every speaker turn.
- General use (podcasts, internal notes): timestamp every 30 to 60 seconds.
Keep one standard time format:
- Use mm:ss for short files and hh:mm:ss for long ones.
- Place timestamps right after the speaker label.
Example:
Jordan Lee [03:14]: We decided to pause the rollout.
Standard tags that stay clean and consistent
Pick a small tag set and stick to it. Use square brackets and keep tags lowercase.
Use these as written:
- [inaudible 03:14]
- [crosstalk]
- [laughs]
- [pause 2s]
For overlap without a messy page:
- Put [crosstalk] on the line where voices overlap.
- If one person cuts in, mark the cut with a short note.
Example:
Interviewer [07:02]: So you started in 2021, right?
Candidate [07:04]: Yeah, in 2021, and then [crosstalk]
Interviewer [07:05]: Sorry, go ahead.
Punctuation and paragraph rules by transcript type
Match the transcript style to the use case, then apply the right level of cleanup.
- Verbatim: keep false starts, filler words, and repeated words if they matter.
- Clean: remove obvious repeats and fillers, fix light grammar, keep meaning.
- Edited: combine sentences for clarity, but never change intent or facts.
Practical rule: if you change structure (edited), keep the same meaning and keep timestamps so someone can verify it fast.
Notation cheat sheet (copy into your team guidelines)
| What it means | Write it like this | Example | | left | left | left | | Speaker label | Name or role + colon | Interviewer: | | Timestamp | In brackets after label | Interviewer [12:30]: | | Can't hear audio | [inaudible time] | [inaudible 03:14] | | Two people at once | [crosstalk] | [crosstalk] | | Non speech sound | [laughs] | [laughs] That was awkward. | | Silence | [pause Xs] | [pause 2s] | | Interruption | short note in brackets | [interrupts] | | Cut off word | use an ellipsis | I was thinking… |
What tools and settings make manual transcription faster (without losing accuracy)?
Manual transcription gets fast when you control playback, reduce rewinds, and remove formatting work. The goal is simple: fewer pauses, fewer mistakes, and a clean audit trail when you properly transcribe an interview.
Tune playback so you don't miss words
Start with a speed you can follow without strain. Most people land in the 1.1x to 1.4x range, then adjust by speaker.
- Set rewind to 2 to 5 seconds. This fixes most "what did they say?" moments.
- Loop hard sections (the same 10 to 20 seconds) until you're sure.
- Use closed back headphones. They cut room noise and reduce fatigue.
Use hotkeys, text expanders, and a fixed template
Your hands should stay on the keyboard.
- Learn play or pause, rewind, and timestamp hotkeys.
- Use text expanders for speaker tags, common phrases, and [inaudible 00:00].
- Start every file with the same header fields (project, date, participants, source).
- Pick one timestamp rule, like every speaker change or every 30 to 60 seconds.
Consider a foot pedal when volume is high
A foot pedal maps to play, pause, and rewind. That keeps both hands typing and lowers strain. It's worth it if you transcribe weekly, or if your interviews run long.
Version your work and don't multitask
Use a simple convention: v0 rough, v1 reviewed, v2 redacted or final. And don't multitask when you're typing names, numbers, or legal terms. One slip can change meaning.
If you publish audio as synchronized media, Web Content Accessibility Guidelines (WCAG) 2.2 (W3C Recommendation, 2023) states that "Captions are provided for all prerecorded audio content in synchronized media" except the listed exception.
Try TicNote Cloud for Free to capture audio, transcribe, and store everything in one workspace.
How do you quality-check an interview transcript and hit the right accuracy level?
Quality-checking is where a transcript becomes "proper." Use a simple two-pass review: first, fix everything you can find. Then, zoom in on the parts most likely to be wrong. This is the fastest way to improve accuracy without rereading the whole file forever.
Pass 1: Do a full listen while you read
Play the recording from start to finish while you read the transcript. Keep your finger on the pause key.
Fix these issues as you go:
- Missing words and clipped phrases (often at the start or end of a sentence)
- Wrong speaker turns (A and B swapped)
- Timing drift (timestamps slowly stop matching the audio)
- Punctuation that changes meaning (question vs statement)
- Overlap and interruptions that got flattened into one line
Tip: If you're unsure, mark it and keep moving. Don't stall for five minutes on one word.
Pass 2: Spot-check the high-risk items (especially with AI drafts)
Now do targeted checks. Jump to every place where errors cause real harm.
AI error-spotting checklist:
- Diarization mistakes (speaker swaps), especially when voices are similar
- Merged speakers (two people shown as one speaker)
- Repeated phrases (the model "loops" a clause)
- Dropped negatives like "not," "don't," or "never" (meaning flips)
- Hallucinated proper nouns (a confident-sounding name that was never said)
The hard stuff to verify every time:
- Names and spelling (people, companies, products)
- Job titles and roles
- Dates, times, and deadlines
- Numbers (budgets, counts, metrics)
- Addresses, email handles, and URLs
- Acronyms and abbreviations
Method that works: pause and replay the same 3 to 8 seconds, 2 to 3 times. If it's still unclear, mark it like [unclear 12:41] and move on.
Handle accents and jargon with a mini glossary
If the audio includes accents, industry terms, or internal code words, make a quick glossary at the top of your working doc. Add the preferred spelling as you confirm it. When possible, confirm spellings from a public source (like a company site) or a trusted internal list.
Set accuracy targets by use case, then escalate when needed
Aim for the accuracy level the job requires:
- Internal notes: "good enough to search and summarize," light spot checks
- Publication: careful pass 1 plus strict checks on quotes, names, and numbers
- HR, legal, investigations: highest rigor, full listen, strict timestamps, and a second reviewer when stakes are high
Escalate to human review (or a second reviewer) when the interview is sensitive, when quotes must be exact, or when you see frequent speaker swaps and name errors.

How should you handle consent, confidentiality, and sensitive interviews while you transcribe?
To properly transcribe an interview, treat it like sensitive data work. Get clear consent, limit who can see the files, and keep only what you truly need. When in doubt, choose the safer option and document it.
Get consent, then write down what was agreed
Consent rules vary by place, and by how the recording happens. Some areas allow recording with one person's consent, others require everyone's consent. If you're unsure, ask for explicit permission before you record.
Document the basics in a note or header:
- Who agreed, and when
- What you're recording (audio, video, screen)
- How the transcript will be used (research, HR, legal, publication)
- Who will access it
- How long you'll keep it
Keep confidentiality tight from minute one
Start with least privilege (only people who need access). Avoid sending raw audio or transcripts over email threads or public links. Use a single source of truth, and track versions so edits are traceable.
Good practice checklist:
- Separate sensitive cases into their own project or folder
- Restrict sharing by role (owner, editor, viewer)
- Keep an audit trail: v1 draft, v2 QA, v3 redacted
Redact and de-identify sensitive details
If the interview includes PII (personal info) or PHI (health info), remove it unless it's required. Keep the minimum necessary data for the job.
Use consistent markers so redactions are easy to audit:
- Replace names: [NAME REDACTED]
- Replace locations: [LOCATION REDACTED]
- Replace IDs: [ID REDACTED]
- For unclear audio: [inaudible 03:14]
Set retention rules and delete what shouldn't live forever
Pick a retention window that fits the purpose and policy. Delete drafts, exports, and duplicate files that don't need to persist. For teams, store sensitive work in a secure workspace with role-based access, and keep projects separated to reduce accidental exposure.
A tool-assisted interview transcription workflow (record → transcribe → translate → summarize → store)
This walkthrough uses TicNote Cloud as the example tool, but the same workflow applies to any app that can record, transcribe, and store files. The primary flow below is web-first for uploading, transcription, Shadow AI refinement, and exporting, with app steps included where hands-on editing or trimming adds value.
Set up a project space so nothing gets lost
Create one project per study, case, client, or podcast season, and keep every related file in that same place from day one.
Use a simple naming rule:
- Project: "HR interviews, Q1 2026"
- Files: "Int 03, Jordan, 2026-01-20"
This "second-brain" setup matters. When audio, transcripts, summaries, and exports live together, you can find quotes and decisions later without digging through drives and chat threads.
Record or upload your interview audio
Capture the interview or upload the audio you already have. If you record elsewhere, export a clean file (WAV, M4A, MP3).
Before you start, confirm:
- You have consent to record
- The mic is close and steady
- You know who is speaking (names and roles)
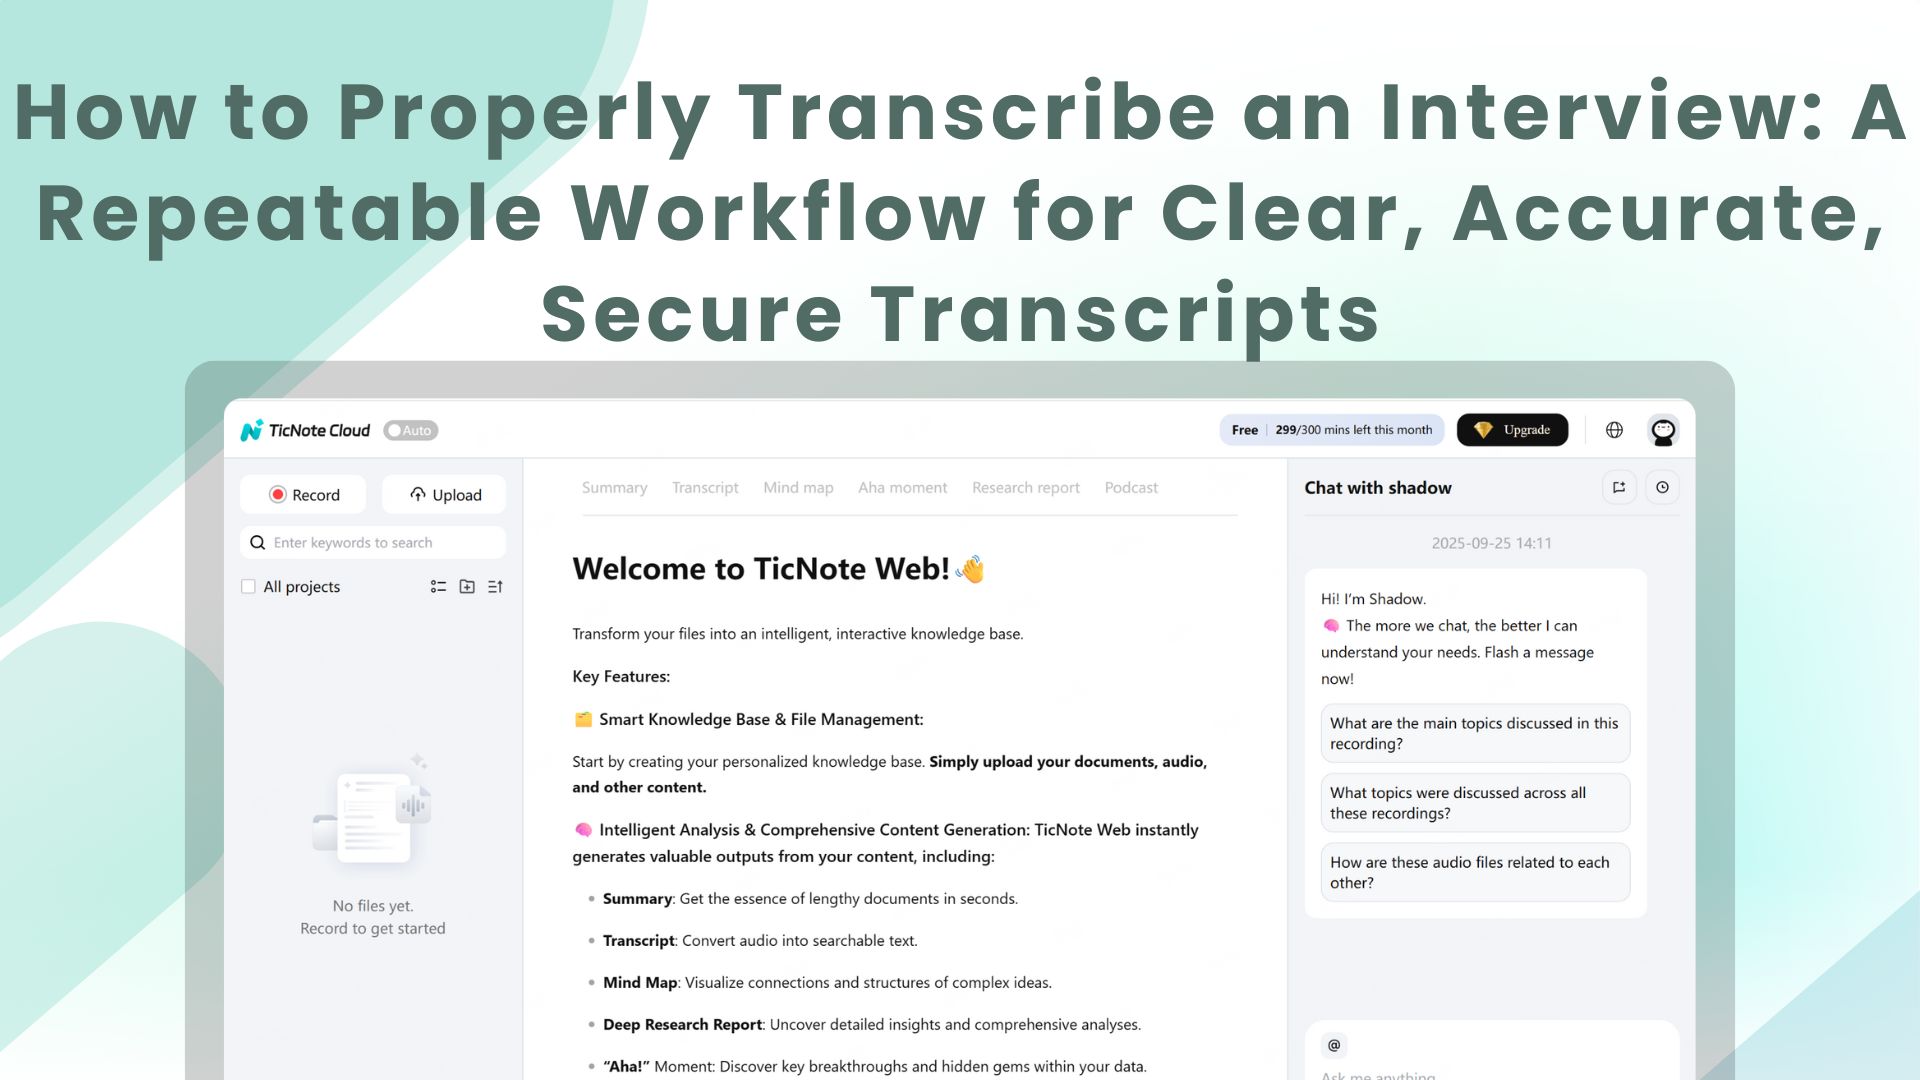
In TicNote Cloud Web Studio, upload the audio file into the right project.

Clear filenames make review and reuse easier later.
Generate an AI draft transcript (Web)
Select the uploaded file from the left panel, switch to the Transcript tab, and click Generate.

When prompted, choose the spoken language and AI model, then confirm to start transcription.

Treat this as a first draft. Accuracy improves after a focused review.
Check speakers and do a fast QA pass (Web + Shadow AI)
Once the transcript is ready, review it in the web editor and start with the highest-value fixes:
- Verify speaker labels ("who said what")
- Fix merged speakers or split speakers
- Correct short backchannels ("yeah", "right") assigned to the wrong person
Then run a quick QA checklist while the audio is fresh:
- Proper nouns: names, companies, places, product terms
- Numbers: dates, prices, counts, addresses
- Negatives: "did" vs "didn't", "can" vs "can't"
- Quotes you may publish

On the web, use Shadow AI to clean phrasing, rewrite sections, or generate clearer versions. Manual word-by-word editing isn't available on web, so Shadow AI handles refinement here.
Apply one shared notation style (App when precision matters)
For teams that need precise formatting, open the same file in the TicNote App.
In the app, you can:
- Manually edit text line by line
- Add consistent speaker labels on every turn
- Insert bracketed notes like [inaudible 03:14] or [overlap]
- Trim or cut sections of the audio if the interview runs long

Many teams generate drafts on the web, then switch to the app for hands-on cleanup and audio trimming.
Optional: translate for multilingual teams
Translate after speaker labels and key terms are fixed. This keeps meaning stable.
Best practice:
- Keep the original-language transcript as the source of truth
- Store the translated version as a working copy for review
Both versions stay in the same project so context isn't lost.
Create a structured summary your team can reuse
Summaries are where transcripts become useful. Use a shared template so every interview produces consistent outputs:
- Key themes (3–7 bullets)
- Best quotes (with timestamps)
- Decisions and action items (owner, due date if known)
- Open questions for the next interview
This is also the place to note context that won't appear in text, like tone, hesitation, or off-record limits. Shadow AI can help draft summaries on both web and app.
Store everything together and make it searchable later
Save the audio, transcript, translation, and summary in the same project. That way you can search once and find:
- The exact quote
- The timestamp and source file
- The summary that explains why it matters
When you need to share, export in standard formats:
- TXT for transcripts
- Markdown, DOCX, or PDF for summaries
- WAV (or original audio) for records
This end-to-end loop—project → upload → transcribe → refine → summarize → store—keeps interview work accurate, private, and reusable at scale.