

TL;DR: The fastest reliable way to transcribe a meeting
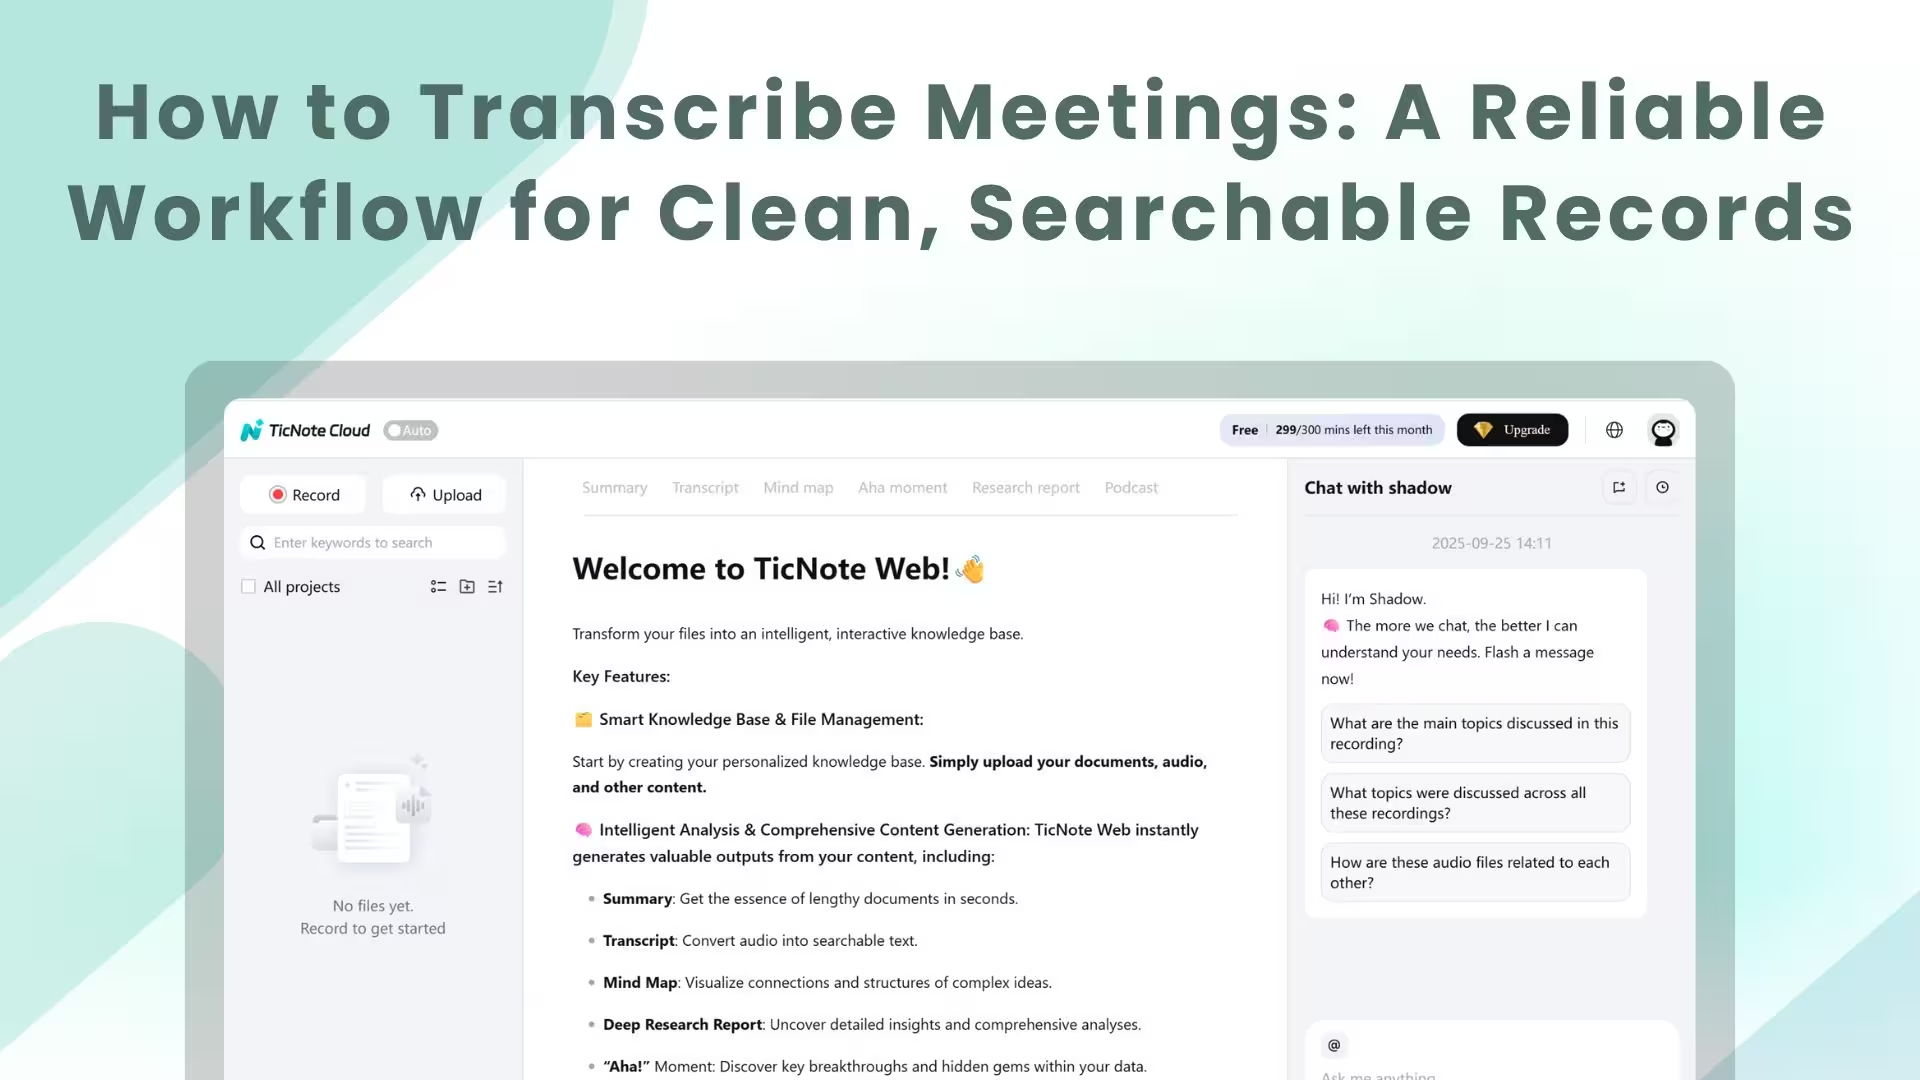
Try TicNote Cloud for Free to capture audio, get a draft transcript, and turn it into clean notes fast. Pick meeting minutes when you only need decisions, owners, and deadlines. Pick a full transcript when wording matters for legal, sales, HR, or audits.
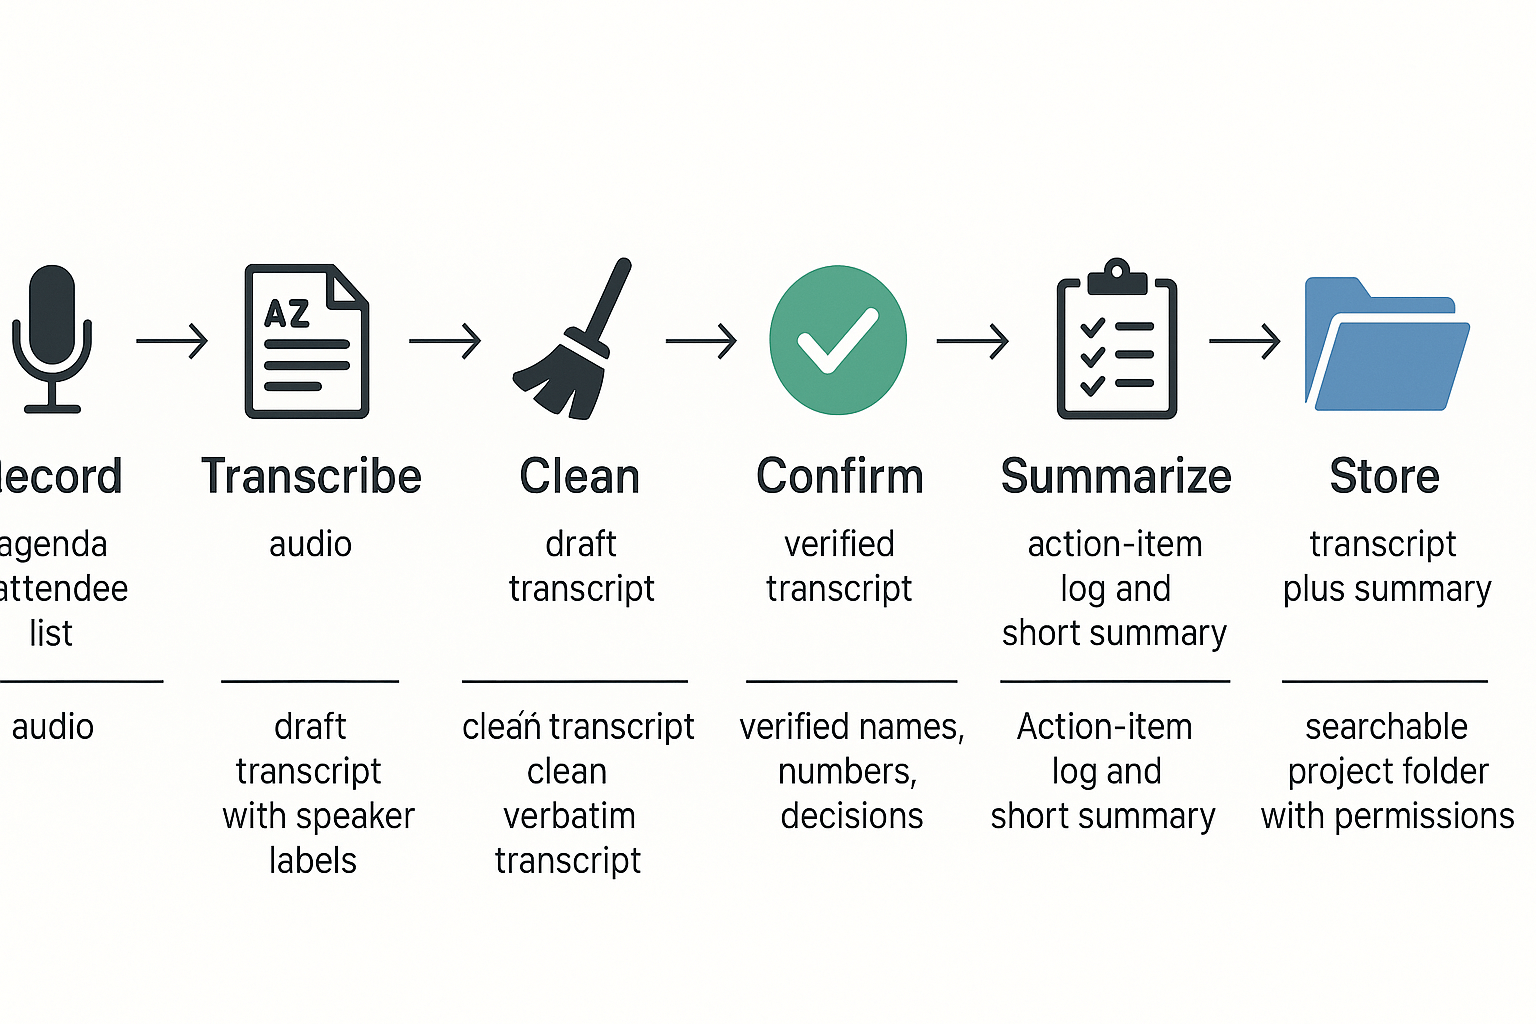
Use this 6-step workflow: 1) record, 2) transcribe, 3) clean (fix names and remove filler), 4) confirm (spot-check key parts), 5) summarize (decisions and actions), 6) store (title, tags, and access rules).
One privacy rule: confirm consent and access before you record or share. Faster tools save time, but you still need a quick review.
If you’ve ever lost an action item or argued over “who said what,” the real cost is the follow-up. The best fix is a simple system that records, labels, and keeps notes searchable. A no-bot tool like TicNote Cloud helps you capture meetings without inviting anything to the call, then keeps everything organized afterward.
How to transcribe meetings step by step (before, during, after)
If you want clean, searchable notes, treat transcription like a workflow. You plan for it, record with care, then review fast. This process works for remote calls, hybrid rooms, and in-person meetings.
Before the meeting: set up labels, file names, and storage
Do this prep once, then reuse it every meeting. It cuts edit time later.
- Pick the output you need. Choose one:
- Verbatim: every word, filler words included. Best for legal, HR, and research.
- Clean verbatim: remove filler words and false starts. Best for most teams.
- Summary plus action log: fastest for weekly syncs and standups.
- Create an attendee list for speaker labels. Get names, roles, and how they should appear. Example: “Priya S., Product” not “Priya”. If guests join late, add them as they arrive.
- Set an agenda with time boxes. Add 3 to 6 topics. Clear topic shifts make transcripts easier to scan.
- Use a simple file naming rule. One pattern keeps the search easy. Example:
YYYY-MM-DD_team_meeting-topic_project2026-01-22_sales_pipeline_review_north-america- Decide where the transcript will live. Pick one home, then link to it from your calendar invite. Common options:
- Project workspace (best for cross-meeting search)
- Shared drive folder with permissions
- Ticket or CRM record for client calls
If you also need audio transcription workflows, use this step-by-step audio transcription guide to standardize inputs and file handling.
During the meeting: record cleanly and capture context
Good habits during the call beat heavy editing later.
- Say a short consent line at the start. Example: “I’m recording and transcribing to capture notes and actions. Is anyone not OK with that?”
- Use the one-speaker rule. Ask people to pause, then repeat overlap. Crosstalk is the top cause of messy text.
- Capture chat and Q&A. Save the chat log, and copy key links into a notes doc. Chat often contains names, URLs, and exact wording.
- Mark proper nouns and numbers in real time. Write down:
- full names, product names, acronyms
- dates, prices, metrics, and IDs
- any “final decision” sentence
Quick tip: if someone states a critical number, ask them to repeat it. It feels small, but it prevents rework.
After the meeting: transcribe, clean, and confirm decisions
Right after the meeting is best, while the context is fresh.
- Upload or import the recording. Keep the raw file unchanged. Store it next to the transcript.
- Select the spoken language. If the meeting is bilingual, choose the primary language first. You can translate later.
- Run transcription and speaker separation. Check that speakers map to the attendee list. If a speaker is unknown, relabel them once and reuse that label.
- Do a fast review pass (focus on high-risk items). Don’t proofread every line. Scan for:
- names and titles
- numbers, dates, budgets, and commitments
- decisions and “we agreed” statements
- action items with owners and due dates
- Publish two outputs. Share both:
- the cleaned transcript
- a short action log for follow-up
Sample formatted transcript excerpt:
[00:12] Alex (PM): Goal today is to confirm the scope for Sprint 12.
[02:05] Priya (Design): We’ll ship the new checkout layout on Feb 2.
[07:44] Jordan (Eng): Decision: keep the legacy API for one more release.
Sample action-item log:
- Owner: Jordan, Task: update API deprecation plan, Due: Jan 29
- Owner: Priya, Task: finalize checkout mock, Due: Jan 26
Simple timeline: how long this usually takes
| Stage | Typical effort |
| Pre-meeting setup (agenda, names, file location) | 3 to 8 minutes |
| In-meeting habits (consent, one-speaker, capture chat) | 1 to 3 minutes total |
| Run transcription | 2 to 10 minutes per hour of audio |
| Review pass (names, numbers, decisions) | 8 to 20 minutes per hour |
| Action log and share-out | 5 to 12 minutes |
Copy-paste checklist for your meeting SOP
- Pick transcript type: verbatim, clean verbatim, or summary plus actions
- Confirm attendee list and speaker labels
- Set agenda topics and time boxes
- Apply file name pattern and choose storage location
- Open with consent prompt
- Enforce one-speaker rule during key decisions
- Save chat and Q&A, capture links
- Note proper nouns, acronyms, and numbers live
- Import recording, select language, run transcription
- Review: names, numbers, decisions, action items
- Publish cleaned transcript and action log, set permissions
Try TicNote Cloud for Free to record, transcribe, and organize meeting transcripts in projects.
Meeting minutes vs meeting transcript: which should you create?
Meeting minutes are a short record of outcomes: what was decided, who owns what, and what happens next. A meeting transcript is the full text of what people said, useful when details matter and you may need to quote or search later. If you’re deciding how to transcribe meetings, pick the format based on reuse, risk, and who will read it.
Know your options (plain-language definitions)
- Meeting minutes: A 1 to 2-page summary of decisions, action items, key points, and open issues.
- Verbatim transcript: Word-for-word, including filler words, false starts, and side comments.
- Clean verbatim transcript: Same meaning, but cleaned for reading, you remove fillers, fix obvious grammar, and keep key wording.
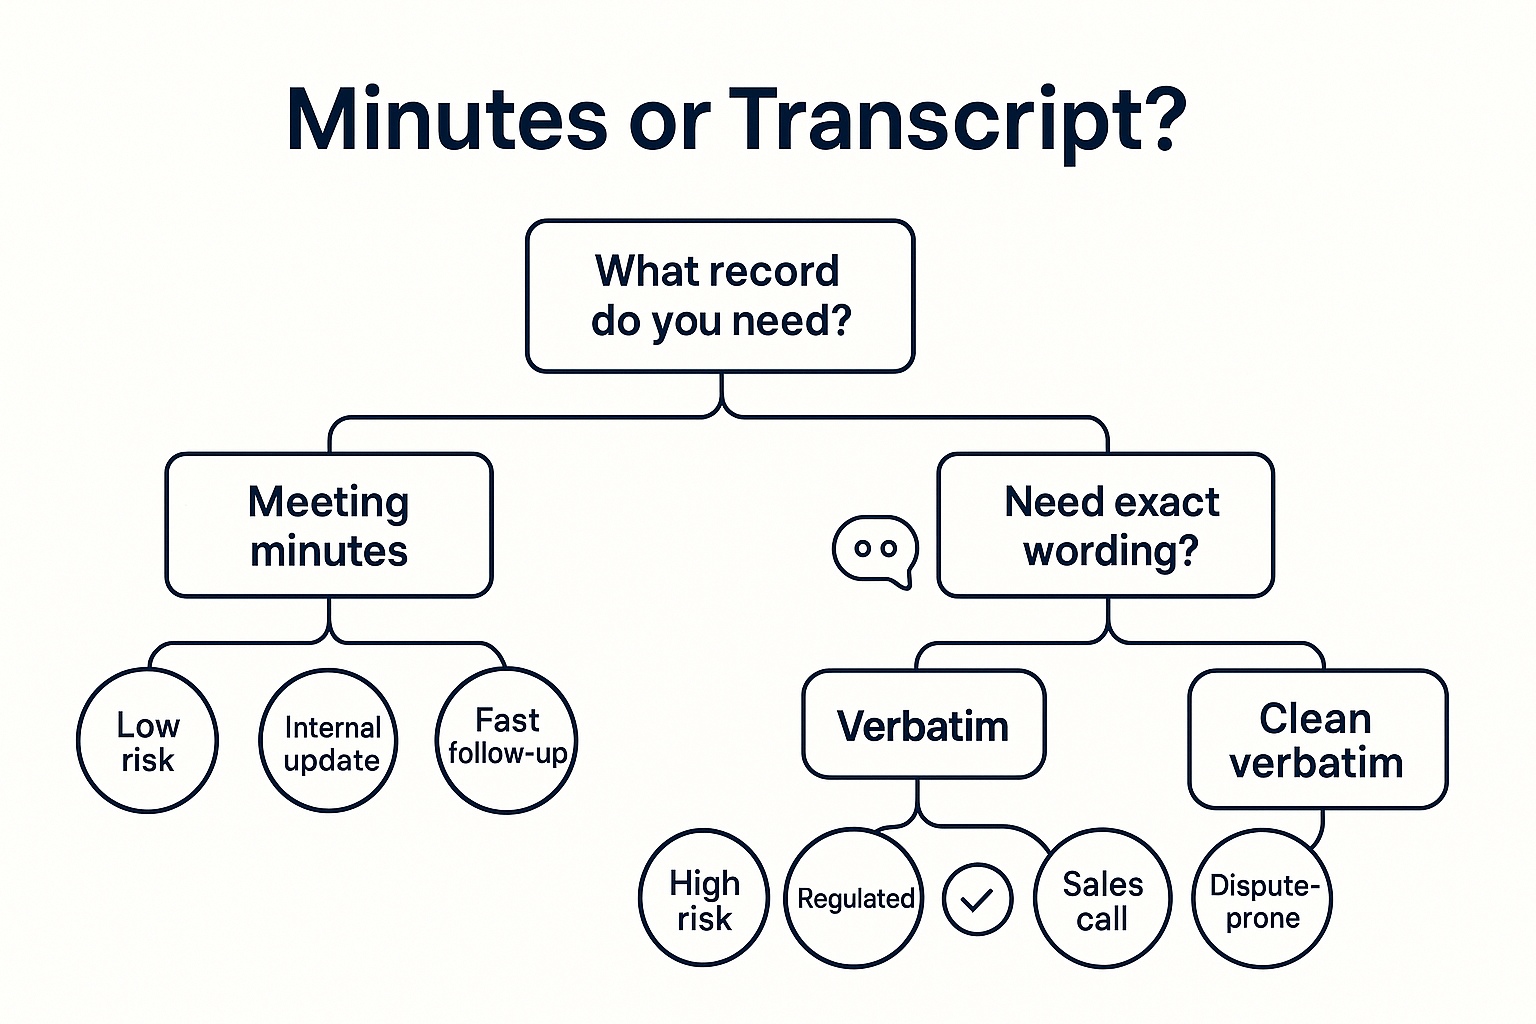
Use this simple decision tree
- Will someone reuse the exact wording later? (sales call details, research quotes, client commitments)
- Yes: create a transcript.
- No: create minutes.
- Is the meeting high-risk or dispute-prone? (regulated work, HR issues, legal topics)
- Yes: use a transcript, often clean verbatim.
- No: minutes are usually enough.
- Do you need speed for internal updates?
- Yes: minutes win.
- No, you need deep search and context: transcript wins.
If you also run interviews, this guide on how to transcribe an interview securely and clearly helps with the same choice.
Convert a clean transcript into minutes in 10 minutes
Use the transcript as your source of truth, then extract:
- Decisions (what was agreed)
- Action items (task, owner, due date)
- Risks and blockers
- Open questions (what needs follow-up)
Tip: skim once for headings, then search for “we’ll”, “decide”, “next”, and names.
Sample clean-verbatim excerpt
Sam: We should ship v2 next Friday, not Thursday. The QA run needs one more day.
Priya: Agreed. I’ll move the release checklist and update Support.
Sam: Great. Let’s keep the scope as-is and push the new dashboard to the next sprint.
Sample action-item log (copy/paste)
- Action: Move release date to Friday
- Owner: Priya
- Due: Today
- Notes: Update Support and release checklist
- Decision: Keep scope as-is for v2
- Open question: When does the new dashboard start next sprint?
What setup helps you record clear audio for transcription (remote, hybrid, in-person)?
Clear audio is the fastest way to get a clean transcript. If the recording is muddy, no tool can fully fix it. Use this setup playbook before you hit record to make meeting notes searchable later.
Remote calls: lock in clean input first
Remote audio fails for one reason: the wrong mic. Fix that, then reduce the echo.
- Use a wired headset or a USB mic, not laptop speakers.
- Pick one input device and stick to it for the whole call.
- Keep your mic 2 to 4 inches from your mouth, slightly off to the side.
- Use mute when you’re not talking to cut keyboard noise.
Before you start, verify these settings in your meeting app:
- Input device: select your headset mic, not “Default.”
- Echo cancellation: keep it on unless you use headphones.
- Separate tracks (if available): record each speaker to a separate track.
- Save location: confirm where the recording file goes, and who can access it.
If you often capture ideas on the go, use the same rules for voice notes, plus a quiet room, with this guide on transcribing voice memos cleanly.
Hybrid rooms: avoid the “one laptop in the middle” trap
A single laptop mic in the center of a table is the most common failure mode. It picks up room echo, side talk, and paper noise. It also crushes quiet voices.
Do this instead:
- Put a mic close to each speaker, or use a real room mic. Closer beats “better.”
- Keep speakers within 1 to 3 feet of the mic when possible.
- Reduce echo: close doors, add soft items (curtains, coats), and avoid glass rooms.
- Turn down the room speakers to prevent feedback, and keep laptops on mute.
In-person meetings: phone vs recorder vs laptop mic
If you must choose one device, use a phone placed near the main speaker. A small recorder is best for longer sessions. A laptop mic is the last resort.
- Phone: good in quiet rooms, keep it face up, 1 to 2 feet away.
- Recorder: best for distance and long battery, place it center table.
- Laptop mic: avoid unless the speaker is very close.
Fast fixes: troubleshoot the usual transcription killers
- Crosstalk: set a “one person at a time” rule for key decisions.
- Accents: ask speakers to state their name once, and slow down on nouns.
- Fast talkers: request short pauses after action items.
- Low volume: move the mic closer first, then raise the input gain.
Quick pre-meeting test routine (60 seconds): record 10 seconds, play it back, confirm names are clear, check volume peaks, then confirm the file saved where you expect.
Try TicNote Cloud for Free to record audio without a meeting bot and turn it into searchable notes.
How should a meeting transcript be formatted so it’s easy to use later?
A useful transcript is easy to scan, search, and quote. When you format it the same way every time, you can find who said what, when it happened, and what needs doing, without replaying the whole call. That’s the goal when you learn how to transcribe meetings for real work, not just a text dump.
Use speaker labels people can trust
Speaker labels are the spine of a good transcript. Keep names consistent, so the search works.
- Pick one naming rule: First name ("Maya"), or First + last initial ("Maya R."). Don’t mix.
- Handle unknown speakers: Use "Speaker 1", "Speaker 2" until you confirm.
- Map aliases once: Add a short note at the top like: "Speaker 2 = Alex (Finance)".
- Keep roles optional: Use roles only when it helps, like "Jordan (PM)".
Choose timestamps based on how you’ll use the file
Timestamps help you jump back to audio fast. But too much makes reading harder.
- Every 2 to 5 minutes: Best default for most teams.
- Per topic: Great for long meetings with an agenda.
- Per turn (every speaker line): Use for legal review, HR issues, or coaching.
Make it readable with clean verbatim rules
Clean verbatim keeps meaning, but drops noise.
- Remove filler ("um", "like") unless it changes intent.
- Break paragraphs every 1 to 3 sentences.
- Keep punctuation simple. Short sentences beat perfect grammar.
- Mark uncertainty clearly: use [inaudible 00:12:08] or [unclear].
Example: clean-verbatim excerpt (with labels + timestamps)
[00:10:00] Maya: We need a firm launch date. Friday works if QA signs off by Wednesday.
[00:10:18] Jordan (PM): Agree. Let’s cut the extra feature and ship the core.
[00:10:33] Speaker 1: I can confirm QA by the end of the day on Wednesday. If we hit a blocker, I’ll flag it.
[00:10:50] Maya: Decision: launch Friday. Action: QA to confirm by Wednesday, 5 pm.
Mini team style guide (copy and reuse)
- Decisions: Start the line with "Decision:".
- Action items: Start with "Action:", include the owner and due date.
- Questions to park: "Open question:".
- Unclear audio: "[inaudible hh:mm:ss]".
- Redactions: "[redacted]" for sensitive names or numbers.
How do you check transcription accuracy (and what affects it)?
Transcription accuracy is not one score. It’s two problems: are the words right, and is the right person linked to the right words? A transcript can look “mostly right” but still fail if it misses names, numbers, or who said what, which is often what teams need most.
Know what “accuracy” really means
Most tools talk about WER (word error rate). It counts how many words were wrong, missing, or added compared to a human reference. The NIST Rich Transcription 2009 Meeting Recognition Evaluation Plan (2009) defines it as: WER = 100 × (S + D + I) / N, where S is substitutions, D is deletions, I is insertions, and N is the number of words in the reference.
The second piece is speaker diarization (who spoke when). Even with a low WER, weak diarization can break a record. It can swap speakers, merge two people, or split one person into many “Speaker 1” blocks.
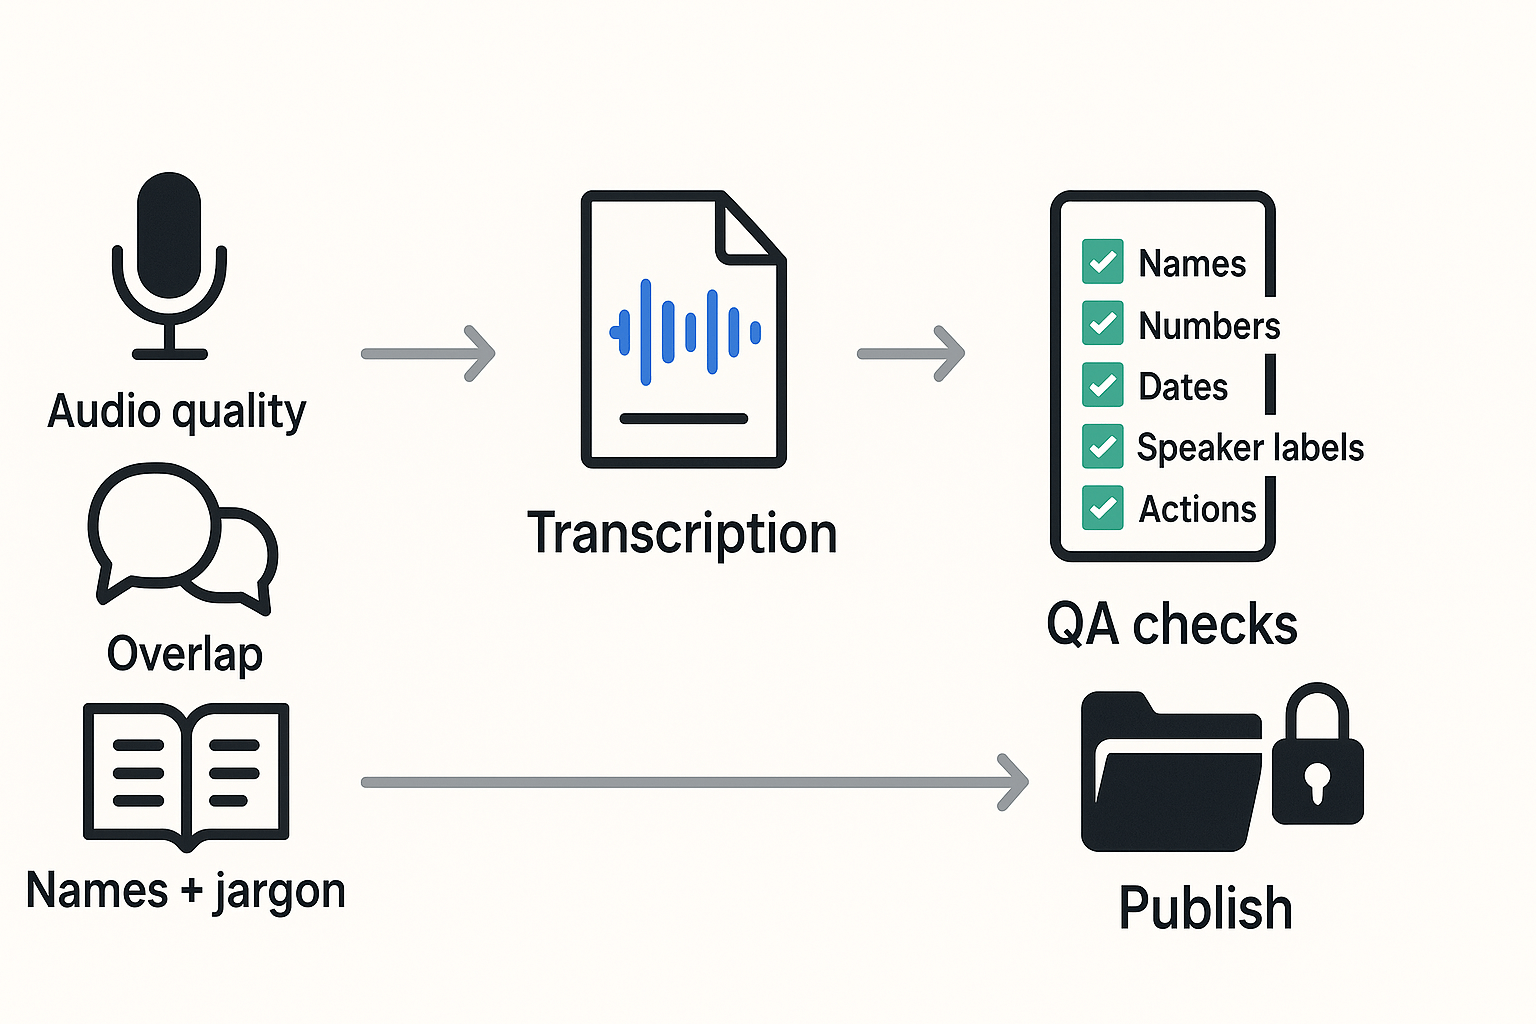
What hurts accuracy most (and how to fix it)
- Poor audio and noise: close other apps, reduce fan noise, and use a wired headset mic.
- Overlap (two people talking): use handoffs, call on people, and pause for questions.
- Distance to mic: keep the mic 6 to 12 inches away.
- Accents and fast speech: ask speakers to slow slightly and avoid talking over others.
- Jargon and names: share an agenda and attendee list, and add key terms.
- Many speakers: smaller groups diarize better, or use assigned mics in person.
A fast QA rubric for busy teams
Do a “risk pass” first, not a full re-listen.
- Names and titles: fix speaker labels, names, and key roles.
- Numbers, dates, and amounts: budgets, deadlines, KPIs, addresses.
- Decisions: what was approved, rejected, or deferred.
- Action items: owner, task, due date, and success criteria.
- Customer, legal, or safety commitments: promises, terms, compliance notes.
Re-listen only to high-risk passages: dense decisions, negotiations, figures, and anything that sounds muffled or overlapped. Accept small errors in filler words if the meaning stays clear.
Simple acceptance thresholds by meeting type
- Low risk (internal standup): accept minor wording issues, verify tasks and dates.
- Medium risk (project planning): verify names, decisions, and all numbers.
- High risk (legal, medical, client commitments): re-listen to key sections, require clean speaker labels, and confirm quotes and figures.
What are the legal, ethical, and security rules for recording and transcribing meetings?
If you want to transcribe meetings at work, treat it like handling any other business record. Get clear notice and consent, limit who can access the files, and delete them on a schedule. These few habits cut risk fast, without slowing your team.
Get consent and give notice every time
Consent rules vary by place and by meeting type. A simple rule: always announce the recording before it starts, and get a clear yes from anyone speaking. For external calls, confirm it in writing too (invite, agenda, or chat).
Use a short script you can read word for word:
- “Quick note: I’d like to record and transcribe this meeting for notes and follow-ups. Is everyone OK with that?”
- “If not, we’ll stop recording and take manual notes.”
- “Only invited stakeholders will have access.”
If someone declines, stop. Then assign a note taker and capture decisions only.
Treat sensitive content as restricted data
Transcripts often include personal data, pricing, health details, or HR topics. Don’t share the raw transcript by default.
- Redact: remove names, account numbers, and addresses.
- Split: store a “restricted” transcript separately for HR, legal, or incident reviews.
- Minimize: share a summary and action items, not the full text.
Lock down storage and sharing
Avoid personal drives and forwarded attachments. Store recordings and transcripts in a managed workspace with:
- Encryption in transit and at rest (basic protection while moving and storing data)
- Role-based access (only people who need it)
- Audit history (who opened, exported, or shared)
Use a simple retention policy (and follow it)
| Meeting type | Keep by default | Owner | Delete trigger |
| Routine internal updates | 30 to 90 days | Meeting host | Project closes or notes are approved |
| Client calls and sales | 90 to 365 days | Account owner | Contract ends plus a buffer period |
| HR, legal, medical, incident | Case based | HR or Legal | Counsel sign off or policy deadline |
One more rule: set ownership at the invite stage. If no one owns it, it won’t be deleted.
How to transcribe and organize meetings with a no-bot workflow (example: TicNote Cloud)
Here’s a practical, no-bot way to record, transcribe, and organize meetings using TicNote Cloud as the example. It captures audio on your device, not by inviting a bot into the call. That helps in teams with strict meeting policies. You’ll also get clean files you can search later.
Choose your capture path: live transcript or upload later
Pick the option that fits your meeting style.
- Live transcription (during the meeting)
You can use the TicNote Chrome extension that supports Google Meet, Zoom, or Teams meetings.
Step 1. Search for TicNote Cloud in the Chrome Web Store and install the extension for live meeting transcripts. Add it to your Chrome and pin it.

Step 2. Open the TicNote Cloud extension menu and go to Settings. Then enable microphone access.

Step 3. Join a Google Meet, Zoom, or Teams meeting and click Start recording to begin a live transcript.

Finally, go to the TicNote Web studio to get the transcription for free. We will introduce it later.
- Upload after the meeting (post-meeting transcription)
- Save the meeting audio or video file.
- Upload it to TicNote Cloud.
- Run transcription after the call, then review.
Tip: If your team can’t record system audio, record a clean mic feed. A clear source beats fancy settings.
Upload the meeting recording to a project (Web)
Open the TicNote Web Studio and upload your meeting audio or video file using the Upload button at the top of the interface. Uploading directly into a project keeps everything grouped from the start.
Projects work best when they reflect how you’ll search later, such as by team, client, or initiative. Each meeting can then live alongside related calls and notes.

After the upload finishes, you’ll see the file listed in the left panel, ready for transcription.
Generate the transcript from the uploaded file
Select the uploaded meeting file from the left panel, switch to the Transcript tab, and click Generate. This starts the transcription process inside the same project.

This step keeps the raw recording and its transcript tightly linked, which makes later review and export much easier.
Select language and AI model before transcription starts
A pop-up window will appear before transcription begins. Here, choose the spoken language of the meeting and the AI model you want to use.
Setting the correct language upfront is one of the simplest ways to reduce errors, especially for names, numbers, and technical terms.
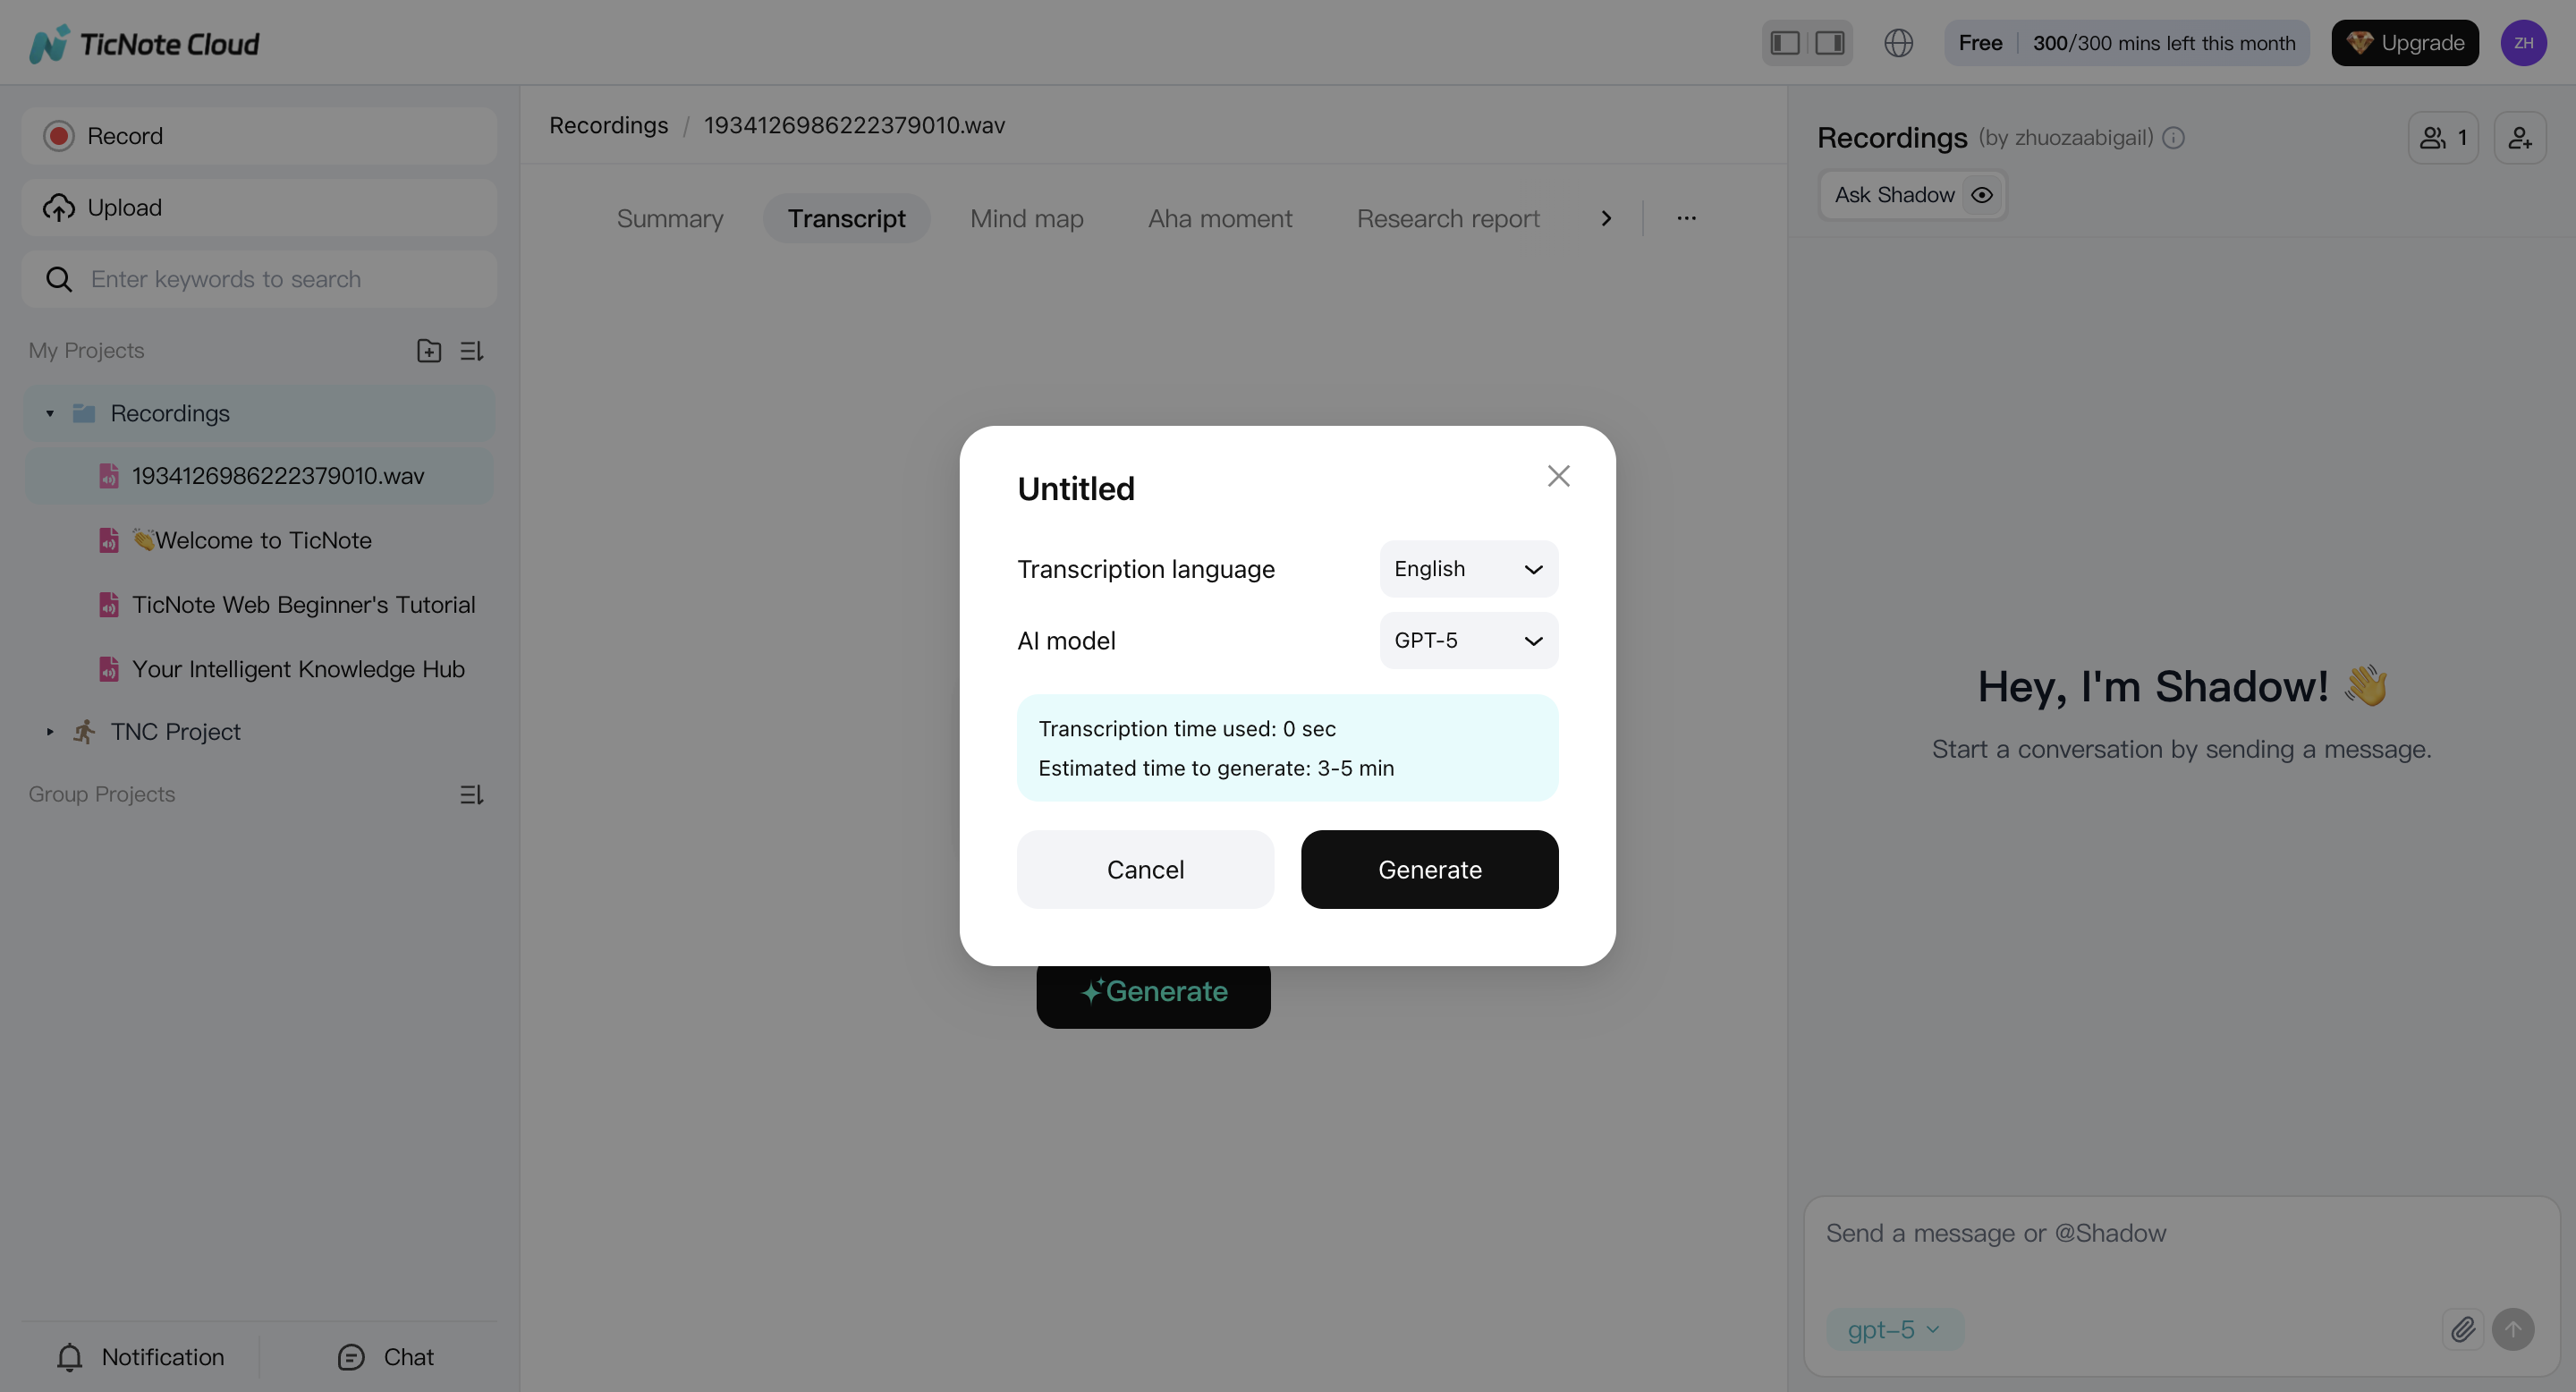
Once confirmed, the transcript will be generated automatically.
Step 4: Review and clean up the transcript for accuracy
When the transcript is ready, review it directly in the editor. This is where a raw transcript becomes something reliable.
Pay special attention to decisions, deadlines, names, and anything that could change meaning if misheard. Fixing these details early saves time when the transcript gets reused later.
At this point, you can already see how a no-bot workflow helps: you’re working with your own file, in your own project, without external participants.
- Transcript: TXT
- Summary: Markdown, DOCX, PDF
- Mind map: PNG, Xmind
- Audio: WAV
")
Which transcription method should you use: manual, AI, or a hybrid workflow?
Pick a method based on risk and effort. The manual is slow but controlled. AI is fast and scales. A hybrid workflow, AI-first with a focused review, is the best default for most teams that want clean, searchable records.
Match the method to the meeting
- Manual transcription: Use it for high-risk meetings (legal, HR, medical) or when exact wording matters. It’s the most controlled, but it takes the most time.
- AI transcription: Use it for recurring internal meetings where speed matters more than perfect words. It’s great for search, highlights, and quick recaps.
- Hybrid (recommended): Use AI for the full draft, then review only key moments. This is the sweet spot for accuracy and cost.
Procurement checklist for an AI meeting transcription tool
Look for these must haves:
- Speaker labels (diarization) that don’t drift over time
- Timestamps at least every 15 to 30 seconds
- Vocabulary support (custom terms, names, acronyms)
- Templates for summaries and action items
- Export formats like TXT, DOCX, PDF, Markdown
- Integrations you actually use (chat, docs, PM tools)
- Privacy commitments: Is your data used for model training?
- Access controls: roles, guests, audit needs
- Retention options: delete, archive, or set policies
Mini comparison table outline (use in vendor reviews)
| Requirement area | Manual | AI only | Hybrid |
| Turnaround time | Slow | Fast | Fast |
| Control over wording | High | Medium | High |
| Ongoing cost | High | Low to medium | Medium |
| Best for | Compliance, quotes | Weekly ops, syncs | Most teams |
| Privacy review needed | Medium | High | High |
Standardize one review pass so transcripts are dependable
Keep it simple. Do a 10 to 15 minute pass: fix names and key numbers, confirm decisions, clean up action items, and spot check any unclear audio. Then lock the file name, date, attendees, and store it in the right project folder for later search.