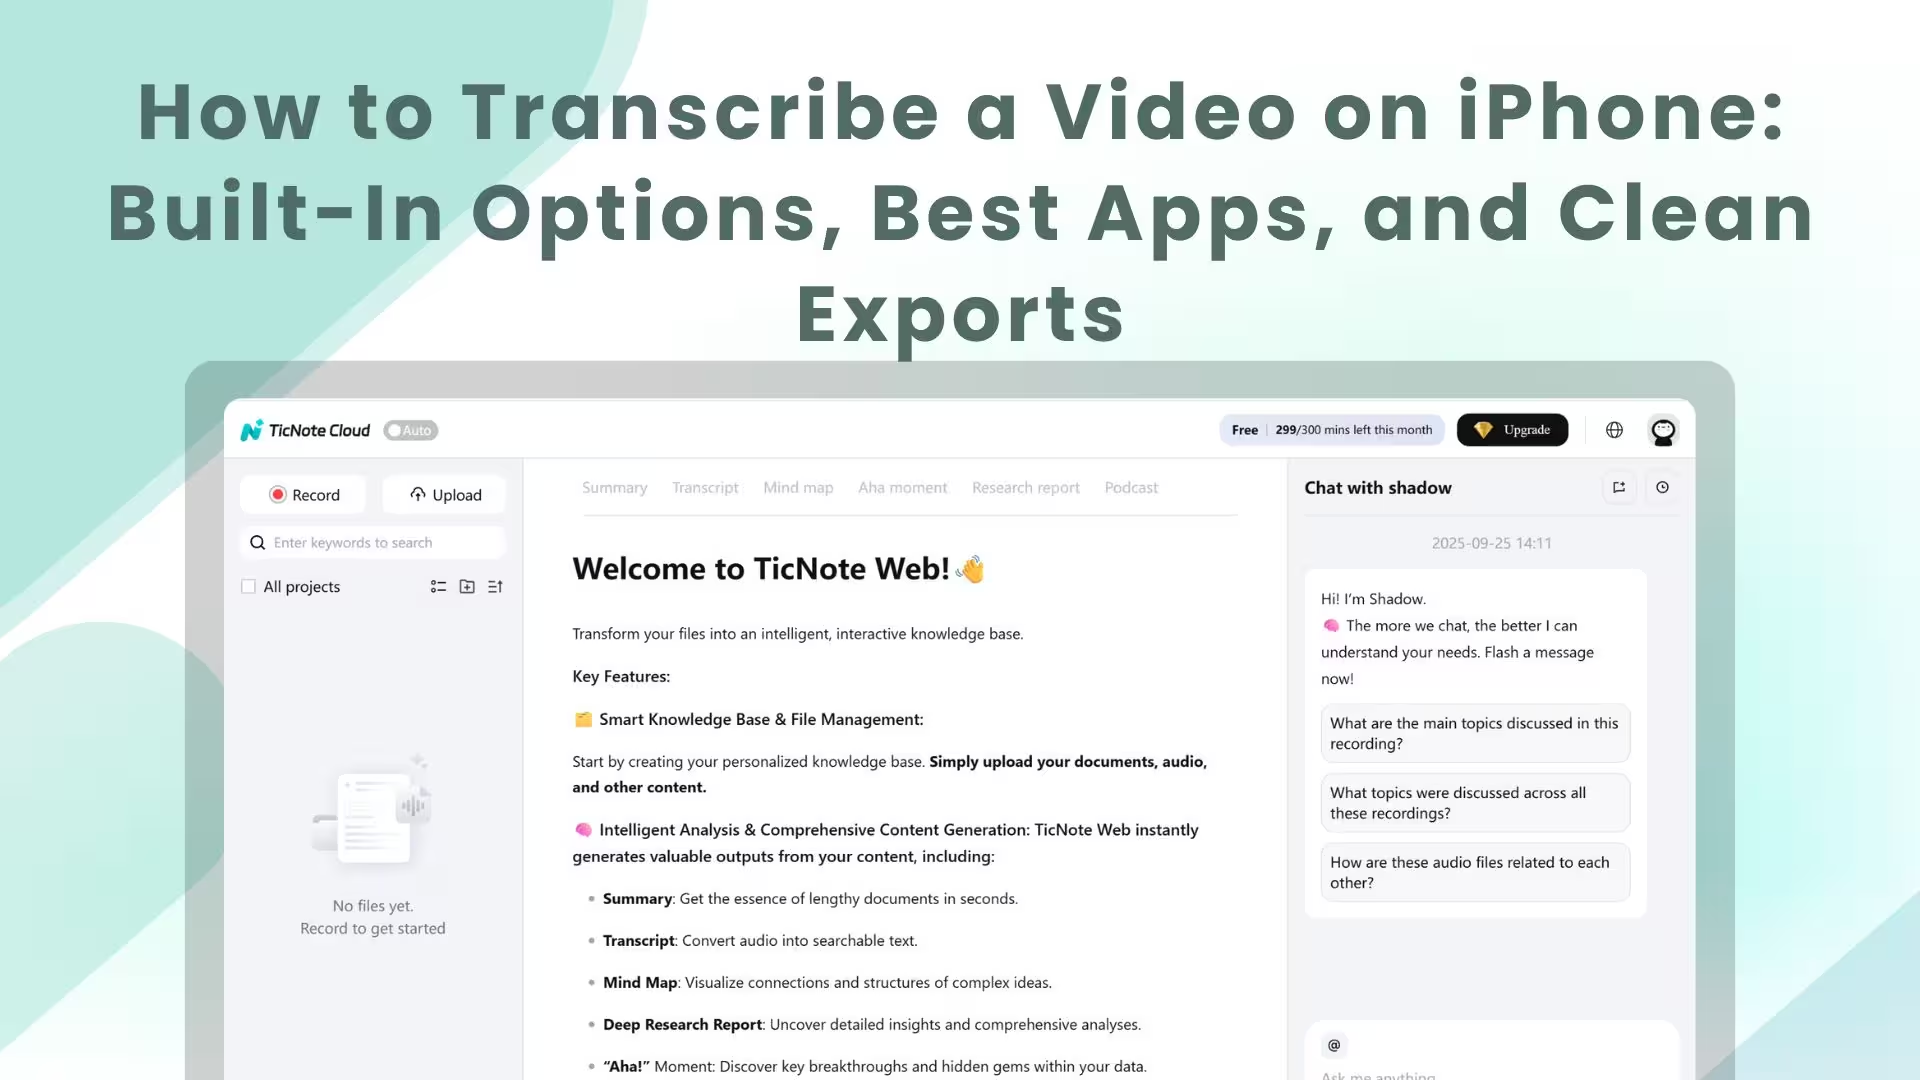
TL;DR: The quickest ways to transcribe iPhone video (and when to use each)
Try TicNote Cloud for Free if you want clean text fast: it's the simplest way to go from iPhone video to a shareable transcript. Here are the quickest options for how to transcribe a video on an iPhone, based on what you need.
- Fastest, good enough: play the video on one device, then use iPhone Dictation to type what your mic hears.
- Best exports: use a video transcription app when you need a TXT transcript, plus summaries and translation.
- Best offline: stay on-device with manual typing, or any offline speech-to-text you already have.
Choose based on: speed, accuracy, privacy, offline use, and export formats. Note: iPhone-native methods often transcribe what the mic hears, not the video's internal audio.
Replaying a clip and fixing messy text wastes time, and it's easy to miss key lines. When you need cleaner transcripts, quick summaries, and a place to store them, TicNote Cloud keeps everything searchable so you can reuse it later.
How to transcribe a video on iPhone: 3 reliable workflows
You can transcribe a video on an iPhone in three ways. Pick based on speed, accuracy, and how clean the export must be. Here are the 3 end-to-end paths and who they fit.
Workflow 1: iPhone built-ins for quick capture
Best when you need a fast quote or rough notes. You'll usually play the video audio out loud, then use a built-in feature to capture text. Setup is low, but accuracy can dip with noise, accents, or multiple speakers.
Workflow 2: App-based upload for accurate transcripts and exports
Best for longer videos, class clips, content drafts, and anything you'll reuse. You upload the file, get a transcript you can edit, then export clean text and a structured summary. If you want a repeatable workflow, this pairs well with a clean transcript workflow and method comparison.
Workflow 3: Manual or assisted transcription for exact wording
Best for short clips, legal wording, and "don't get this wrong" quotes. You type it yourself (often while slowing playback), or you lightly edit an auto transcript line by line. It takes longer, but you control every word.
| Method | Best for | Pros | Limits | Outputs |
| Built-in iPhone tools | Quick quotes, rough notes | No install, fast start | Can require speaker playback, less accurate | Notes text, copied text |
| App upload workflow | Long videos, sharing, reuse | Higher accuracy, editing, and organized exports | Needs an app, often cloud processing | TXT transcript, summaries (Markdown/DOCX/PDF) |
| Manual or assisted | Critical quotes, short clips | Maximum control | Slow, tiring for long files | Exact text you format yourself |
Decision rule: If it's longer than a few minutes or you'll share it, use the app-based path. If it's a quick quote, built-ins are fine. If it must be exact, go manual.
Try TicNote Cloud for Free to upload a video and export a clean TXT transcript.
What should you do before you transcribe (to improve accuracy)?
Before you transcribe a video on iPhone, spend 2 minutes on prep. Cleaner audio and the right settings mean fewer wrong words, faster edits, and more reliable timestamps.
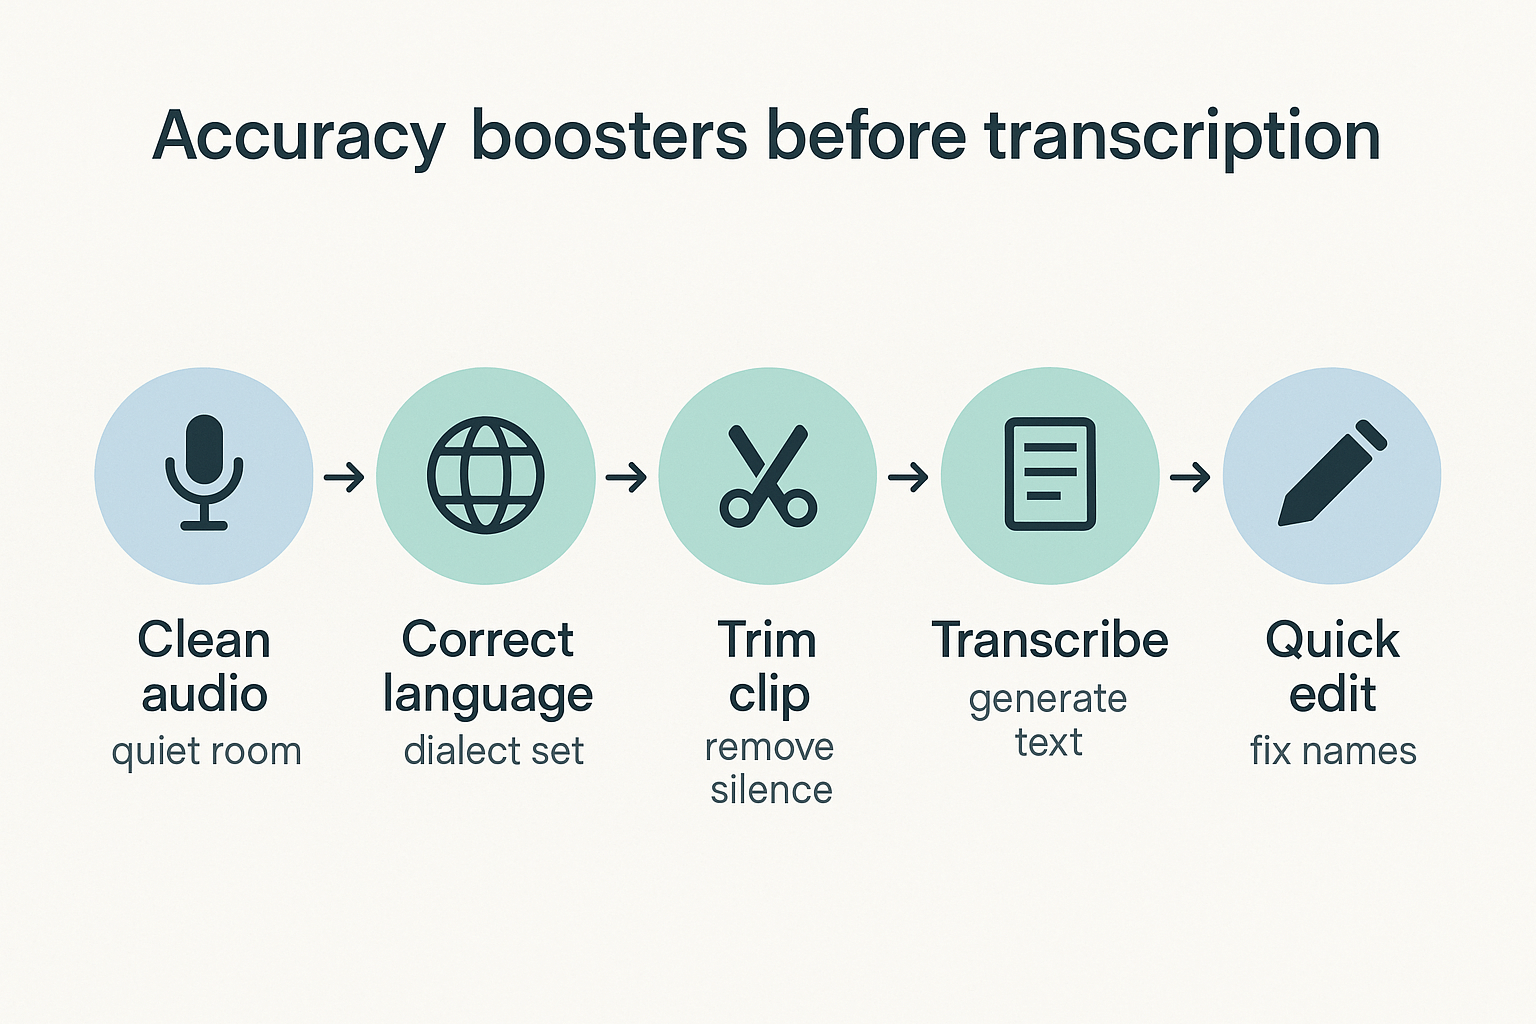
Run this 2-minute accuracy checklist
- Get clean audio fast: Move to a quiet spot. If you can, use wired or Bluetooth headphones while you work to cut echo and help you hear issues.
- Check volume and clarity: Play the clip once. If the voice is faint, don't transcribe yet.
- Know your speakers: Note how many people talk, and write down names upfront. This makes later speaker labels and quotes much quicker.
- Set the right language and dialect: Pick the correct language before you start. Dialect matters for names, slang, and accents.
- Trim the dead space: Use Photos or iMovie to cut long silences and off-topic parts. Shorter clips transcribe faster and reduce "mystery" text.
Quick fixes for common iPhone cases
Creators: If the video came from another app, download the file first. Some shared clips play back quieter, which hurts accuracy.
Students: For your next lecture, sit closer to the speaker. Better yet, use an external mic. You'll get cleaner audio, fewer errors, and more useful time markers.
If you need more options beyond video, this guide on audio transcription workflows covers setup tips that also apply here.
How do iPhone's built-in tools transcribe video audio (and what are the limits)?
iPhone's built-in transcription is often a workaround. In most cases, your iPhone turns speech into text by listening to what the microphone hears. So to transcribe a video on iPhone, you usually play the video audio out loud, then let Dictation or Captions "listen" and type.
Method 1: Use Notes Dictation while the video plays
This is the fastest native option for rough transcripts.
- Open Notes and create a new note.
- Tap the microphone on the keyboard to start Dictation.
- Press Play on your video, ideally on a second device. Keep the iPhone close to the speaker.
- When it's done, stop Dictation and edit.
Plan on cleanup. You'll often need to fix:
- Punctuation and paragraph breaks
- Names, brands, and jargon
- Missed words if the audio is quiet
Method 2: Turn on Live Captions (if available)
Live Captions can show on-screen text while audio plays. It's handy when you want to follow along, check a quote, or confirm a timestamp.
Basic flow:
- Enable Live Captions in Settings (if your device and iOS support it).
- Play the video and watch the captions update.
- Use it as a reference, since copying the text is not always smooth.
Method 3: The Voice Memos route (record first, transcribe second)
If you want a cleaner pass, record the video's audio into Voice Memos.
- Put the video on speaker (another device helps).
- Open Voice Memos and record the audio playback.
- Transcribe that recording using any available transcription feature or a transcription app.
This can reduce dropouts because you get one dedicated audio file.
The limits to expect (so you don't waste time)
Built-in methods are convenient, but they're not designed for true video-to-text.
Common issues:
- Background noise and echo can wreck accuracy
- Two people talking at once confuses the transcript
- Little to no speaker labels (who said what)
- Weak punctuation and formatting
- Not great for private content if you're forced to play audio in public
How to transcribe iPhone video step by step (upload → transcript → summary)
These steps show how to transcribe a video recorded on an iPhone using TicNote Cloud. The main flow below is app-first (recommended for iPhone users), with a web option if you prefer working on a larger screen. You'll go from upload to a clean transcript, then to a structured summary you can reuse or share. Translation can happen in the same flow when needed.
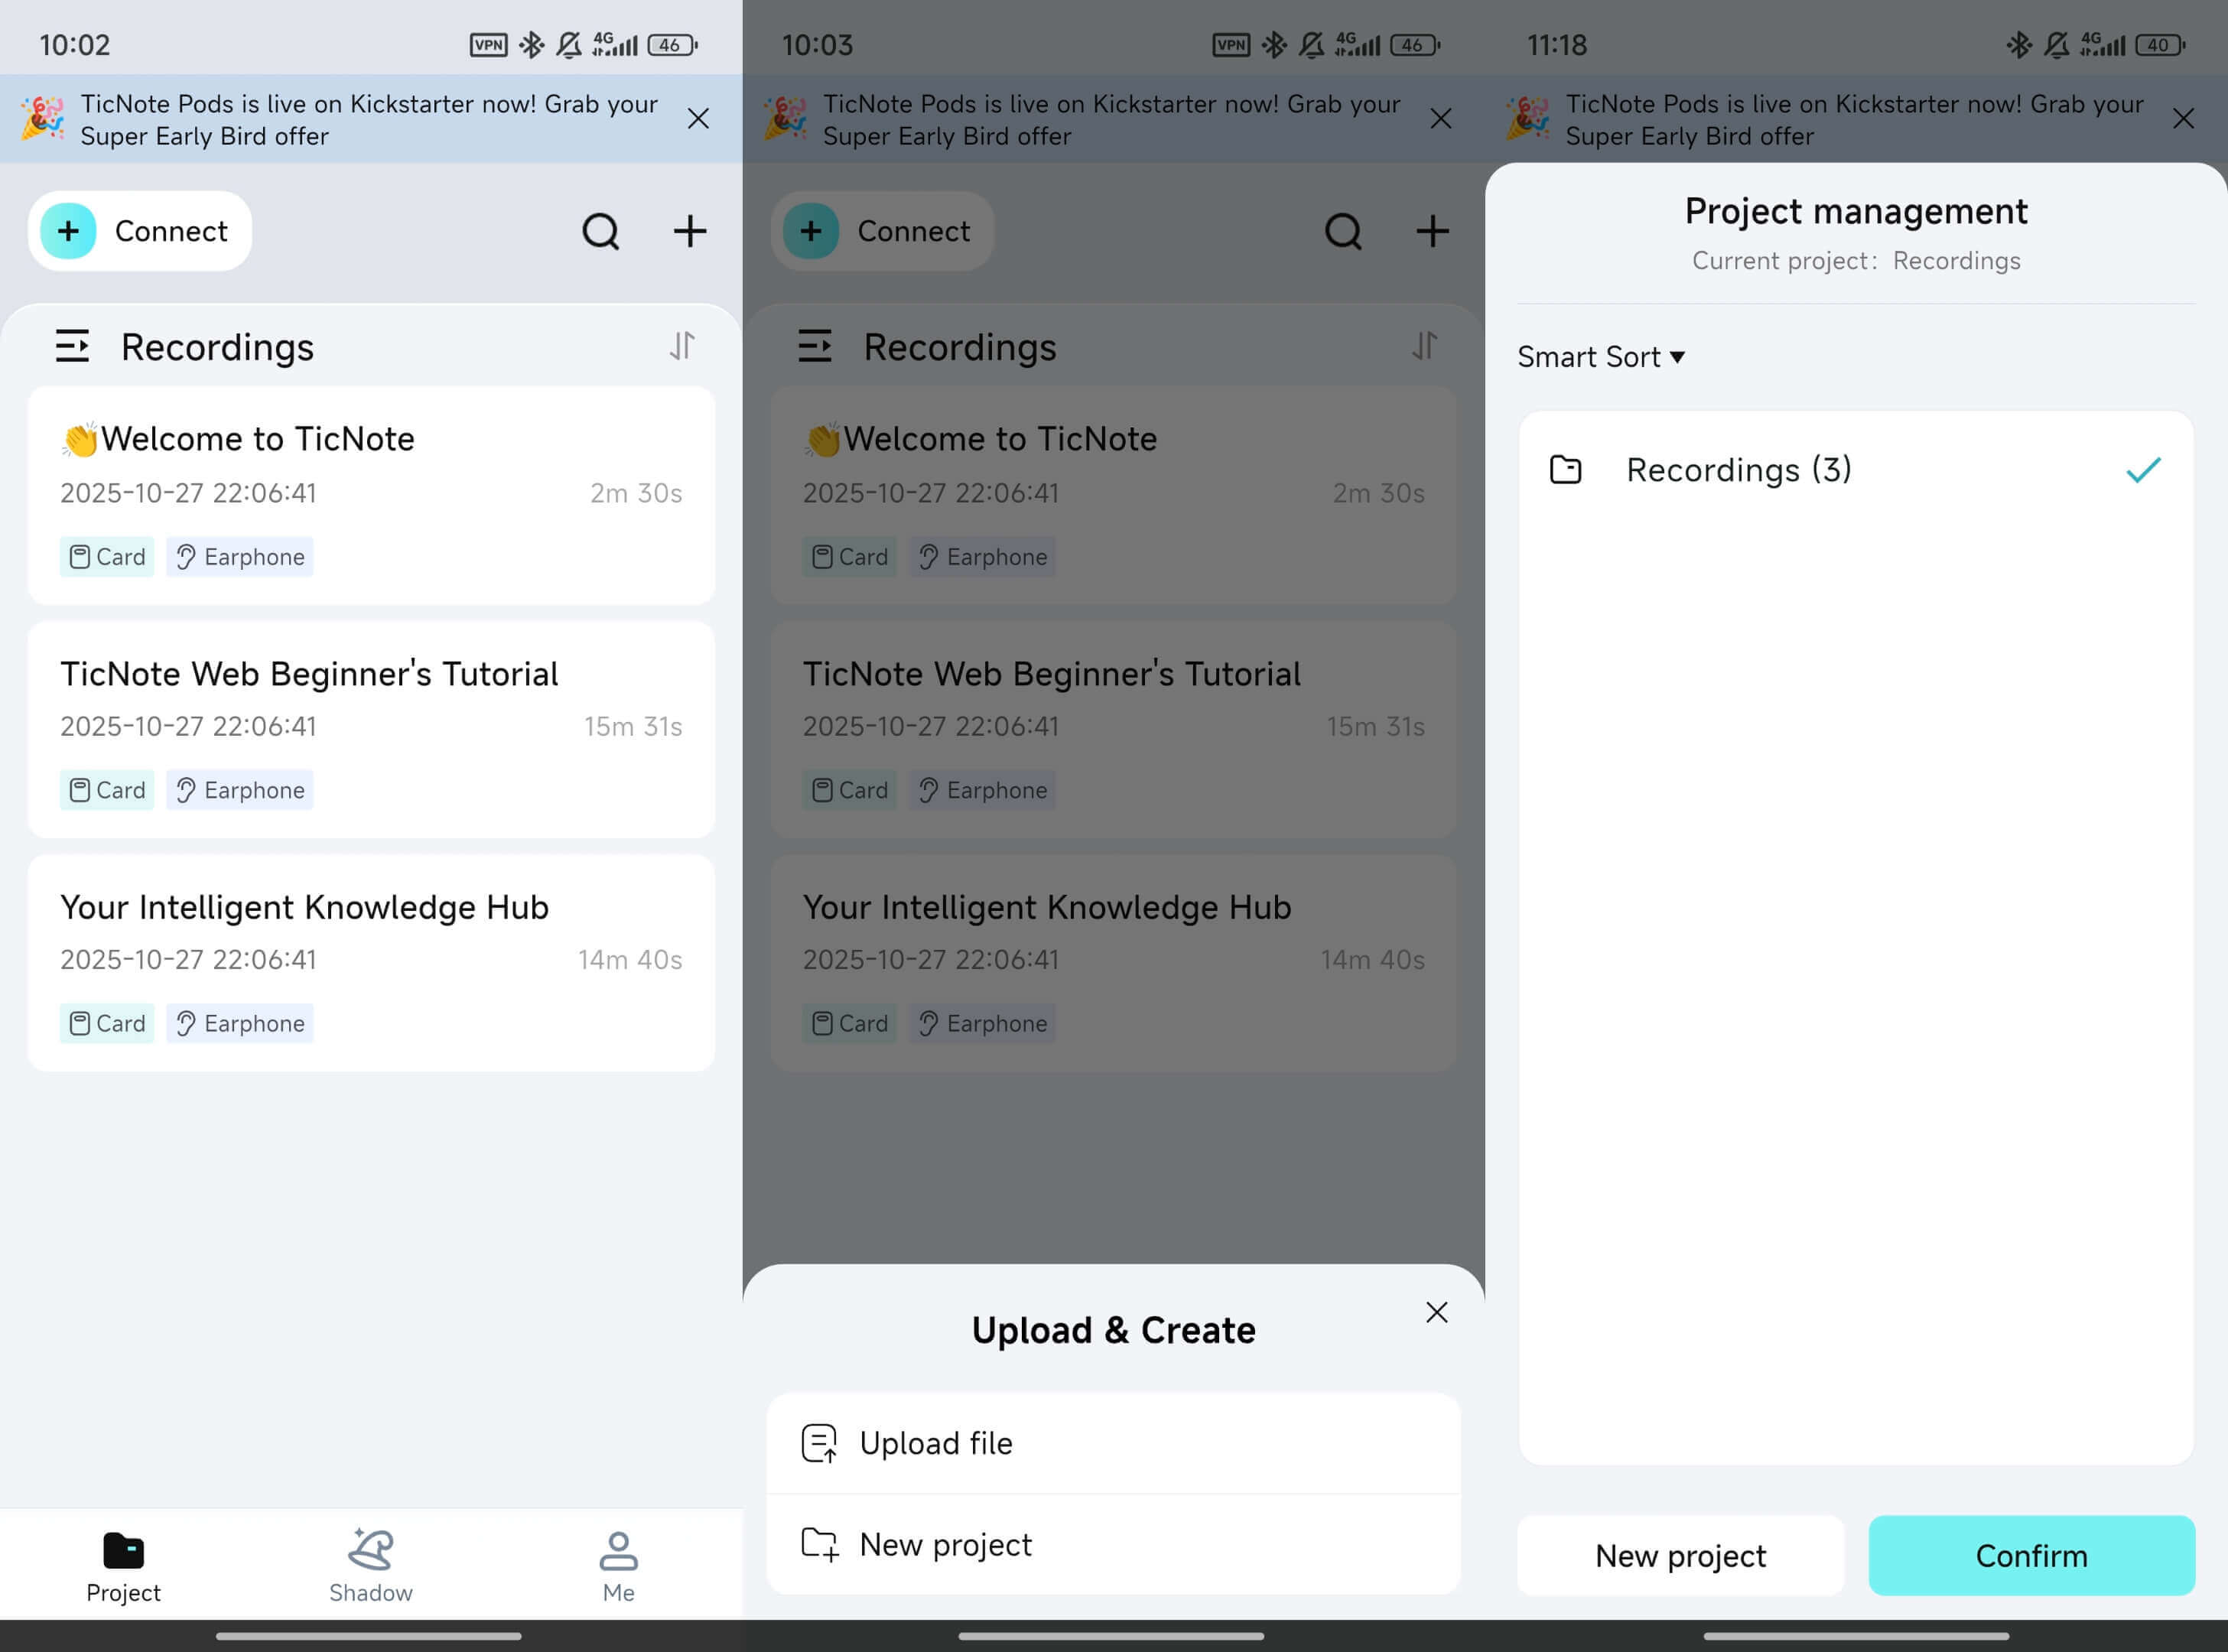
1) Set up a project so your files stay organized
Start by creating a project for the class, client, or channel. Projects keep your videos, transcripts, and notes in one place. That makes it easier to search later and reuse the same template each time.
Inline quick start: open TicNote Cloud and create a project, then upload your video.
2) Import the iPhone video into the TicNote App (recommended)
From your iPhone, upload the video directly into the TicNote App.
- Open the app and tap the add (+) button
- Choose the video from the Photos or Files app
- Add it to the correct project
If the video is very large or slow to upload, you can first save it from Photos to Files, then upload from there.
If you run into size or format limits, extracting audio first and uploading the audio-only file is often faster.
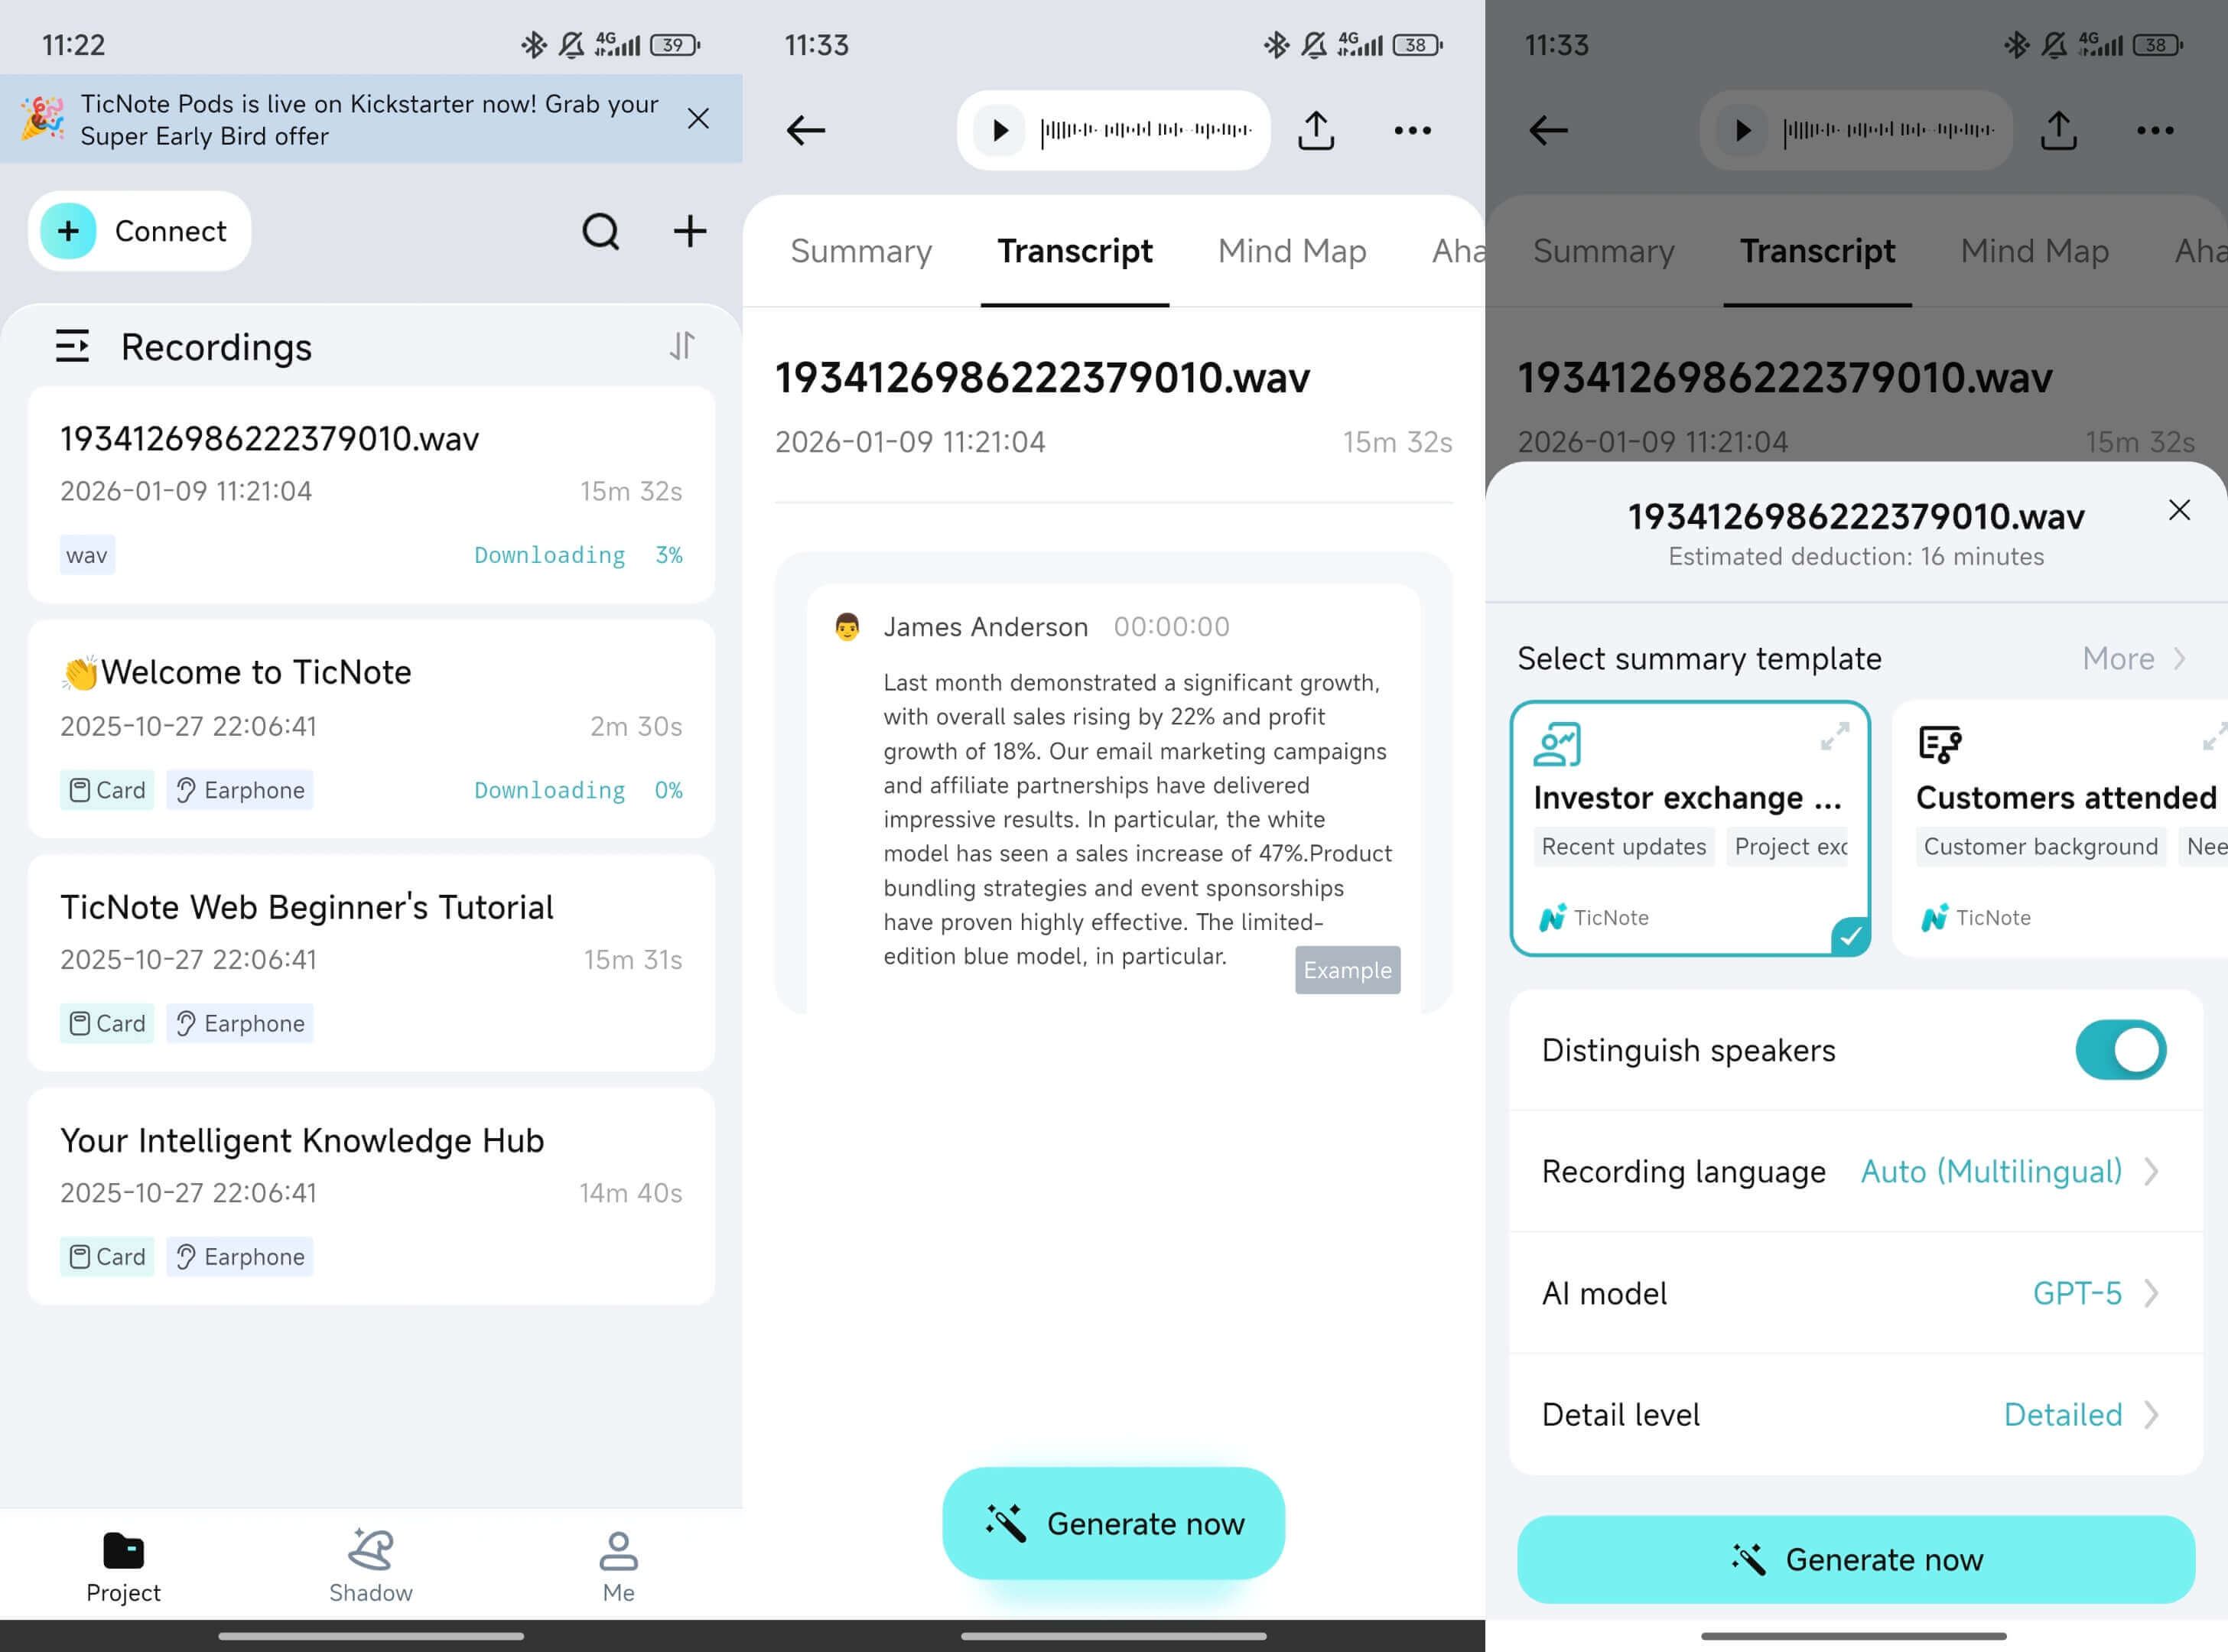
3) Pick the spoken language and start transcription
Select the uploaded video in the app and tap Transcript.
Before generating the transcript, choose:
- The spoken language
- The detail level
- Whether to distinguish speakers (useful for interviews, classes, or meetings)
Then tap Generate now to start transcription.
Language choice matters most when the video includes strong accents, multiple speakers, or industry-specific terms.
4) Clean up the transcript fast (app editing + audio trimming)
Once transcription finishes, do a short, focused cleanup pass directly in the app:
- Fix names and key terms (people, brands, product names)
- Add speaker labels if you need quotes or meeting notes
- Remove obvious filler in the first minute or two, then spot-check
If the recording is long or repetitive, you can trim or cut sections of the video or audio in the app and adjust the transcript to match. This is especially helpful when only part of the video contains useful information.
5) Turn the transcript into usable notes with templates
Next, generate structured notes from the transcript. Using a template keeps outputs consistent across videos.
Common templates include:
- Decisions: what was agreed and why
- Action items: who does what, and by when
- Outline: a clean, section-by-section summary for posting or sharing
You can also use Shadow AI in the app to rewrite or condense the transcript into clearer notes before exporting.
6) Export transcripts and summaries from the app
When everything looks right, export based on where the content will live next:
- Transcript: TXT
- Summaries: Markdown, DOCX, or PDF
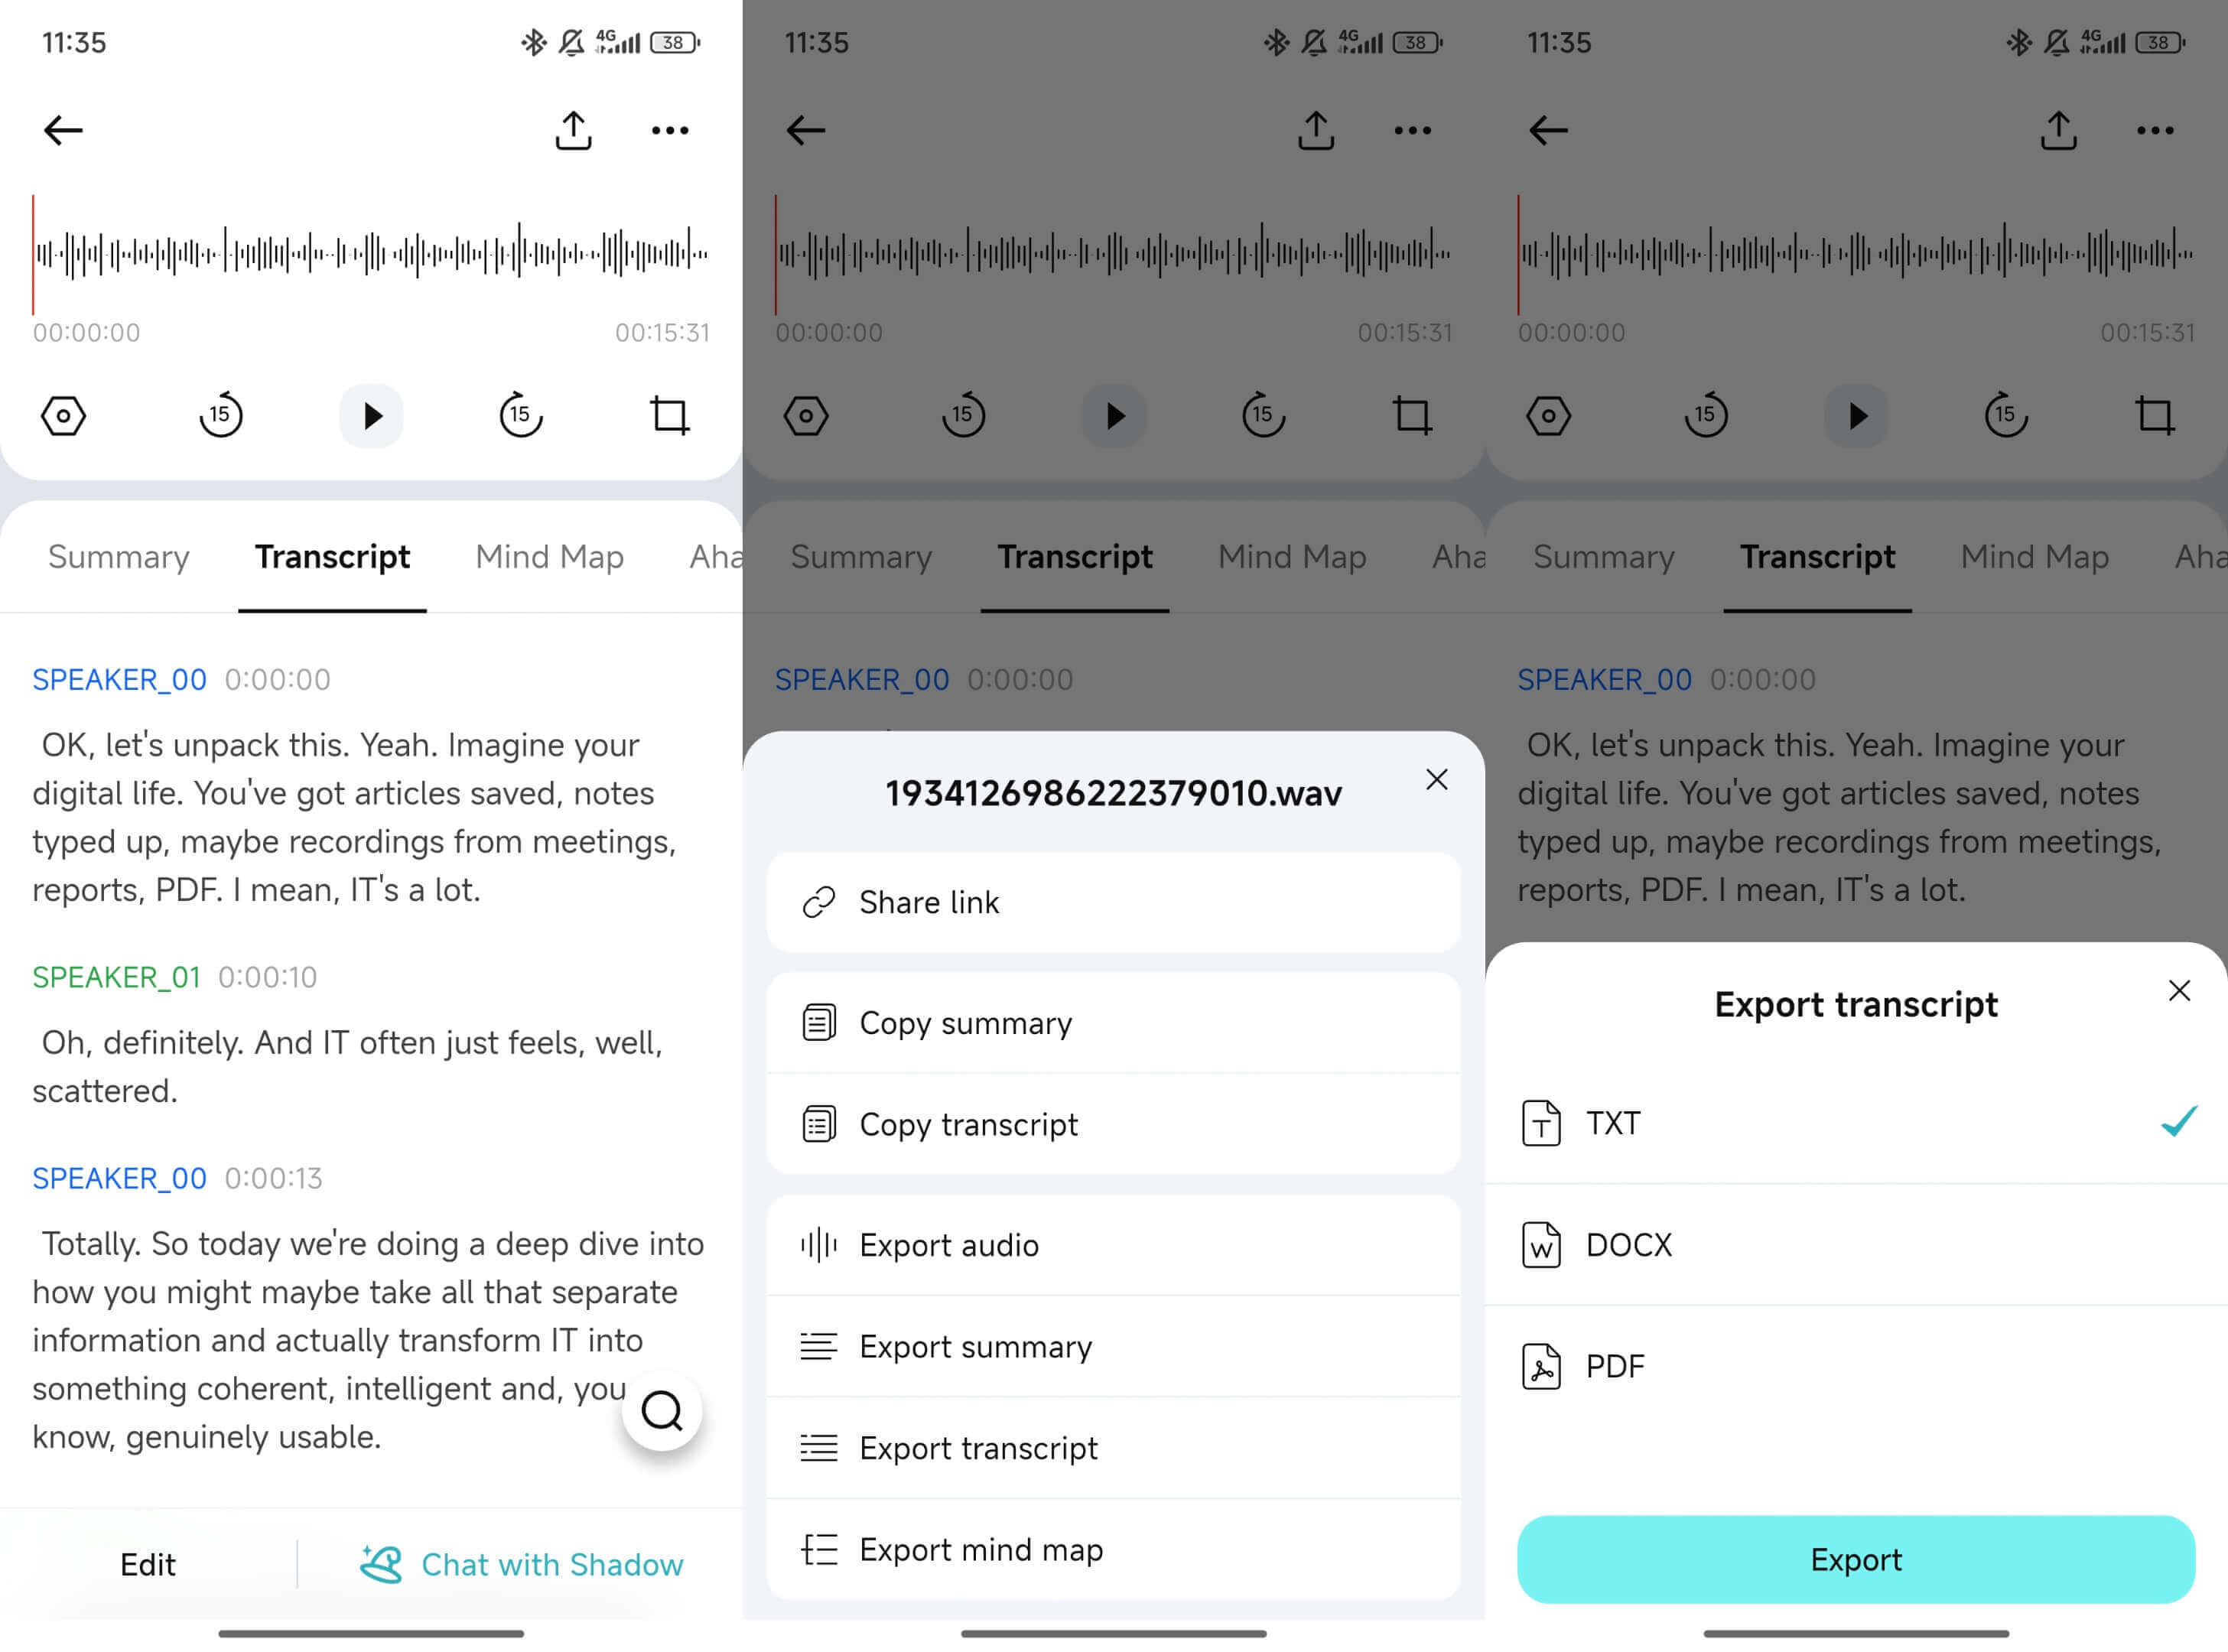
Keeping exports inside the same project makes them easy to find later.
Optional: upload and process iPhone videos on the web
If you move the iPhone video to your computer, you can also upload it in TicNote Cloud Web Studio.
Click Upload to add the file to a project, select it from the left panel, open the Transcript tab, and generate the transcript. On the web, you can use Shadow AI to clean or rewrite the text and export it, but manual text editing and audio trimming are handled in the app.

Many users upload and generate drafts on mobile, then review or export them to a desktop.
7) Translate when you need multilingual output
If you publish to more than one audience, translating after the transcript is clean.
- Translate the summary when you want speed
- Translate the full transcript when you need quotes, captions, or review
Store the original transcript and translations in the same project so everything stays searchable and connected.
This app-first loop—project → upload → transcribe → edit → summarize → export—makes iPhone video transcription fast, reusable, and easy to repeat.
How can you format, edit, and organize a transcript so it's usable?
Once you know how to transcribe a video on an iPhone, the real win is making the text easy to scan and reuse. A fast cleanup pass takes 5 to 10 minutes and fixes most "messy transcript" problems.
Do a 3-pass cleanup (fast and beginner-friendly)
Pass 1: Fix names and key terms first. Correct people, brands, class terms, and product names. Use Find to catch repeats, and replace them everywhere.
Pass 2: Cut obvious filler. Remove words like "um," "uh," and repeated "you know," but don't over-edit. If a filler changes meaning, keep it.
Pass 3: Add readability. Add basic punctuation and split long blocks into short paragraphs. Aim for one idea per paragraph.
Add light structure so it's skimmable
A usable transcript reads like notes, not a wall of text:
- Add short headings like "Intro," "Main point," and "Next steps."
- Turn lists into bullets for key points, tools, and takeaways.
- If you don't have diarization (speaker ID), add simple cues like:
- Speaker 1: …
- Speaker 2: …
Optional: Add timestamps for quick video jump-backs
Use a simple style like [00:45] at each topic change, or every 30 to 60 seconds. It makes reviewing faster and helps you pull exact quotes.
Organize it so you can find it later
Name files like 2026-01-20 Client-onboarding-call.txt. Keep all transcripts in one folder or one project space. Add consistent keywords in the first lines (topic, names, course, client) so the search works later.
Try TicNote Cloud for Free to export clean TXT transcripts and keep them organized in searchable projects.
How do you export and reuse your iPhone transcript (notes, posts, captions)?
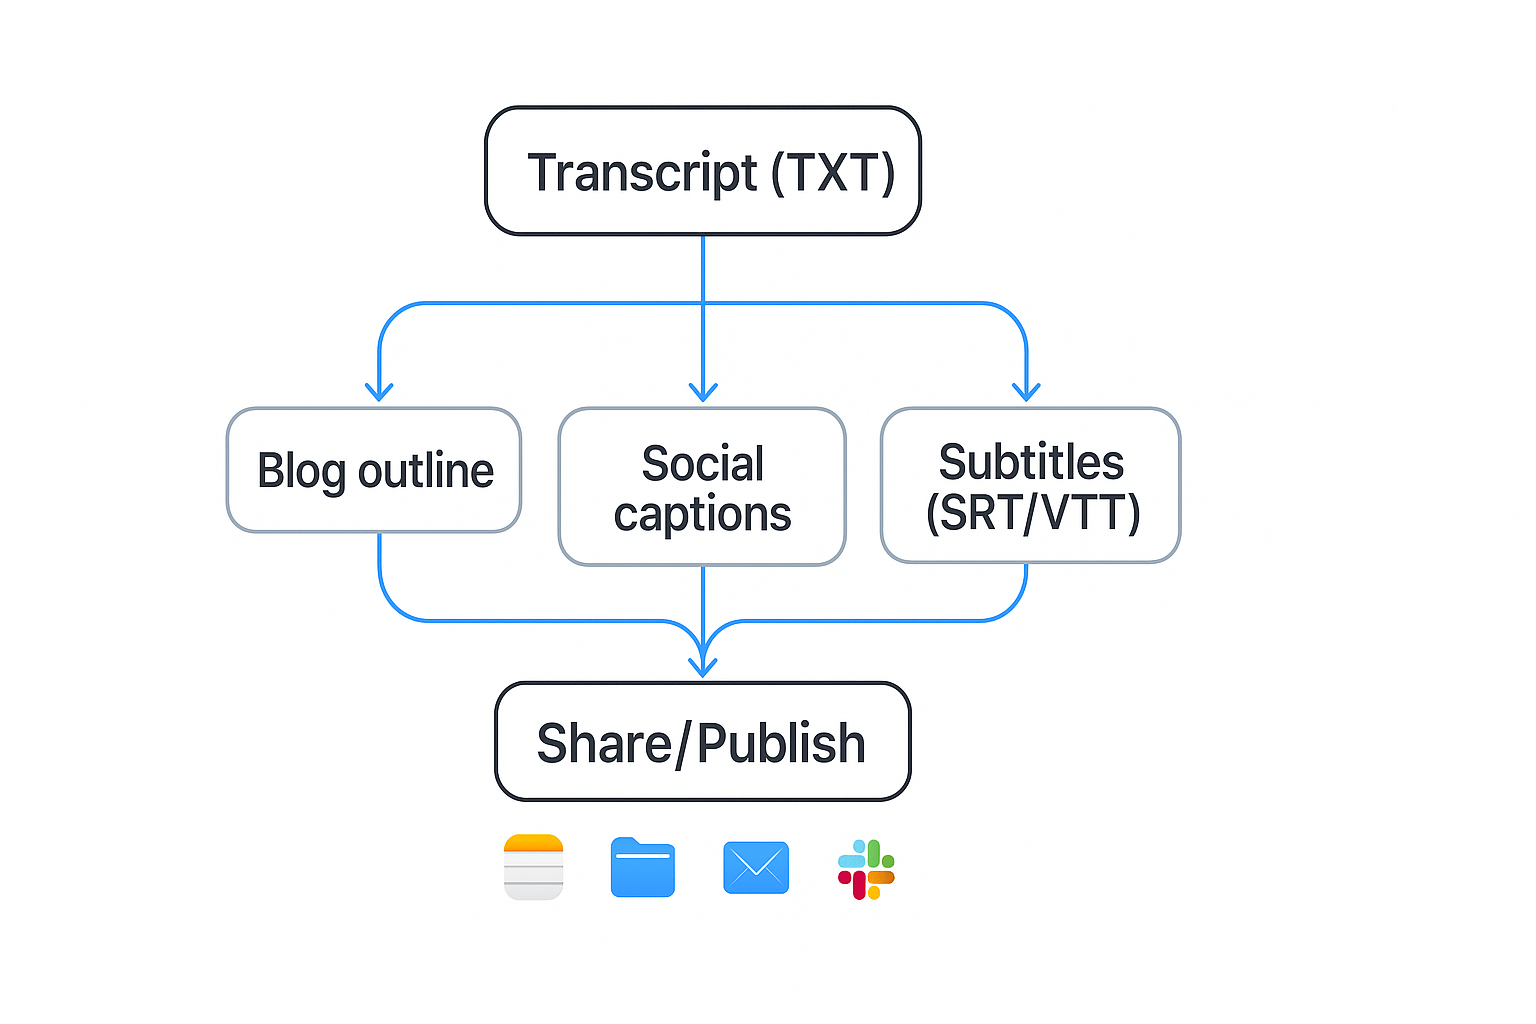
Once you know how to transcribe a video on an iPhone, the real win is reuse. Export the transcript as TXT for quotes and drafts, export a summary as Markdown, DOCX, or PDF for sharing, then save it all to Files so every app can grab it.
Export routes that work well on iPhone
Most transcription tools give you a Share button. Pick the route that matches what you'll do next:
- Copy and paste into Notes, Google Docs, or a CMS for fast edits.
- Save to Files (iCloud Drive or On My iPhone) so you can open it in any editor later.
- Send as an attachment by Mail, Messages, or AirDrop.
- Post to team tools like Slack or Notion, if your app supports it.
- Share a link when the app offers a share link, handy for reviews.
Tip: keep a simple folder, like Files > Transcripts > Project Name so you can find things later.
Turn a TXT transcript into subtitles (SRT or VTT)
TXT is great for reading, but subtitles need timing. You'll usually convert TXT into SRT or VTT using a subtitle editor. Web players also support VTT, and WebVTT: The Web Video Text Tracks Format (W3C Recommendation, 2023) is "intended for marking up external text track resources in connection with the HTML element."
To speed conversion, clean your transcript first:
- Use short sentence breaks, one idea per line.
- Remove filler words you won't caption.
- Keep speaker names only if needed.
- Add timestamps if your tool can export them.
Quick creator checklist (post to captions)
- Pull 3 to 5 hooks (opening lines).
- Pull 5 to 10 pull quotes.
- Outline a post with headings from the transcript.
- Turn the best lines into short captions, then generate subtitles.
Try TicNote Cloud for Free to export clean TXT transcripts and share-ready summaries.
What about privacy, consent, and where transcription happens (on-device vs cloud)?
When you transcribe a video on an iPhone, privacy depends on where the audio is processed. On-device transcription keeps the audio on your phone (when supported). Cloud transcription uploads audio or video to a service, then sends text back.
Know what your iPhone and apps can access
You may see prompts for Microphone, Speech Recognition, and Photos or Files access. Grant only what you need. If an app can import a single file, pick that instead of full Photos access.
Reduce exposure before you hit "transcribe"
A few small moves help a lot:
- Use headphones and avoid transcribing in public
- Trim out sensitive parts before uploading
- Use a copy of the file, not the original
Consent and retention: keep it simple
If you record other people, ask first and say how you'll use the transcript. After export, clean up your data:
- Delete the source video or Voice Memo from Photos and Recently Deleted
- Delete the transcript inside the app or workspace you used
- Check the provider's policy on retention and whether data is used to train models
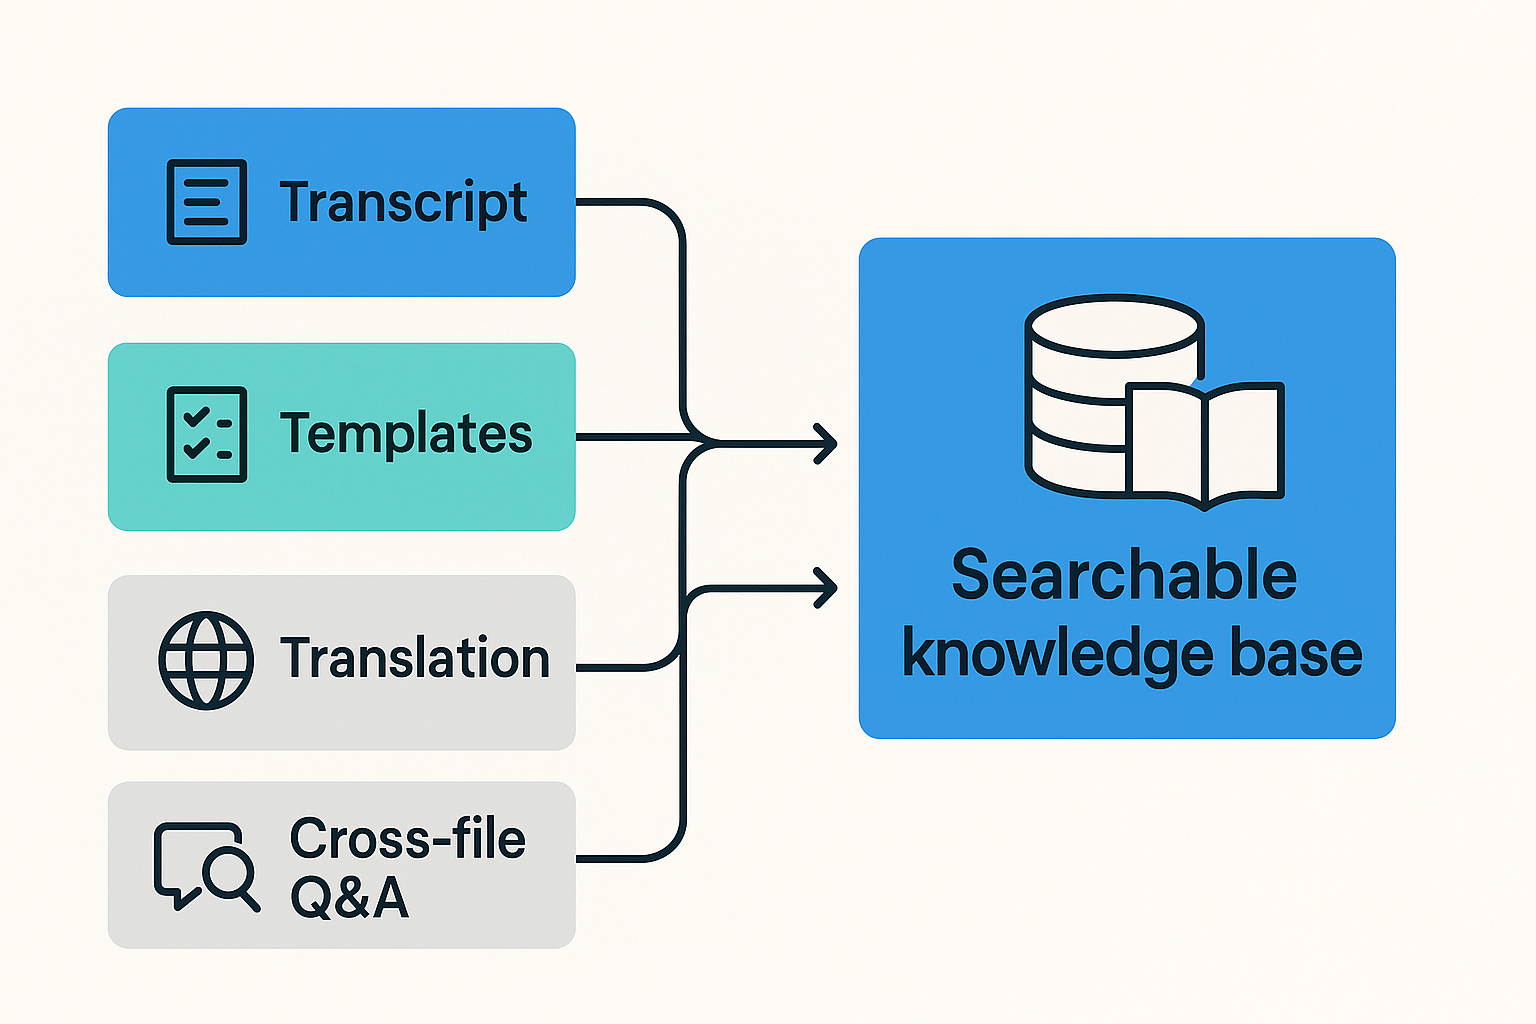
What features are unique for long-term "transcribe → knowledge base" work?
When you learn how to transcribe a video on an iPhone, the hard part is not the text. It's finding the right line later. You want the decision, the task, the quote, and who owns it.
Stop losing transcripts in random folders
A long-term setup works best when everything lives in one workspace. That means you can group video uploads by client, class, podcast, or project, then keep notes, summaries, and follow-ups together.
In TicNote Cloud, you can:
- Organize files in project spaces (so each topic stays clean)
- Share projects with role-based access (Owner, Member, Guest)
- Export in formats that fit real workflows: transcript as TXT, summaries as Markdown, DOCX, or PDF, plus mind maps as PNG or Xmind
Ask across files with Shadow (cross-file Q&A)
Cross-file Q&A means you can ask one question across many transcripts. For example: "What did we decide about the launch date?", "Who owns the next step?", or "When did we approve the budget?" Shadow can pull the answer with the source context, so you spend less time searching.
If you also capture short clips and memos, it helps to transcribe voice memos to text cleanly and keep them in the same project.
Review faster with mind maps and deep research
A mind map gives you a quick visual of the main themes. Deep research turns messy discussion into a structured report you can scan, share, and reuse.