
TL;DR: A safe, accurate workflow to transcribe medical dictation
Try a safer drafting path with TicNote Cloud while you follow this repeatable pipeline for how to transcribe medical dictation: intake, draft, format, QA, clinician query, then delivery of EHR-ready text.
Problem: Dictation moves fast and the riskiest details hide in the noise. Agitate: A single guessed dose, side, or missed “denies” can flip meaning and harm care. Solution: Use a consistent checklist and draft in TicNote Cloud, then escalate anything unclear instead of guessing.
Pipeline you can run every time: verify audio and encounter context, draft a clean transcript, apply the right note template, run safety QA checks, send focused clinician queries, then deliver the final note.
Double-check these five high-risk items on every job:
- Patient identifiers and encounter details
- Medications: name, route, frequency
- Numbers: dose, decimals, ranges
- Laterality and site
- Negations: “no,” “denies,” “without,” plus allergy status
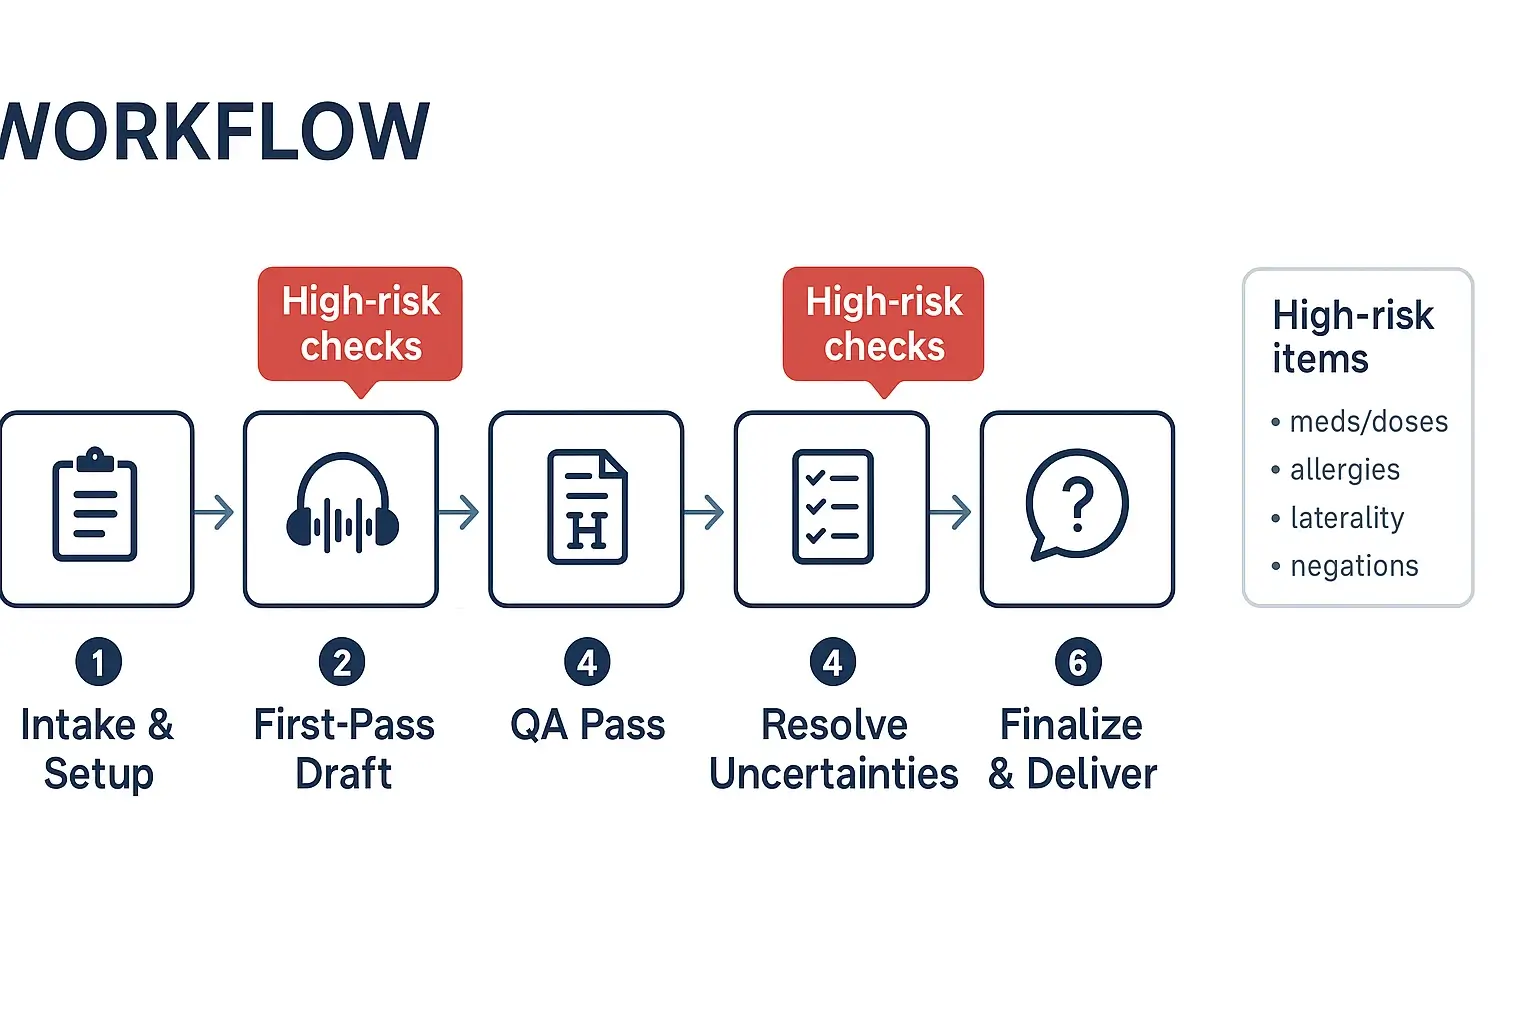
How to transcribe medical dictation step by step (intake to delivery)
A safe workflow matters because clinical notes carry risk. One missed “no,” a wrong side, or a dose typo can cause harm. Below is a six-step process you can use to transcribe medical dictation from intake to EHR-ready delivery.
Step 1: Intake and job setup (get the basics right first)
Start by confirming the “who, what, when” before you type.
- Confirm metadata:
- Patient name and a second identifier (per your local policy)
- Date of service, location, encounter type
- Dictating clinician, specialty, and contact path for questions
- Note type (SOAP, H&P, consult, op note, discharge summary)
- Required turnaround time and delivery method
- Pick the right template now:
- Use your clinic’s approved headings and section order
- If the clinician dictates “headers” (for example, “Assessment, number one…”), map them to the template sections.
- Lock down file naming and PHI storage:
- Use a consistent naming pattern, for example: Date_Clinician_PatientID_NoteType_v1
- Store audio and drafts only in approved systems and folders
- Avoid copying PHI into chat tools, personal email, or local sticky notes
- Build a micro-glossary for local terms:
- Provider names, clinic locations, common meds, local shorthand
- Typical procedure names and device brands used in that practice
Step 2: First-pass draft (capture what you hear, fast)
Your first pass is about capture, not perfection.
- Set playback controls early: slow down audio without changing pitch.
- If there are multiple speakers, label them (Clinician, Patient, Nurse).
- Use timestamps only where needed, such as: [00:12:41 unclear med].
- Type what is said, in order, including dictated punctuation and headings.
High-risk tip: When you hear meds, doses, allergies, or laterality, mark them for later review. A simple tag like {VERIFY} keeps you from “fixing” things too soon.
Step 3: Normalize and structure (clean read without changing meaning)
Now turn the raw draft into a clinical note. This is where many errors sneak in, so move in a set order.
- Decide your style: verbatim vs clean read.
- Verbatim keeps speech patterns.
- Clean read removes fillers, repeats, and false starts, but keeps meaning.
- Enforce headings and section order (per your template).
- Standardize punctuation and spacing for readability.
- Remove obvious speech artifacts (um, you know) unless they change meaning.
Handle lists with extra care:
- Med lists: keep one med per line when possible.
- Problem lists: keep the clinician’s numbering and priority.
- Dictated “headers”: if the clinician says “Review of systems,” start that section even if they do not pause.
Quick check while you clean:
- Do you see any missing negatives (denies, no, without)?
- Did the clinician switch sides (left vs right) mid-dictation?
- Are numbers written clearly (5 vs 50, 0.5 vs 5)?
Step 4: QA pass (audio-to-text verification on high-risk elements)
Do a second listen, but don’t re-listen to everything the same way. Target the risky parts first.
Use a focused QA sweep:
- Medications: drug name, dose, unit, route, frequency
- Allergies: agent and reaction, and “NKDA” (no known drug allergies) vs “NKA”
- Laterality: left/right, unilateral/bilateral
- Negations: denies, negative for, no evidence of
- Numbers and units: mg vs mcg, mL vs L, bpm vs bpd
- Dates and timelines: onset, duration, follow-up intervals
Then run a structured checklist before you finalize:
- All required sections present
- Identifiers match the job ticket
- Abbreviations are allowed locally
- No blanks, no “???” left behind
- Uncertainties are flagged for resolution
Step 5: Resolve uncertainties (query, don’t guess)
If you can’t prove it from the audio, don’t “best guess.” This is the step that prevents dangerous errors.
Query the clinician when:
- Any dose, unit, or route is unclear
- Allergies or reactions are uncertain
- Laterality is missing or conflicted
- A negation could flip meaning
- A key diagnosis, procedure, or disposition is not clear
What to include in a good query:
- Exact snippet you heard
- Timestamp or dictation marker
- Two plausible options (if appropriate)
- The impact area (med list, assessment, orders)
Clinician query script (copy/paste):
- “At [timestamp], I hear: ‘___’. Can you confirm if it is (A) ___ or (B) ___?”
- “Please confirm laterality: left vs right for ___.”
- “Please confirm dose and units for ___, I cannot verify from audio.”
Escalation thresholds:
- High-risk uncertainty (med dose, allergy, laterality, negation): hold delivery until confirmed.
- Low-risk uncertainty (spelling of a non-critical proper noun): flag and deliver with a note, per policy.
Step 6: Finalize and deliver (EHR-ready, traceable)
Before delivery, format for the EHR and protect the record.
- Apply your clinic’s formatting standards: headings, spacing, approved abbreviations.
- Confirm identifiers again, including date of service and clinician name.
- Remove internal tags like {VERIFY} and any timestamps you don’t want in the final note.
- Deliver only through the approved channel (EHR inbox, secure portal, encrypted transfer).
Use basic version control:
- Save a final version as vFinal (or v2) and keep prior drafts per policy.
- If you changed meaning-critical items after a clinician reply, add a short change log for internal tracking.
If you’re also building a process for non-clinical audio, you can adapt this same flow using a broader step-by-step transcription workflow for intake, drafting, and delivery.
Try TicNote Cloud for Free to draft transcripts faster and keep outputs consistent.
What standards should you follow when you transcribe clinical dictations?
Standards keep your transcript clear, safe, and easy to sign. When you transcribe medical dictation, use one house style and stick to it. The goal is simple: same meaning, no added guesses.
Choose verbatim vs clean read (and don’t mix them)
Most teams use one of two modes:
- Verbatim: Keep false starts, repeats, and filler. Use when required for legal, research, or dispute work.
- Clean read: Remove verbal clutter but keep meaning identical. Don’t “improve” clinical content.
Clean read rules that prevent harm:
- Delete only non-meaningful filler (um, you know) and obvious restarts.
- Keep patient quotes word-for-word, including slang.
- Keep legally relevant wording, like informed consent language.
- Never change facts, certainty, or timing.
Use a strict abbreviations policy
Abbreviations are a top error source. Follow facility and specialty guidance first.
- Avoid unsafe short forms. If it can be read two ways, expand it.
- Write medication units in full when unclear (for example, “units” instead of “U”).
- Build a personal glossary for provider habits, drug names, and local shortcuts.
- If the dictation conflicts with your glossary, flag it instead of “fixing” it.
Write numbers, units, and dates for safety
Small formatting choices can change a dose.
- Use a leading zero for decimals: 0.5 mg, not .5 mg.
- Don’t use trailing zeros: 5 mg, not 5.0 mg.
- Separate look-alike units: mg vs mcg, mL vs L.
- Keep time and dates consistent (pick one format and apply it).
Quick sanity checks before delivery:
- Does the dose fit the patient type (adult vs pediatric)?
- Are vitals possible (heart rate 600 is a red flag)?
- Do ranges make sense (5 to 50 mg may need a query)?
Treat negations and laterality as “never-miss” items
Negations and laterality errors can flip the clinical meaning.
- Listen for denial words: “no,” “denies,” “without,” “negative for.”
- Recheck left vs right at every mention of a site or procedure.
- If the dictation contradicts itself, don’t reconcile it silently. Insert a clear flag and query the clinician.
How do you format common medical note types from dictation (SOAP, H&P, consults)?
Good formatting makes dictation safer. It turns a rambling audio file into a note that is easy to scan, code, and sign. When you transcribe medical dictation, your job is often to sort content into the right headings without changing meaning.
Format a SOAP note by sorting dictation cues
Start by listening for “signal phrases.” Then drop each sentence into S, O, A, or P.
- Subjective (S): symptoms, patient quotes, history since last visit
- Objective (O): vitals, exam (PE), labs, imaging, measurements
- Assessment (A): problems, diagnoses, differentials, clinical impression
- Plan (P): meds (dose, route, frequency), orders, referrals, follow up, patient instructions
Quick cue map:
- “Patient reports…”, “Denies…”, “Since last week…” → Subjective
- “BP is…”, “On exam…”, “CT shows…” → Objective
- “Assessment is…”, “Likely…”, “Rule out…” → Assessment
- “Will start…”, “Continue…”, “Order…”, “Return in…” → Plan
Side by side SOAP example:
Dictated phrasing: “Pt reports left knee pain for 3 days, worse with stairs. Denies swelling. Vitals stable. Exam shows mild tenderness medial joint line, no effusion. Assessment: likely MCL sprain. Plan: ibuprofen 400 mg PO q8h prn pain, ice, rest, PT referral, follow up in 2 weeks.”
Verbatim transcript: “Patient reports left knee pain for three days, worse with stairs. Denies swelling. Vitals stable. Exam shows mild tenderness medial joint line, no effusion. Assessment likely MCL sprain. Plan ibuprofen four hundred milligrams by mouth every eight hours as needed for pain, ice, rest, PT referral, follow up in two weeks.”
Clean SOAP output: S: Left knee pain x3 days, worse with stairs. Denies swelling. O: Vitals stable. PE: mild tenderness at medial joint line, no effusion. A: Suspected MCL sprain. P: Ibuprofen 400 mg PO q8h PRN pain. Ice and rest. Refer to PT. Follow up in 2 weeks.
Use an H&P template, even when dictation is out of order
A solid History and Physical (H&P) uses predictable headings:
- Chief Complaint (CC)
- History of Present Illness (HPI)
- Past Medical History (PMH) and Past Surgical History (PSH)
- Medications
- Allergies
- Family History (FH)
- Social History (SH)
- Review of Systems (ROS)
- Physical Exam (PE)
- Assessment and Plan
If a section is missing, add the heading and leave a blank line. If a missing item could change care, flag it for a query (for example, allergies, anticoagulants, laterality, or key negatives).
Fast templates for discharge summaries and procedure notes
Discharge summary must have:
- Admit date, discharge date, discharge diagnosis
- Brief hospital course
- Discharge meds (bullets, each with dose, route, frequency)
- Follow up and return precautions
Procedure or op note must have:
- Procedure name and laterality or site
- Indication
- Anesthesia
- Findings
- Estimated blood loss (EBL)
- Specimens
- Complications (or “none”)
- Disposition and post op instructions
Consistency rules that prevent confusion:
- Use the same headings every time.
- Put meds in bullets, not paragraphs.
- Write numbers and units clearly (mg, mcg, mL).
- Keep wording plain, so clinicians can skim fast.
How do you handle unclear audio, accents, and interruptions while you transcribe?
Unclear audio is normal in clinical dictation. The goal is safety and speed at the same time. Use a simple playbook so you don’t guess, and your reviewer can fix issues fast.
Use a two-pass listen that saves time
First pass: listen for structure. Mark the note type, sections, and key topics. Second pass: fill in details like meds, doses, labs, and laterality (right vs left).
During the second pass:
- Loop short clips (2 to 5 seconds) instead of long rewinds.
- Slow down to 0.8x for names and numbers, then return to normal.
- Use headphones and isolate one channel if you can.
- Mark speaker changes and interruptions like coughing, paging, or cross-talk.
Tag uncertainty the same way every time
Don’t hide problems in “cleaned” text. Use clear tags so QA can resolve them.
Use a consistent set like:
- [inaudible 00:01:23] when you can’t hear it at all
- [unclear] when you hear sound but not meaning
- [possible: metoprolol] when you have one best guess
- [two speakers] when overlap blocks meaning
Keep tags next to the risky item, not at the end.
Verify without guessing or exposing PHI
Follow a “no guessing” rule for high-risk items: drug, dose, route, frequency, allergies, laterality, and negations (denies vs reports).
Low-risk checks that help:
- Confirm spellings against approved internal lists (provider names, clinics).
- Sanity-check units, mg vs mcg, and mmol/L vs mg/dL.
- Reconcile numbers with nearby context, like “increase to” or “reduce from.”
If you want a repeatable loop, adapt the same re-listen habits you’d use to transcribe interviews and calls securely.
Escalate fast with a time box and a tight query
Time-box each unclear segment (for example, 60 to 90 seconds). If it’s still unclear, tag it and escalate.
Query the clinician when the item is high risk or changes care. Use this short script:
- Timestamp: “00:12:41”
- Context: “Plan section, HTN meds”
- Question: “Did you say A, B, or C?”
- Options: “1) metoprolol 25 mg BID, 2) metoprolol 50 mg daily, 3) amlodipine 5 mg daily”
What quality checks prevent the most dangerous transcription errors?
The safest way to transcribe medical dictation is to QA (quality assurance) what can harm a patient first. That means you don’t “proofread the whole note evenly.” You do a risk pass on meds, numbers, laterality, and negations, then a second pass for clarity and format.
Run a high risk checklist first (patient safety pass)
Use this checklist in the same order every time:
- Patient and encounter basics: name or MRN (if present), date of service, note type, ordering clinician.
- Meds and allergies: drug name, allergy substance, reaction, and “no known” statements.
- Dose and units: mg vs mcg, mL vs units, decimals, ranges, and titrations.
- Route and frequency: PO, IV, IM, PRN (as needed), times per day, taper schedules.
- Laterality and site: left vs right, side of symptoms, site of procedure, level (L4-L5), eye/ear.
- Problems and key diagnoses: active problem list items, “rule out,” “history of,” and resolved issues.
- Procedures and devices: what was done, where, and any device settings or sizes.
- Negations and qualifiers: “no,” “denies,” “without,” “not on,” “stopped,” “allergic to.”
Now the read back tactics that catch most critical errors:
- Point to every number in the note and replay audio 3 to 5 seconds before and after it.
- Replay every left/right and site phrase once, even if you feel sure.
- Replay every negation and confirm what it applies to (symptom, med, allergy, test).
Classify errors by severity so actions are clear
Use a simple table so anyone on the team knows what happens next.
| Severity | What it means | Examples | Required action |
| Critical | Could cause patient harm | Wrong drug, wrong dose or unit, wrong route, wrong laterality, missed “no” or “denies” | Stop work, replay audio, make an immediate query to the clinician, do not “guess” |
| Major | Changes meaning, but lower immediate harm | Wrong diagnosis term, wrong procedure detail, missing key timeline, wrong lab value context | Second pass review, fix and document, query if still unclear |
| Minor | Does not change meaning | Spelling, punctuation, minor grammar, formatting | Simple edit |
Track measurable targets and audit sampling
Set team targets that match clinical risk:
- Critical errors: goal is zero.
- Major errors: low and trending down each month.
- Minor errors: acceptable, but should not slow delivery.
Operational metrics to track:
- Turnaround time bands by note type (short follow ups vs long H and P (history and physical)).
- Rework rate: percent of notes returned for fixes.
- Audit sampling: review all high risk encounters, plus a random sample (for example, a small percent) of routine notes weekly.
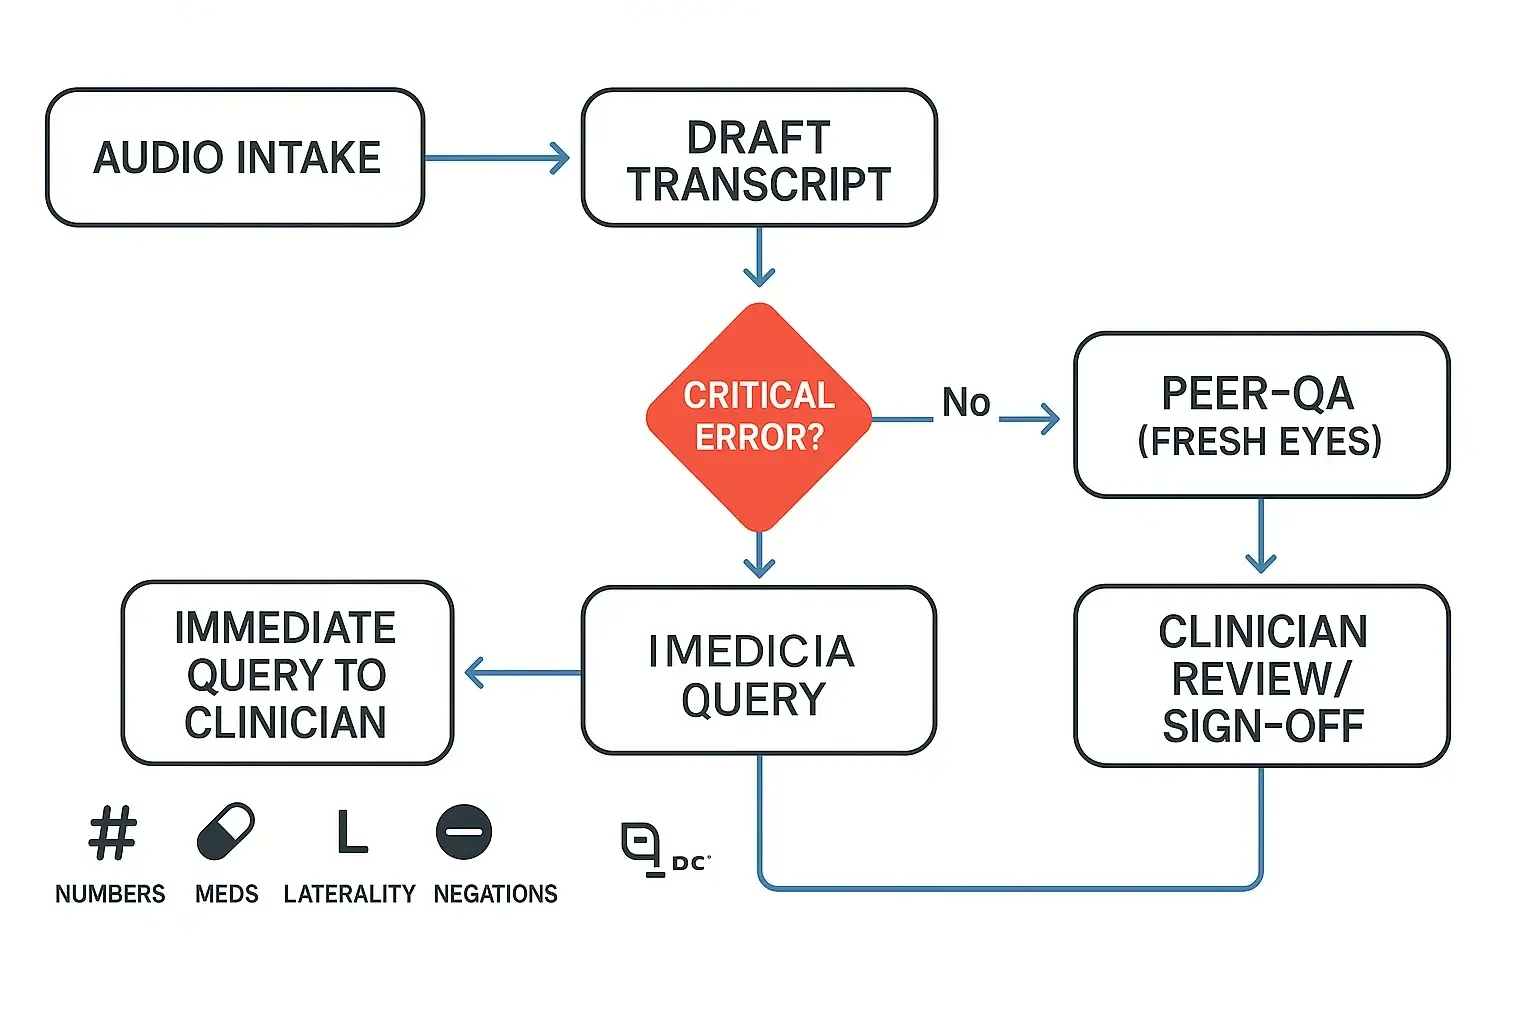
Use a two pass review loop with clear roles
For higher risk notes, don’t rely on one person.
- Transcriptionist: drafts, runs the high risk checklist, flags uncertainties.
- QA reviewer: fresh eyes pass on all high risk items, checks numbers, laterality, and negations.
- Clinician sign off: confirms intent and resolves queries.
Log corrections by category (critical, major, minor) and by cause (audio, accent, template misuse). That gives you a short list of training topics that prevent repeats.
How should you protect PHI when you transcribe medical dictation (HIPAA-minded)?
Protecting PHI (protected health information) is part of how you transcribe medical dictation safely. Use a simple rule: only the right people can access it, only on approved systems, and only for as long as needed. Build the workflow so mistakes are hard to make.
Lock down the basics: encrypt, authenticate, control access
Start with four safeguards most small teams can implement fast:
- Encrypt data in transit and at rest (when it moves and when it’s stored). The HIPAA Security Rule calls for technical measures to protect ePHI in transit, see 45 CFR § 164.312 — Technical safeguards (Electronic transmission security).
- Use strong passwords plus MFA (multi-factor authentication), so a stolen password isn’t enough.
- Use role-based access, give “least privilege” (only what each role needs).
- Turn on audit trails when available, so you can tell who opened what and when.
Also, keep PHI off personal devices. Store files in a controlled workspace, not on laptops, personal email, or USB drives.
Handle vendors and contractors safely (before you share audio)
If you use a transcription service or contractor, treat them like part of your security perimeter:
- Use a BAA (Business Associate Agreement) if they handle PHI.
- Require approved devices and a secure login.
- Limit access by project, patient, or clinic.
- Log access and changes, especially for corrected notes.
Retention and secure deletion: keep less, delete better
Set a simple retention policy: keep only what you need for care, billing, and legal rules. Define timelines for raw audio, drafts, and final notes. When you delete, include downloads, backups, and “recent files,” then use secure disposal for printed pages (locked bins and shredding).
Day-to-day PHI do’s and don’ts
Do:
- Lock screens, auto-timeout, and use encrypted drives.
- Use secure sharing inside approved systems.
Don’t:
- Email PHI attachments.
- Upload to unapproved consumer cloud storage.
- Print unless needed, and never leave pages unattended.
Your local policies and legal counsel always override general guidance.
A practical alternative workflow to draft and organize transcripts (with screenshots)
This walk-through uses TicNote Cloud as the example tool, but the same safety-first ideas work in any secure dictation-to-text setup. The goal is simple: get a clean draft fast, then add checks before a clinician signs off.
Web Studio workflow: from upload to clinician-ready draft
- Upload or record the dictation
Start by creating a project for a provider or clinic. Then upload an audio file from your device.
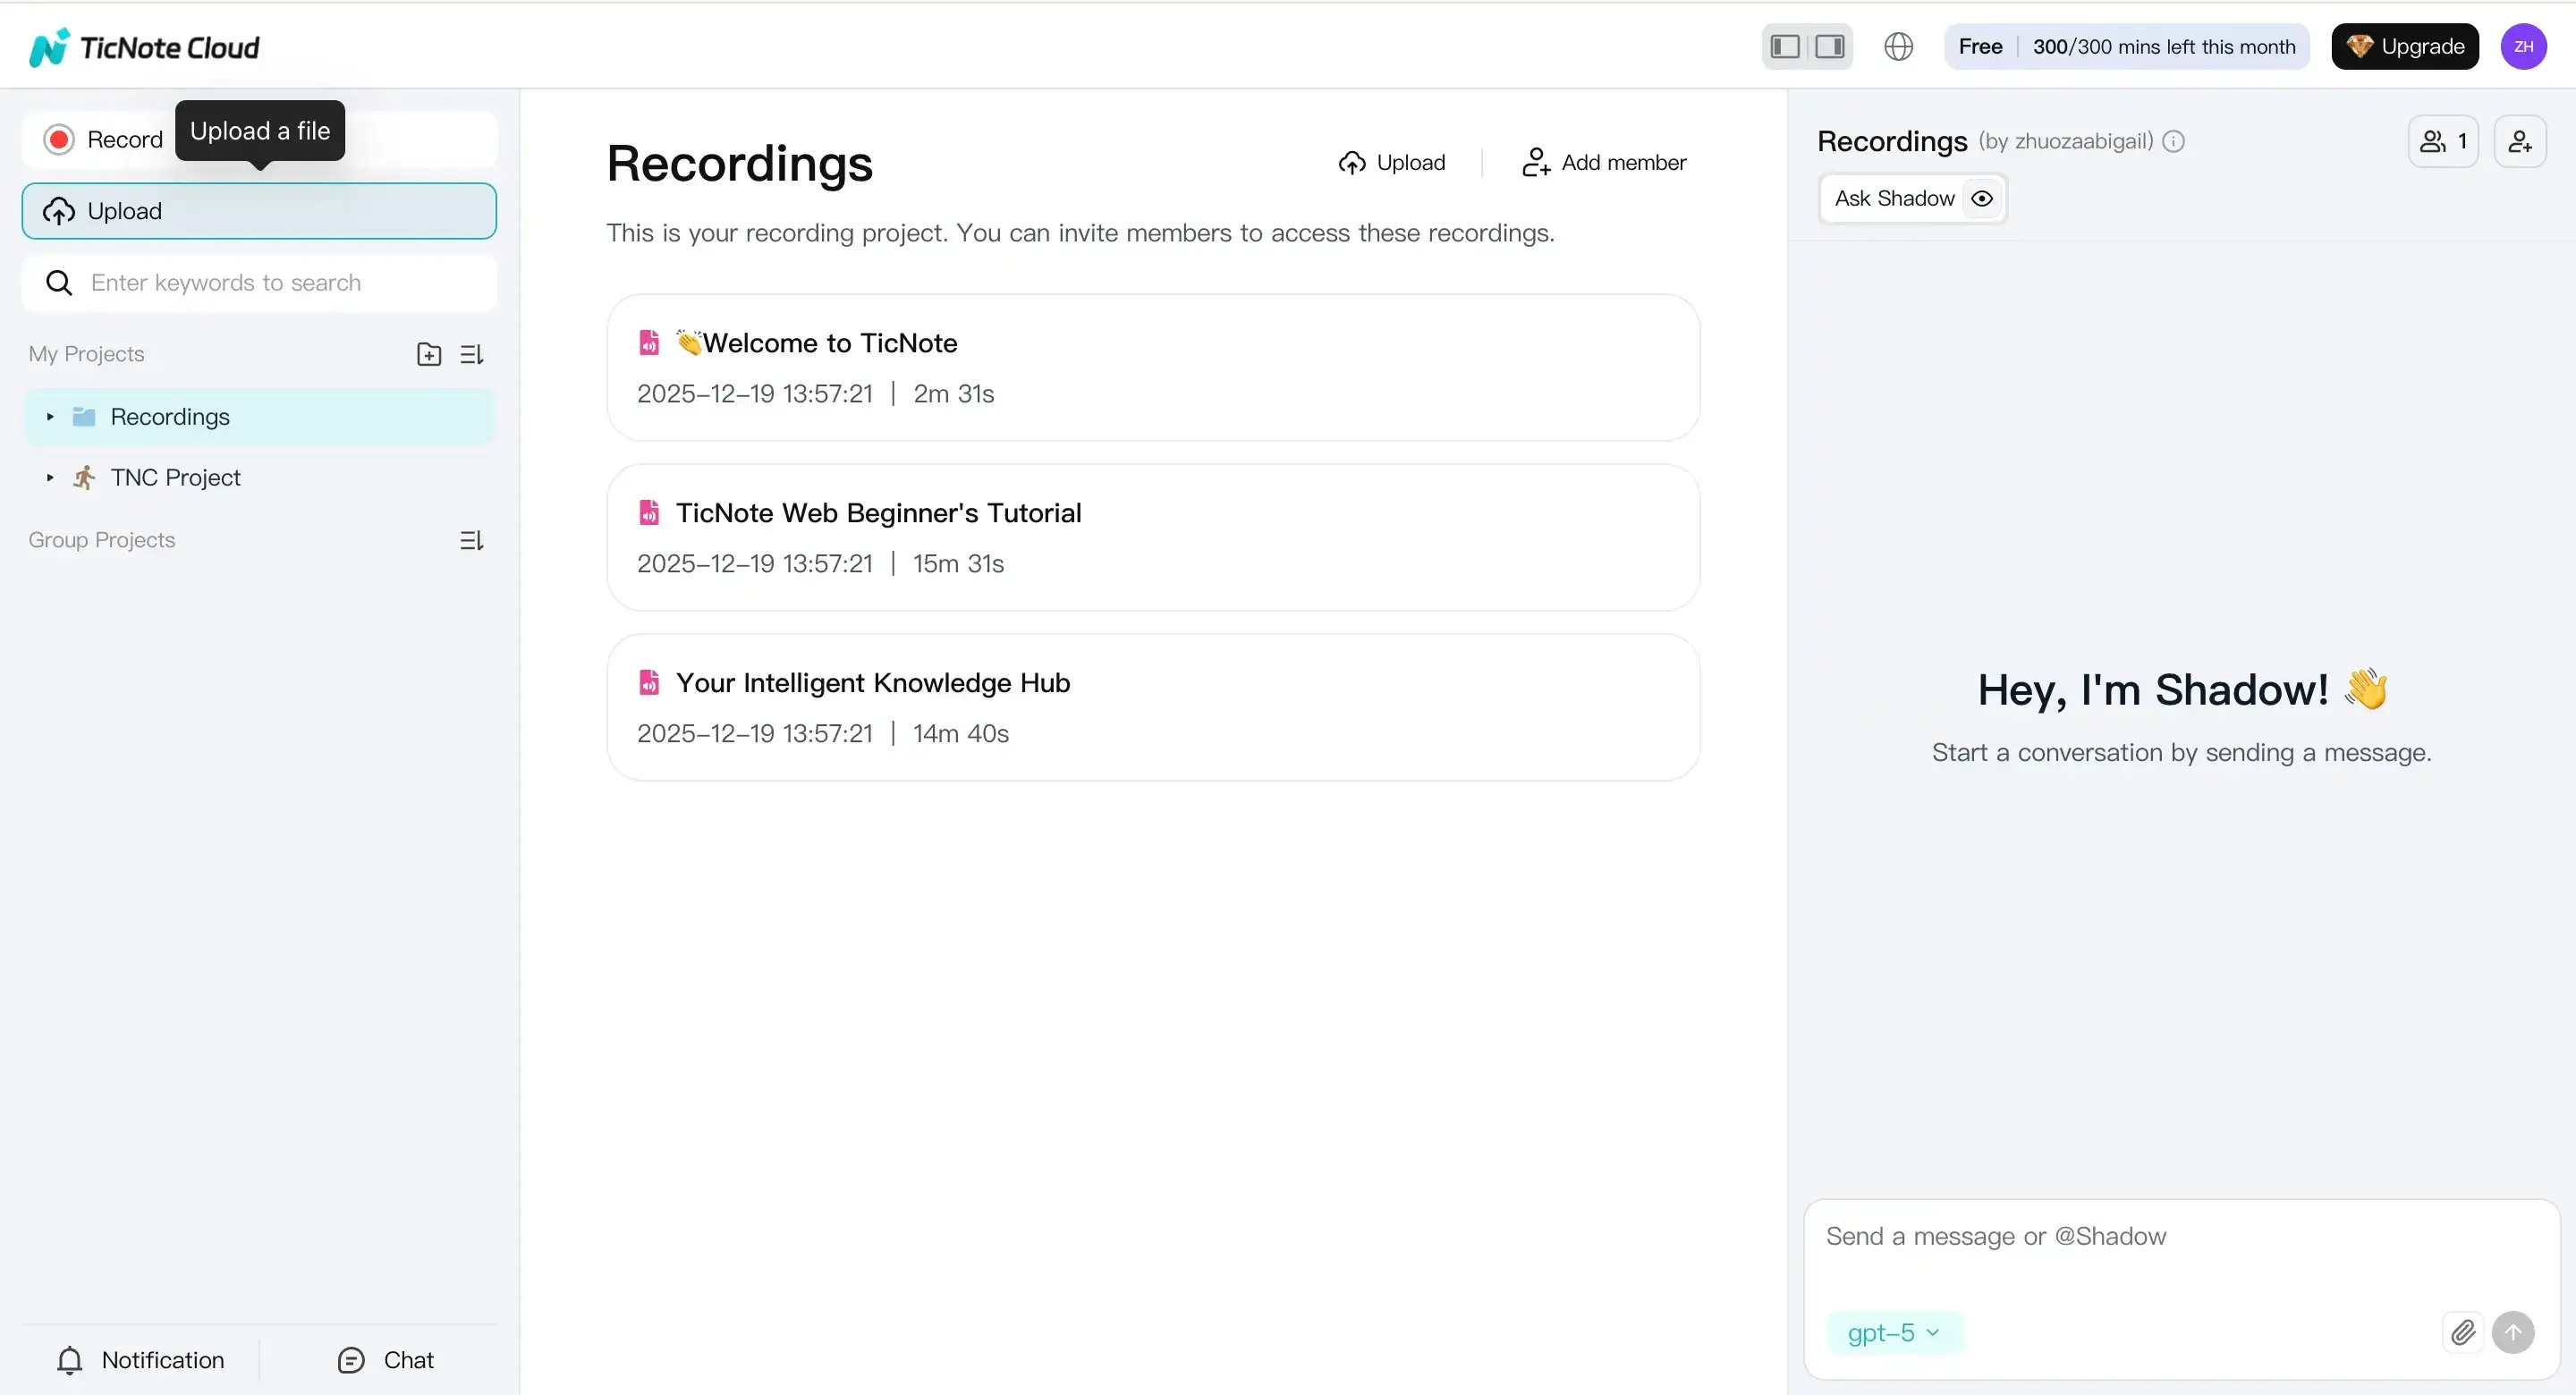
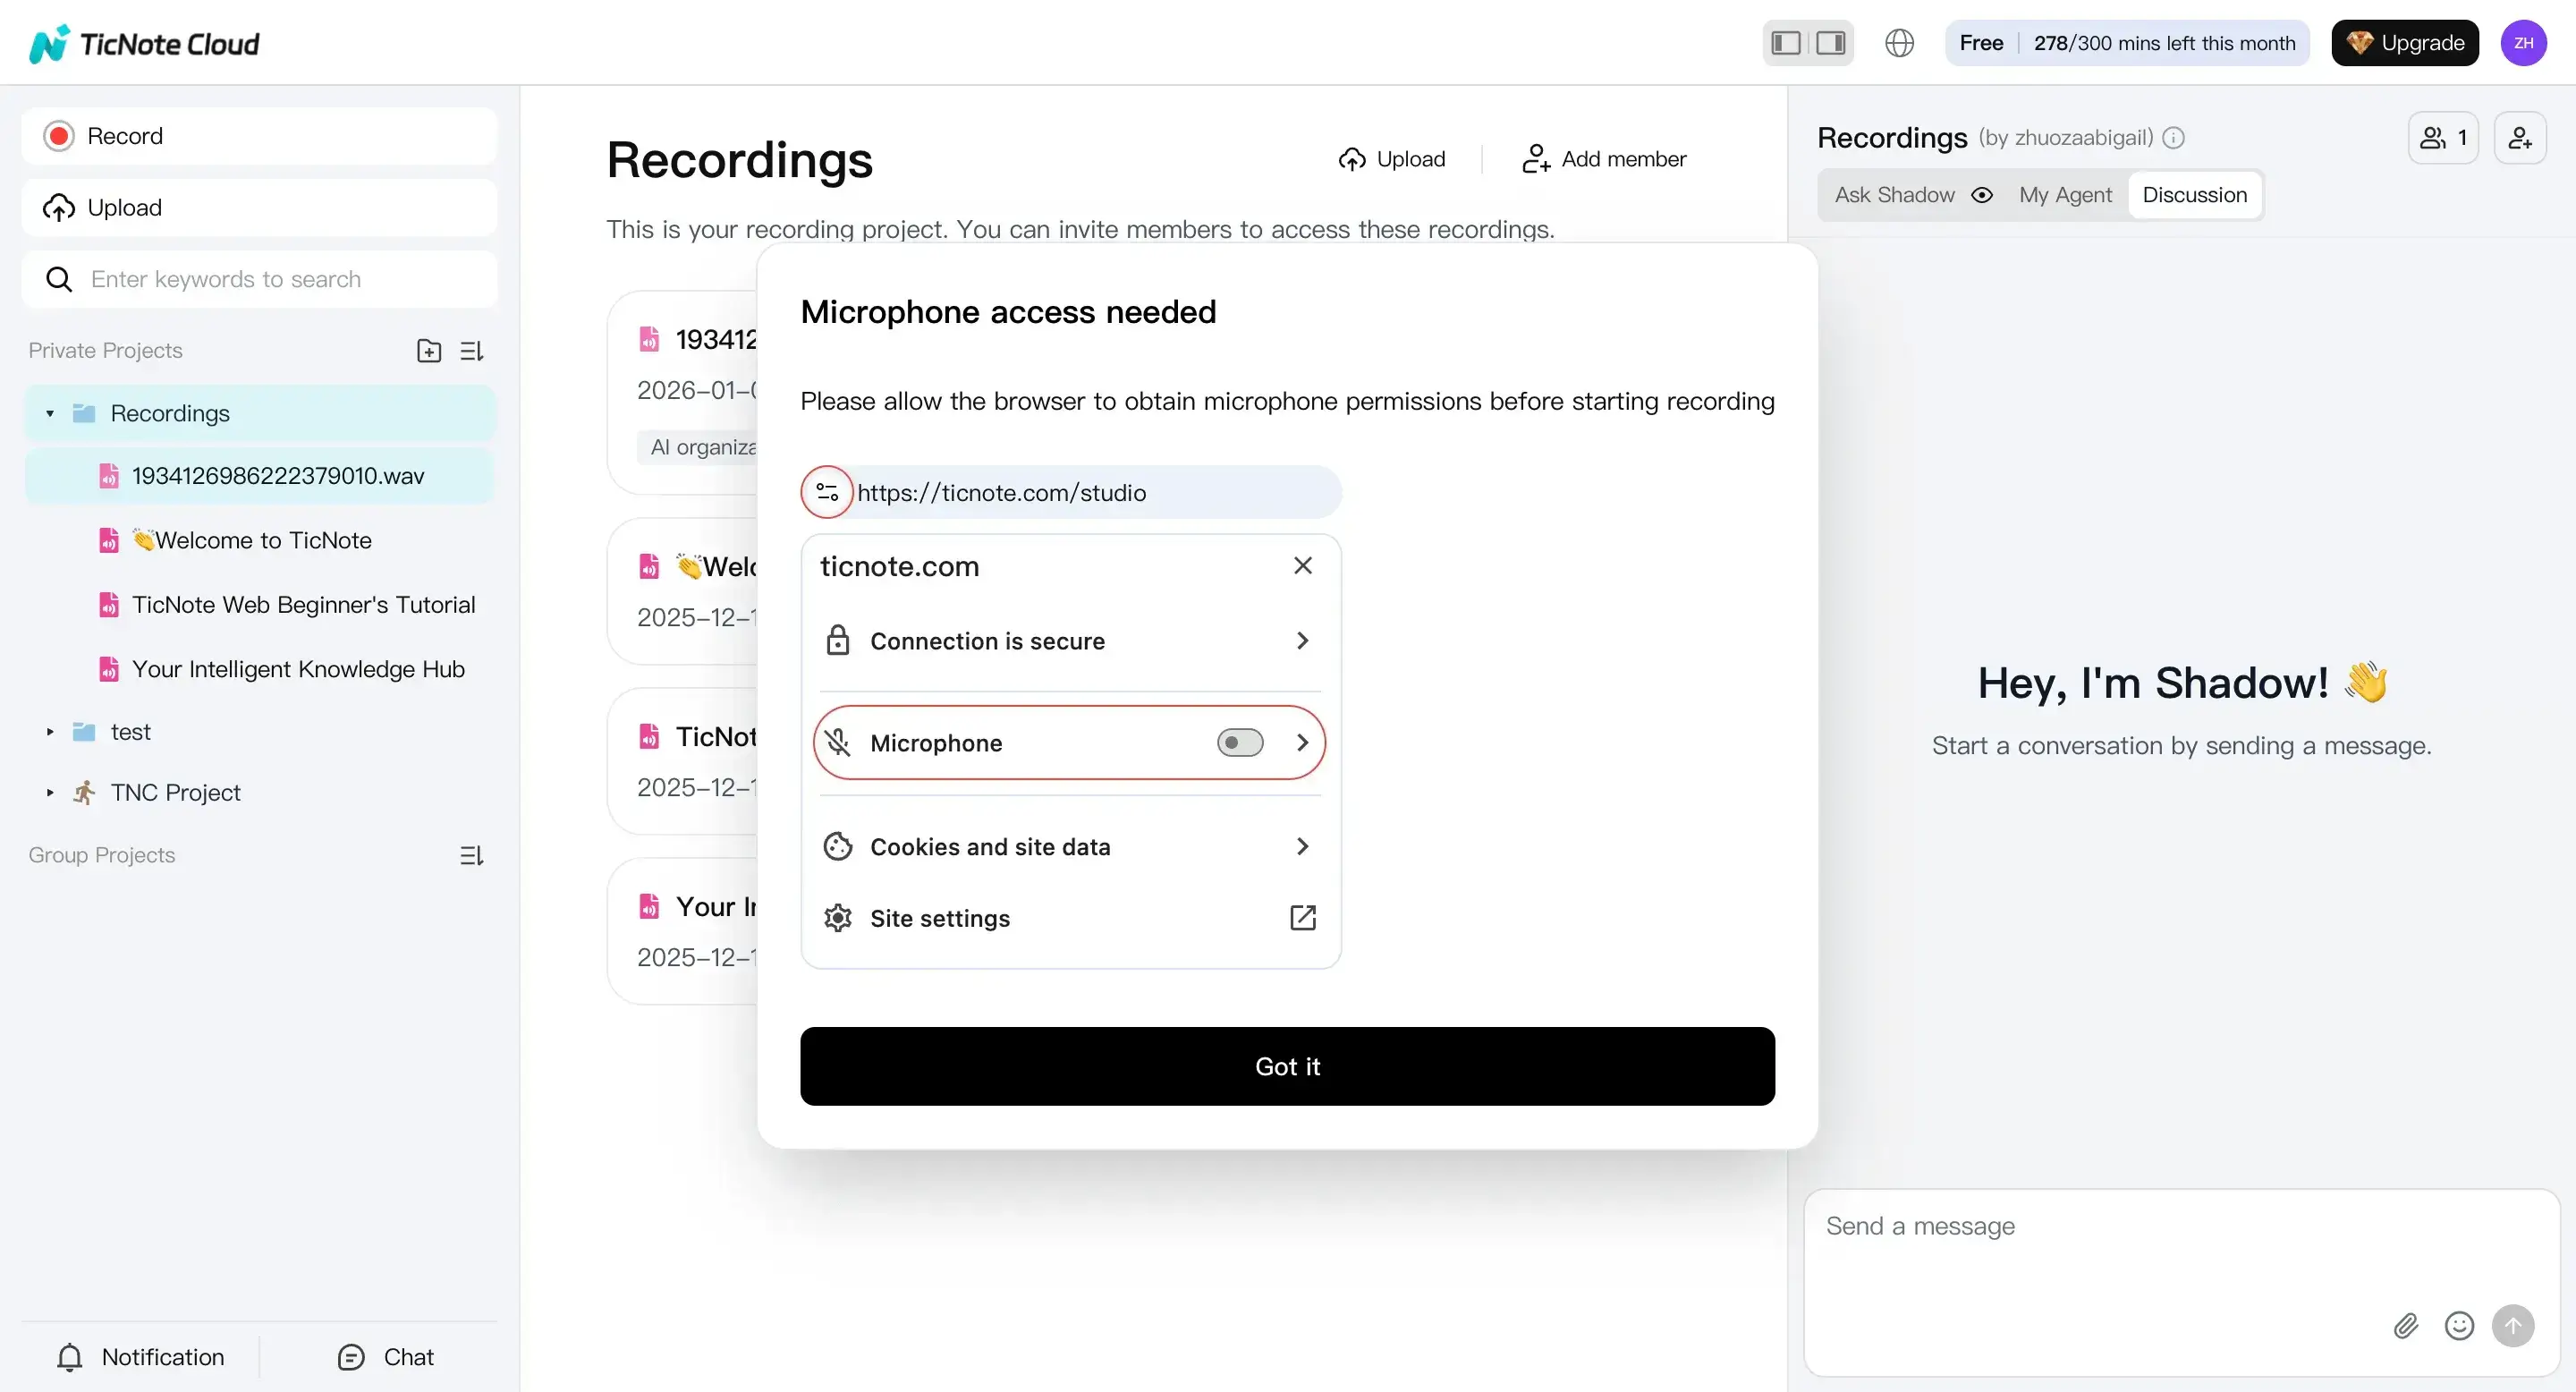
If you’re capturing dictation live, use Record. Confirm your mic is allowed, finish the recording, and it saves to the default Recordings project.
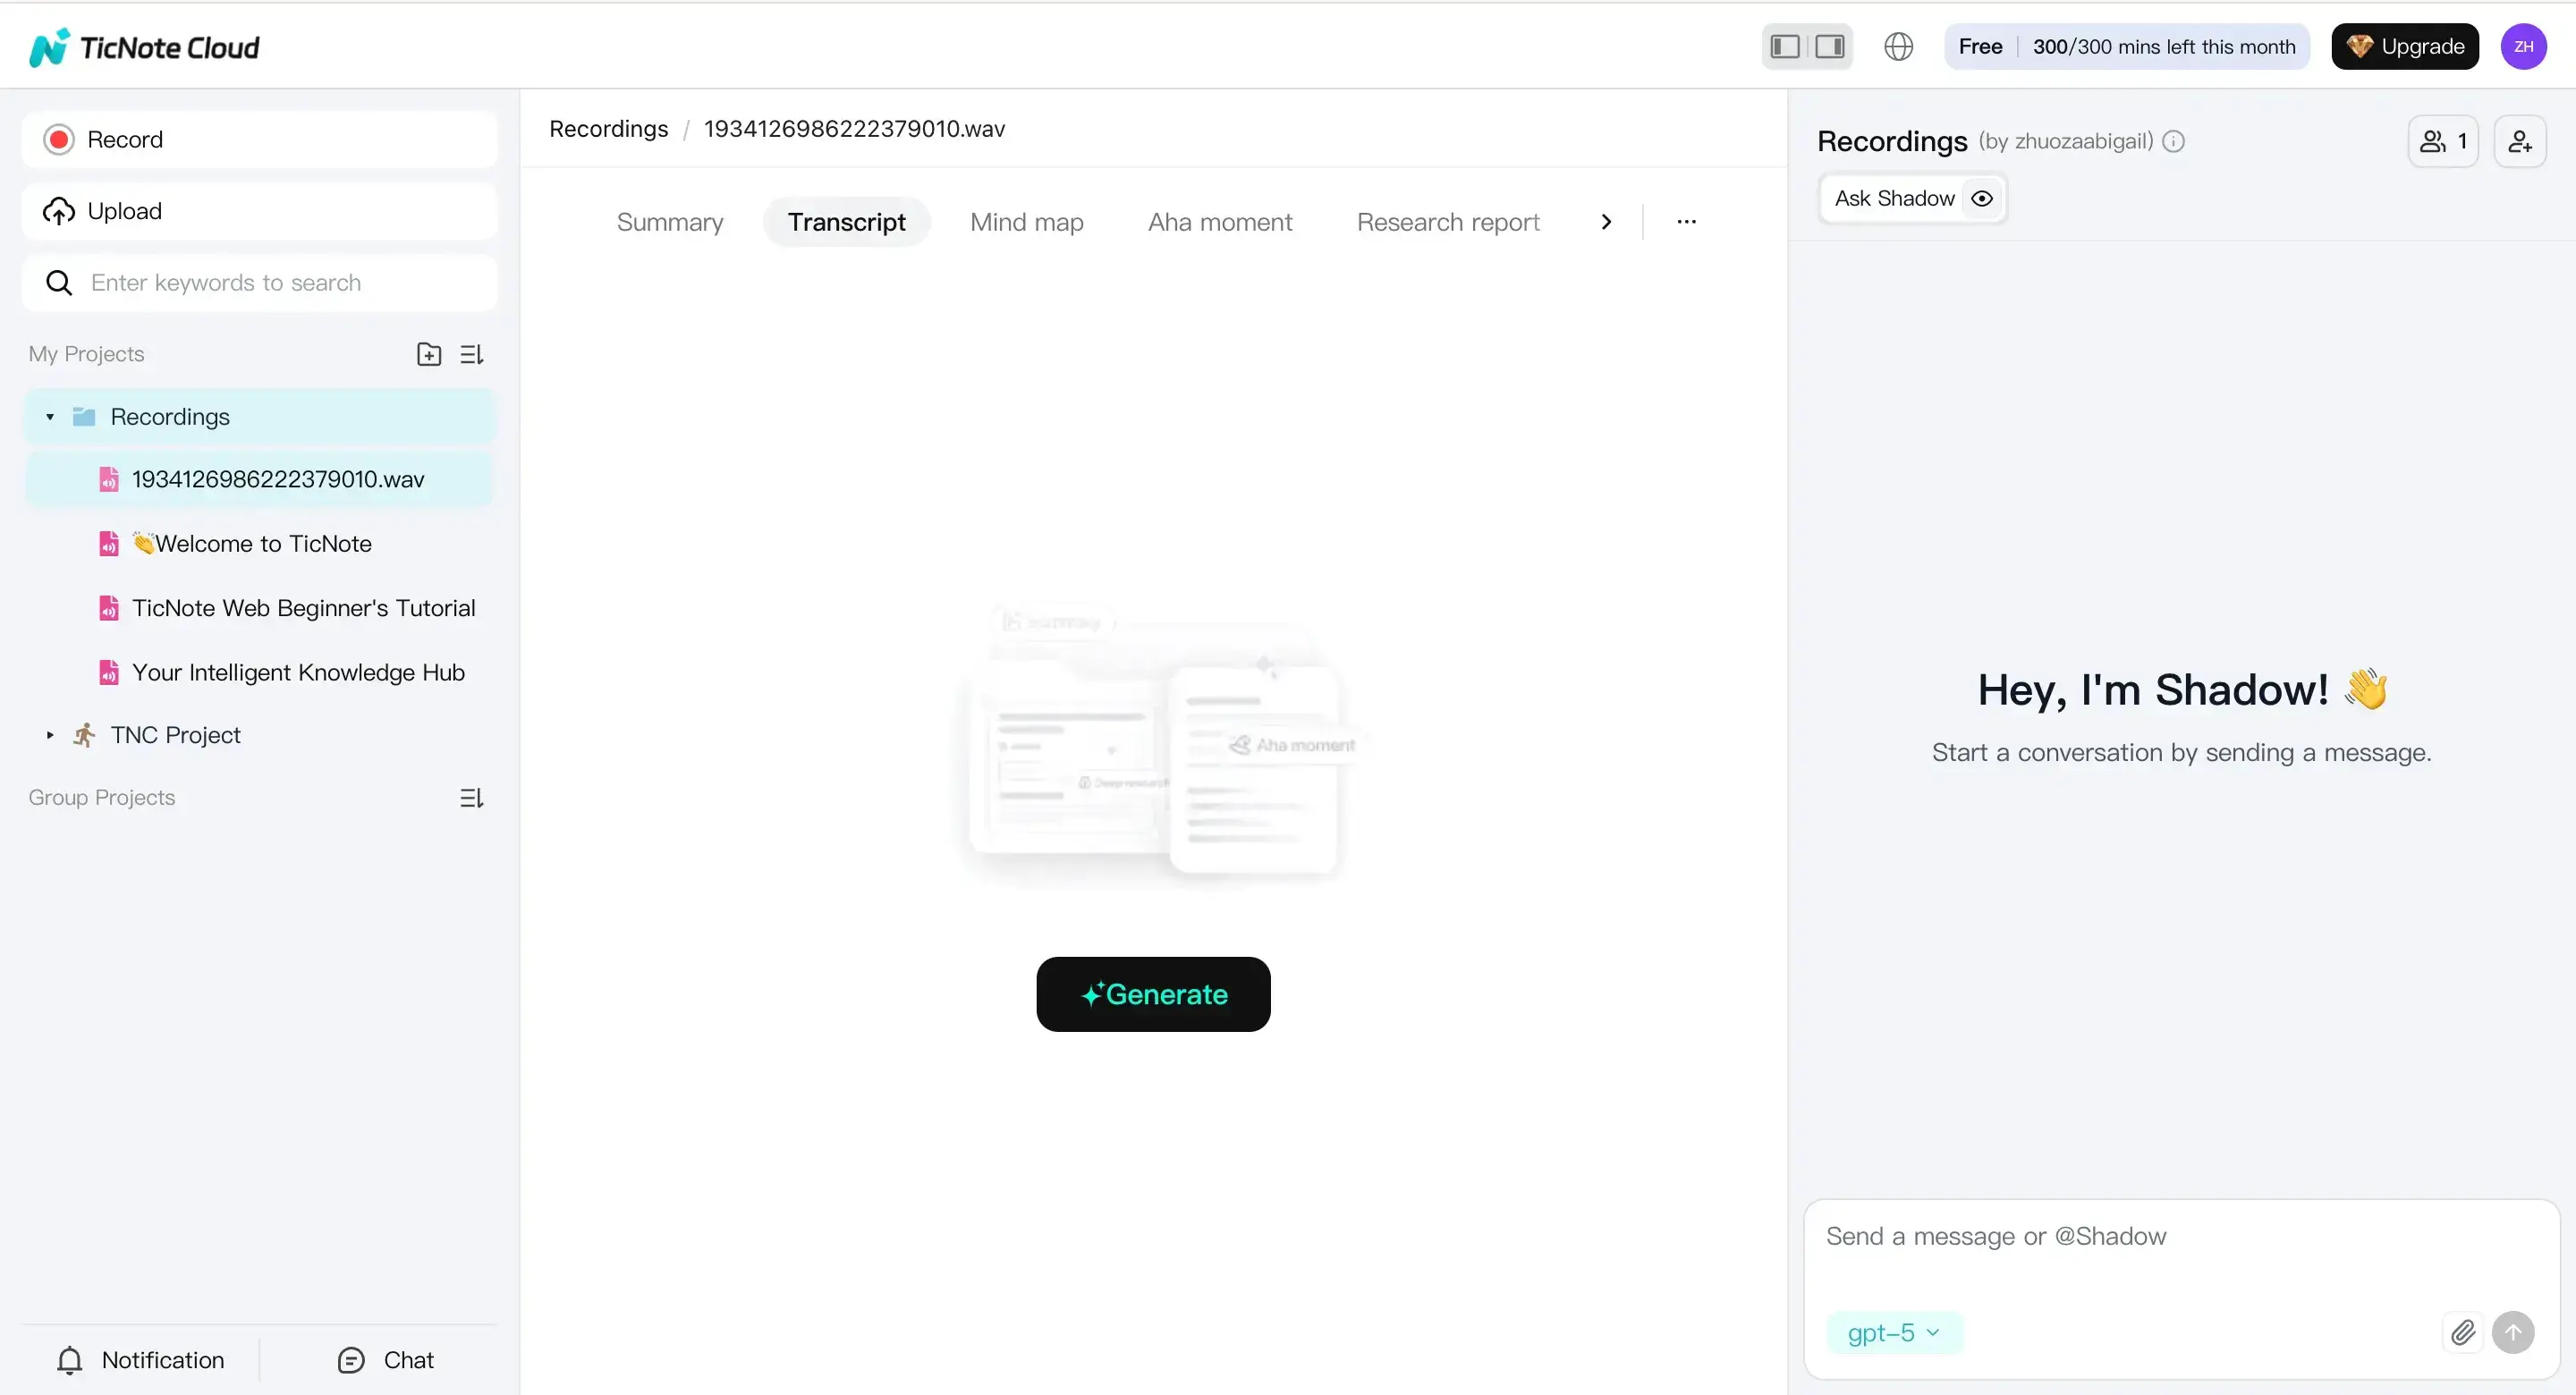
- Set up transcription for clinical audio
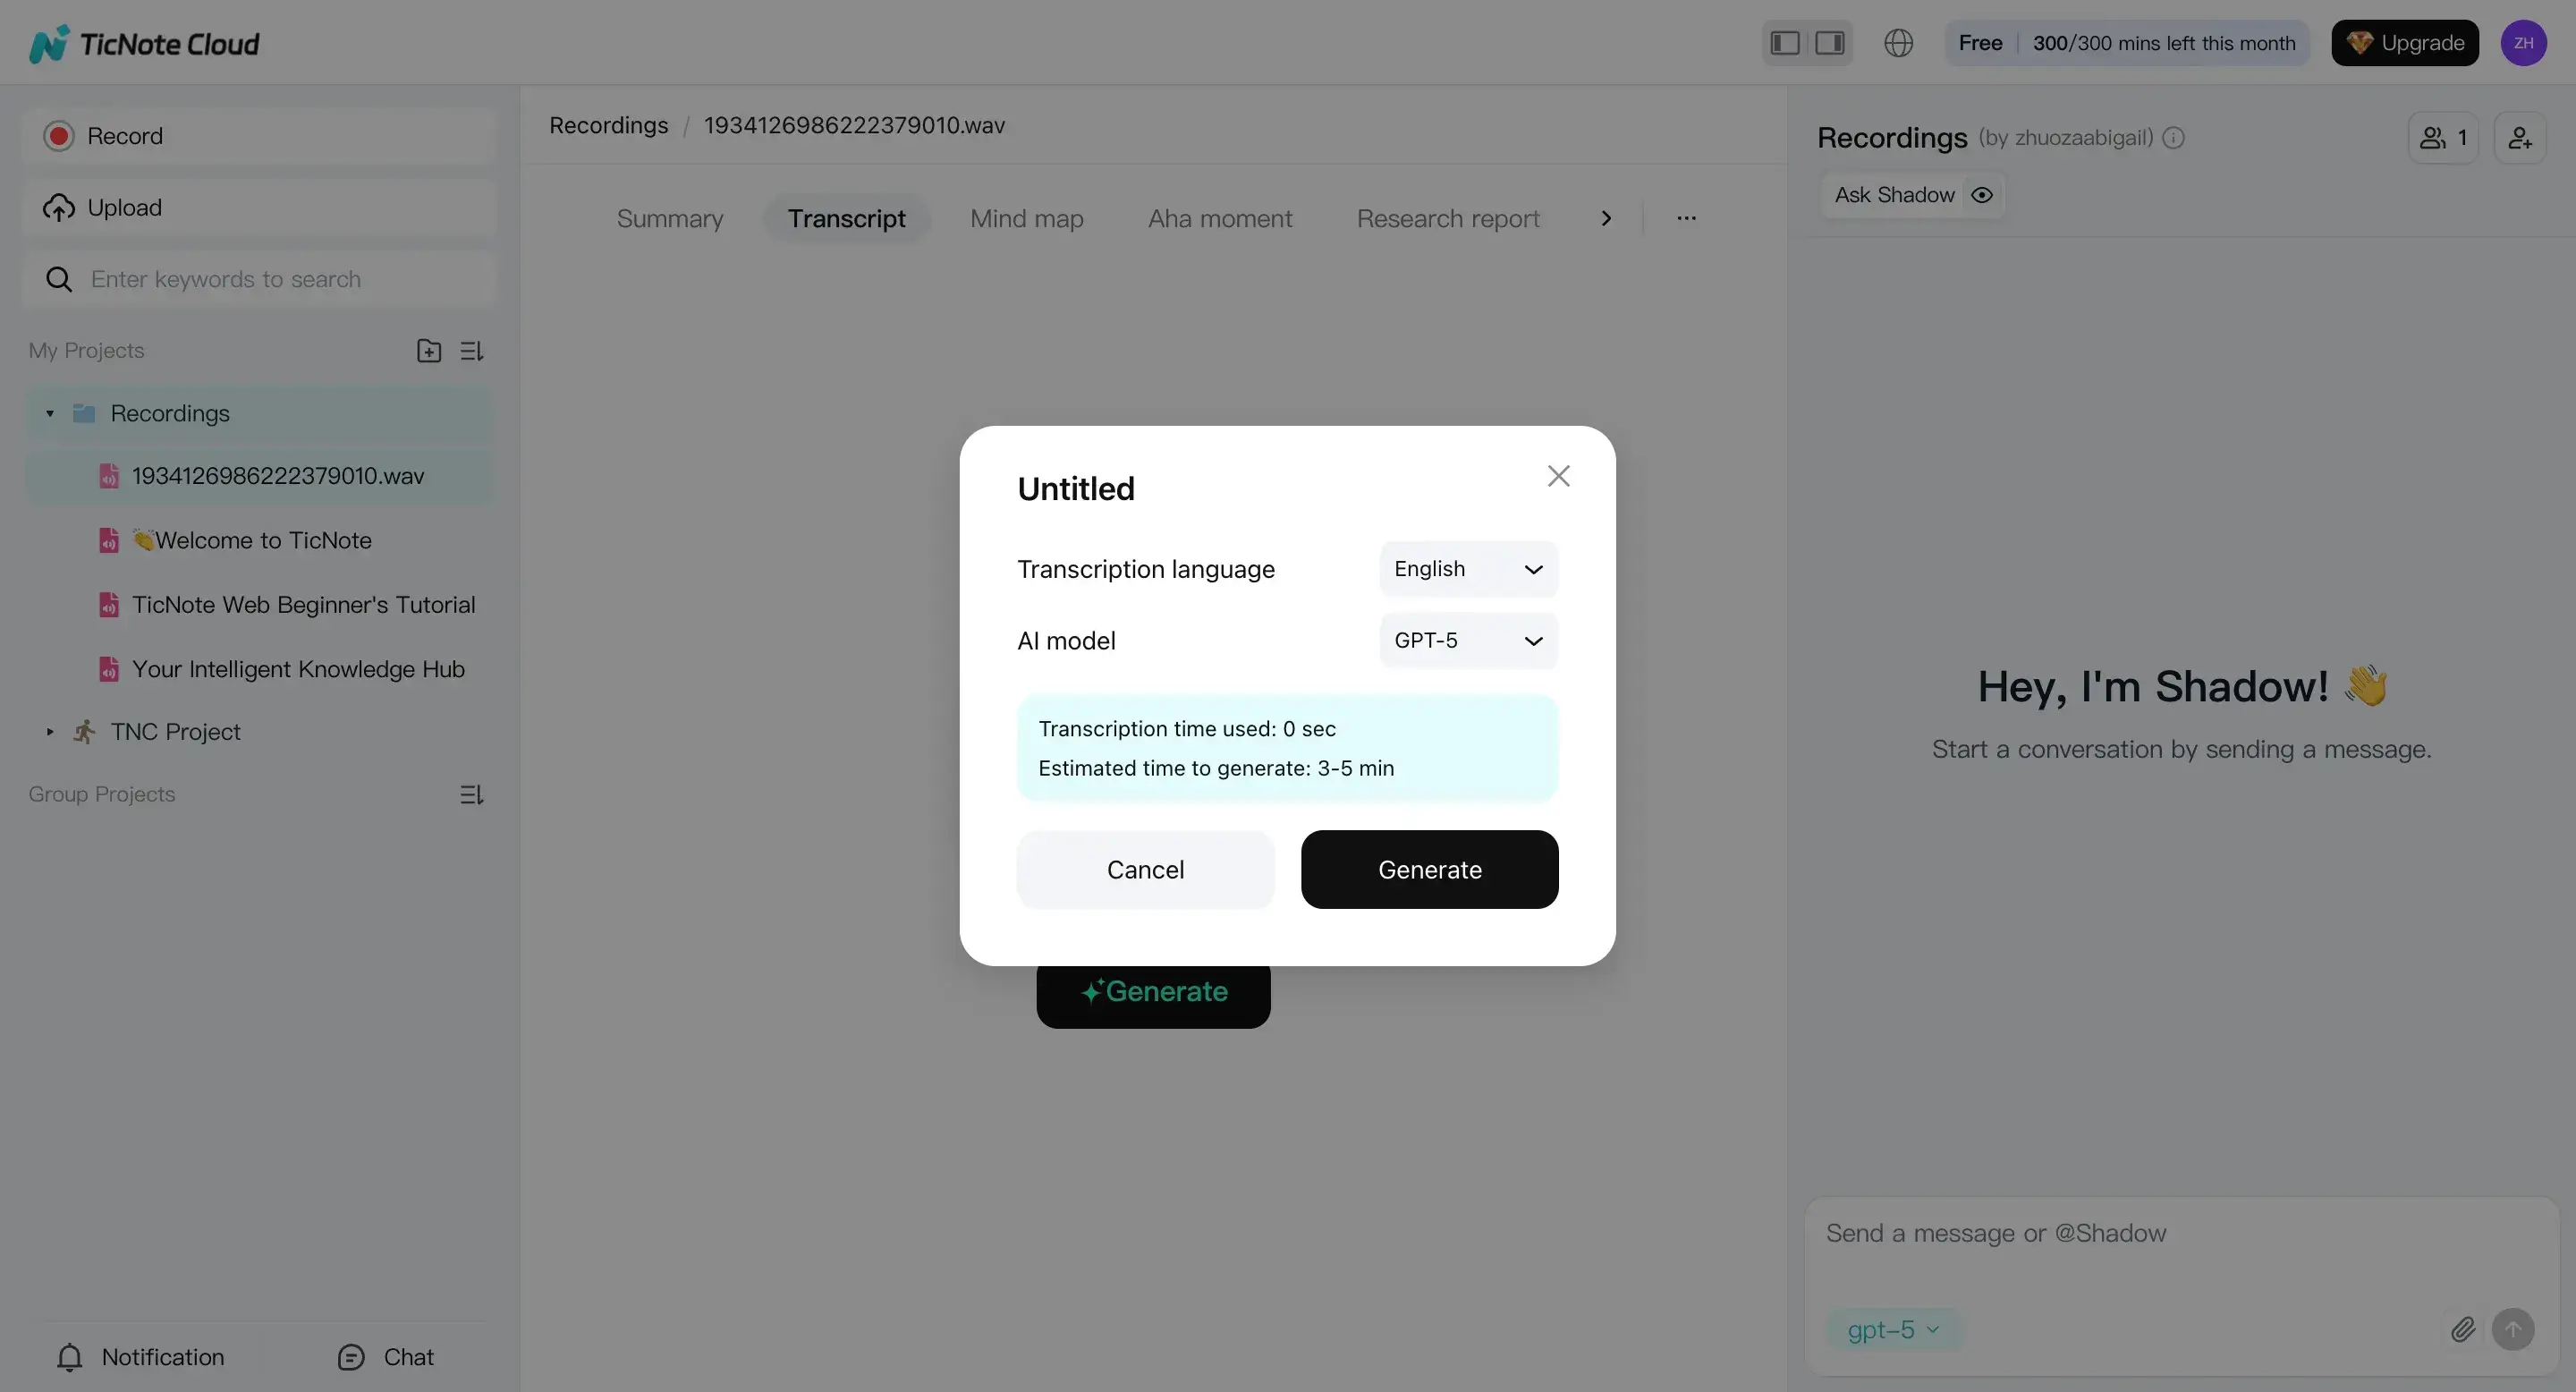
Open the file in the left panel. Go to the Transcript tab and hit Generate.
In the prompt, pick the correct language and AI model. For clinical work, match the speaker’s language, and keep settings consistent across your team.
- Review, edit, and run a “risk scan” with Shadow AI
Read the transcript in the editor and fix obvious issues first: names, dates, units, and drug strings. Then ask Shadow AI to flag internal conflicts, like missing doses, a route with no frequency, or laterality that flips mid-note.
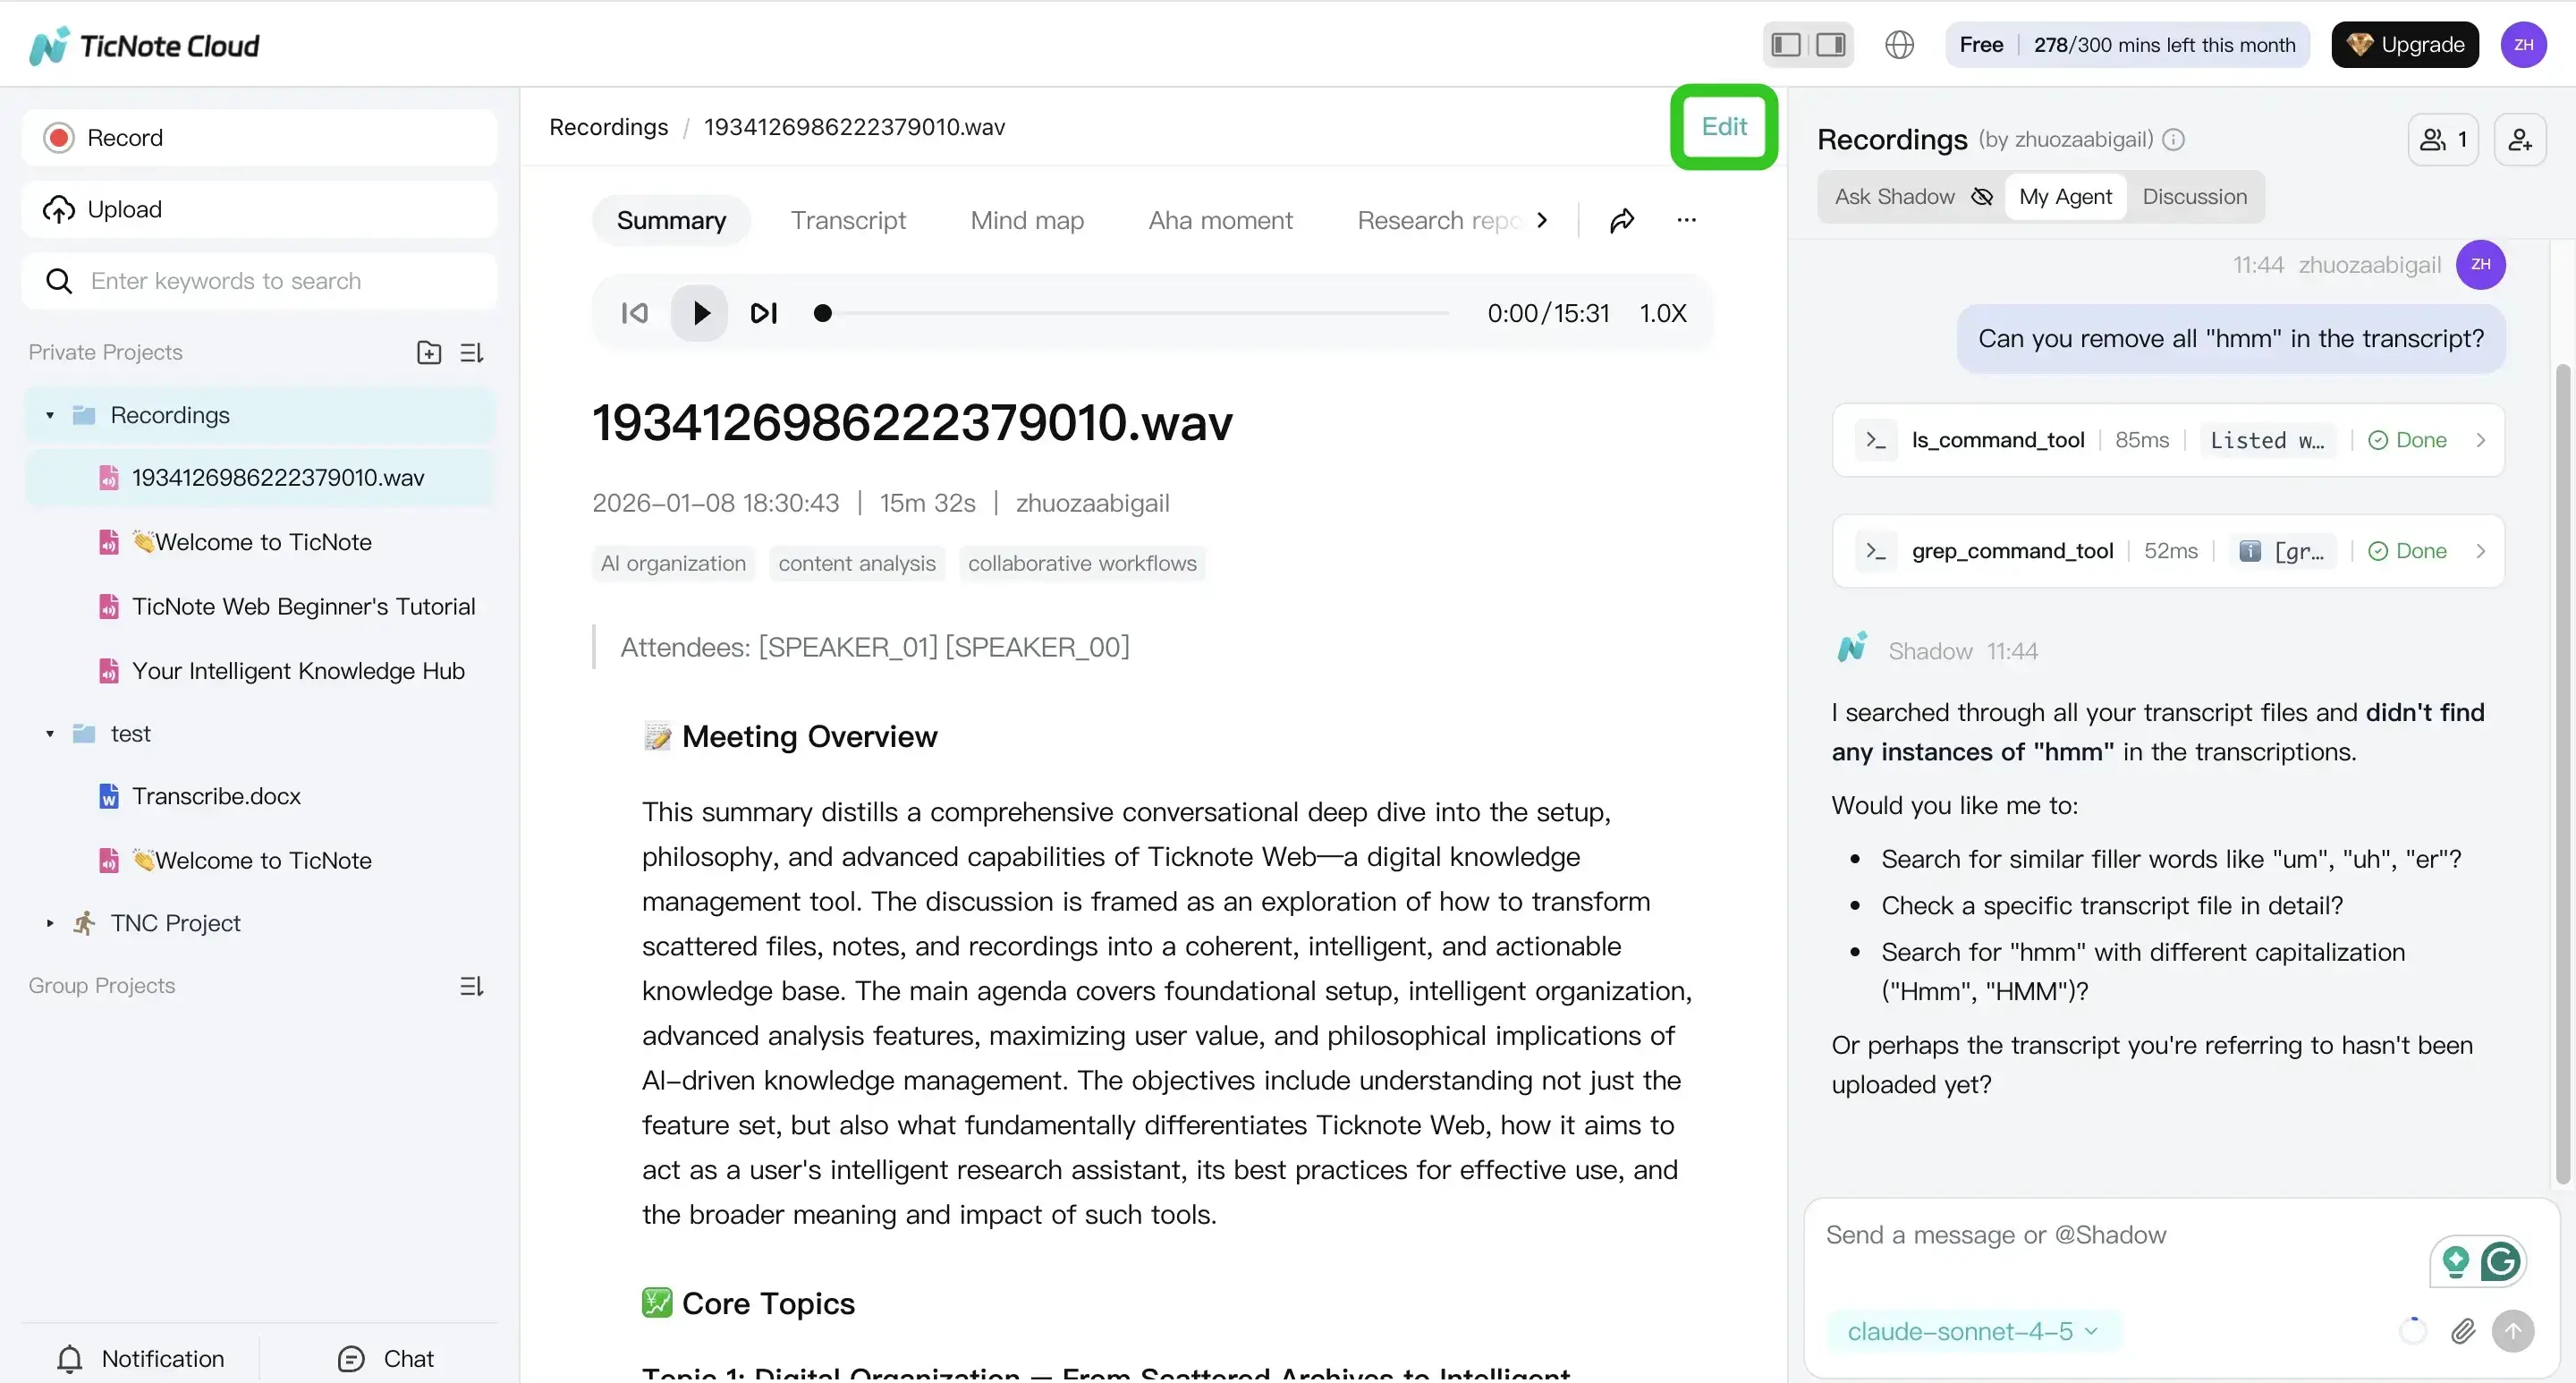
Keep it PHI-safe: don’t paste extra patient identifiers into chat. Work only with what’s already inside the secure workspace.
- Export, then hand off for clinician review
When it reads clean, export it for your next step. Use TXT for a raw transcript, or export a formatted draft for review and signing.
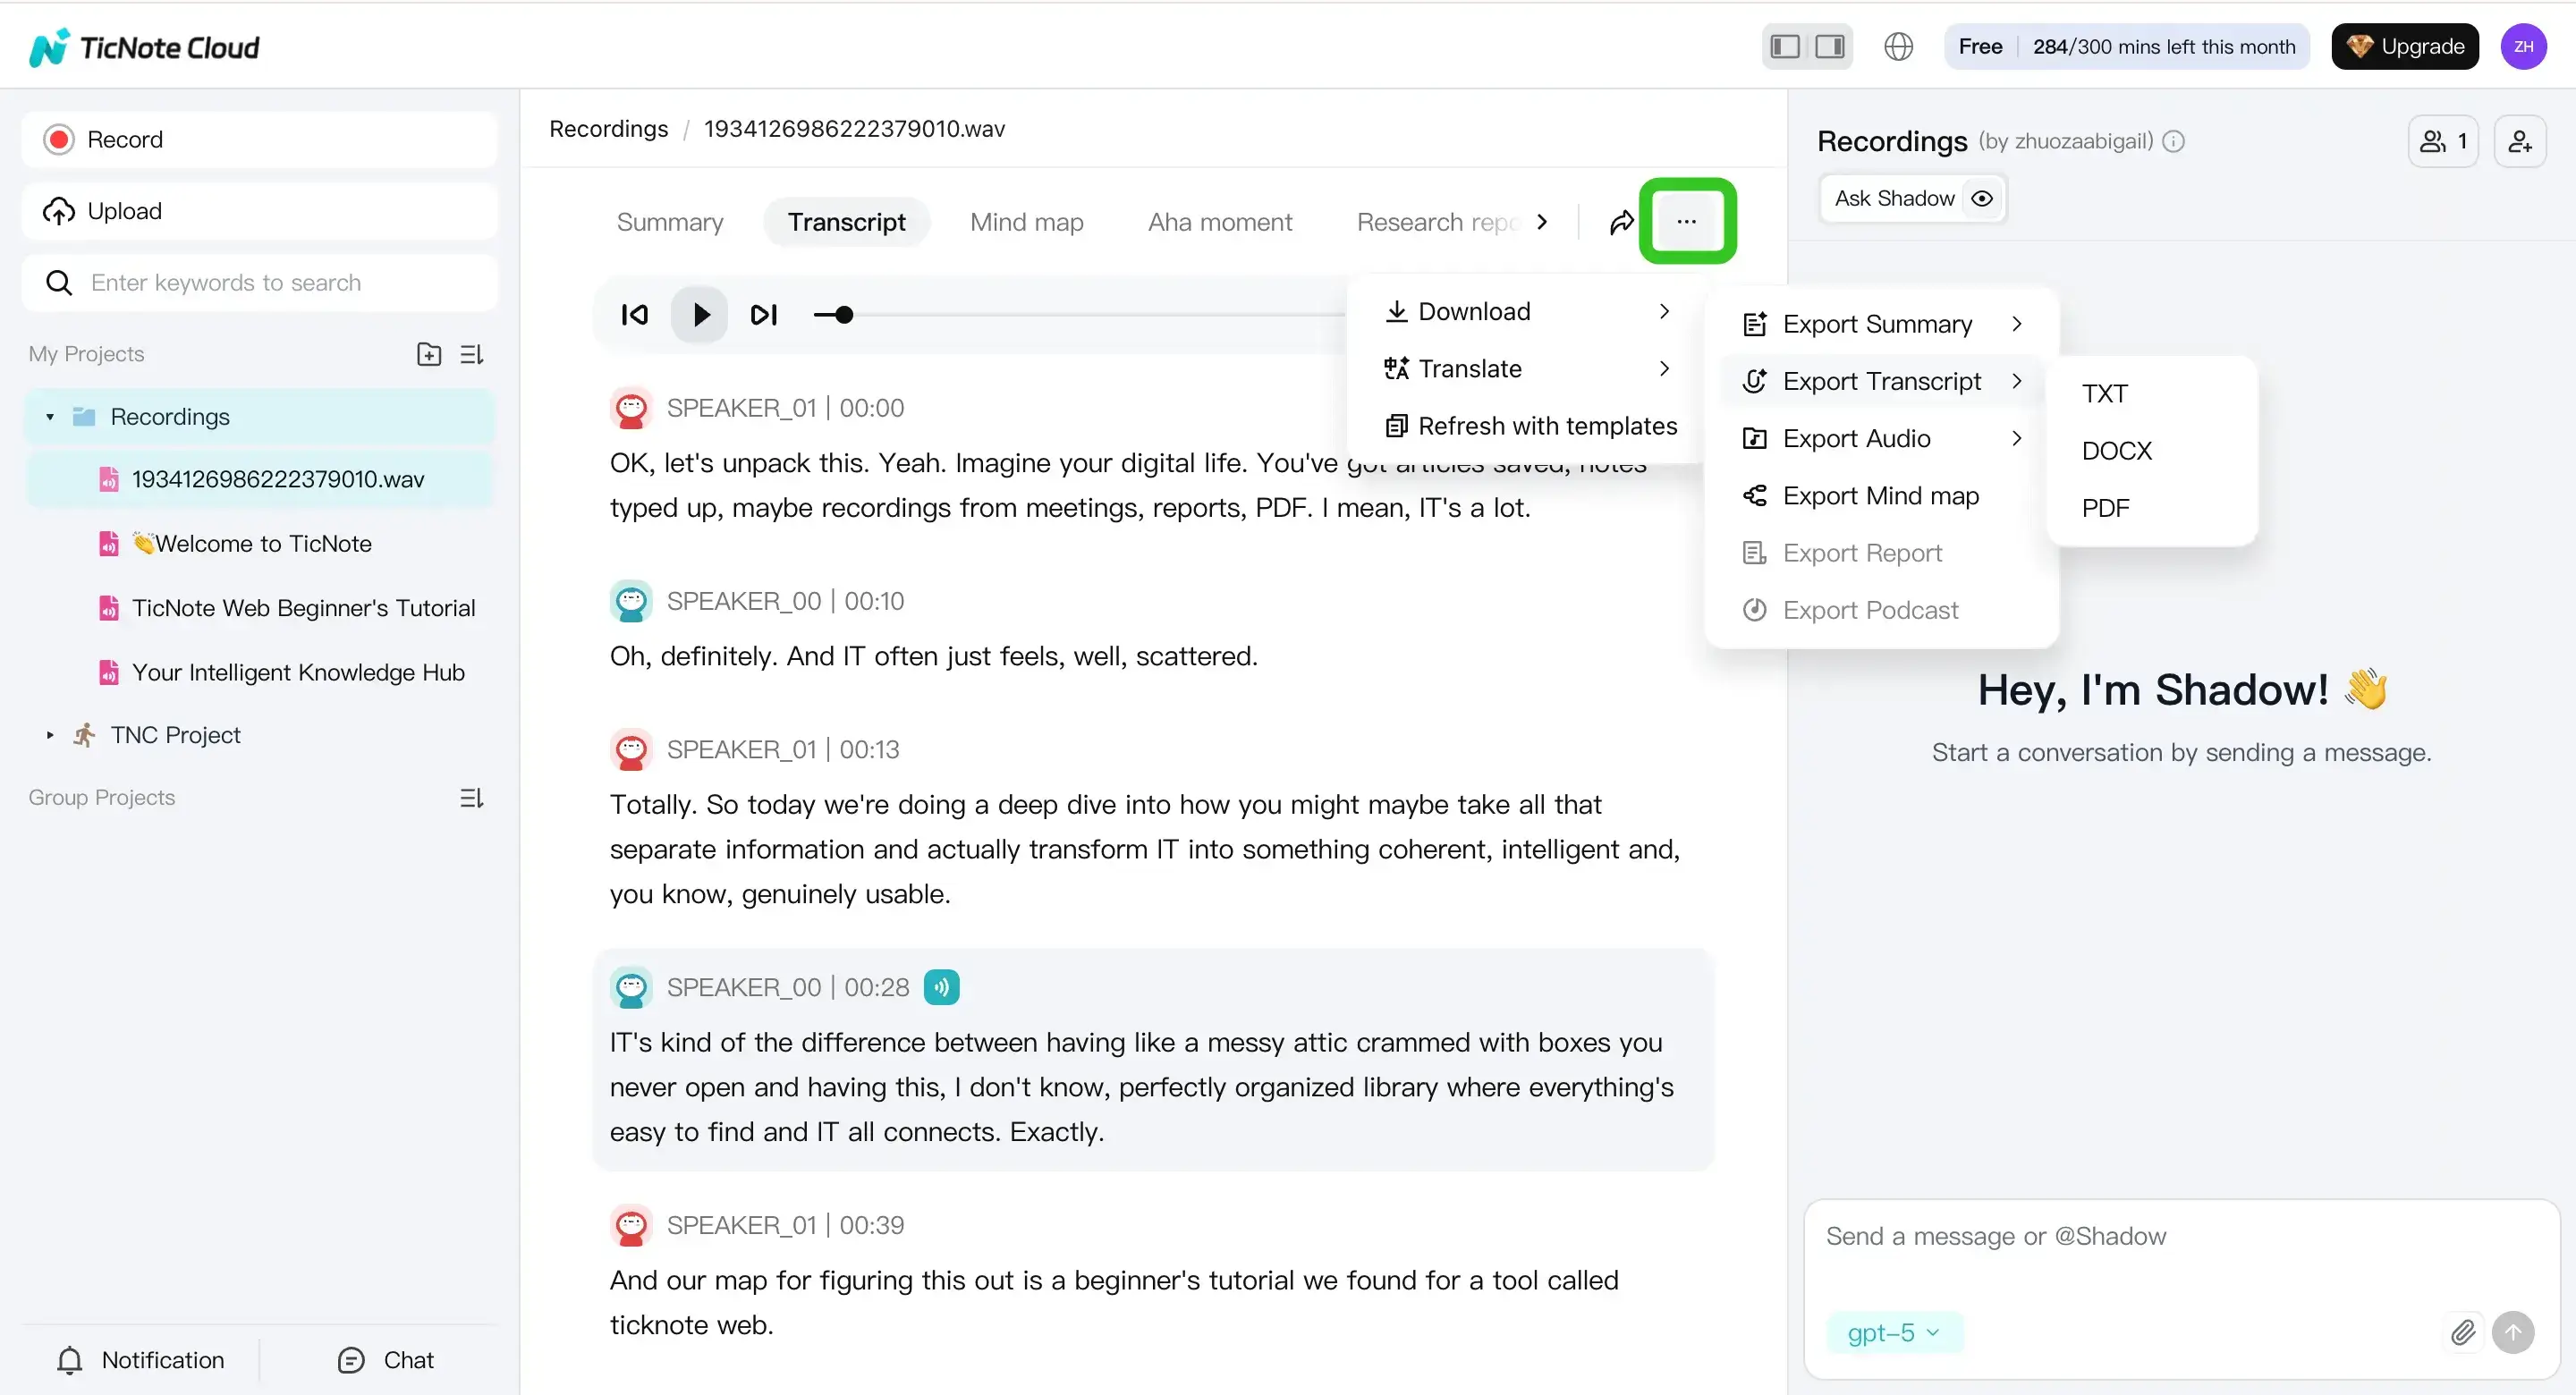
Practical handoff checklist:
- Mark any uncertainty in-line (so the reviewer sees it fast)
- Add a short “clinician questions” list (missing med dose, unclear side)
- Deliver in the format your team uses (DOCX/PDF/Markdown), then paste into the EHR per policy
If you also capture dictation on phones, this guide on transcribing voice memos on iPhone and Android can help you standardize your intake.
Mobile App workflow: fast drafts for on-call and after-hours
On mobile, the loop is the same: upload or record, generate the transcript, review and edit, then export.
Start by tapping add to upload into a project.
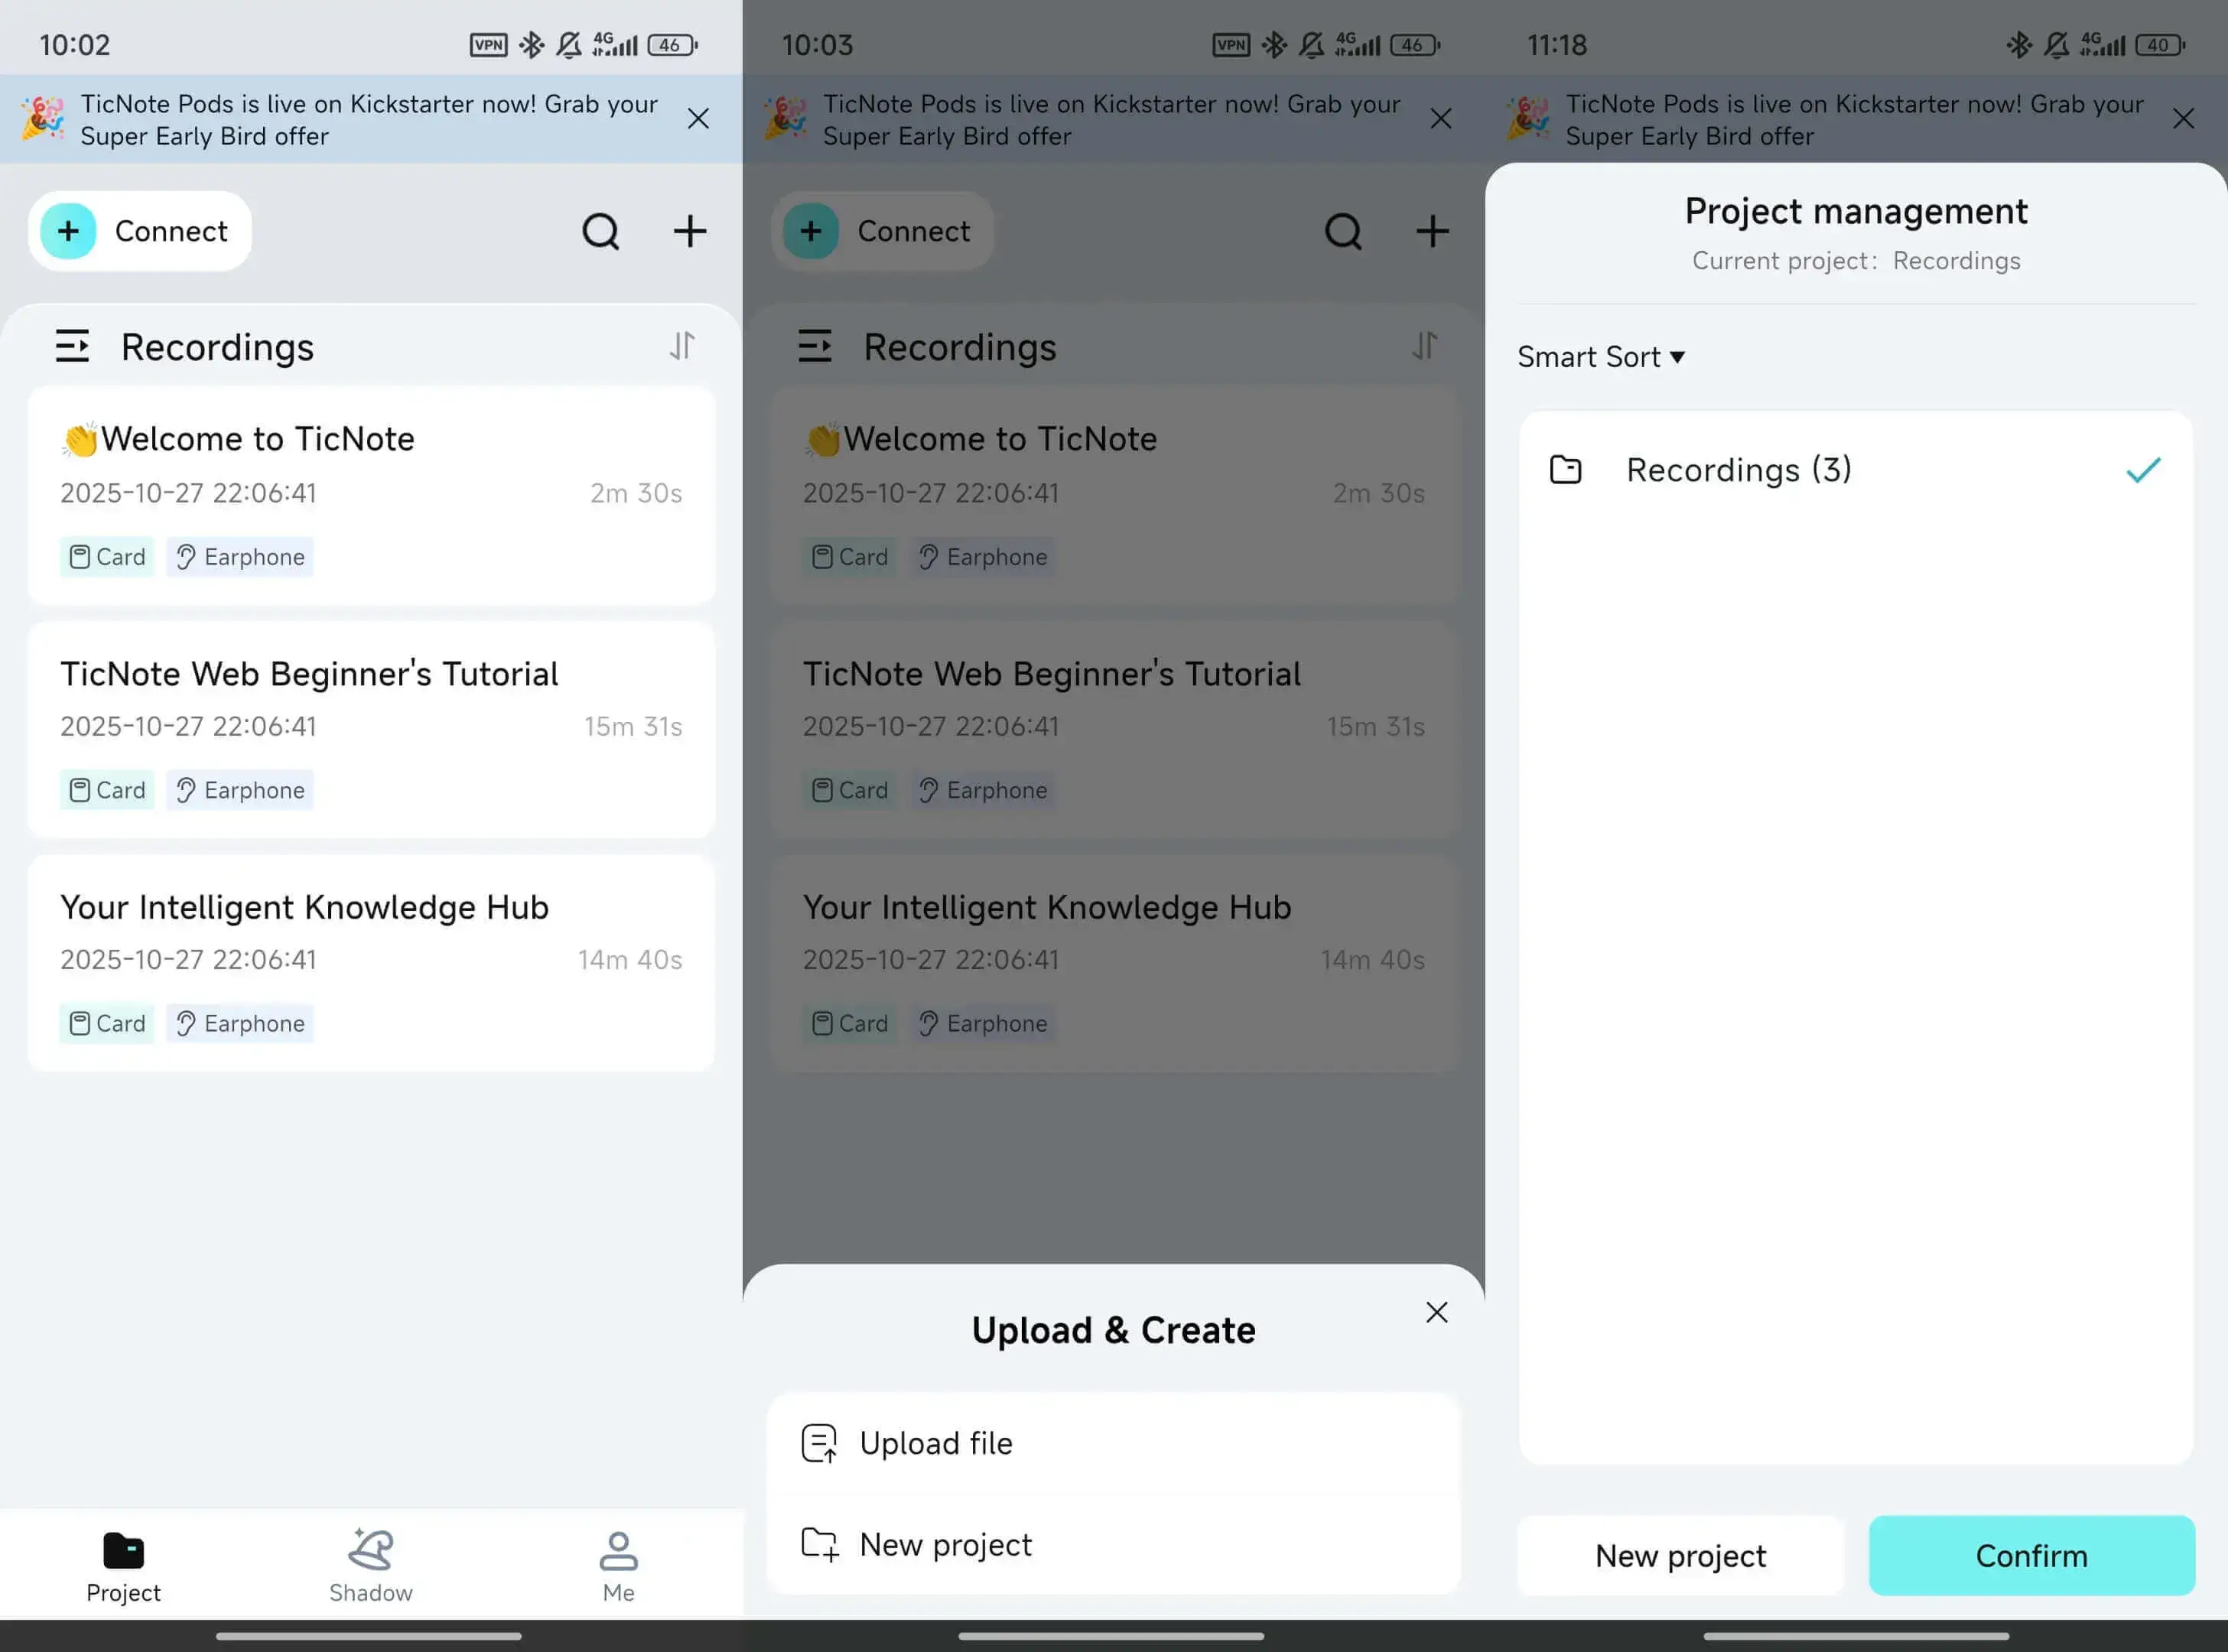
Then generate the transcript, check for high-risk items (meds, doses, laterality, negations), and export for review or secure transfer.
Optional accelerators (keep it consistent, keep it findable)
Once your basics work, small upgrades help a lot:
- Templates to keep headings consistent across providers
- Projects to separate by clinic, provider, or service line
- Shadow Q&A to find prior phrases or confirm what was actually dictated
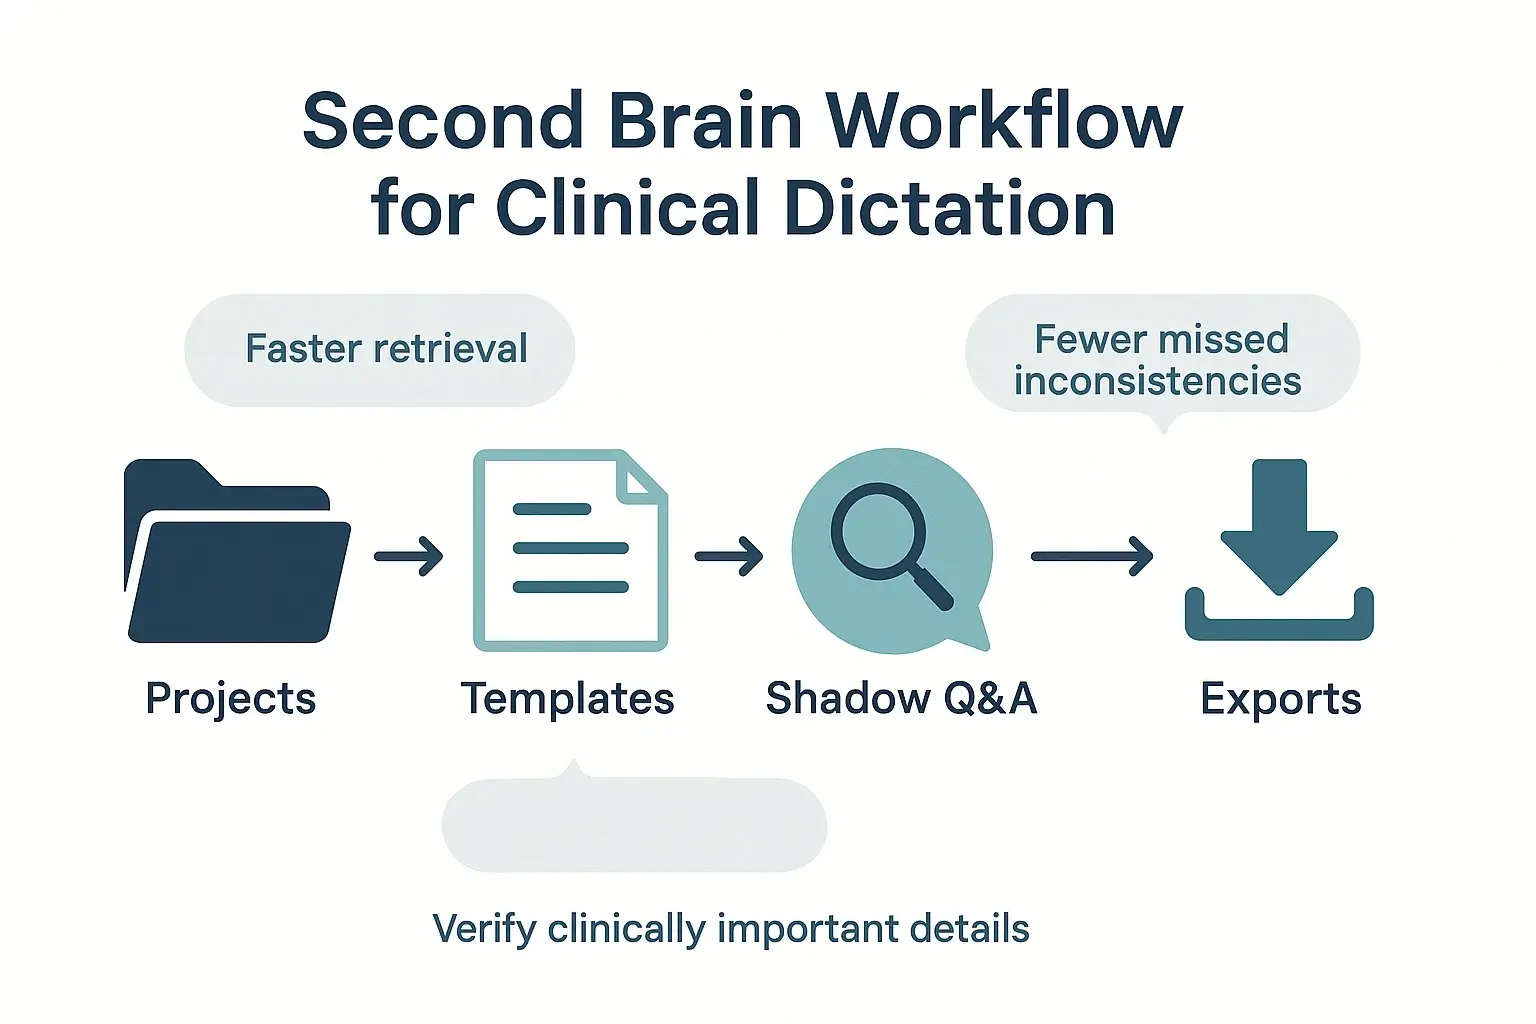
Exclusive to TicNote Cloud: Second-brain features that help you reuse and find clinical info faster
After you transcribe medical dictation, the next bottleneck is finding key details later. TicNote Cloud can act as a second brain for internal use, like training, handoffs, and continuity checks, where policy allows. It’s not an EHR, so keep clinician sign off and final documentation in your normal system.
Organize by projects so retrieval is fast
Set up project workspaces by provider, clinic, specialty, or case type. Then use consistent names so search works the same every time.
- Project examples: “Cardiology, Dr Lee”, “Ortho, Left Knee Cases”, “Clinic A, Urgent Care”
- File naming: date, patient alias or MRN token (per policy), visit type, dictating provider
Use Shadow Q&A for continuity checks (then verify)
Shadow can ask questions across many files, which helps you spot mismatches between visits. Use it to find where info first appeared, but always confirm in the source audio and transcript before anything becomes clinical record.
- “Where was laterality first stated?”
- “Does today’s med list conflict with the prior list?”
- “Did the provider ever deny chest pain?” (watch for negations)
Deep Think can help you reason through messy timelines. Still, treat outputs as a draft that needs human review.
Reduce friction with translation and quick review tools
If your team works with diverse speakers, translation can help reduce rework. After translation, double check drug names, units, and doses, since small changes can be dangerous.
For fast internal understanding, mind maps and research reports can summarize long visits for handoffs. They’re for review and learning, not a substitute for clinician sign off or EHR documentation.