

TL;DR: Transcribe a Teams meeting fast (and find the transcript later)
If you need a quick backup, you can also capture and transcribe meetings in TicNote Cloud while you learn how to transcribe a Microsoft Teams meeting in Teams itself.
Sometimes the Start transcription button is missing or blocked. That's frustrating when you still need clean notes fast. If that's your situation, TicNote Cloud gives you a simple transcription and reuse flow that doesn't depend on the Teams meeting UI.
- Start transcription (desktop): Open the meeting in Teams desktop (New Teams or classic) → More actions (…) → Record and transcribe → Start transcription → choose Spoken language → confirm. Start Recording too if you need audio or video.
- Find it later: Check the meeting Chat (standard meeting), the Channel post (channel meeting), or Calendar → meeting → Recap or Recording & transcript to open and download the transcript.
- No transcription option? First check your role (Organizer, Co-organizer, Presenter), your client (desktop supported), and your org policy. If the button is missing, jump to the troubleshooting section.
If you're new to meeting transcription in general, see our guide on how to transcribe audio for the basics before diving into Teams-specific steps.
How to transcribe a Microsoft Teams meeting step by step
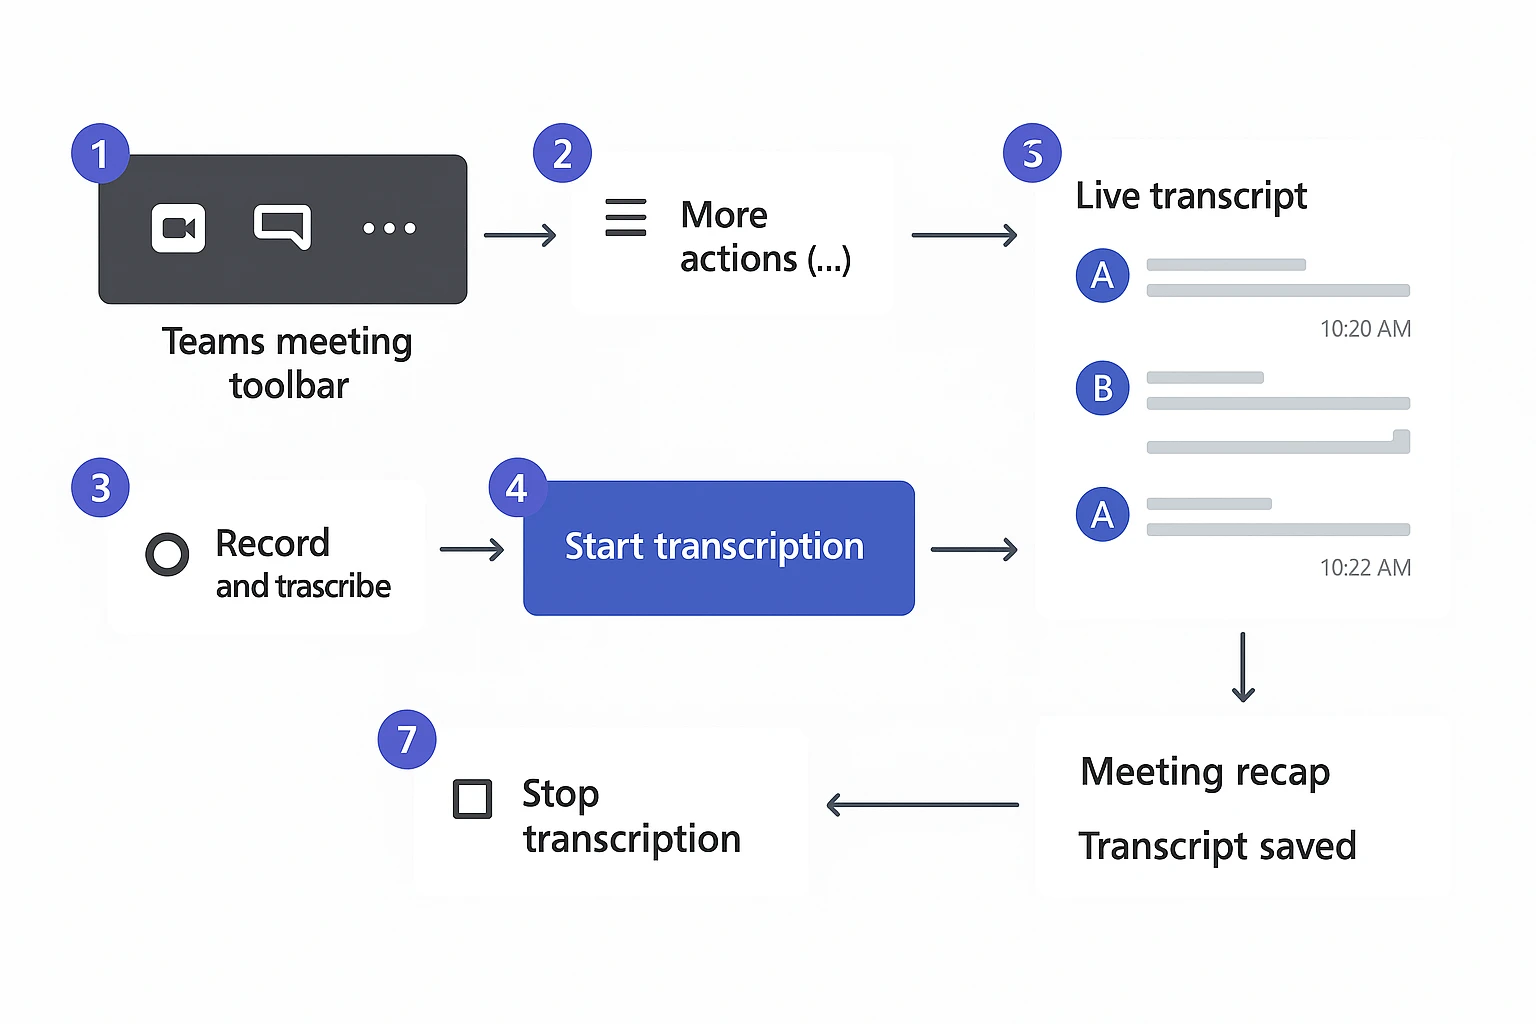
If you're wondering how to transcribe a Microsoft Teams meeting, the key is to start transcription from the meeting toolbar, pick the right spoken language, then stop it so Teams saves the text to the recap. The exact buttons can vary by org policy, but the flow is the same in New Teams on desktop.
Start transcription during the meeting (New Teams desktop)
- Join the meeting in the Teams desktop app.
- On the meeting toolbar, select More actions (… ).
- Choose Record and transcribe.
- Click Start transcription.
Once transcription starts, attendees will see a notice that transcription is on. A live transcript pane opens and updates as people talk. For best speaker labels, ask people to pause for a beat when switching speakers. That small gap helps Teams match names to the right lines.
Tip: In some orgs, meeting options may allow auto record or auto transcript. In others, transcription is tied to recording, so you may need to start recording first to unlock transcription.
Choose the spoken language (and what it affects)
When prompted, set the spoken language. This is the language Teams listens for, not the language you want the text translated into. Pick the wrong one and accuracy drops fast, especially for names and numbers.
Quick tip for multilingual meetings:
- Pick the dominant language for transcription accuracy.
- Use live captions for attendees who mainly need readability.
Language choices can depend on your tenant settings and region, so you may not see every language you expect.
Stop transcription (and what attendees see)
To stop, open More actions (… ) again, go to Record and transcribe, then choose Stop transcription. The live transcript pane stops updating. What was already captured stays saved for the meeting recap, unless your organizer or admin settings remove it later.
Recording vs transcription vs captions (do you need both?)
| Feature | What it is | Best for |
| Captions | Live text on screen | Accessibility and real time clarity |
| Transcription | Saved text after the meeting | Notes, search, action items, follow ups |
| Recording | Saved audio/video file | Training, compliance, full playback |
Common policy pattern: some orgs allow recording but turn off transcription, or allow transcription only when recording is also on. If you don't see Start transcription, it's often a policy or license issue, not a bug.
Try TicNote Cloud for Free to capture searchable transcripts and clean summaries in one place.
What do you need before you can transcribe in Teams (roles, policies, licenses)?
Before you can transcribe a Microsoft Teams meeting, you need three things to line up: the right meeting role, the right tenant settings (admin policies), and a meeting type that supports transcript storage and access. If any one of those is blocked, the Start transcription button may be missing, greyed out, or the transcript may be created but hard to access later.
Check your role first (who can start transcription)
In most orgs, transcription can be started by:
- Organizer / Co-organizer / Presenter: Usually can start and stop transcription.
- Attendee: Usually can't start transcription.
- Guest or external user: Often can't start it and may not be able to open the meeting recap.
One common exception: some companies restrict transcription to the organizer only. So even presenters may not see the control.
Confirm the meeting type (standard vs channel)
Meeting type changes where the transcript link shows up, and who inherits access.
- Standard (non-channel) meeting: Access tends to follow who was invited and who can open the meeting chat or recap.
- Channel meeting: Access often follows team and channel membership. If you are not in that Team or channel, you might not see the transcript, even if you attended.
Admin settings that can remove "Start transcription"
If the option is missing, it's usually a policy issue, not a Teams bug. Ask your admin to check:
- Meeting policy: Transcription is disabled in the meeting policy.
- Recording and transcription toggles: Some tenants tie transcription to recording or require recording to be enabled.
- Compliance or security controls: Information barriers, sensitivity labels, or other compliance rules can block transcription.
- License or feature availability: Your org may limit transcription to certain user groups.
Guest and external user blockers (and what to ask for)
Guests and external users often hit "no permission" because:
- They aren't allowed to start transcription by tenant policy.
- They can't access the meeting recap, chat, or file location where the transcript lives.
What to ask the organizer or IT:
- Make you a Presenter (or Co-organizer) if policy allows.
- Confirm transcription is enabled for your user group in Teams meeting policies.
- If the transcript is stored in OneDrive or SharePoint, confirm the sharing permissions include you.
Where are Teams transcripts stored, and who can access them?
Teams transcripts can feel "lost" because you see them in Teams, but they live in Microsoft 365 storage. The easy rule is this: you usually find the transcript in the meeting chat or recap, and you open it based on the permissions of the underlying file.
Find it later fast: chat, channel post, or calendar recap
Use this quick matrix to locate the transcript link.
- Standard (non-channel) meeting
- Meeting Chat: look for the transcript entry.
- Calendar recap: open the meeting in Teams, then go to the recap.
- Channel meeting
- Channel conversation post: the meeting post in the channel shows the recording and transcript links.
- Calendar recap: recap also appears for the meeting.
One more gotcha: the recap or "Meet" history view may only show recent meetings in some tenants, so older recaps might be harder to browse even if the files still exist.
Where the files actually live: OneDrive vs SharePoint
What you click in Teams is often just a pointer. The recording and transcript are stored in Microsoft 365, and access follows that storage.
Microsoft Support — Record a meeting in Microsoft Teams (2025) explains the default storage pattern: for non-channel meetings, the recording file is saved in the meeting organizer's OneDrive for Business; for channel meetings, the recording file is saved in the SharePoint site for the channel. In practice, the transcript you see in chat or recap inherits permissions from that OneDrive or SharePoint location.
Who can access it (and why someone gets "no permission")
If an attendee can see the meeting but can't open the transcript, it's almost always a permissions mismatch. Common cases:
- Guests and external users: they may join the call, but not have access to your OneDrive or SharePoint.
- Forwarded invites: the person attends, but was never granted file access.
- "Added later" attendees: they weren't on the original meeting or channel roster when files were created.
- Channel meetings: you must be a channel member to access the SharePoint files.
Fixes that work most often:
- Share the underlying file from OneDrive (non-channel) or SharePoint (channel).
- Use the right sharing scope (for example, people in your org vs specific people).
- For channel meetings, add the person to the team and channel, not just the calendar invite.
Retention and expiration: what to ask IT
Even if you can find transcripts today, they can disappear later due to policy. Ask your IT admin:
- What is the retention period for meeting recordings and transcripts?
- Do recordings or transcripts auto-expire or auto-delete?
- Are items kept under eDiscovery holds for legal needs?
- Who can delete or edit transcript files?
- Does the recap stay after the file is removed, or does it break?

How do you download, edit, and reuse a Teams transcript?
After you learn how to transcribe a Microsoft Teams meeting, the real win is reuse. Download the right file type, clean it up fast, then pull out decisions and tasks you can share.
Download the transcript (DOCX vs VTT)
In Teams, open the meeting chat or channel post, then find the meeting recap. Look for Transcript and choose Download.
Use the format that matches your next step:
- DOCX: best for editing, sharing with stakeholders, and pasting into a doc or wiki.
- VTT (WebVTT captions file): best for video captions, subtitles, and accessibility workflows.
Quick tip: rename right away so it stays findable later.
- MeetingName_YYYY-MM-DD.docx
- MeetingName_YYYY-MM-DD.vtt
For teams, store the "clean" DOCX in a shared SharePoint project folder (or a team wiki) so everyone links to one source.
Clean it up without breaking audit needs
Start with safe edits:
- Fix speaker display names (for example, "iPhone" to "Alex Chen").
- Remove filler like "um" if you're sharing widely.
- Correct obvious mishears, product names, and numbers.
If you need auditability, keep timestamps and save two versions: Original and Edited. If sensitive info shows up, redact it (remove it) before you share.
Search, quote, and turn it into follow-up notes
Here's a quick reuse workflow:
- Scan for agenda headings or topic shifts.
- Search for words like decide, approved, action item, next steps.
- Build an action list: owner + task + due date.
- Pull 1 to 3 short quotes for context in your recap.
If you downloaded VTT, consider converting it to plain text before you paste it into docs. That makes search and formatting easier.
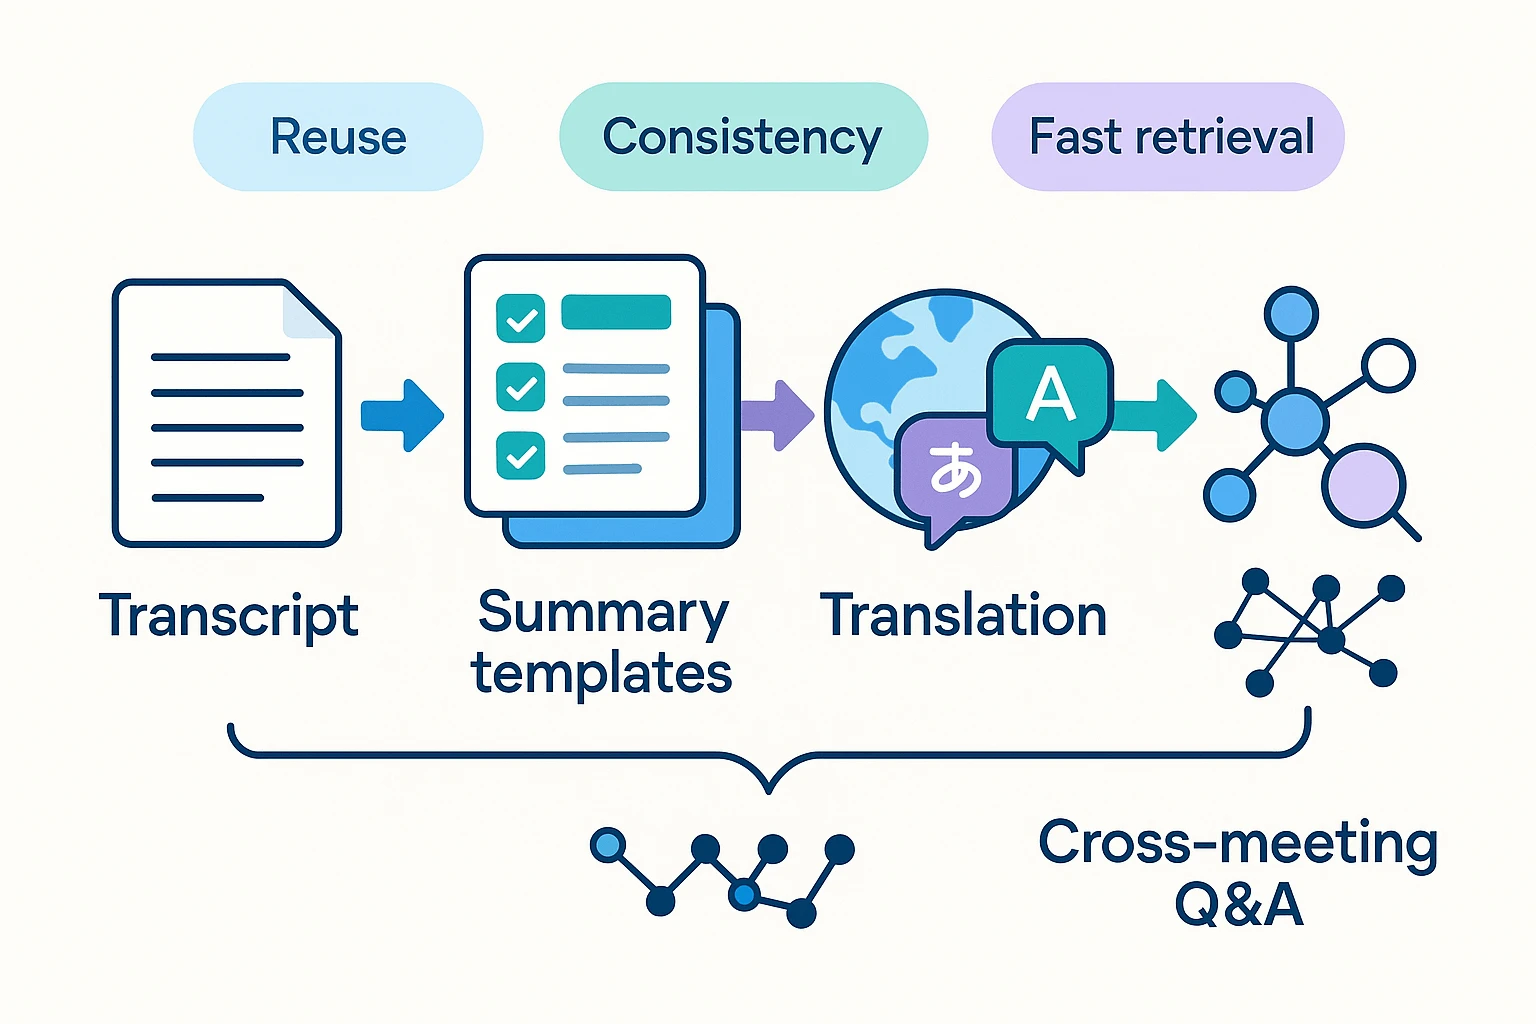
If you do this across many meetings, a consistent template helps. You can also use an AI notes workspace like TicNote Cloud to turn transcripts into structured summaries, translations, and cross-meeting Q and A in one place.
Learn a cleaner reuse flow in this guide on transcribing videos and keeping transcripts usable.
What should you say about consent, privacy, and compliance before transcription starts?
Teams makes it easy to transcribe, but you still need clear consent and a simple privacy plan. Before you transcribe a Microsoft Teams meeting, say what you're doing, why you're doing it, where the file will live, and how people can opt out. Keep it short, then follow through on access and retention.
A 10-second consent script (copy and paste)
"Hi everyone. I'm going to start live transcription to help us capture notes and action items. The transcript will be saved in Microsoft 365 with this meeting's files, and only people with access to the meeting can view it. If you don't consent, please tell me now or message me privately, and I'll pause transcription or we'll switch to manual notes. I'll also pause before any sensitive topics."
Sensitive meetings: when to pause or avoid transcription
Pause or skip transcription when the talk could create a risky verbatim record:
- HR topics (performance, discipline, termination)
- Student records (protected education data)
- Health info (patient details, diagnoses, treatment)
- Legal advice or attorney client privilege
- Security incidents (breaches, credentials, vulnerabilities)
- Client NDA or deal terms that shouldn't be repeated
Practical workaround: move that agenda item to a smaller, approved meeting. Or capture only decisions and actions in plain notes, without quotes.
Internal policy checklist for organizers
Use this quick check before you hit "Start transcription":
- Confirm your org policy allows meeting transcription.
- Announce transcription at the start and when someone joins late.
- Check consent rules for your region and for external guests.
- Limit access to need to know users (team or channel permissions).
- Know retention rules and any auto expiration in your tenant.
- Write down where the transcript is stored, so you can audit access later.
Why is Teams transcription missing or stuck, and how do you fix it?
Teams transcription fails in a few repeatable ways: the button is missing, the transcript never appears, the language is wrong, or accuracy is rough. Use the quick checks below to spot the cause fast, then apply the right fix for your meeting type and role.
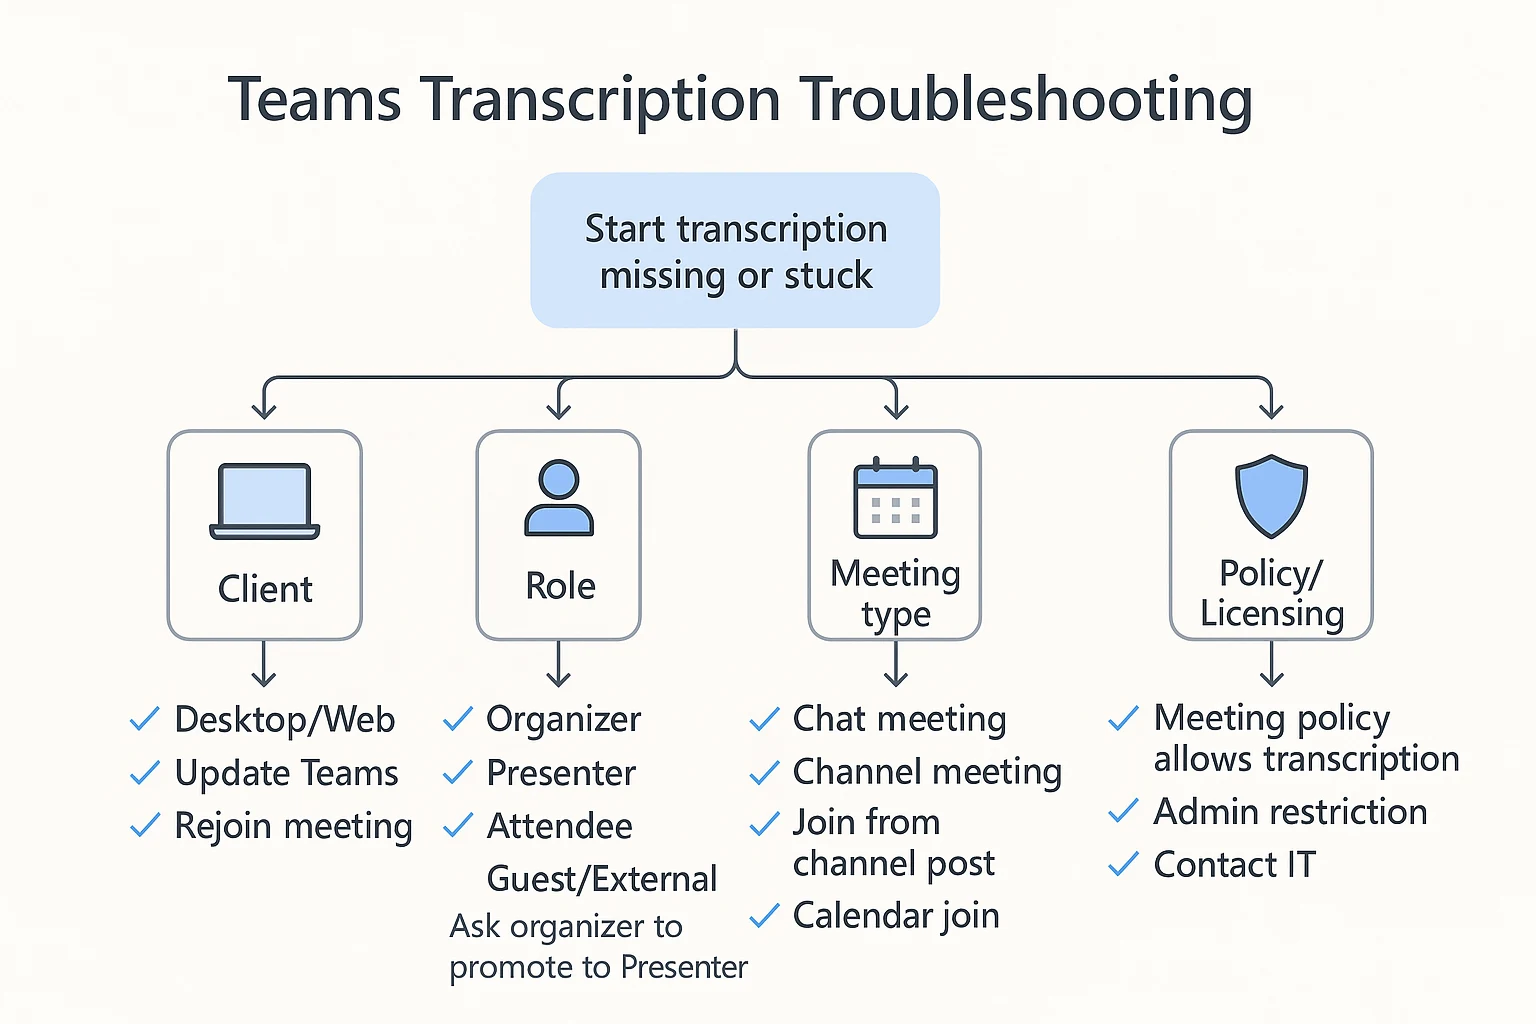
"Start transcription" is missing or greyed out
Work top to bottom. Stop when you find the match.
- Are you on a supported client?
- Switch to Teams desktop or Teams on the web.
- Fully quit Teams and reopen it, then rejoin the meeting.
- Do you have the right role?
- Ask the organizer to set you as a Presenter (attendees often can't start it).
- If you're guest/external, assume you can't start it. Ask the organizer to start it.
- Is it the right meeting type?
- Try from the main meeting window (not a pop-out or forwarded link).
- If it's a channel meeting, make sure you joined from the channel post.
- Is transcription blocked by policy?
- If others can't see it either, it's likely an org policy or license issue.
- Your best next step is IT: ask them to confirm the meeting policy allows transcription for your account.
The transcript never shows up after the meeting
Transcripts can be delayed, and they can be stored in different places.
Checklist:
- Wait and refresh: close and reopen Teams, then check again on desktop.
- Check the recap: open the meeting from your Calendar, then open Recap.
- Check the meeting chat: many transcripts appear in the chat thread.
- For channel meetings: look in the channel conversation where the meeting was posted.
- Confirm it actually ran: if transcription was stopped early, you may only have a partial file.
- Ask the organizer to re-share: they can often open the recap and post the transcript link/file again.
- Retention got it? If your org auto-deletes transcripts, only IT may be able to recover it.
Wrong language, or your language isn't available
If you have permission, stop transcription and start it again with the correct spoken language. If your language isn't supported, turn on live captions for readability, then translate after the meeting using a separate transcript workflow.
Poor accuracy: quick audio fixes that help
Transcription quality depends on clean audio.
- Use a headset mic and avoid speakerphone.
- Ask people to not talk over each other.
- Have speakers say their name before updates.
- Reduce room noise and echo.
- Keep your connection stable (audio dropouts cause gaps).
If there's heavy jargon or overlap, plan a quick cleanup pass after the meeting and reuse the corrected version for notes and follow-ups. For a reliable, tool-agnostic approach, see this guide to building a clean, searchable transcription workflow.
When Microsoft Teams transcription isn't enough
Teams built-in transcription works well for most standard meetings — but it has real limits that teams run into quickly.
What Teams transcription doesn't do well:
- Speaker accuracy degrades in large meetings. With 10+ participants talking over each other, Teams often misattributes lines or leaves long segments unlabeled.
- No support for non-Teams calls. If your team also uses Zoom, Google Meet, or in-person recordings, Teams transcription can't help you. You end up with transcripts in multiple places with no unified workflow.
- Limited post-meeting editing. You can download the DOCX, but editing it is manual. There's no built-in way to clean up filler words, fix names, or restructure the output.
- AI summaries are tied to Copilot licensing. Meeting summaries and action item extraction require a Microsoft 365 Copilot license (currently ~$30/user/month), which isn't available to most teams.
- No multilingual transcription. Teams only transcribes in the language set at the start of the meeting. Multilingual or code-switching meetings produce garbled output.
- Retention policies can delete your transcript. Depending on your IT admin's settings, transcripts stored in OneDrive/SharePoint may auto-expire — and there's no warning.
A practical alternative: TicNote Cloud
If you hit any of the limits above, TicNote Cloud is worth considering as a complementary layer. It works alongside Teams (not instead of it) — you can record and transcribe any meeting, on any platform, with accurate speaker labels, AI-generated summaries, and action items, without needing a Copilot license.
Key differences:
This isn't a reason to abandon Teams transcription — for standard meetings where everyone is on the same tenant and speaks one language, it works fine. But if you're hitting edges, having a backup workflow matters. For a full breakdown of options, see our roundup of the best AI transcription tools for meetings in 2026.
What's a good alternative when Teams transcription doesn't fit your workflow?
If Microsoft Teams transcription is blocked, missing, or hard to reuse, you can switch to a capture and transcribe workflow that you control. The steps below use TicNote Cloud as an example, because it lets you go from file or recording to transcript, summary, and exports without a meeting bot joining the call.
A simple "capture → transcribe → summarize → store" workflow (Web Studio)
This flow works well when you need clean notes fast, or when the Start transcription button in Teams isn't available. You can bring your own audio or video and keep everything organized in a project.
- Upload a file or record something to transcribe
Start in the TicNote web studio by creating a project for the meeting, client, or class. Then click Upload to add your audio or video.
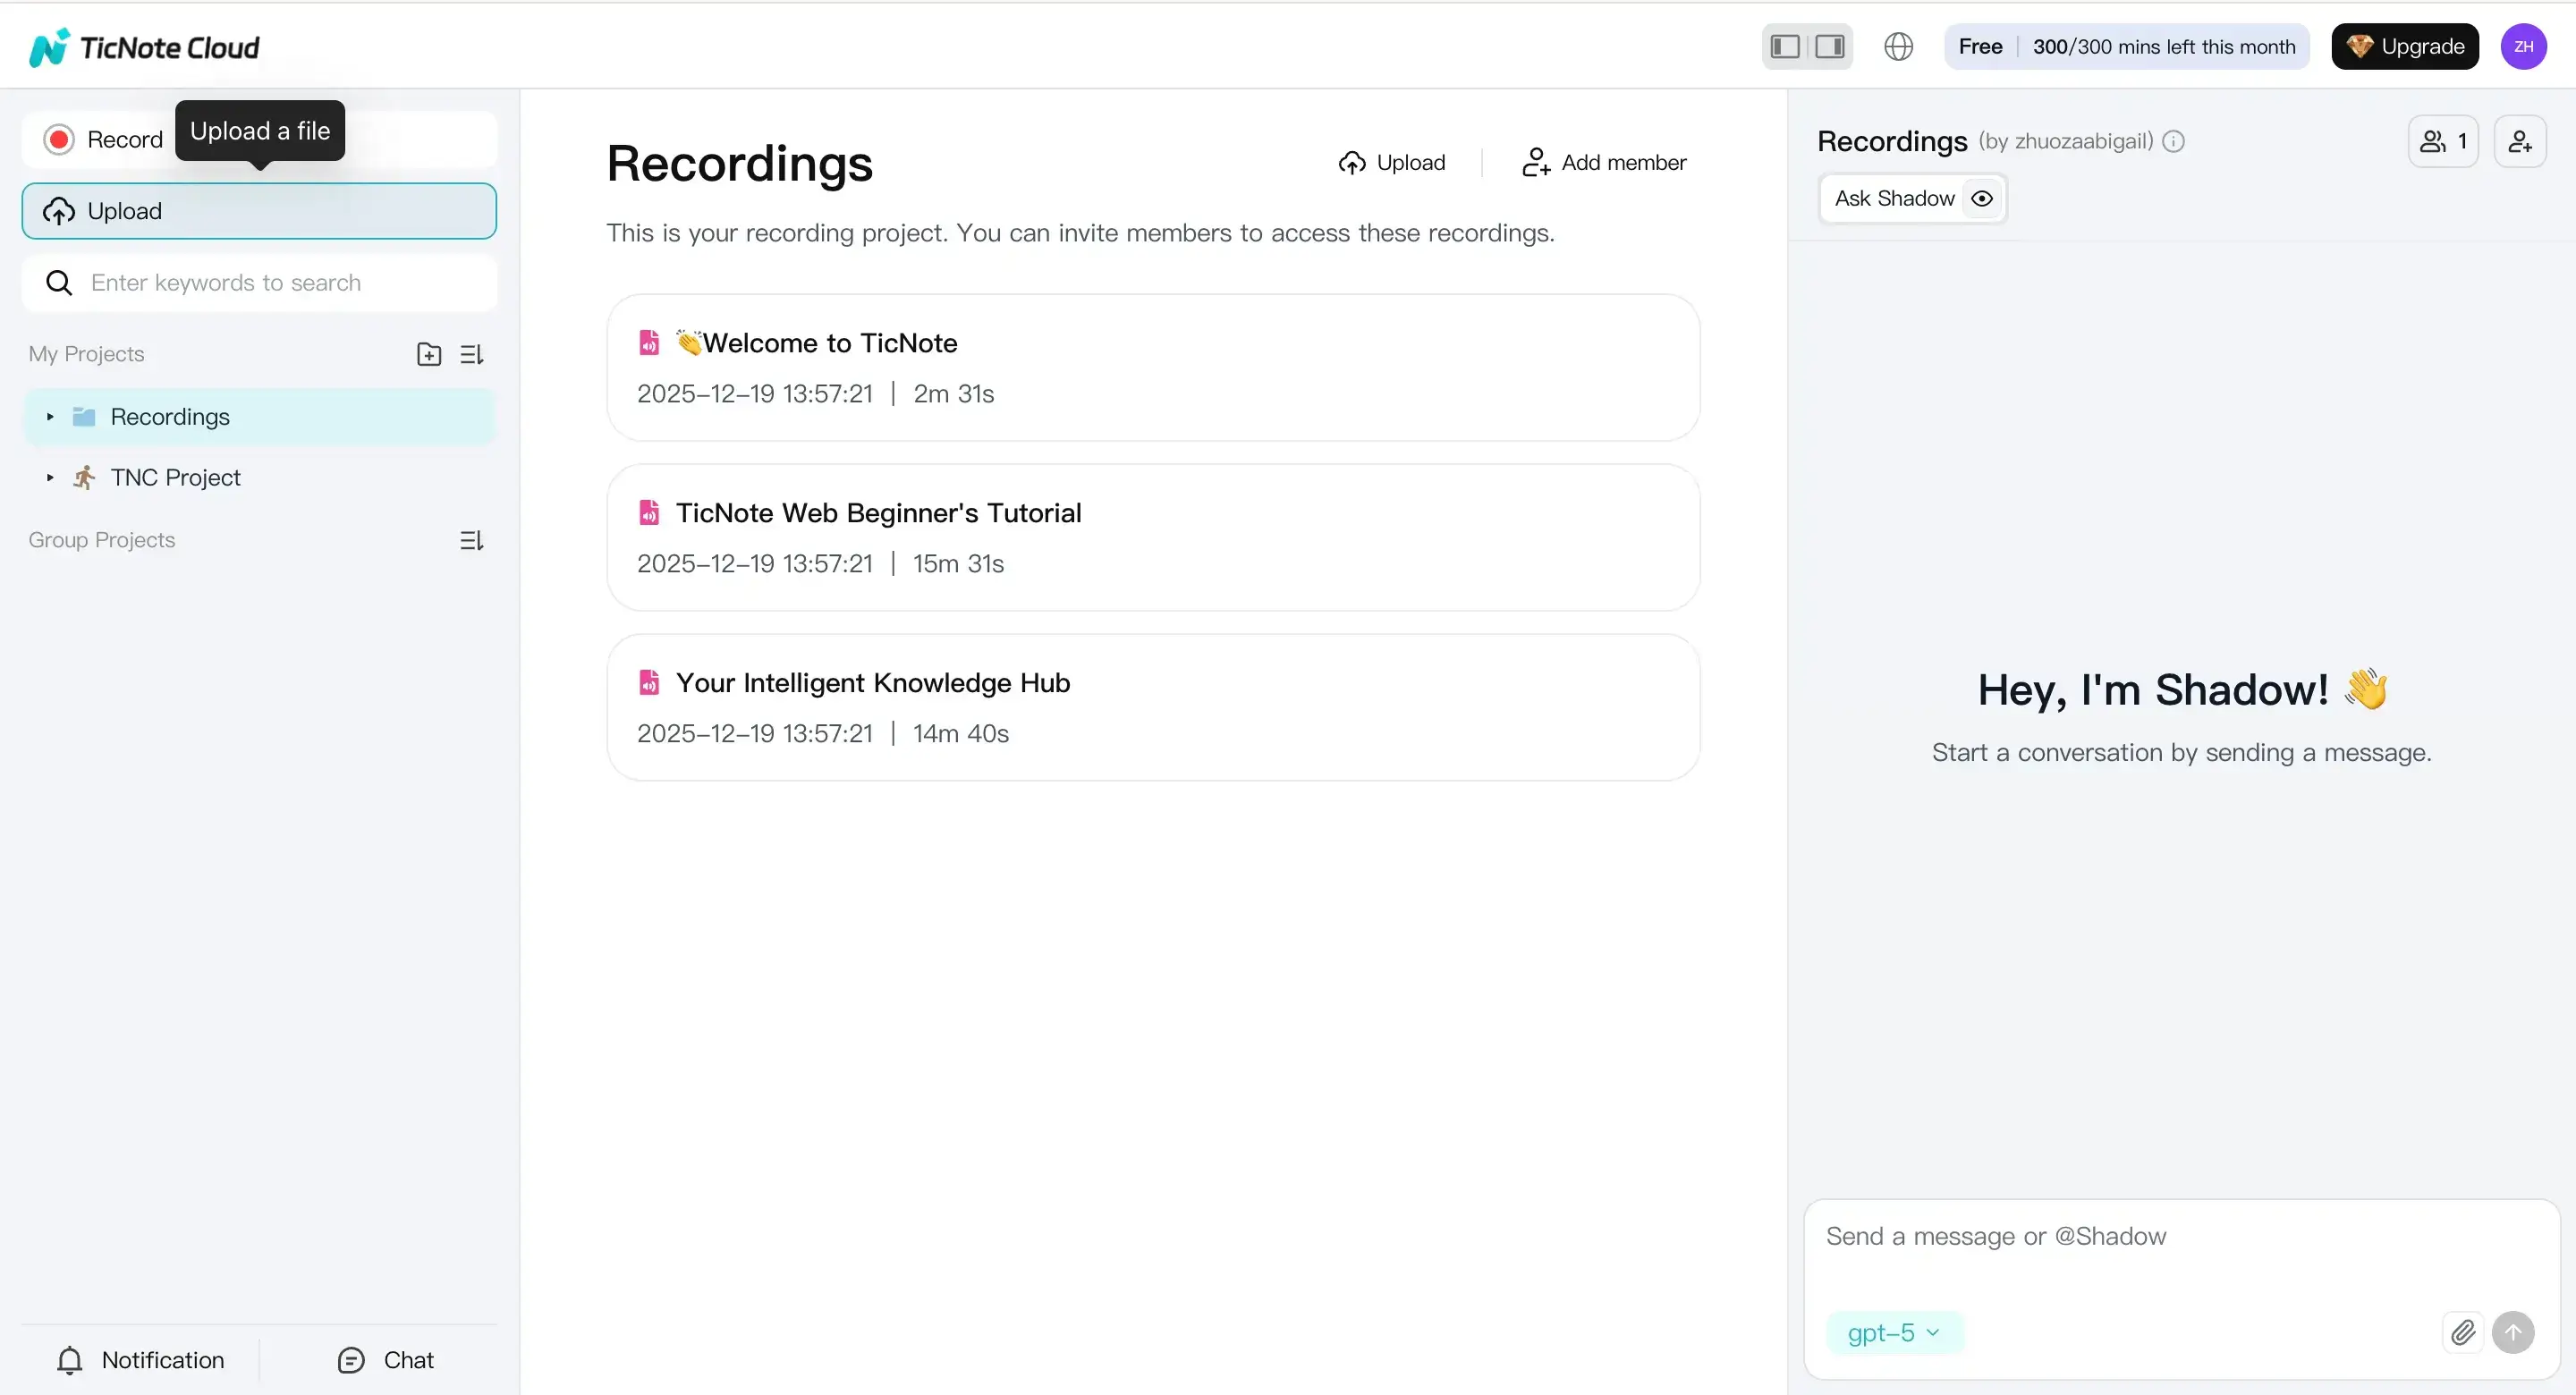
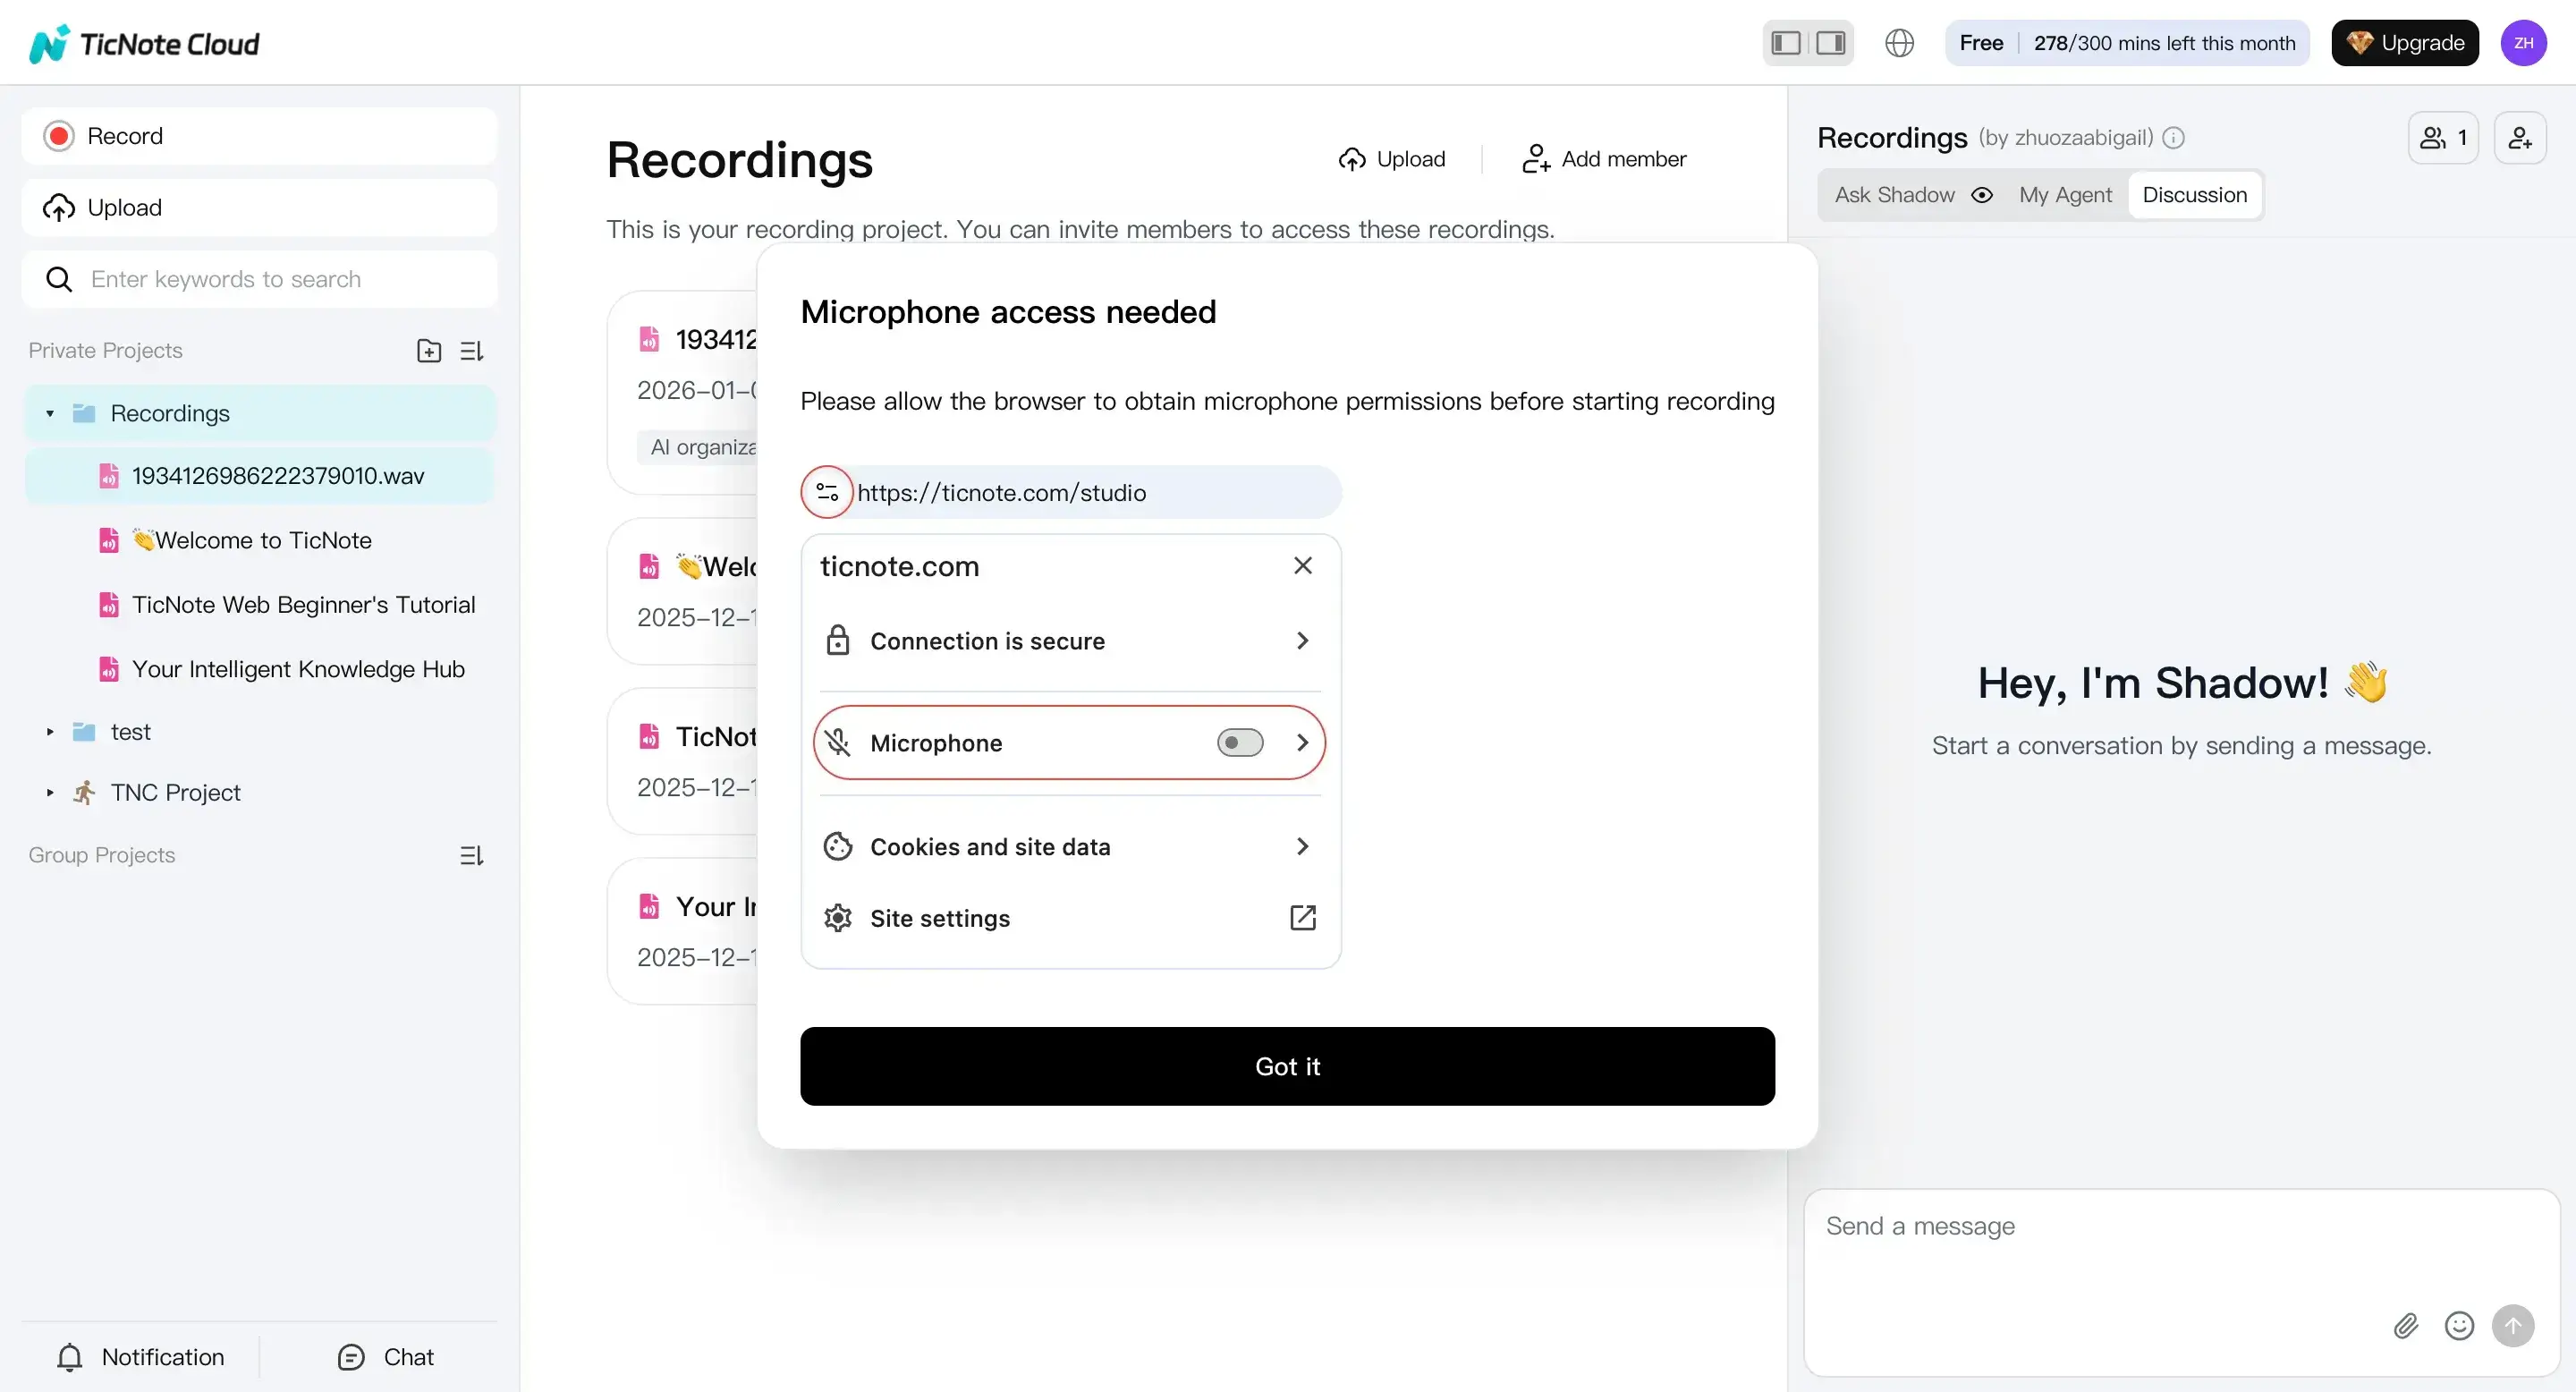
If you don't have a file yet, click Record and capture your voice. Make sure your browser has mic access so the recording saves correctly.
- Generate the transcript with the right settings
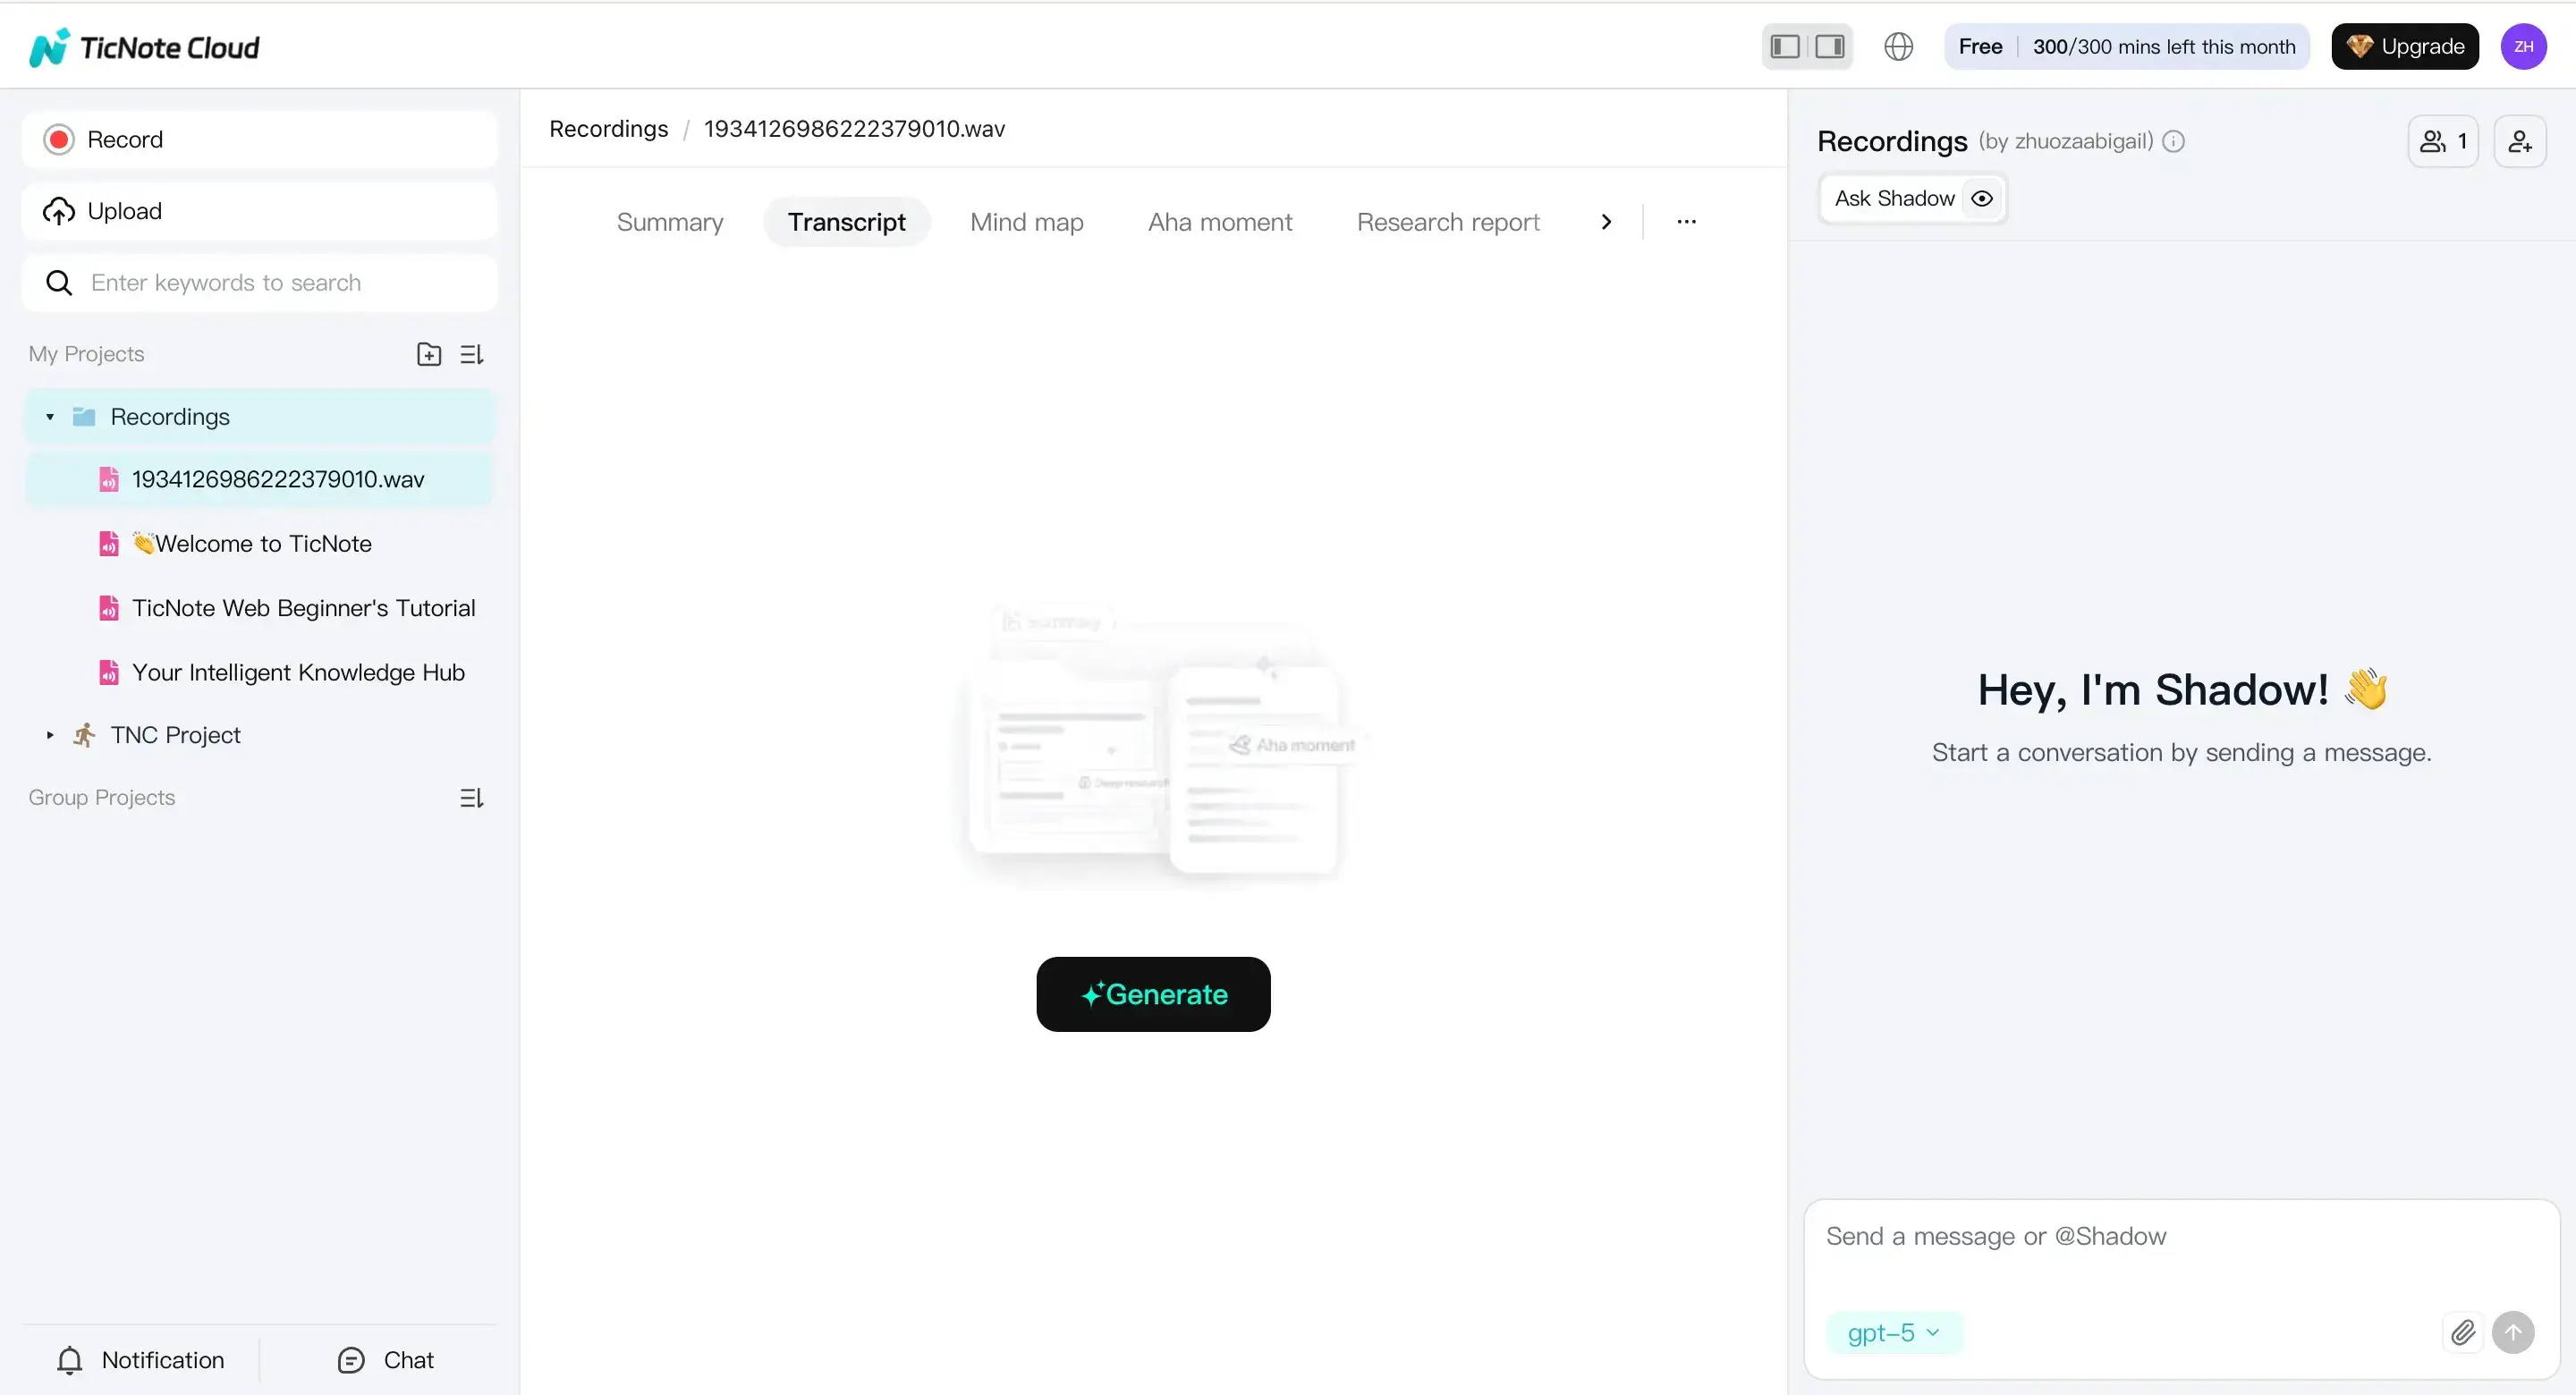
Pick the file in the left panel, open the Transcript tab, then click Generate.
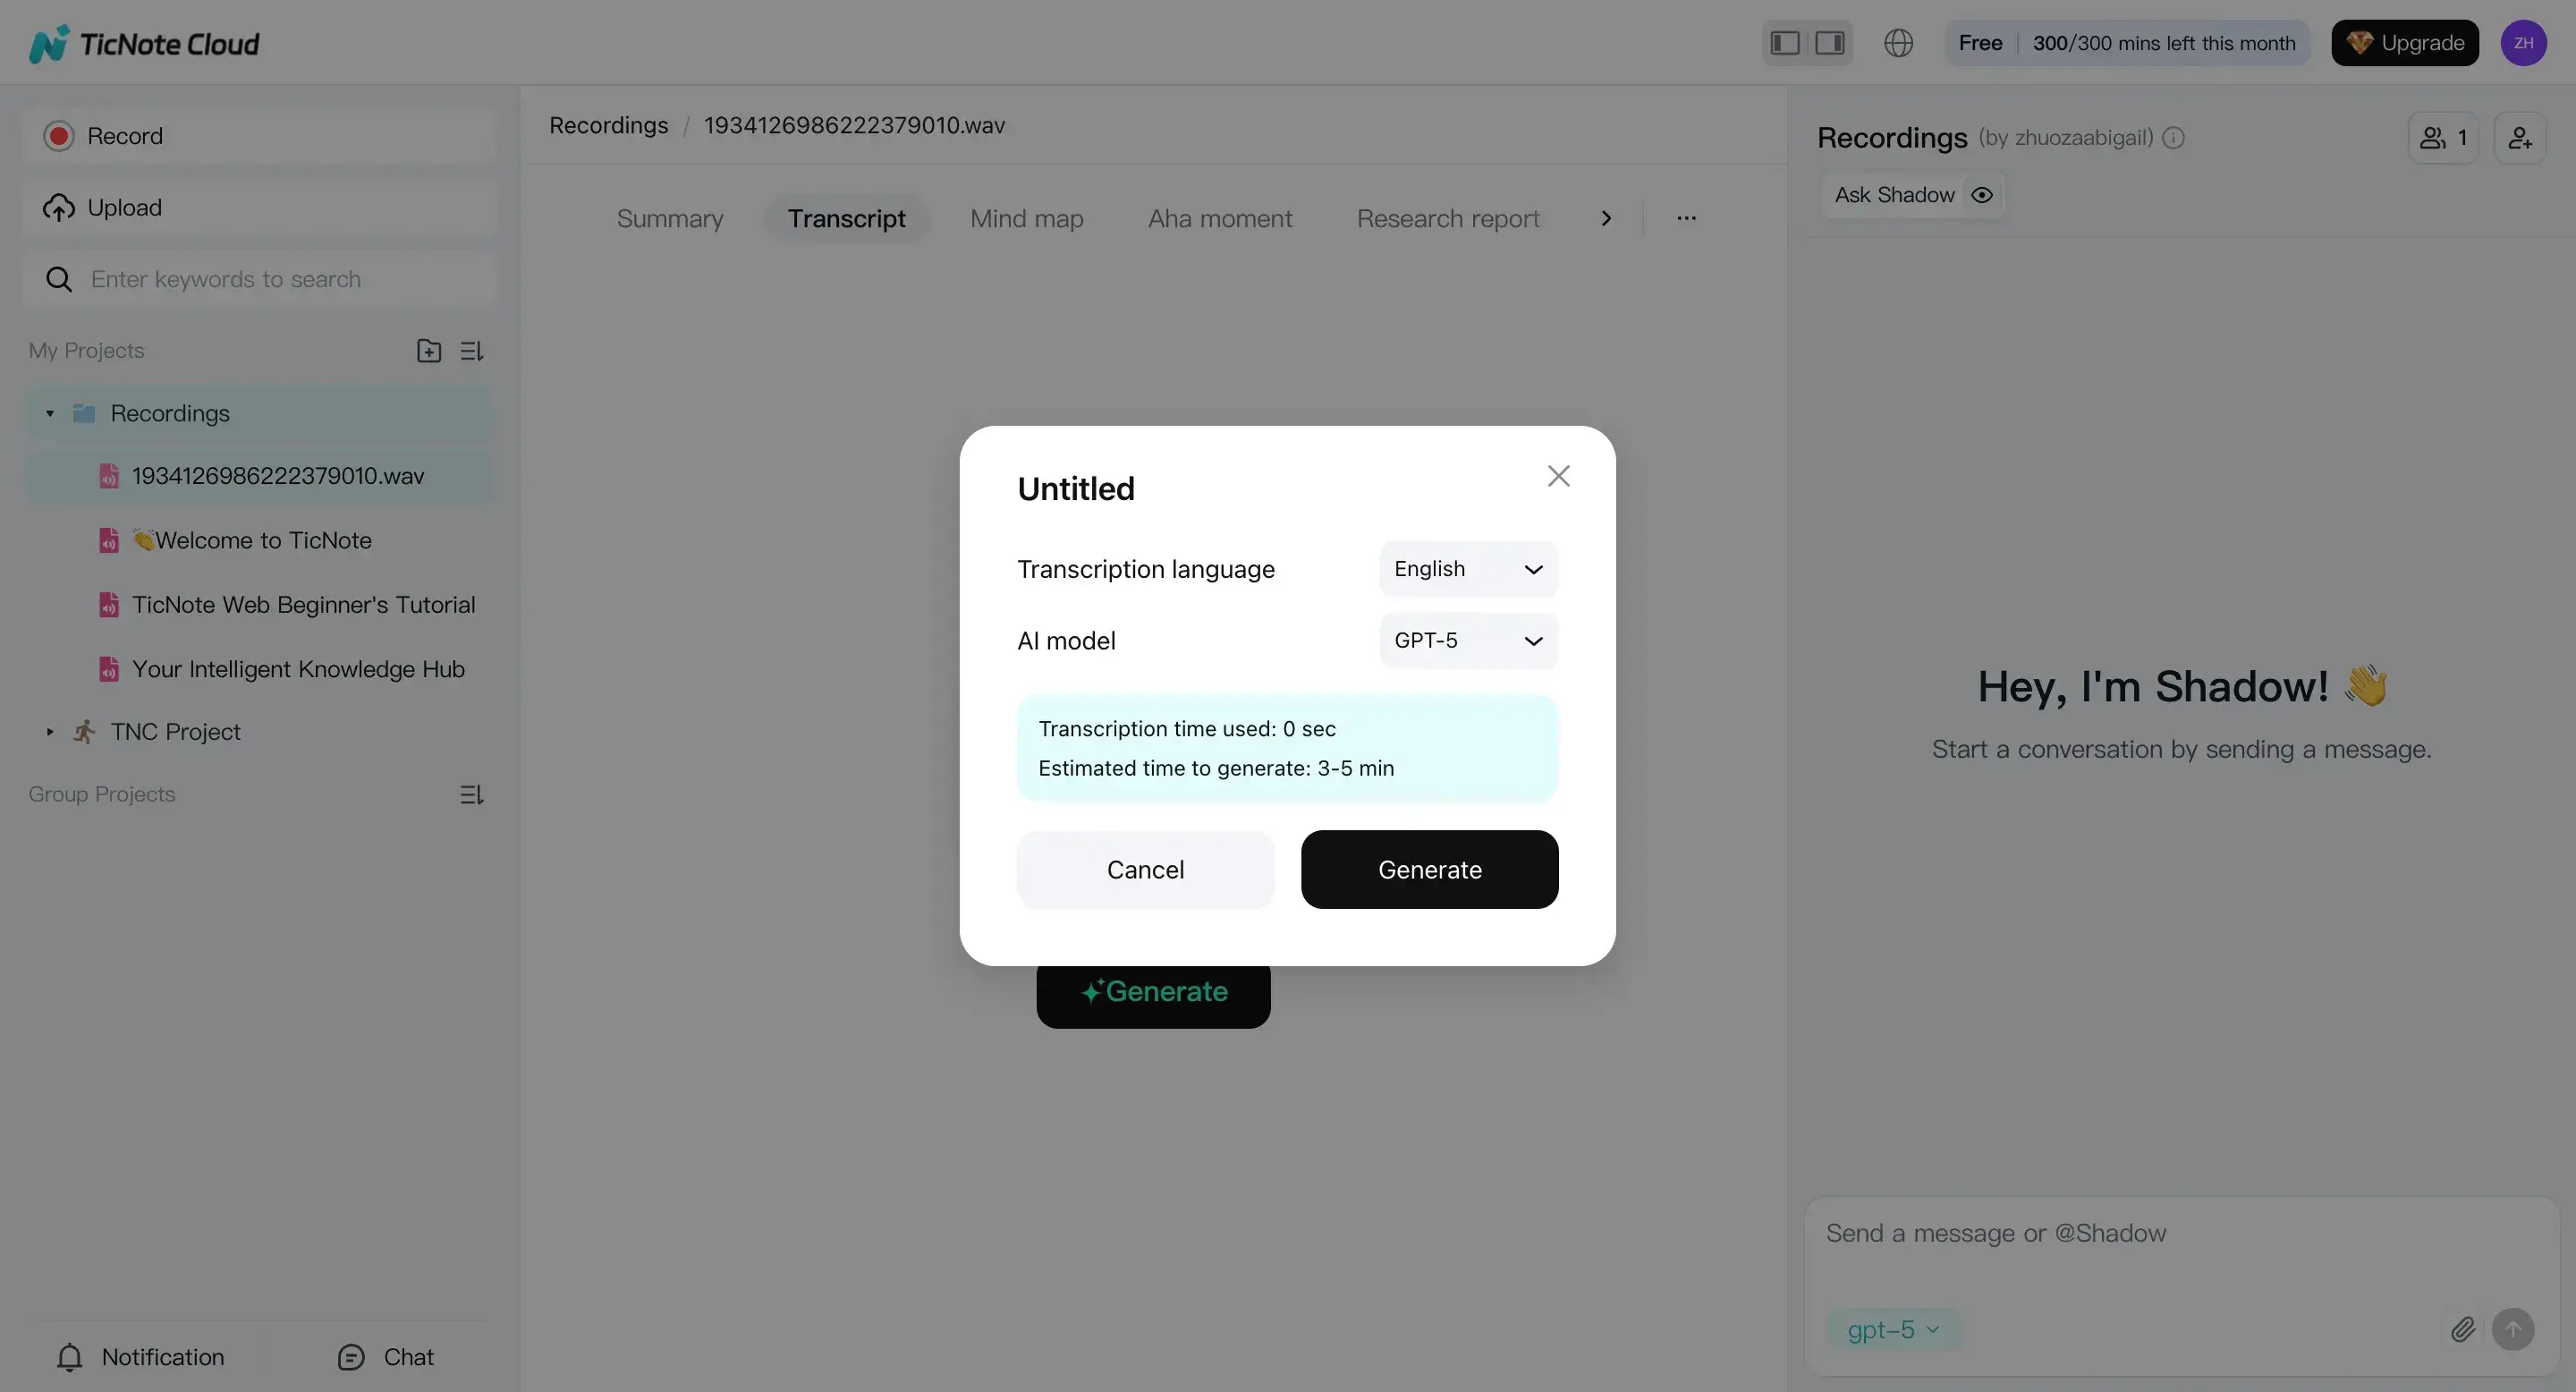
In the pop-up, set the transcription language and pick an AI model. This is also where you avoid messy output by choosing the closest match to the meeting language.
- Review and refine the transcript, summary, and mind map
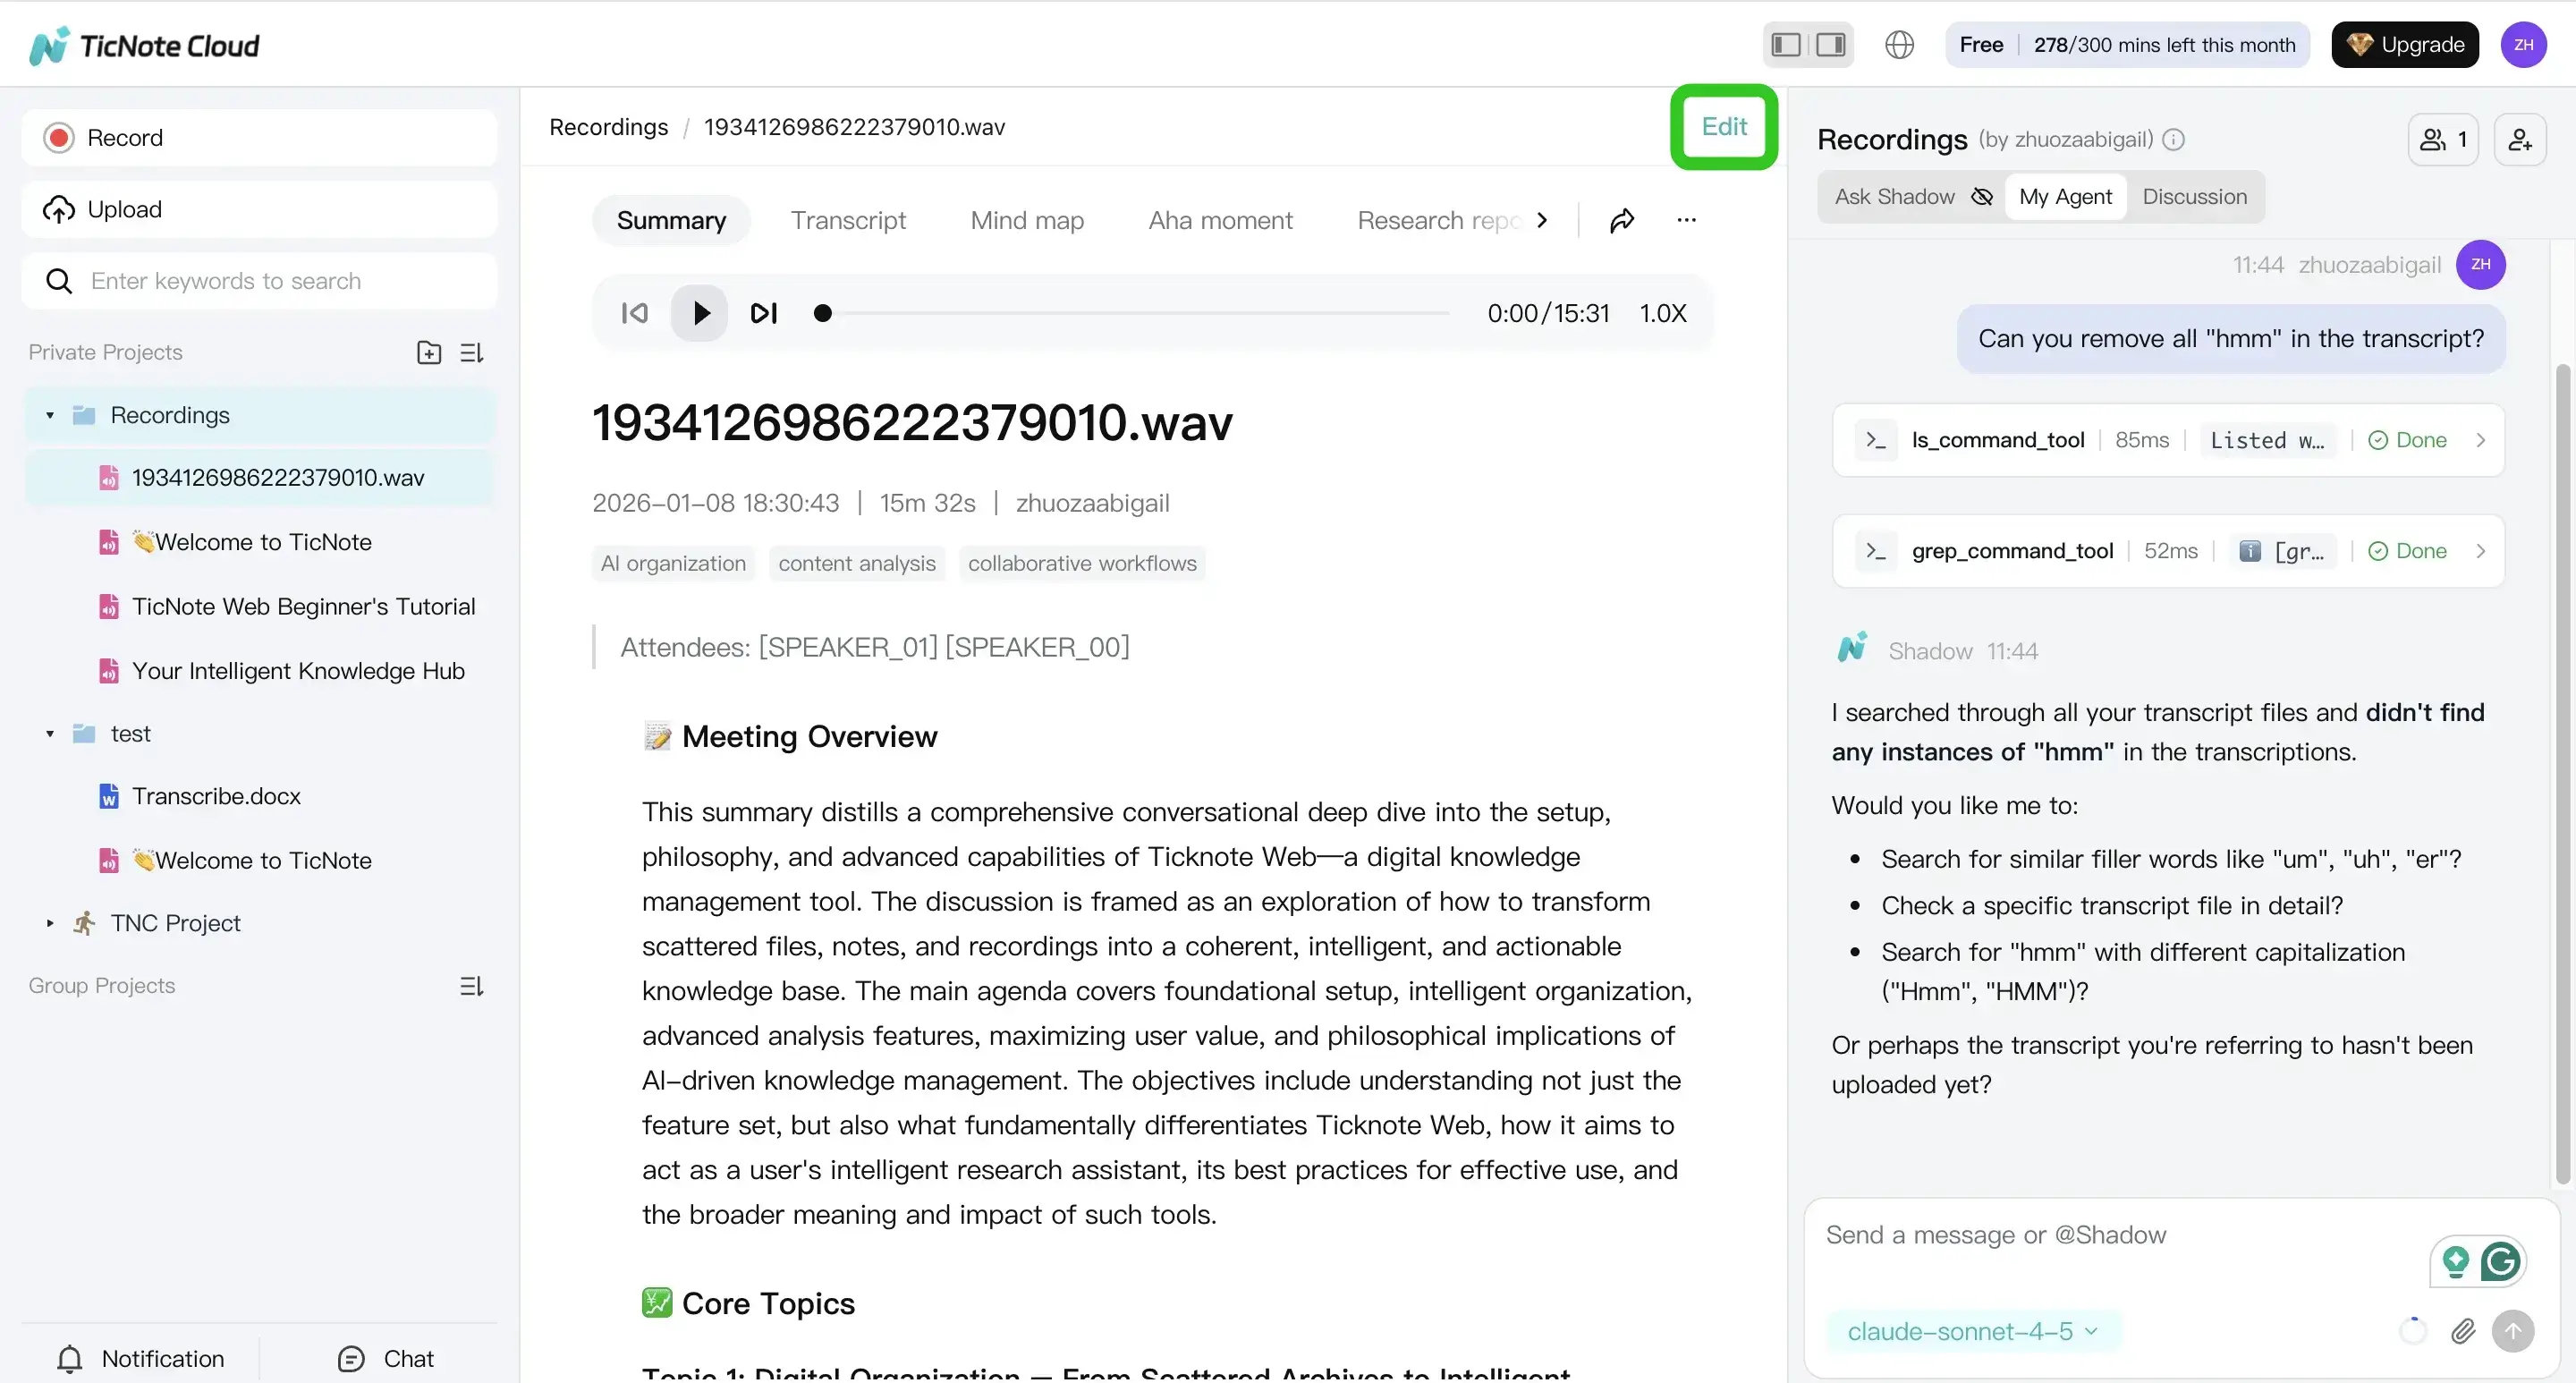
Once it's done, scan the transcript for names, numbers, and decisions. You can edit text directly, or ask Shadow AI for targeted fixes like speaker labels, action items, or cleaning up team jargon (for example, "expand acronyms and standardize product names").
Tip: If you want a repeatable workflow, keep a short glossary (product terms, customer names, internal acronyms) in your project so you can reuse it across meetings.
- Export what your team actually uses
When your transcript is ready, export it from the menu. In the file view, click the three dots button, choose Download, then Export Transcript and pick a format that fits your handoff.
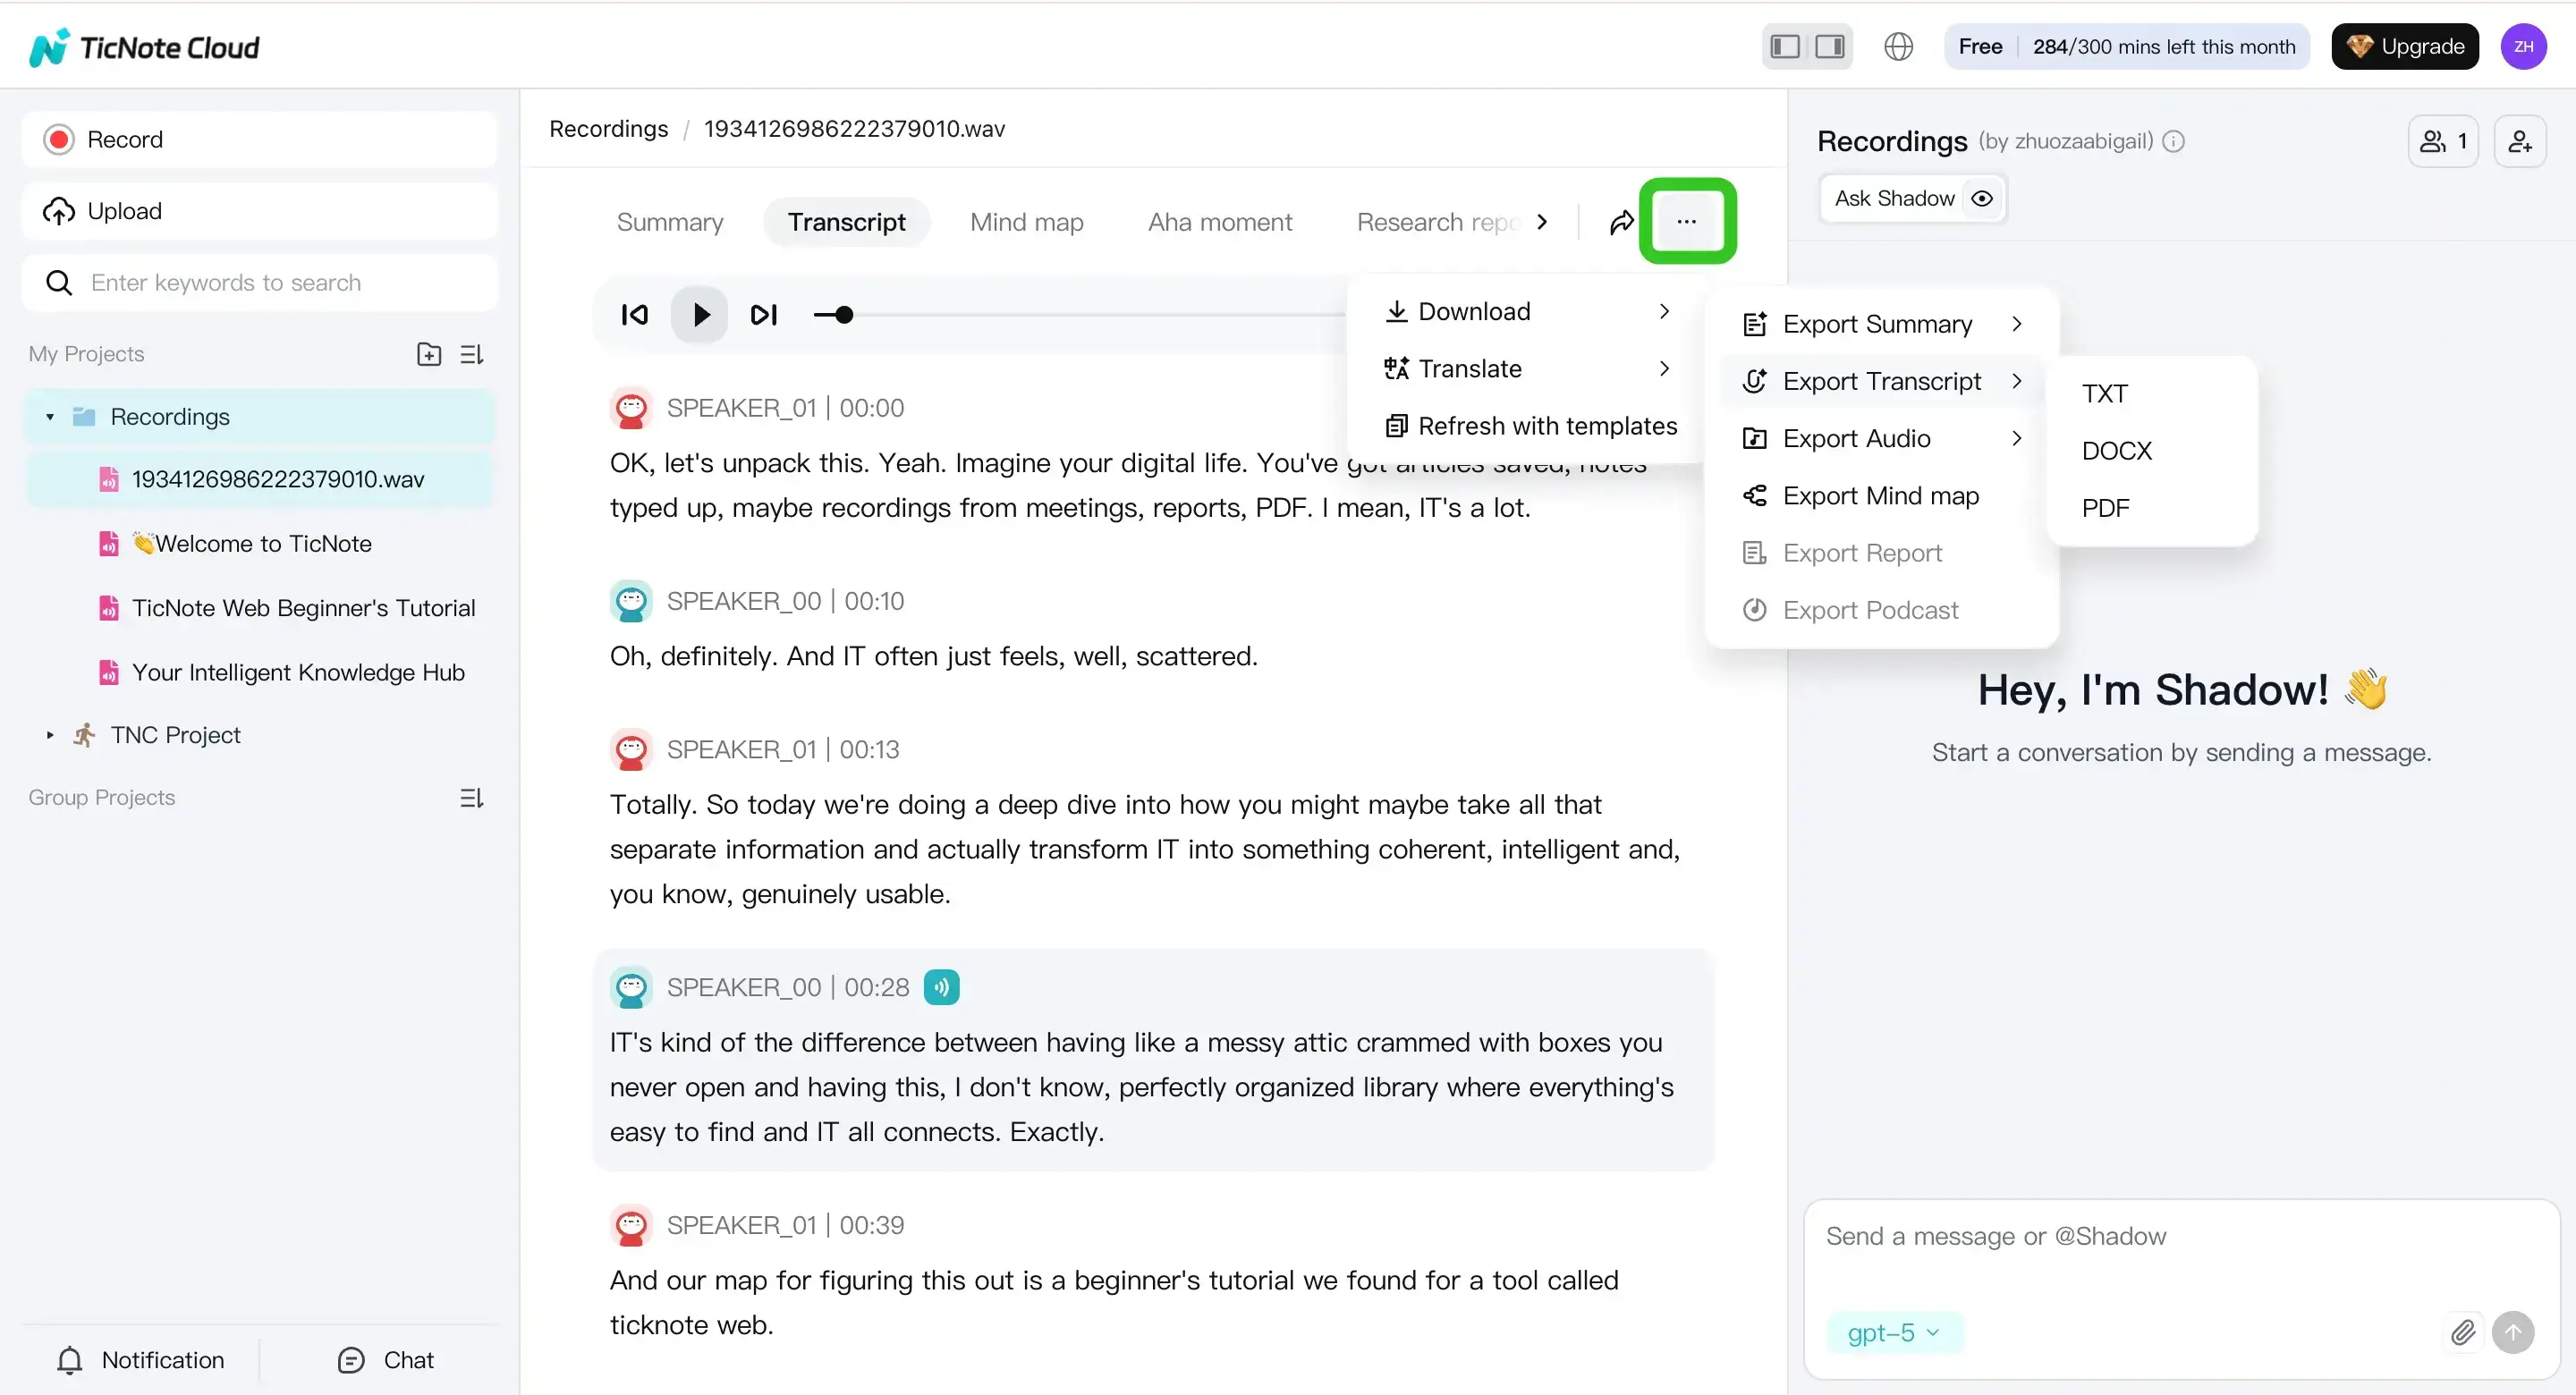
You can also download the summary or mind map for faster sharing with people who won't read a full transcript.
If you want more ways to handle different sources, this guide on transcribing audio for meetings and research lays out a few practical setups.
Record Teams Meeting with TicNote Cloud Extension
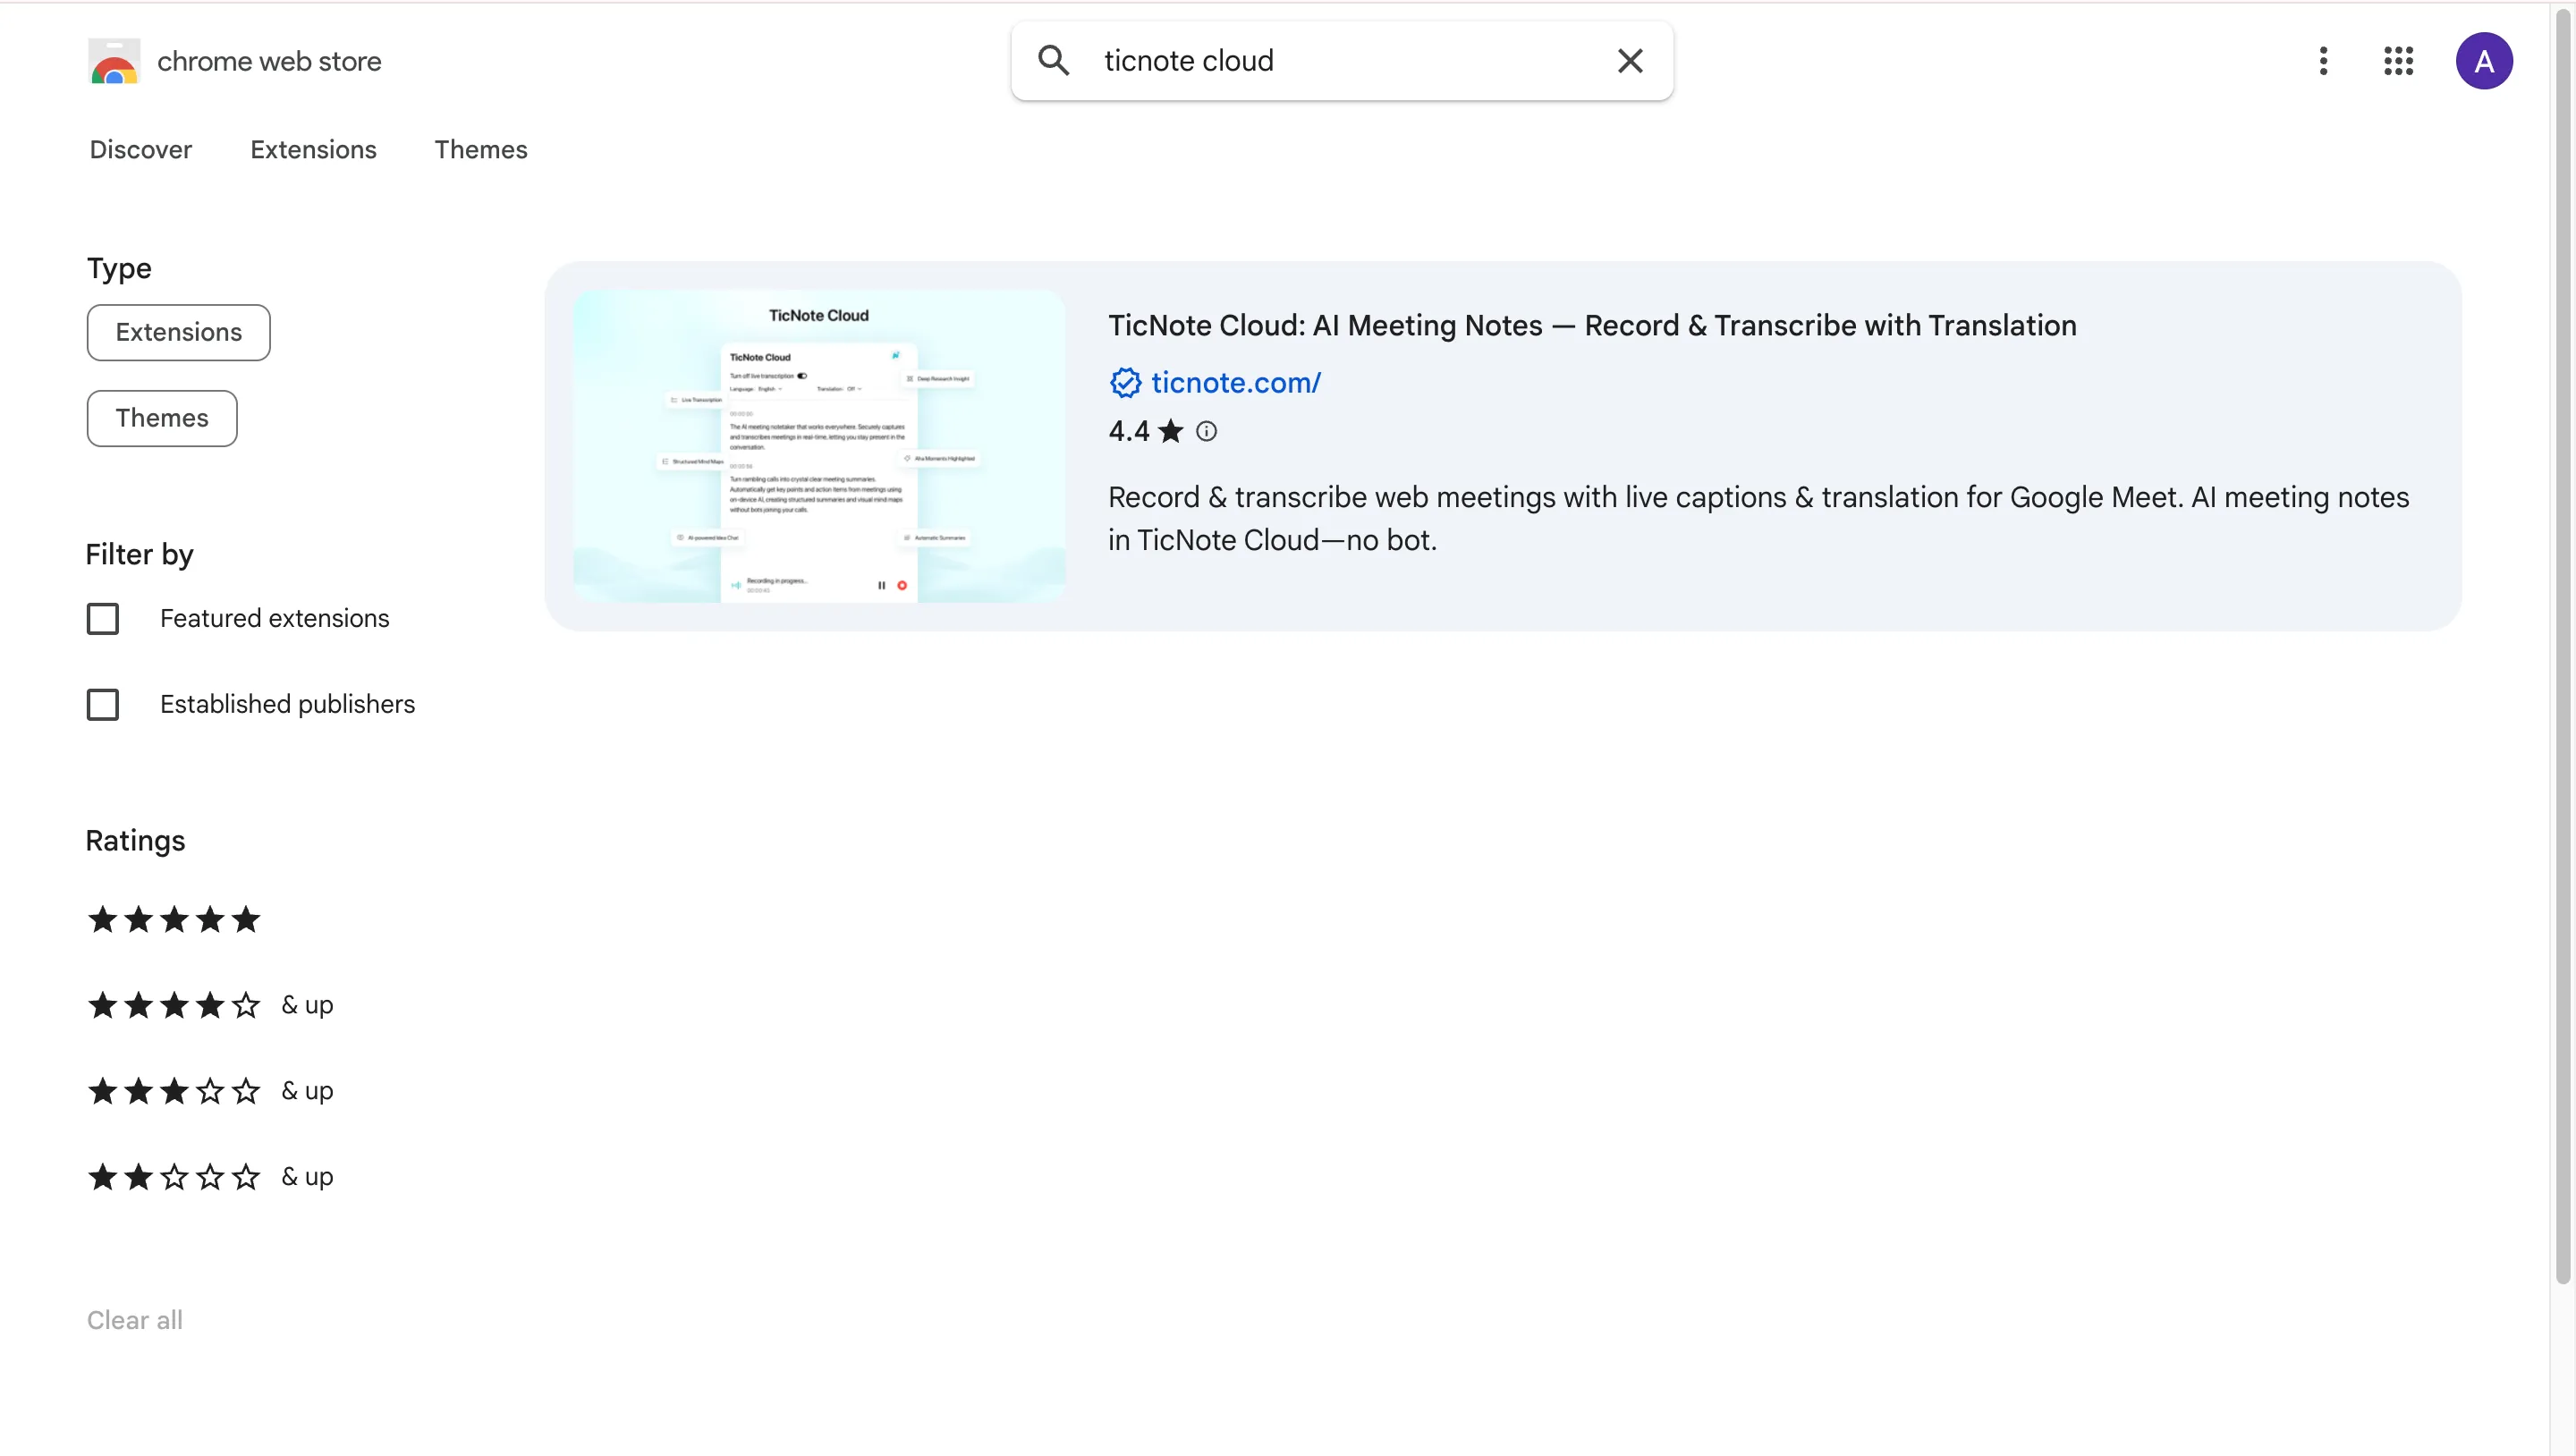
If you don't want to upload the Teams meeting to the TicNote Cloud web studio, you can also use its Chrome extension to record the meeting directly. The extension can record online meetings like Microsoft Teams, Google Meet, and Zoom. The recording will be automatically saved to the TicNote Cloud.
Search for TicNote Cloud in the Chrome extension. And then you can record the Teams meeting.
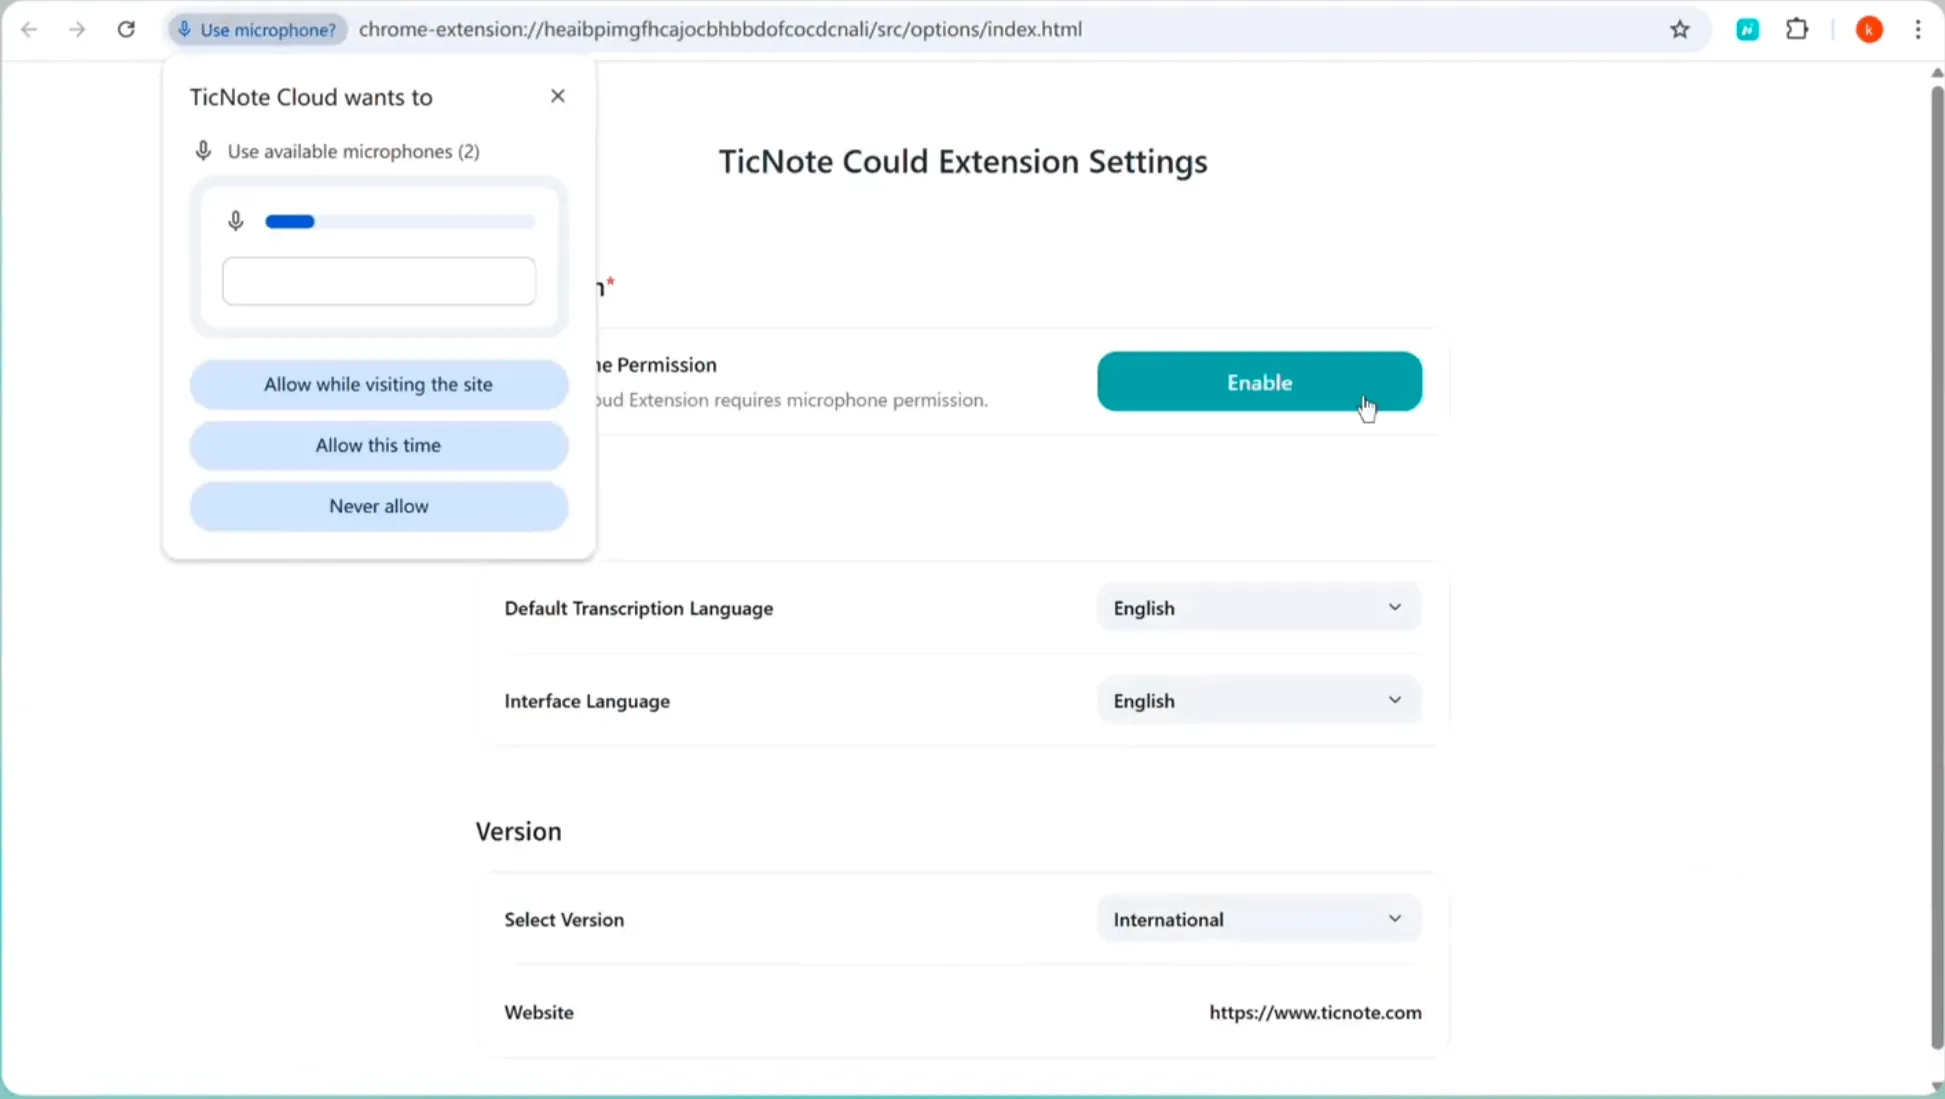
Don't forget to enable microphone permission.
Use an alternative when any of these are true
If Teams isn't cooperating, an alternative workflow can save time.
- Admin policy blocks transcription or recording
- The transcription button is missing for your role or meeting type
- Guests can't access the transcript later (common in external meetings)
- You need translation for global teams
- You want reusable notes, not just a long text file you never open again
Which features help turn transcripts into a second brain?
A transcript is useful. But it's even better when it turns into living notes you can search, reuse, and trust later. That's the "second brain" goal: capture what happened, shape it into consistent outputs, and make it easy to retrieve across weeks of meetings.
Capture without a meeting bot (more policy-friendly)
Some orgs don't allow meeting bots, or clients won't approve extra attendees. A no-bot capture flow helps you keep your workflow moving in stricter settings. You still need to follow your org's consent rules, but you can avoid the "Can we invite this app?" debate on every call.
Keep meetings organized with project spaces + templates
A second brain needs structure. Put recurring meetings into one project or workstream so files don't scatter across chats and drives.
Then use templates to make notes comparable week to week. For example:
- Agenda (what you planned)
- Decisions (what changed)
- Risks and blockers (what's stuck)
- Next steps (who does what by when)
If you run weekly syncs, this consistency is the difference between "we talked about it" and "we can find it fast."
Ask grounded questions with Shadow AI chat (cross-file Q&A)
Once your transcripts and summaries live in one place, you can query them like a knowledge base.
Common prompts:
- "What did we decide about pricing last month?"
- "List open action items for client Y."
- "Which meetings mention this requirement?"
The key is grounded answers. You're not asking a chatbot to guess. You're asking it to use your stored meeting files as the source.
Translate and review faster with mind maps
For global teams, translation can turn "I missed that meeting" into "I'm unblocked." Translate key sections for stakeholders, then share a short summary.
For fast executive review, a mind map gives you the shape of the meeting in seconds: main topics, branches, and follow-ups.
Export in the format that fits the next step
Different outputs solve different problems:
- TXT transcript: quick search and archiving
- Markdown, DOCX, or PDF summary: clean docs for stakeholders
- PNG or Xmind mind map: slide-friendly recaps and knowledge base visuals