

TL;DR: The fastest way to get a Zoom transcript (based on your permissions)
If you need to know how to transcribe zoom meetings fast, pick the path that matches your access:
- You’re the host and Cloud Recording is on: Enable Audio transcript, record to the cloud, then download the transcript file (often VTT).
- You’re a participant: Ask the host to turn on live captions and share the transcript link or file after.
- No access to cloud transcription: Record permitted audio on your side, then transcribe after the call in a separate tool and export clean notes.
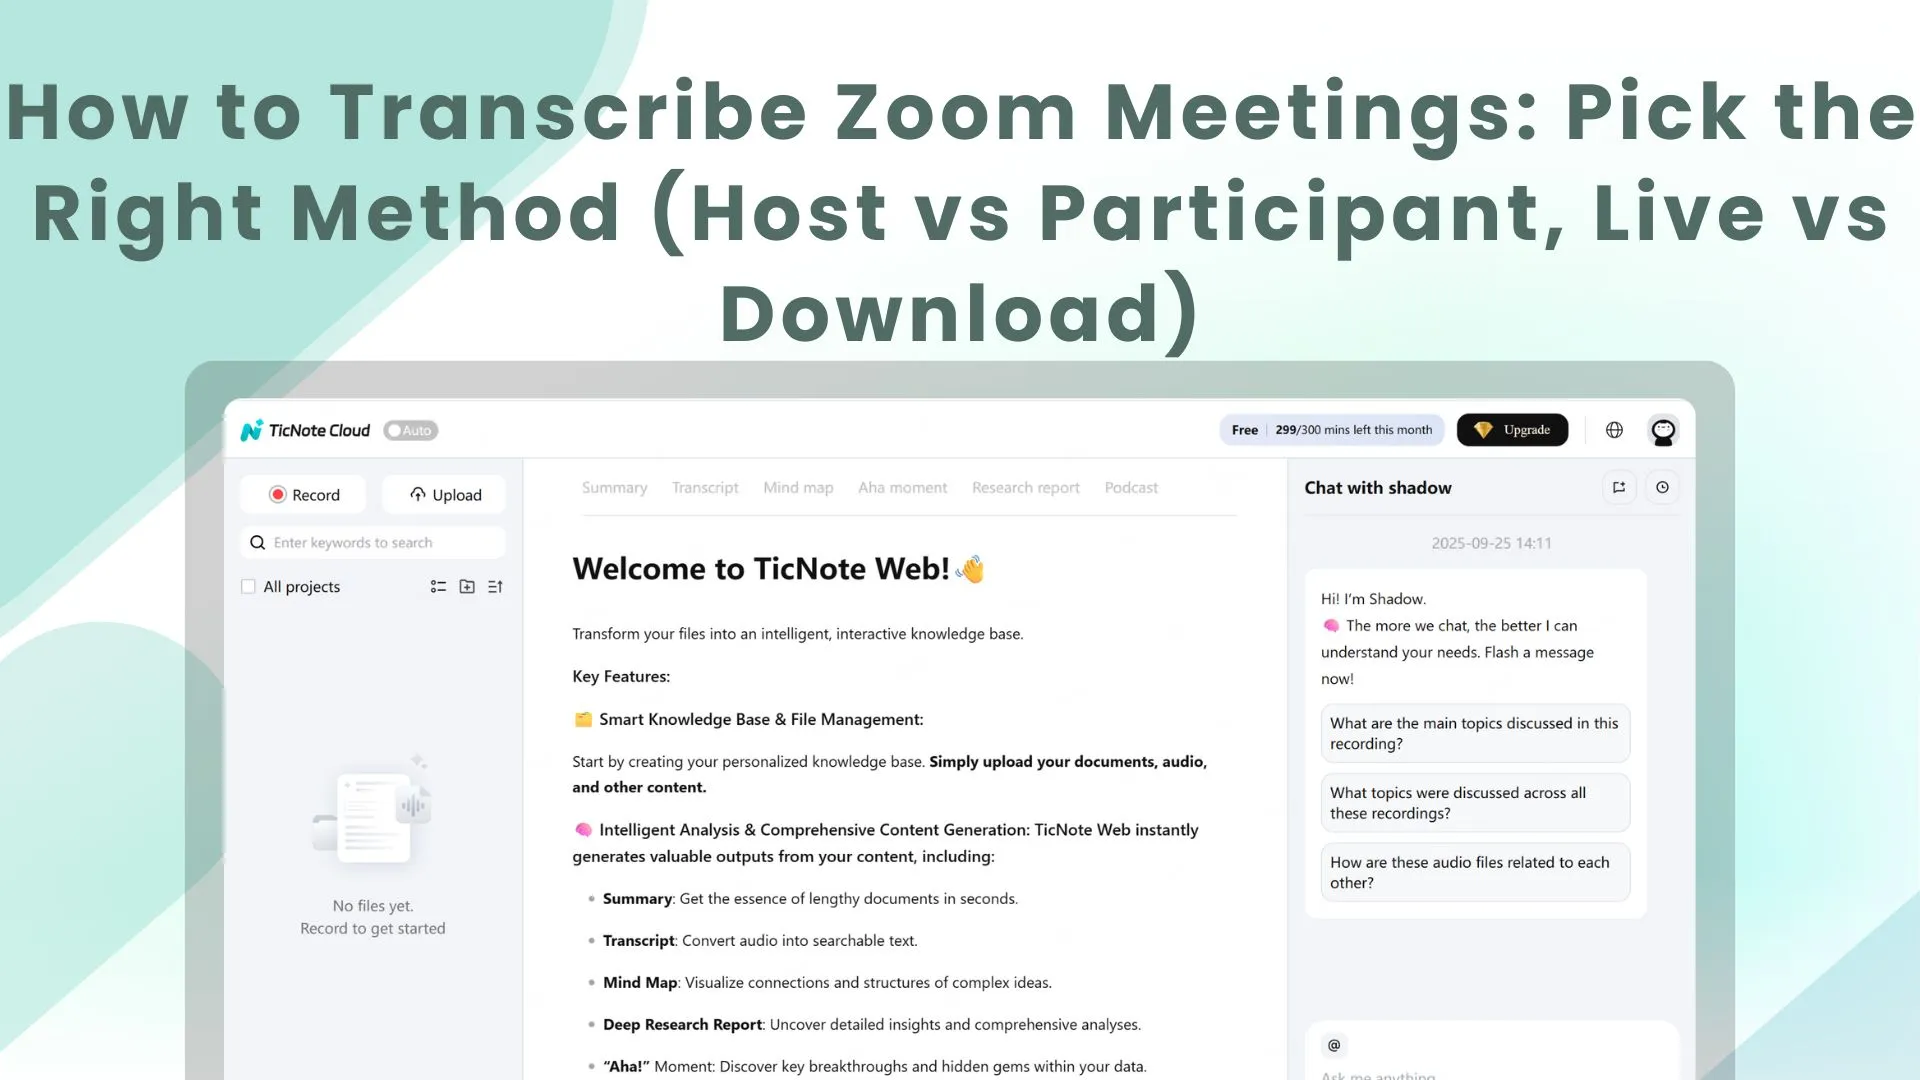
Missed a decision because captions vanished? It’s worse when you can’t download a file. A practical fix is to try TicNote Cloud for Free so you can transcribe what you’re allowed to capture, then turn it into searchable notes.
Quick expectations:
- Captions: for reading in real time.
- Transcript: for search, quotes, and sharing.
- Summary and action items: the time-saver layer for follow-ups.
What's new in Zoom transcription in 2026
Zoom has updated its transcription and AI features significantly. Here's what changed and what it means for your workflow:
- Zoom AI Companion (formerly Zoom IQ) is now included in paid plans. If you're on a paid Zoom account, you get AI-generated meeting summaries and action items at no extra cost — no add-on required as of early 2025.
- AI Companion now supports in-meeting questions. During a live meeting, you can ask Zoom's AI "what did I miss?" and get a summary of the last few minutes — useful if you joined late.
- Smart chapters in cloud recordings. Zoom now auto-segments cloud recordings into chapters based on topic changes, making navigation much faster.
- Transcript editing in the web portal. You can now edit the transcript directly in the Zoom web portal before downloading — fixing speaker names and correcting errors without exporting to a third-party tool first.
- Free plan update: As of 2024, free Zoom accounts no longer get cloud recording by default. This means free users cannot access Zoom's native transcript feature. The workaround is to use a third-party tool like TicNote Cloud that records and transcribes locally without needing cloud recording access.
Free plan users: your best workflow
If you're on Zoom free and need transcripts, the most reliable path is:
- Record the meeting locally (allowed on free plans)
- Upload the audio/video to a transcription tool
- Review and export
See how to transcribe audio for a step-by-step on uploading recorded files.
How to transcribe Zoom meetings (live captions vs post‑meeting transcript)
To transcribe Zoom meetings the right way, first pick the output you actually need. Most people mix up three things: live captions (what you see while people talk), a live “full transcript” panel (a running text log during the call), and a post‑meeting transcript file you can download after a cloud recording finishes.
Know the 3 outputs Zoom can produce
1) Live transcription (captions): On-screen text that updates as people speak. It’s built for accessibility and real-time understanding.
2) Live transcript view (during the meeting): A running transcript in a side panel. It’s still real time, but easier to scan than captions because it keeps a longer text history.
3) Post‑meeting cloud transcript (downloadable file): A transcript that’s generated after the meeting ends, usually linked to a cloud recording. This is the one you can share, search, and reuse for follow-ups.
Captions vs transcript vs summary: what’s the difference?
| Output | When you get it | What it’s good for | How shareable it is | Typical limits |
| Captions (live) | During the call | Accessibility, keeping up live | Low, often view-only in the meeting | Host controls, language support varies, accuracy drops with crosstalk |
| Transcript (post-meeting) | After the call | Search, quotes, compliance record, follow-ups | Higher, can be downloaded and stored | Often requires cloud recording, plan limits, speaker overlap reduces accuracy |
| Summary (notes) | After (or near real time in other tools) | Action items, decisions, brief for stakeholders | Very high, easy to paste into docs | Depends on the tool, needs a solid transcript to be reliable |
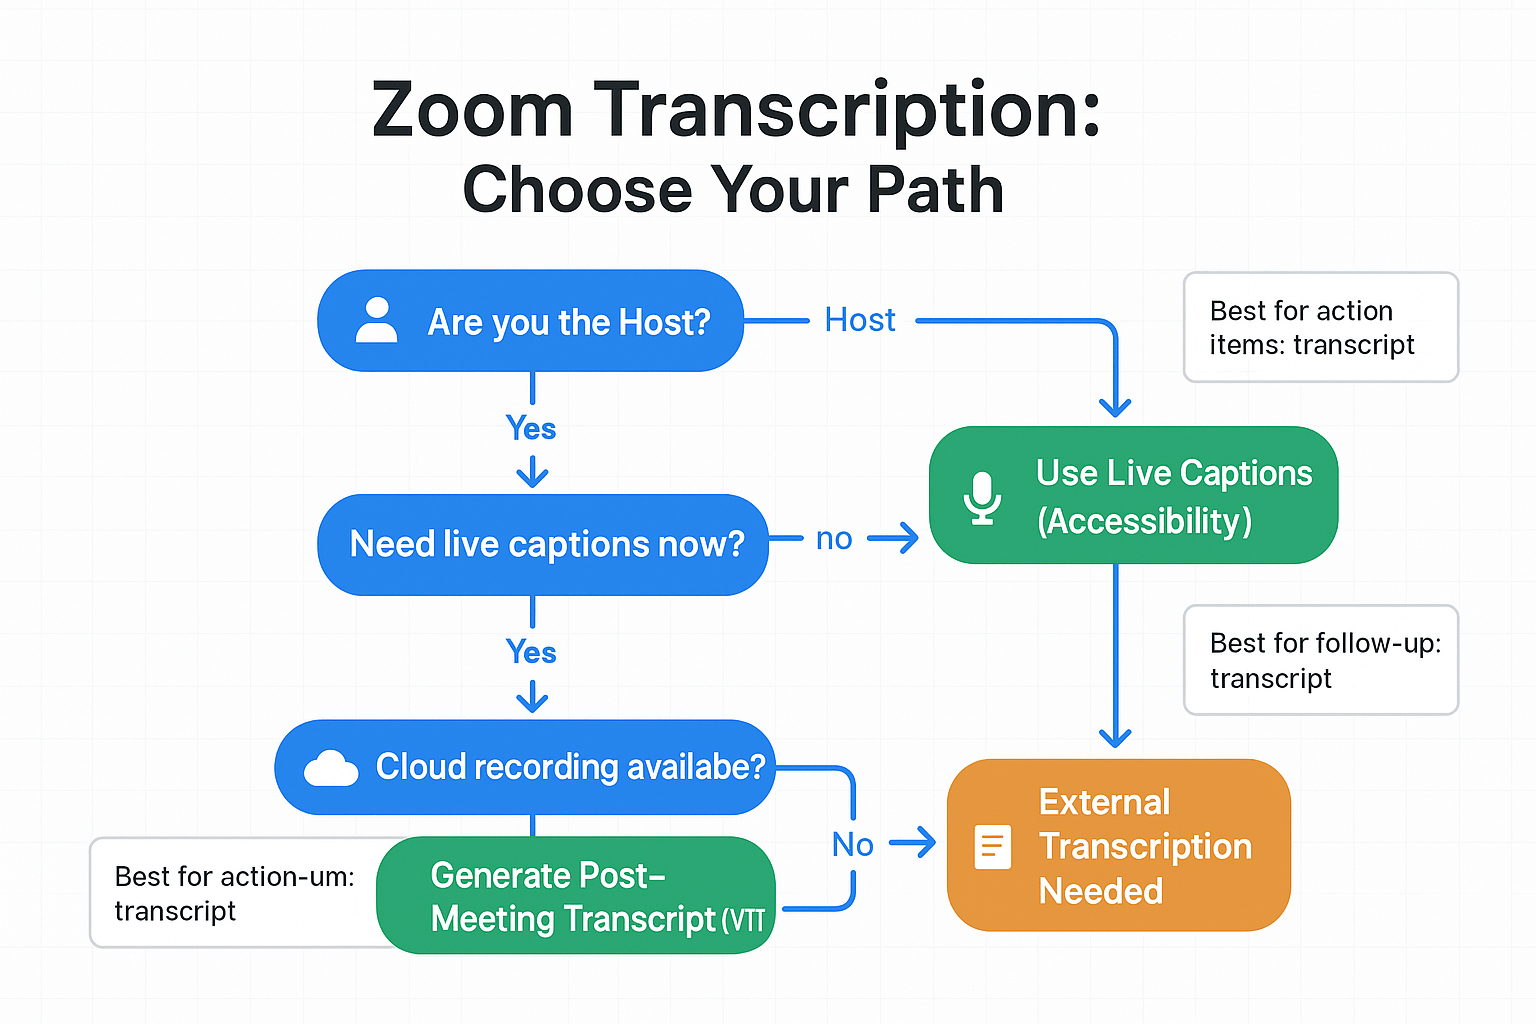
Mini decision flow: pick your path
- Need accessibility now? Use live captions.
- Need a downloadable record for follow-ups and search? Use a post-meeting transcript from a cloud recording.
- Need action items and a project memory? Use transcript plus a summary workflow (tasks, decisions, owners, next steps).
Why cloud vs local recording changes everything
This is the part that trips people up. Cloud recording is what usually unlocks Zoom’s native post‑meeting transcript generation and hosting. Local recordings are just files saved to a computer, they typically do not come with an automatic Zoom transcript file. If you only have a local recording (or no recording at all), you’ll need an external transcription step to turn audio into text.
What should you do before you transcribe a Zoom call? (consent, policy, and setup)
Before you transcribe a Zoom call, lock in three things: permission, a clear plan (live captions vs recording), and clean audio. This keeps you compliant, avoids awkward surprises, and saves you time fixing a messy transcript later.
Run a quick compliance pre flight
First, check your org or client rules. Company policy can be stricter than local law. If you’re unsure, treat it like a recording.
Decide what you will capture:
- Live captions only: best for access needs and quick reference.
- Recording plus transcript: best for search, quotes, and follow ups.
- No recording, post meeting notes: best when recording is not allowed.
Set expectations early:
- Purpose: notes, action items, and decisions.
- Retention: how long you will keep it.
- Sharing: who gets access and where it lives.
Use a simple spoken consent script
Keep it short and plain. Say it near the start, before you turn on captions or recording.
"Quick heads up: I’m going to transcribe this meeting to capture notes and action items. The transcript will be stored in our workspace and shared only with the attendees. Is everyone OK with that?"
Callout box:
"Always obtain consent and follow policy before recording or transcribing." Privacy and compliance best practice
Do the setup that makes transcripts cleaner
A few small steps can improve accuracy fast:
- Pick the spoken language in Zoom (or your transcription tool) before people talk.
- Ask speakers to use a headset or wired mic if possible.
- Reduce cross talk: use Raise Hand, call on people, or use the chat.
- Do a 10 second mic check: are levels peaking or too quiet?
- Ask everyone to set their display name. If the group is large, have people say, "This is Priya," before long updates. It helps later edits and speaker labels.
What should you do before you transcribe a Zoom call? (consent, policy, and setup)
Before you transcribe a Zoom call, lock in three things: permission, the method (live captions or a post meeting transcript), and audio setup. This keeps you compliant and saves cleanup time later.
Run a quick compliance pre flight
Start with your rules, not the tool.
- Check your company and client policy for recording and transcription
- Confirm what “allowed” means for this call (internal, client, candidate, research)
- Decide if you will record or only generate live captions (captions are still transcription in many policies)
- Set retention: how long you will keep the file and transcript
- Set sharing: who can access it, where it will live, and how it will be shared
If you are unsure, treat policy as stricter than the law. Laws also vary by country, state, and industry.
Use a simple spoken consent script
Say it near the start, then pause.
“Quick note: I’d like to record and transcribe this Zoom meeting to capture notes and action items. The transcript will be stored in our workspace and shared only with the project team, is everyone ok with that?”
If someone declines, stop and switch to manual notes.
Privacy and compliance reminder: “Always obtain consent and follow policy before recording or transcribing.”
Do the setup that improves transcript quality
Small changes make a big difference.
- Set the meeting’s spoken language correctly (so the engine guesses less)
- Ask people to use a headset or wired mic when possible
- Reduce cross talk: one speaker at a time, short pauses after questions
- Do a 10 second mic check, levels should not peak or crackle
- Ask everyone to use their real name in Zoom, and to say their name before long updates (helps speaker labels during edits)
How do hosts enable Zoom’s native transcription and download the transcript?
If you’re the host, the simplest way to transcribe Zoom meetings is to turn on cloud recording plus “audio transcript”, then record to the cloud. After the call, Zoom processes the file and adds a transcript you can download and share.
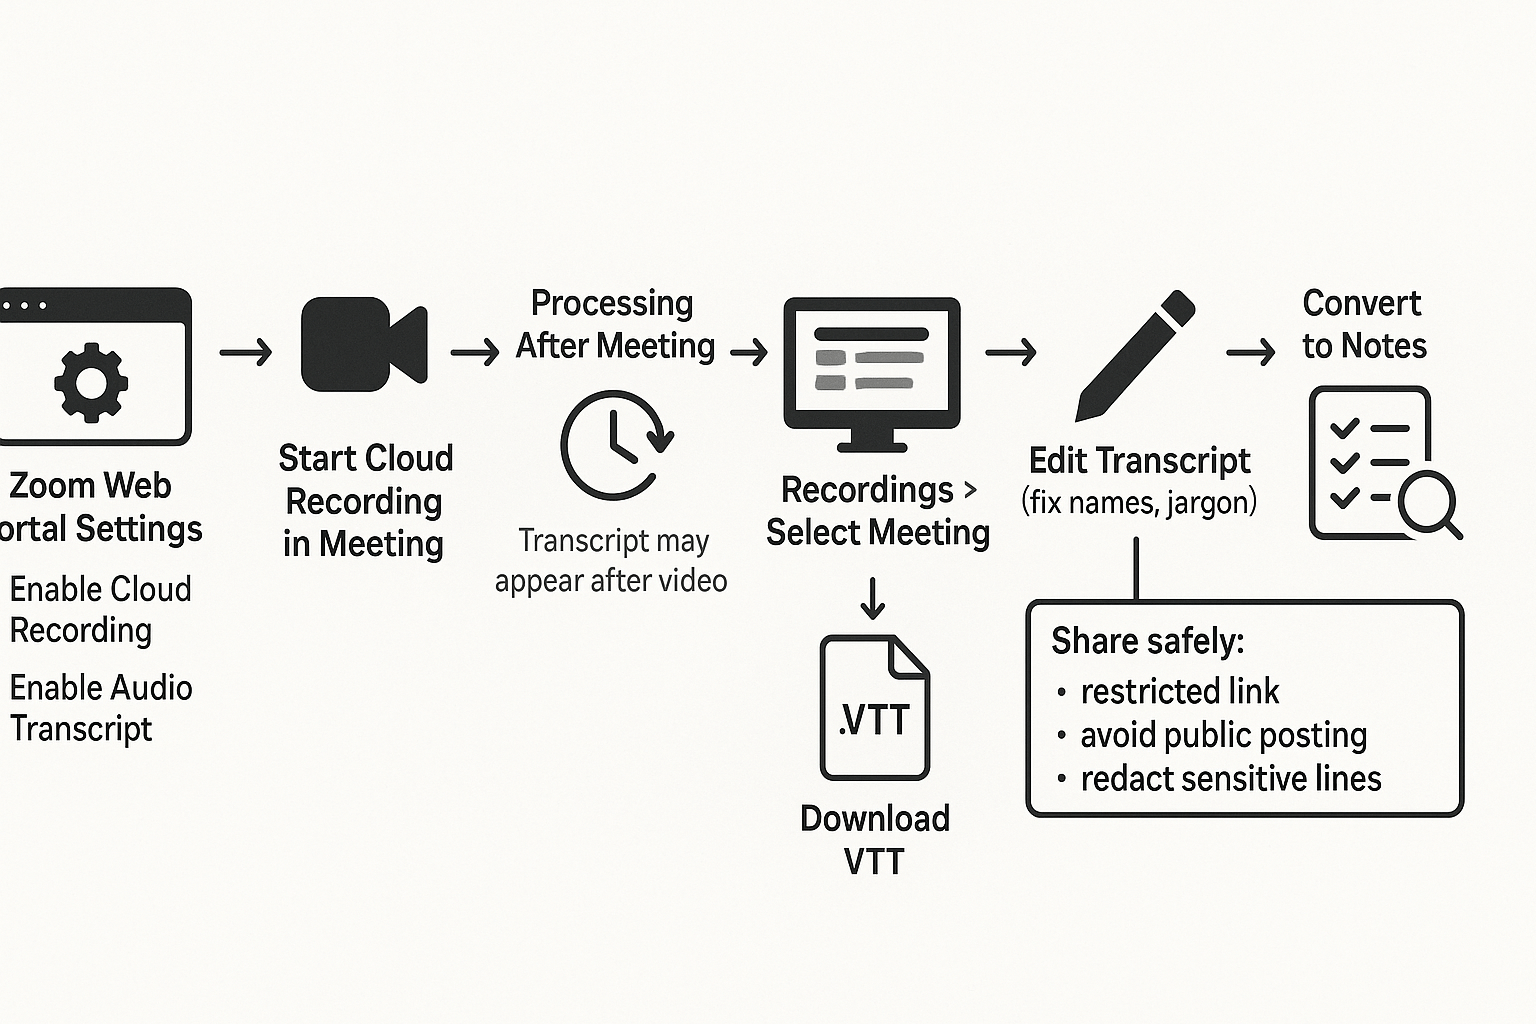
Step 1: Turn on cloud recording and the audio transcript option
Most of this is controlled in the Zoom web portal (and sometimes by your admin).
- Sign in to the Zoom web portal.
- Go to Settings.
- Under the Recording section, enable:
- Cloud recording
- The option to create an audio transcript (wording can vary by account)
- Save changes.
If you don’t see these toggles, or they’re locked, your plan or admin policy may block them.
Step 2: Start a cloud recording during the meeting
In the Zoom meeting:
- Click Record.
- Choose Record to the Cloud.
That’s the key. Local recording usually won’t produce Zoom’s cloud transcript file.
Step 3: Wait for processing after the meeting
When the meeting ends, Zoom processes the cloud recording. The video and audio may appear first. The transcript can show up later, even if the recording is ready.
So if you don’t see it right away, check again after a bit.
Step 4: Find the transcript in the web portal and download it as VTT
To locate and download the file:
- Open the Zoom web portal.
- Go to Recordings.
- Select Cloud Recordings.
- Click the meeting you need.
- In the recording details, find the transcript or closed caption file.
- Download it as a VTT file (WebVTT caption format).
VTT is useful because many tools can import it for captions, editing, or notes.
Step 5: Quick edits before you download (optional, but worth it)
If Zoom lets you edit the transcript in the portal, do a fast cleanup first:
- Fix speaker names (or label key voices)
- Correct product names and jargon
- Scan for numbers, dates, and action items
A five minute pass here can save a lot of confusion later. For a broader system, you can also follow a clean transcription workflow for searchable records after you export.
Share safely: control access and reduce risk
Transcripts often include sensitive details. A few simple habits help:
- Share using the Zoom recording link with access controls (authenticated users, passcode)
- Don’t post transcript links in public channels
- Redact private sections before sending the file outside your org
Common limitations hosts run into
- Transcription is missing: your account plan or admin may have it disabled.
- You recorded locally: you may not get a VTT from Zoom, so you’ll need another transcription path.
- Transcript quality is weak: noisy audio, cross talk, and heavy accents can reduce accuracy.
How can participants get a Zoom transcript if they’re not the host?
If you’re not the host, you usually can’t create or download Zoom’s post meeting transcript. The host controls cloud recording, transcription, and sharing. So your best move is to ask for the right setting or file, then use a compliant backup if needed.
Ask the host for one specific thing (copy and paste)
Pick one request based on what you need most.
Option A: Live captions you can save (fastest for participants)
Hi [Name], could you please enable Live Transcription in Zoom for this meeting and, if available, allow attendees to save captions? That would let me capture accurate notes for action items.
Option B: Share the official recording and transcript after the call
Hi [Name], could you share the cloud recording link after the meeting and include the transcript file (VTT or TXT) if Zoom generates it? I’ll use it to draft clean minutes and tasks.
Option C: Grant recording permission (only if your org allows it)
Hi [Name], could you allow me to record this meeting on my side for note taking? If yes, I’ll confirm consent at the start and store it per policy.
If the host can’t or won’t share, use a compliant alternative
You still have a few safe paths:
- Take notes from approved captions: If captions are on, capture key decisions, owners, and dates.
- Ask for an official minutes doc: Many teams prefer a single source of truth.
- Record only what you’re allowed to record: If policy allows, record your own mic and system audio feed, then transcribe it later. Keep the file access tight, and delete it on schedule.
If you need a repeatable notes process, it helps to follow the same structure you’d use to transcribe an interview securely so your transcript turns into clean outcomes.
What not to do (high risk)
- Don’t record secretly, even “just for notes.”
- Don’t bypass admin controls or disabled recording settings.
- Don’t upload client or regulated calls to tools that break policy, contracts, or data rules.
These missteps can trigger privacy issues, contract violations, or compliance trouble.
How do you transcribe a Zoom meeting when cloud transcription isn’t available?
If Zoom cloud transcription isn’t available, you can still transcribe Zoom meetings by using a local recording, exporting the audio, or using any external transcription tool that accepts audio or video files. The simplest path is: find your recording files, upload the audio track (it’s usually cleaner), then turn the raw transcript into readable notes with speakers, headings, and action items.
Start with what files you actually have
If you have a Zoom local recording, you’ll usually end up with:
- MP4: the meeting video (often includes shared screen)
- M4A: an audio-only file (often easiest and fastest to transcribe)
Zoom typically shows the save location when the meeting ends. It also tends to store local recordings in a folder named by date and meeting title. If you’re hunting for files later, search your computer for the meeting date plus “Zoom” or “double_click_to_convert.”
If you only have audio, stick to common formats your tool can read:
- M4A (common from Zoom)
- MP3 (small file size)
- WAV (bigger file, but stable quality)
If your audio is M4A, this guide on transcribing M4A into text can help you pick a method and export the right format.
Clean the audio first (small fixes, big gains)
Before you upload anything, do quick cleanup. This often improves accuracy more than people expect.
- Trim dead time at the start and end
- Cut loud dings (calendar pings, Slack sounds)
- Pick one channel if it’s stereo but only one side is loud
- Normalize volume so quiet speakers aren’t lost
Keep it simple. The goal is steady voice volume and less noise.
Turn a raw transcript into usable meeting notes
Most tools output either captions (like VTT) or plain text. Either way, you’ll want to edit for reading and follow-up.
- Add punctuation and split long blocks into short paragraphs
- Insert headings like “Agenda,” “Decisions,” and “Next steps”
- Fix speaker names (or label as Speaker 1, Speaker 2)
- Pull out decisions and action items with owners and dates
A fast pattern is: skim once for structure, then search for key words like “decide,” “next,” “I’ll,” “can you,” and “by Friday.”
Alternatives checklist: how to choose an external transcription method
Use this criteria list to compare tools without getting stuck on brand names:
- Accuracy on real calls (cross-talk, accents, jargon)
- Multilingual transcription or translation support
- Export formats you need (TXT, DOCX, PDF, VTT, SRT)
- Bot-free options (upload files instead of joining meetings)
- Retention controls (delete, storage region, access logs)
- Sharing permissions (role-based access, guest links, team projects)
How to transcribe a Zoom recording step by step (example workflow)
These steps show how to transcribe Zoom meetings using TicNote Cloud as an example. The same workflow fits most upload and transcribe tools: put the recording in a workspace, pick language and settings, generate a transcript, then turn it into notes you can reuse.
Web Studio workflow (detailed)
- Create a project, then add your Zoom recording
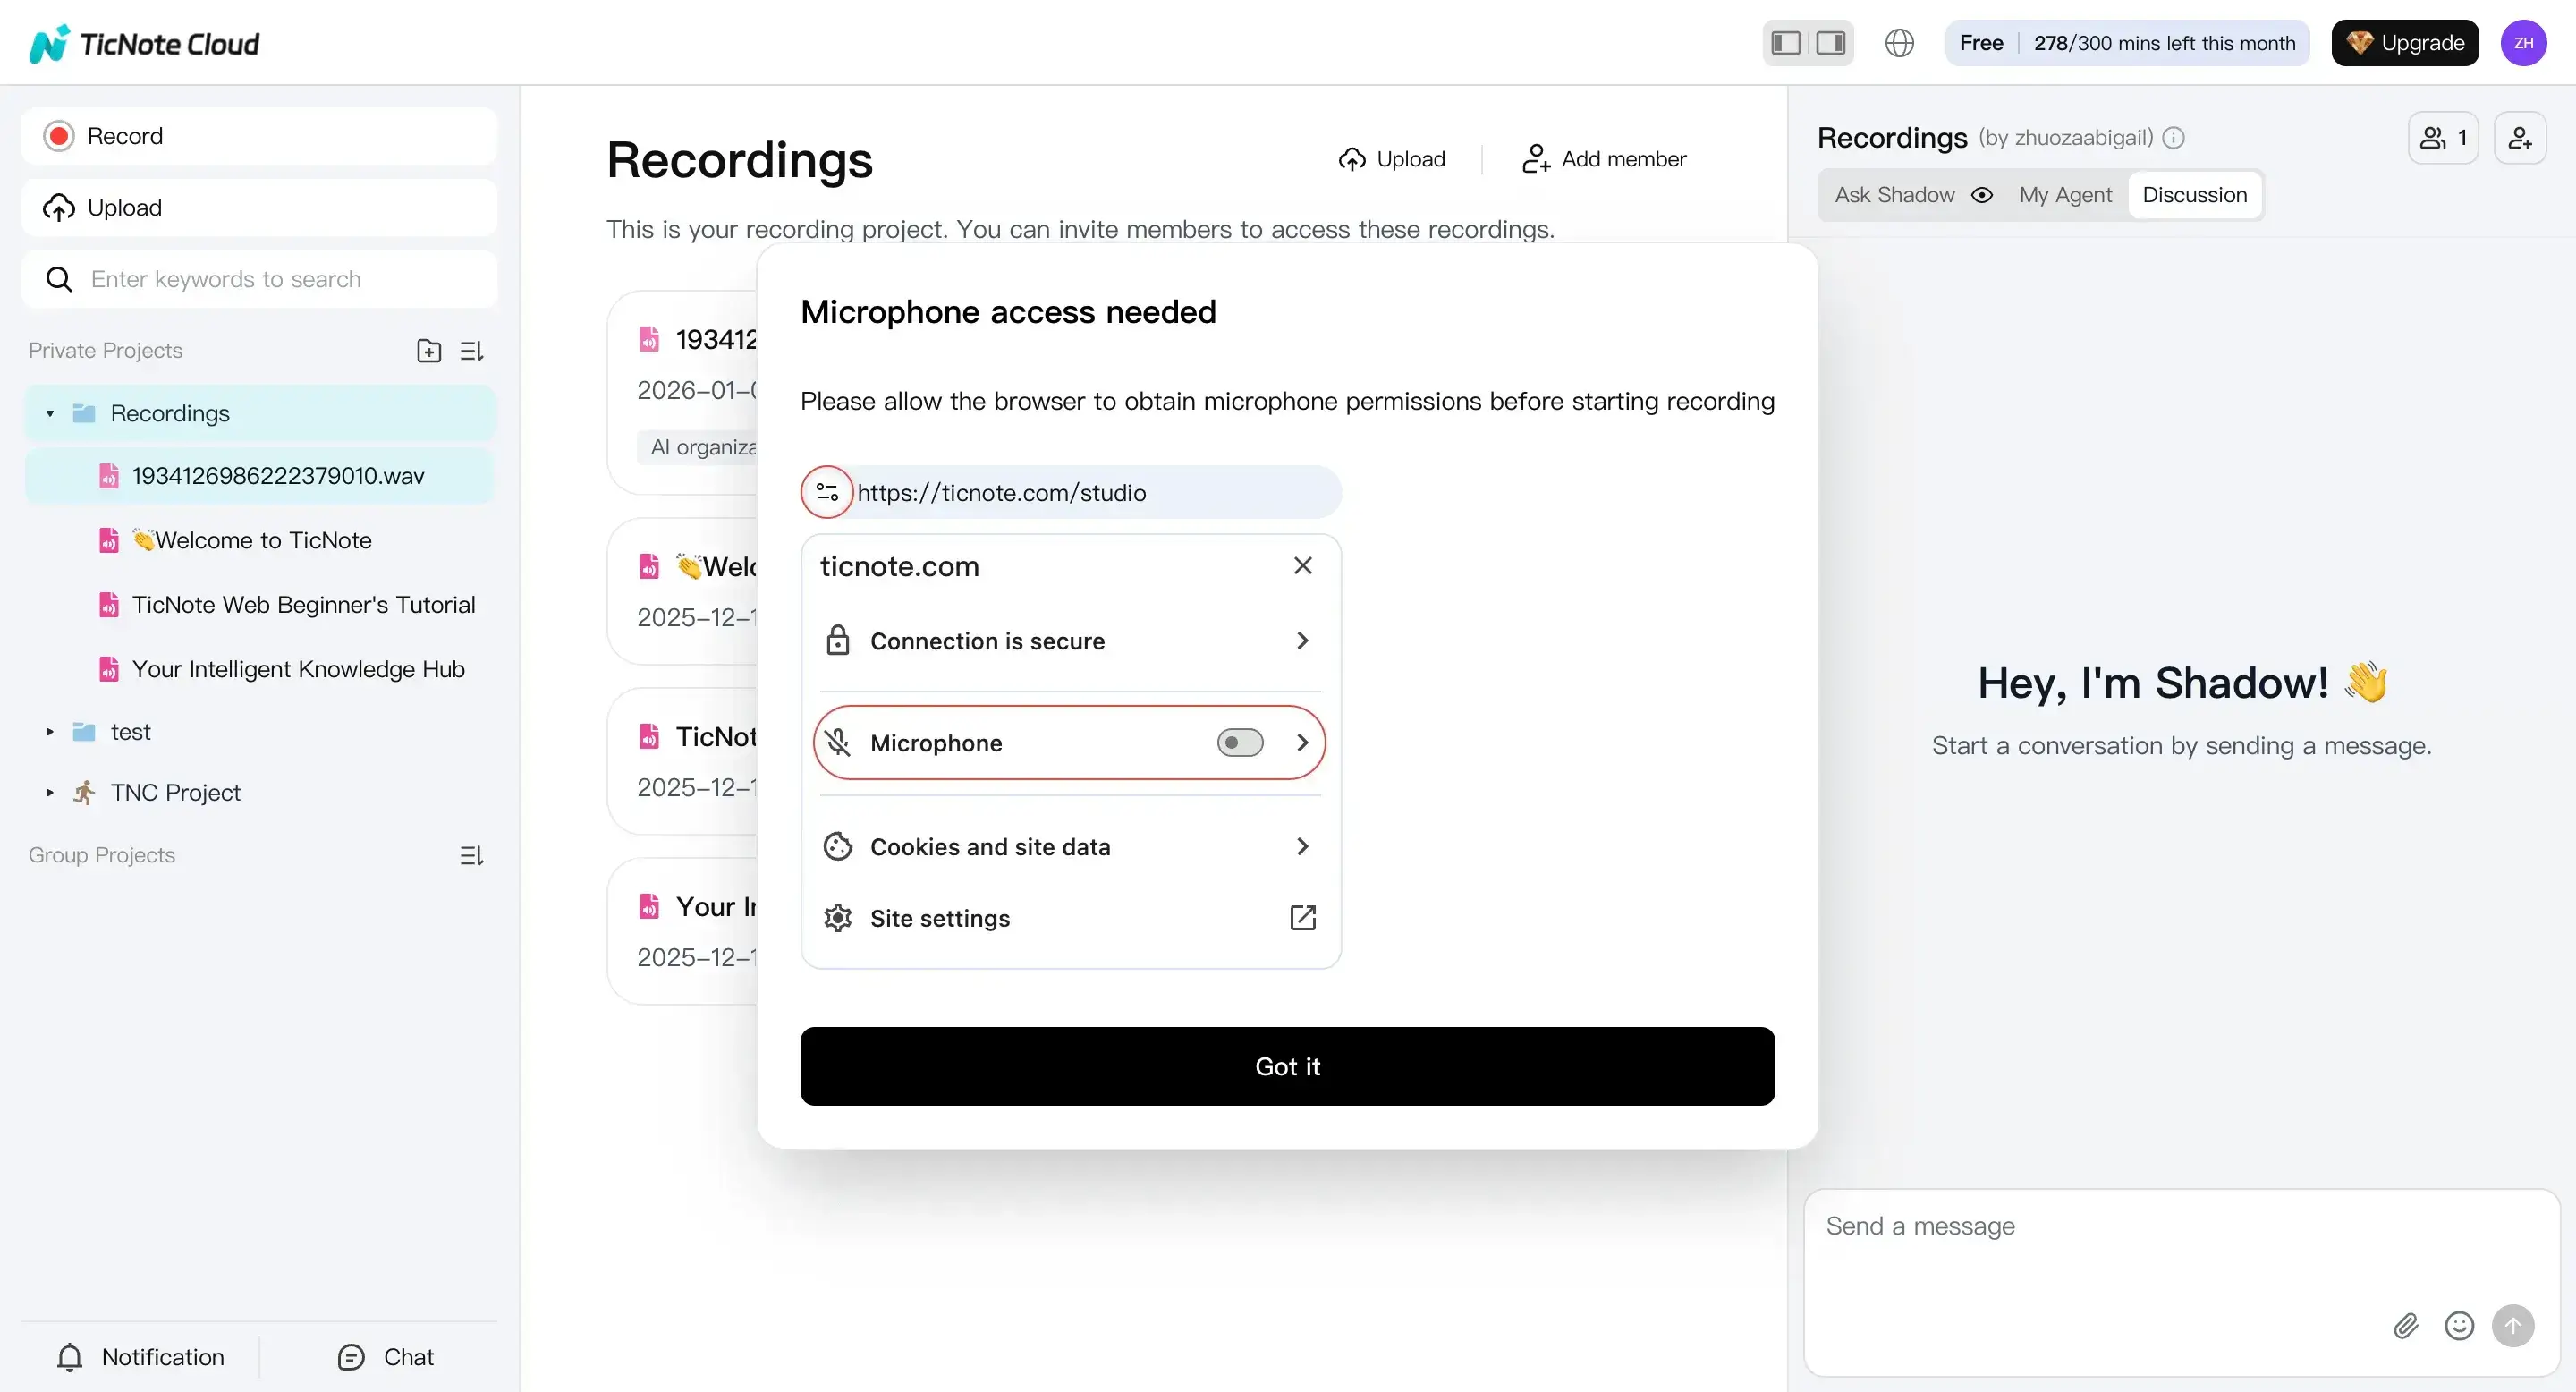
Start in the TicNote web studio. Create a new project for the meeting (or the whole client or team). Then click Upload to add your Zoom MP4 (video) or M4A (audio).
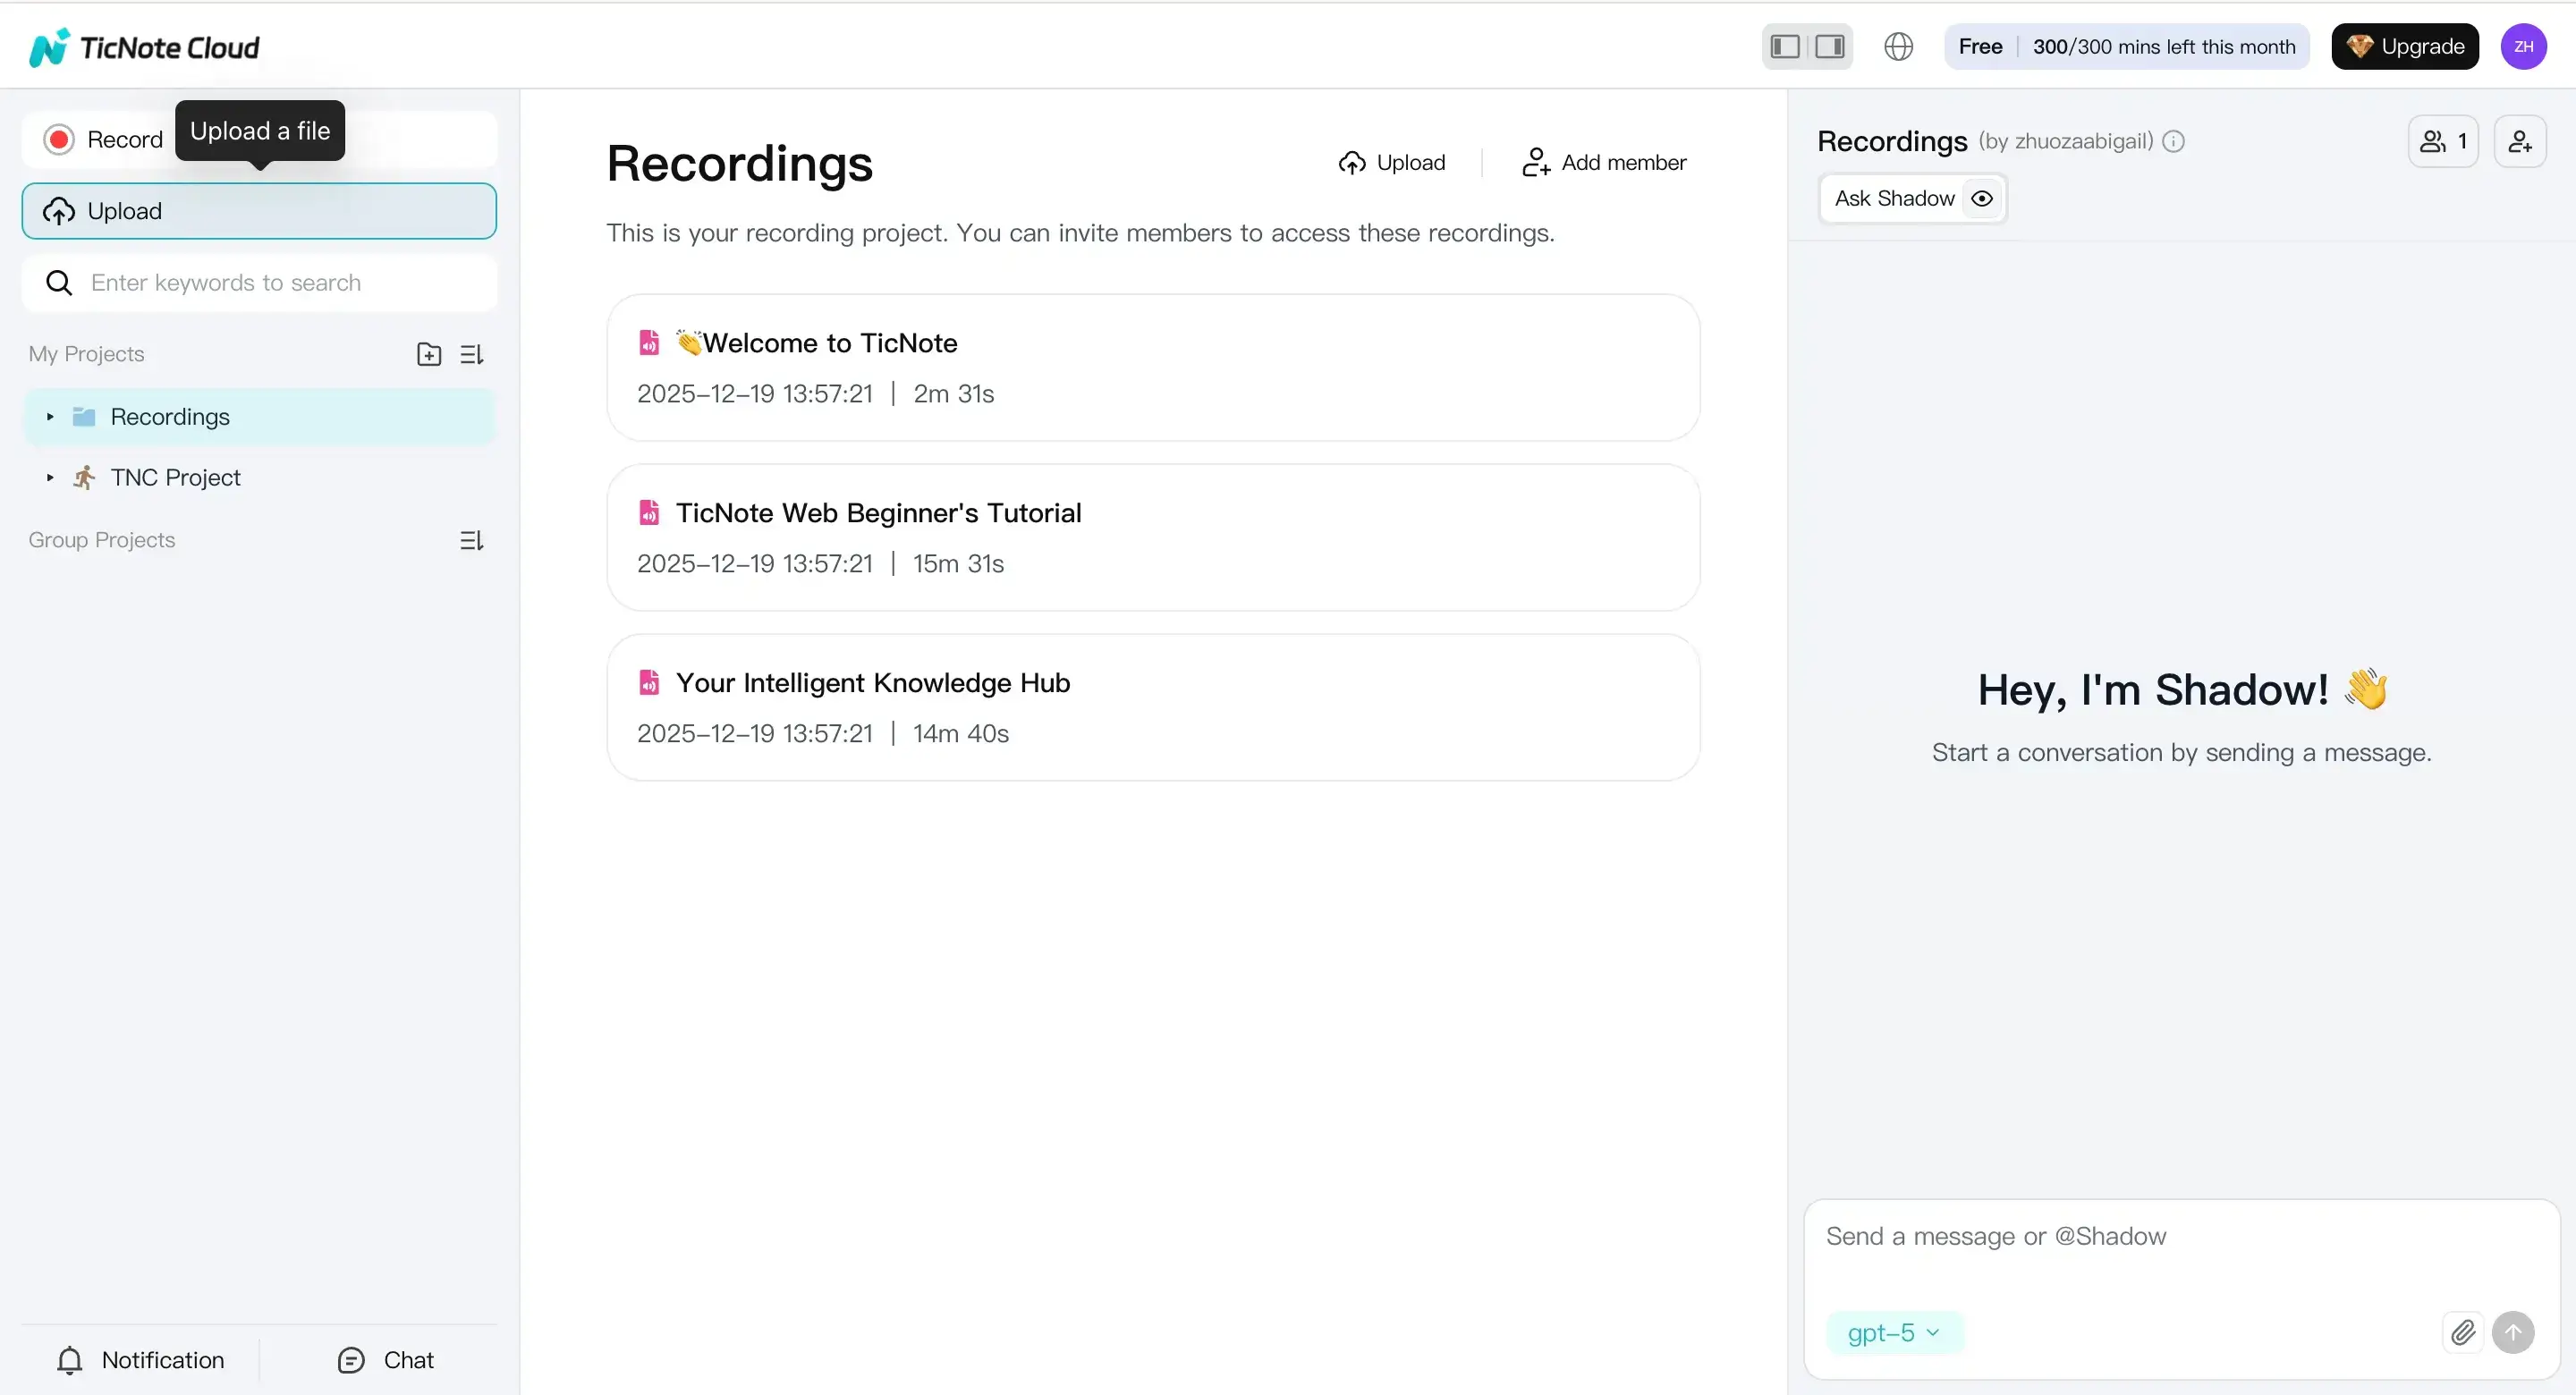
If you can’t upload a Zoom file, you can also make an audio-only recording (if your policy allows it). Click Record, allow microphone access, and finish the recording. TicNote saves it to the default Recordings project.
- Set language and model before you generate the transcript
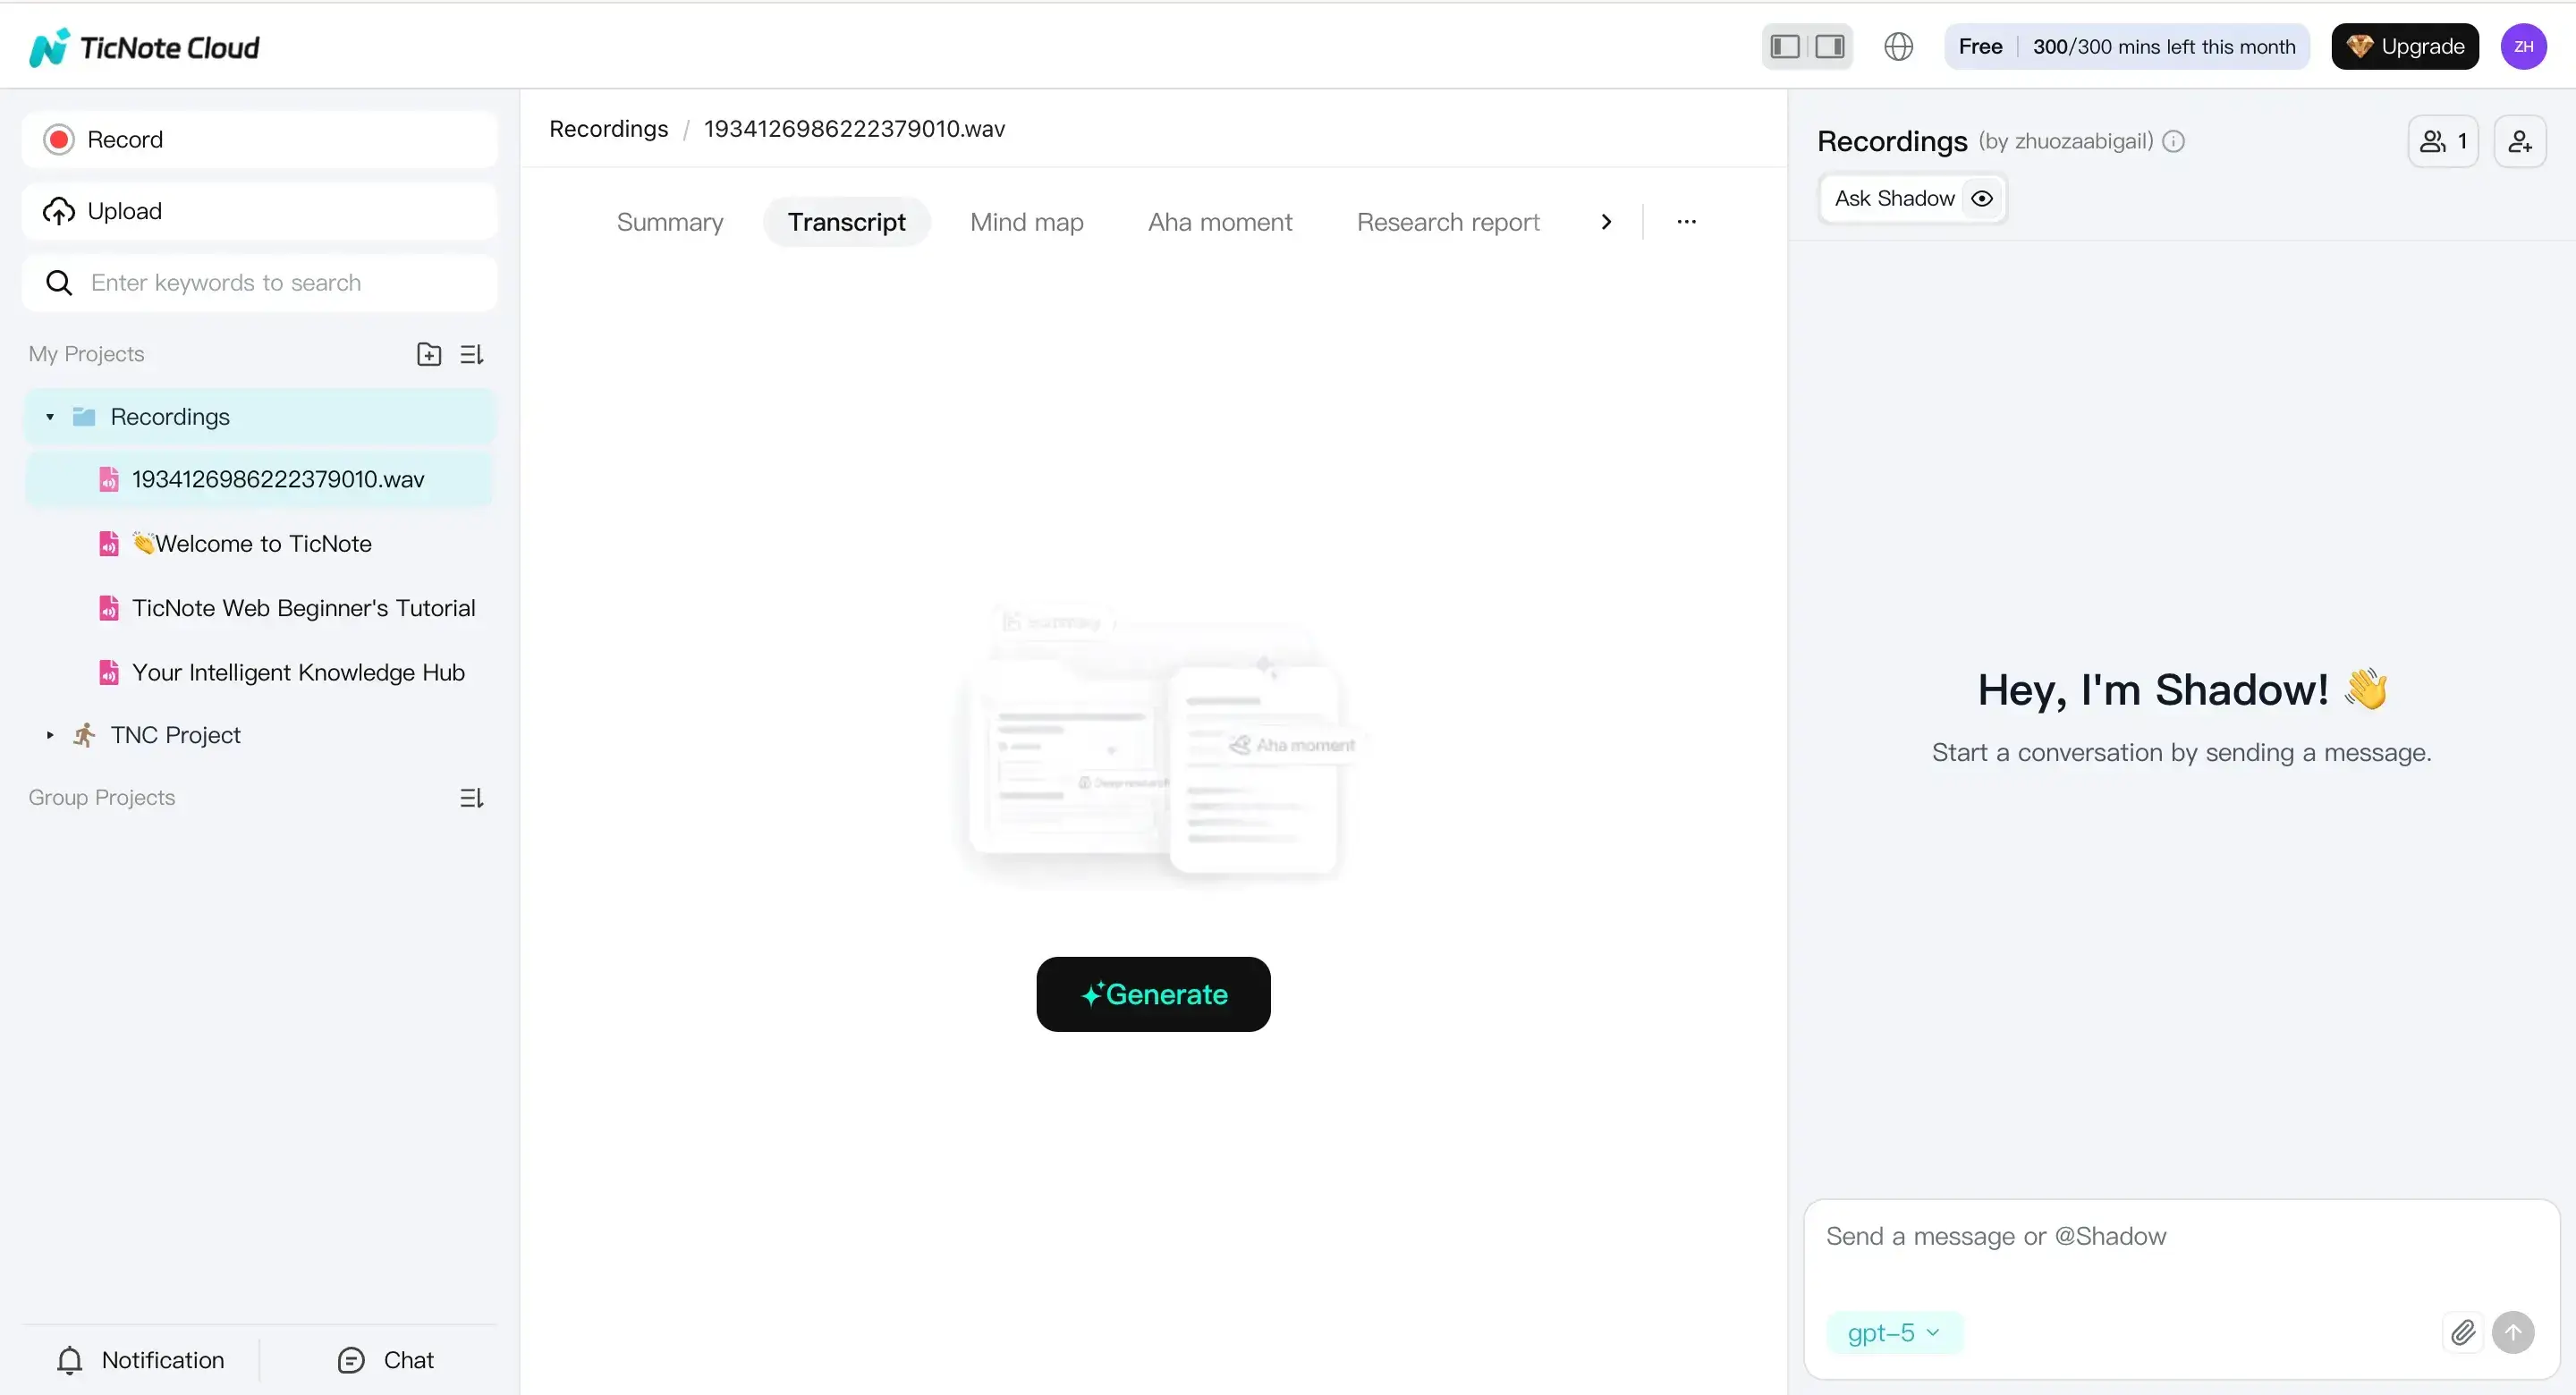
Select the file from the left panel. Open the Transcript tab, then click Generate.
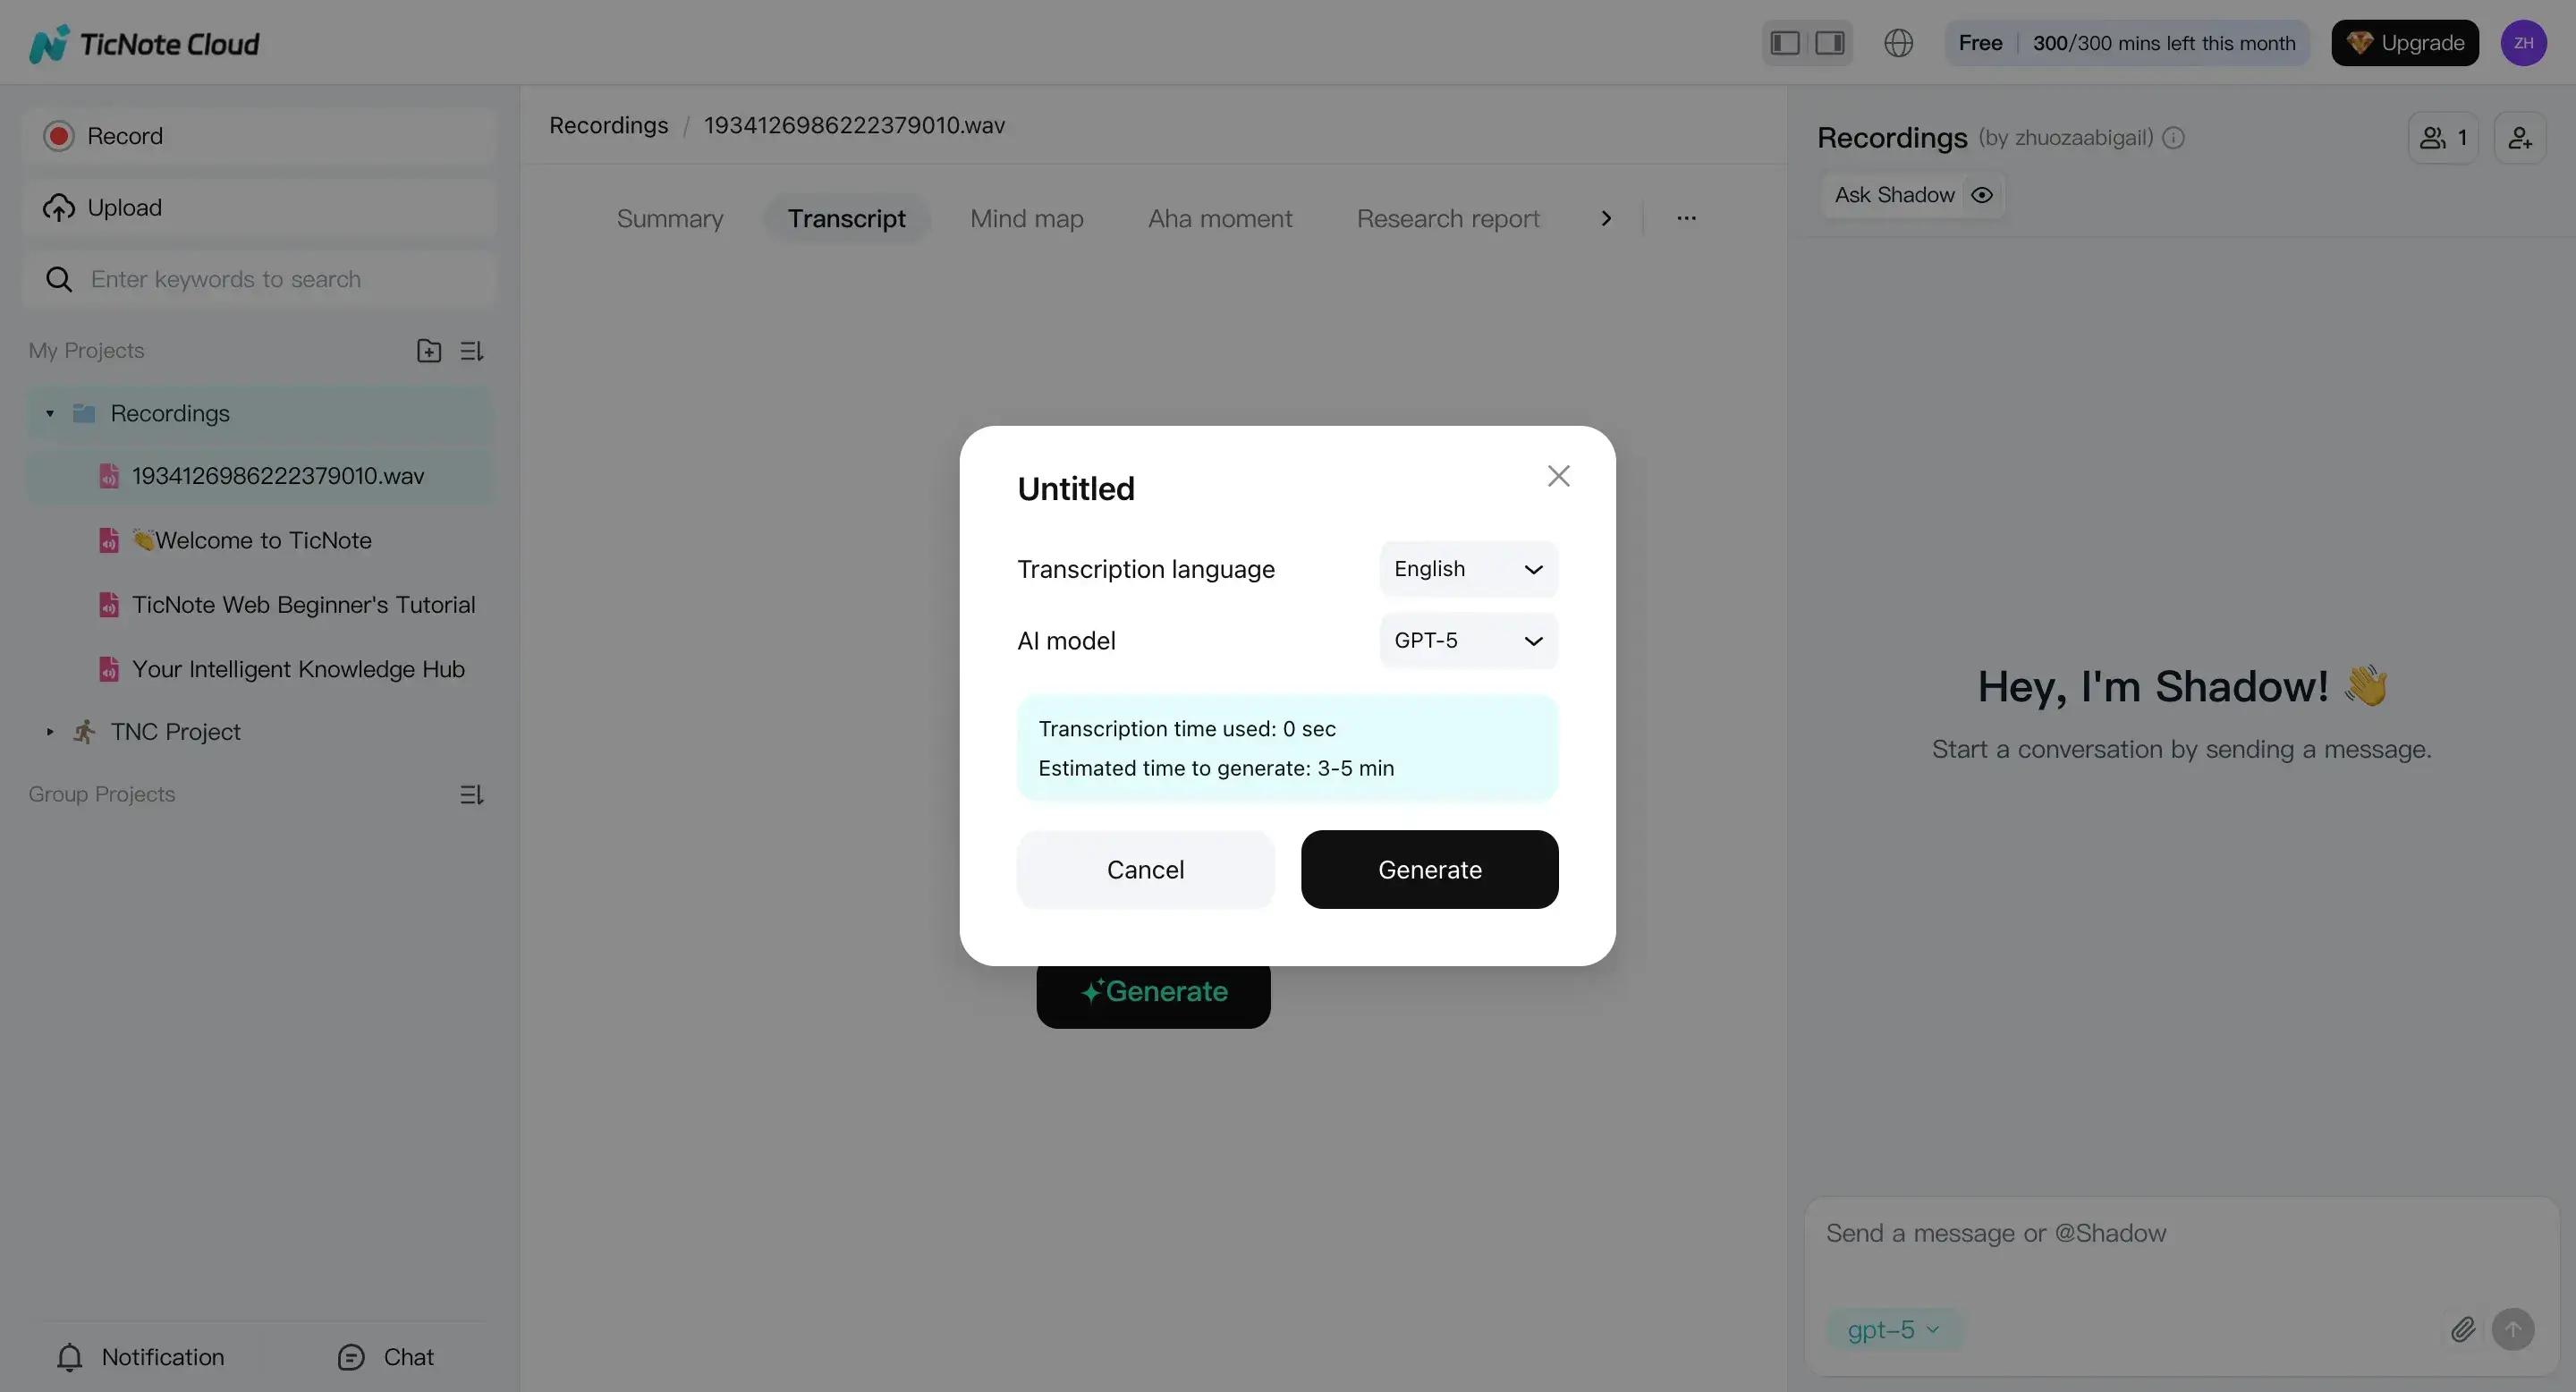
In the pop-up, choose the spoken language(s). Then pick the AI model or settings your org prefers. Confirm to start the transcription job.
- Clean up the transcript and turn it into notes
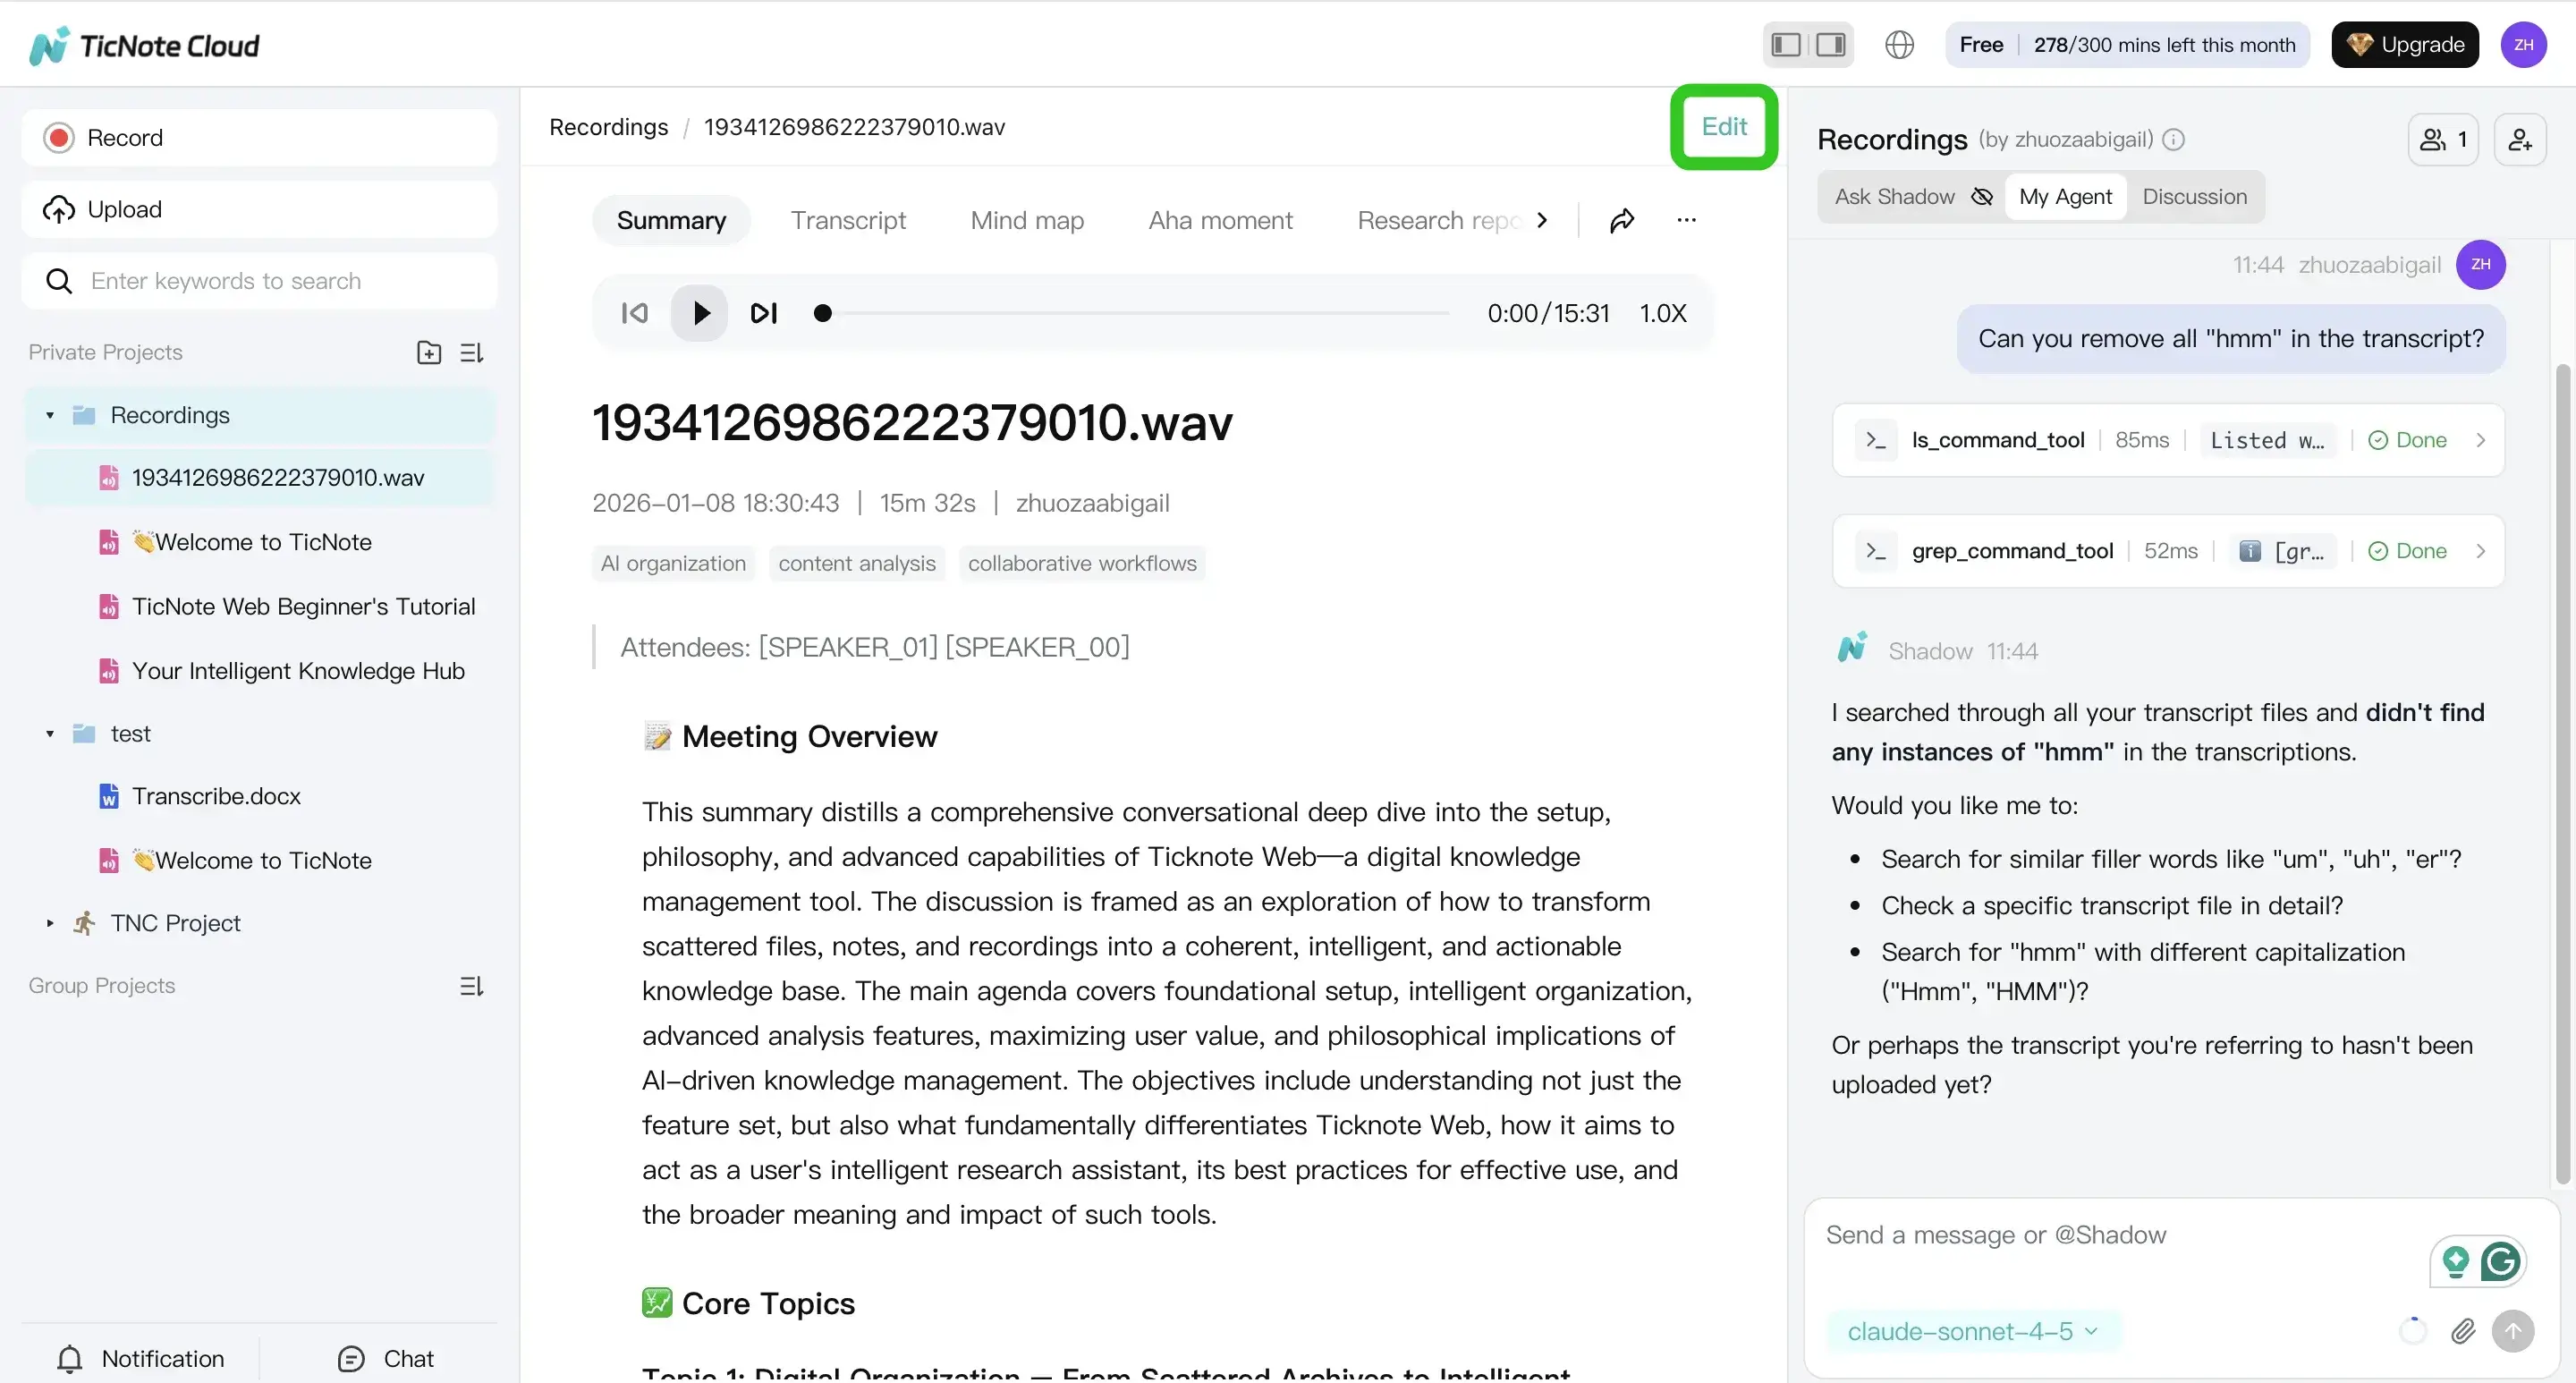
Once it’s ready, read through the transcript in the editor. Fix names, acronyms, and any domain terms (product names, customer orgs, medical or legal jargon). Keep edits easy to verify by listening to the original recording as needed.
You can also ask Shadow AI to help, like: “Rewrite speaker names,” “List action items,” or “Draft a follow-up email from this call.”
Optional: generate a mind map for a fast review. It helps you spot the main topics and decisions in seconds.
- Export what you need, then keep it searchable in the project
When the transcript and notes look right, export them for sharing.
- Transcript: TXT
- Summary or structured notes: Markdown, DOCX, or PDF
- Mind map: PNG or Xmind
To export, open the file menu and choose the transcript export options.
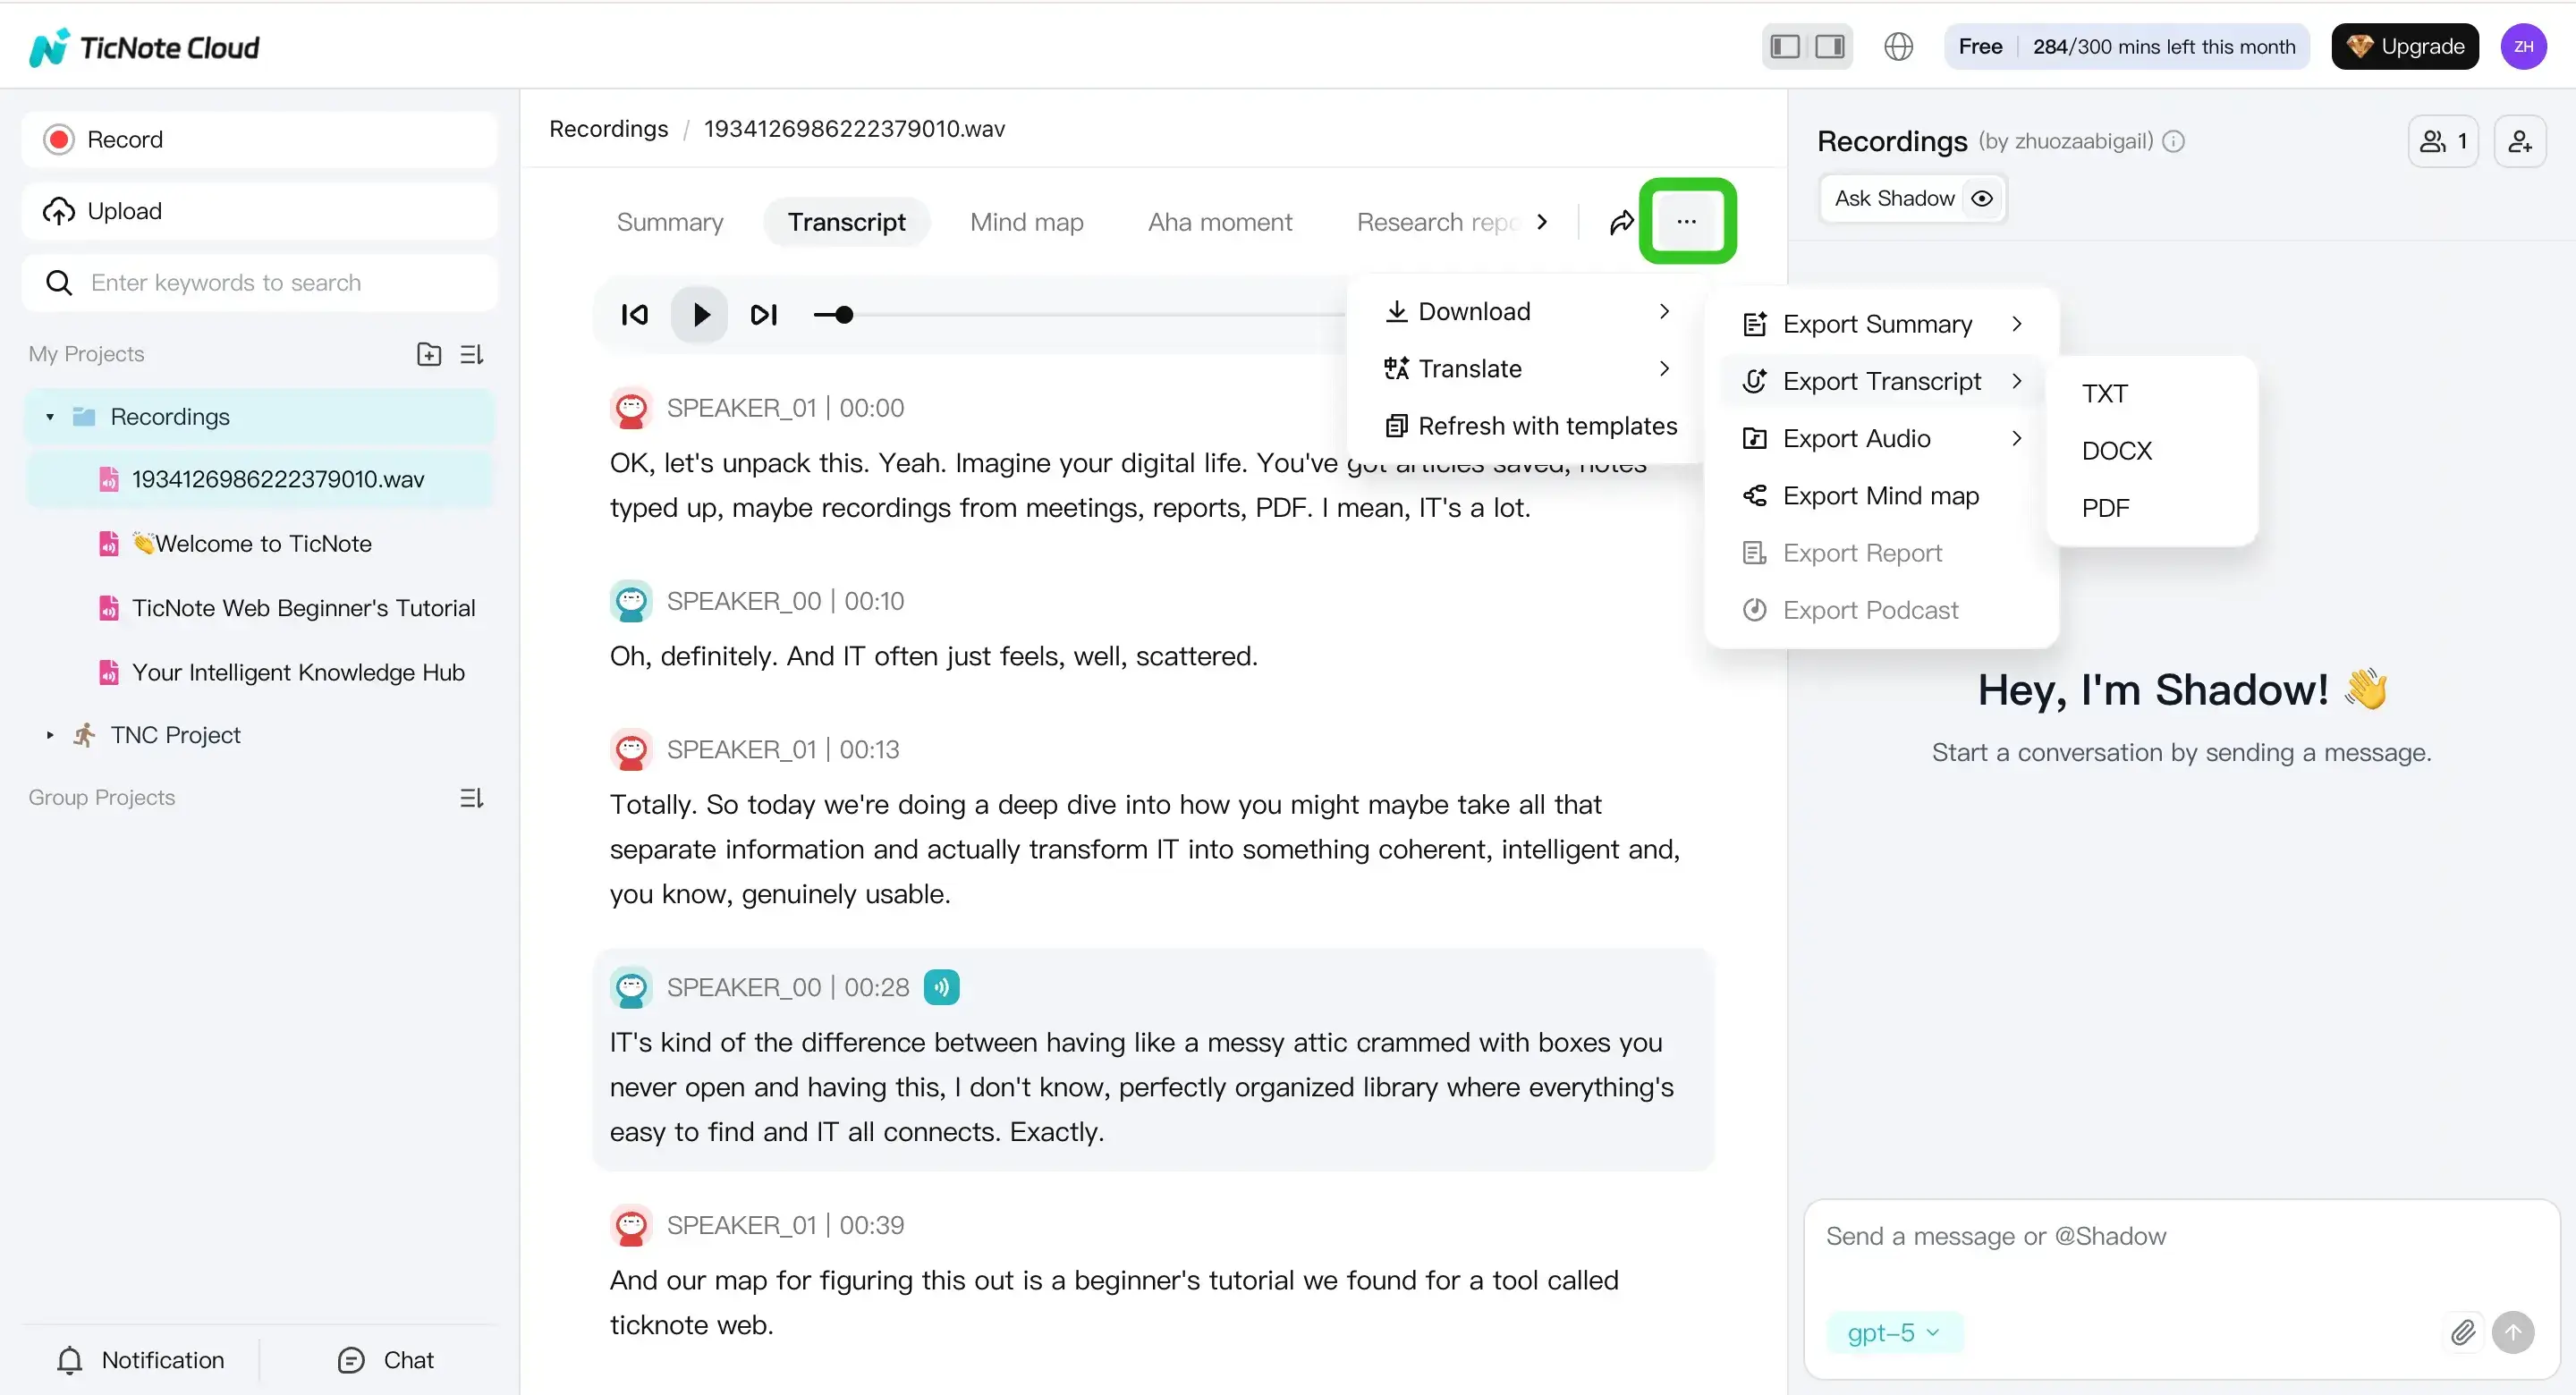
Finally, store the transcript, summary, and follow-ups in the same project. That way you can search across meetings later, and build a running knowledge base.
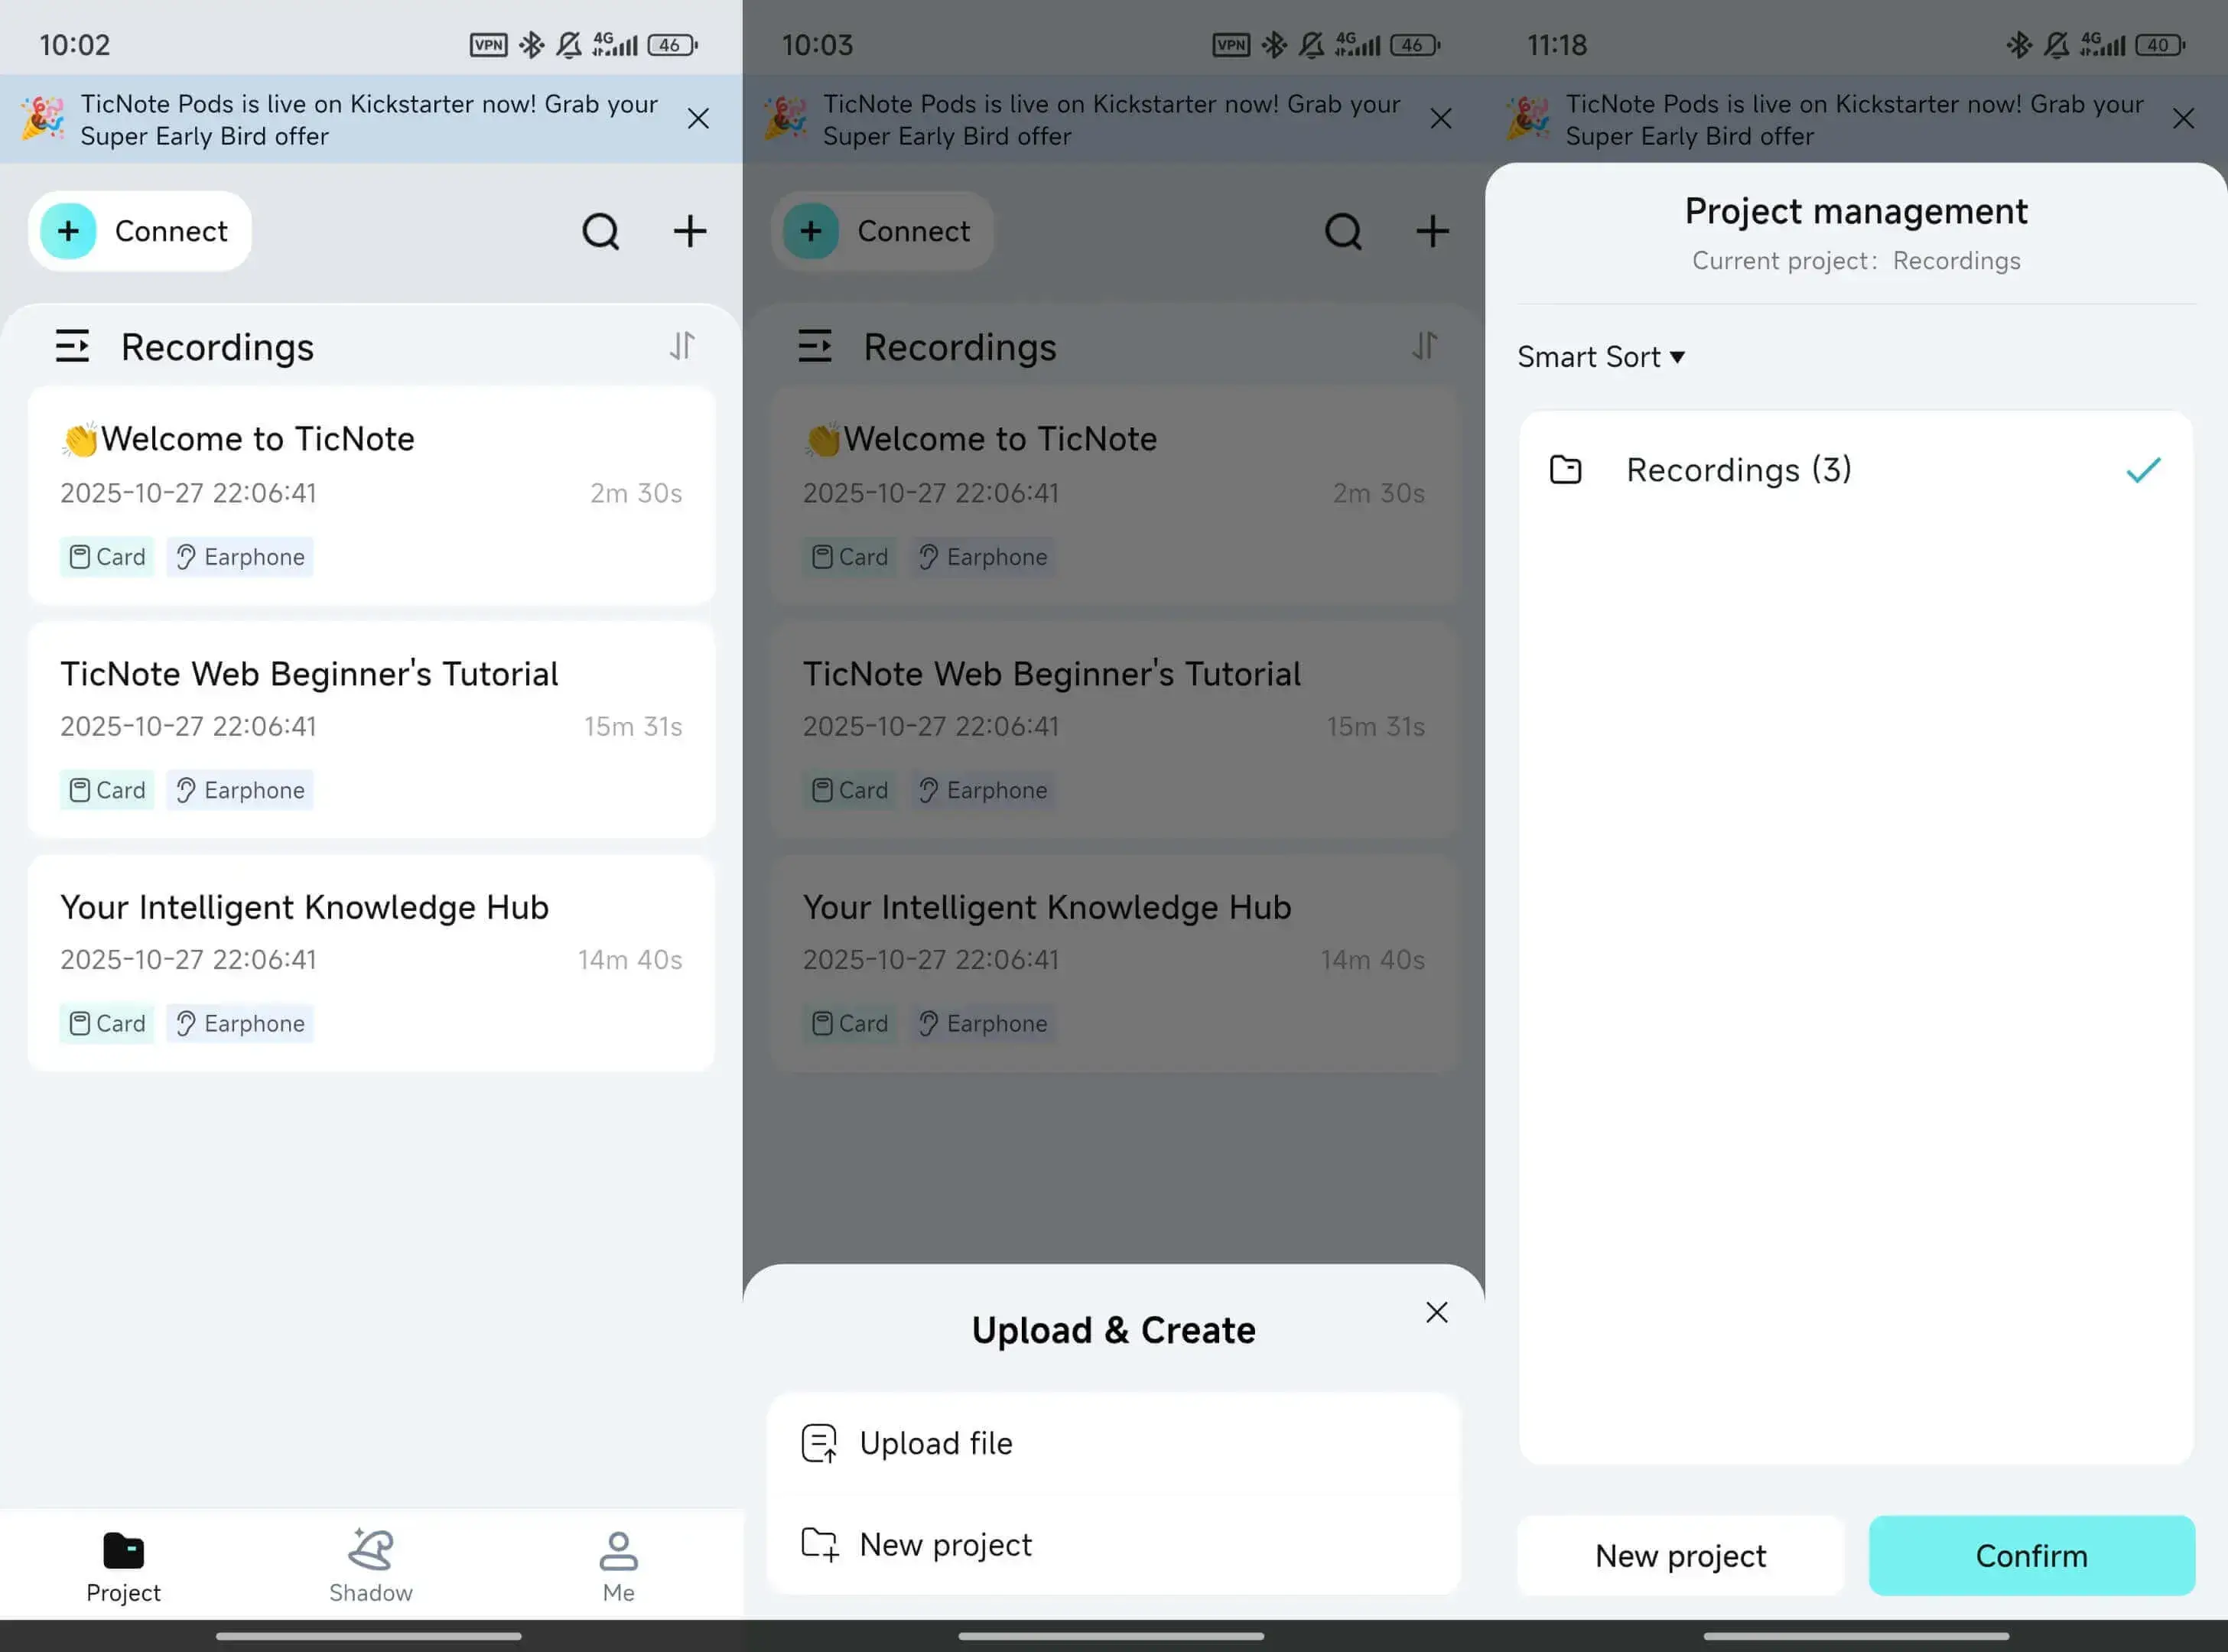
App workflow (quick version)
On mobile, you can do the same core steps: add the file to a project, generate the transcript, then export. Tap the add button to upload your MP4 or M4A into the right project.
For more general guidance on uploads and transcription choices, this step-by-step audio transcription workflow applies to meetings, interviews, and research too.
Try TicNote Cloud for Free. Create one project per team or client so transcripts, action items, and follow-ups stay in one place.
What features are exclusive to TicNote Cloud for Zoom transcription workflows?
Once you have a transcript, the real win is what you can do next. TicNote Cloud helps you turn Zoom call text into decisions, tasks, and repeatable notes, without relying on a meeting bot. It’s the “after” layer that makes how to transcribe zoom meetings useful at work.
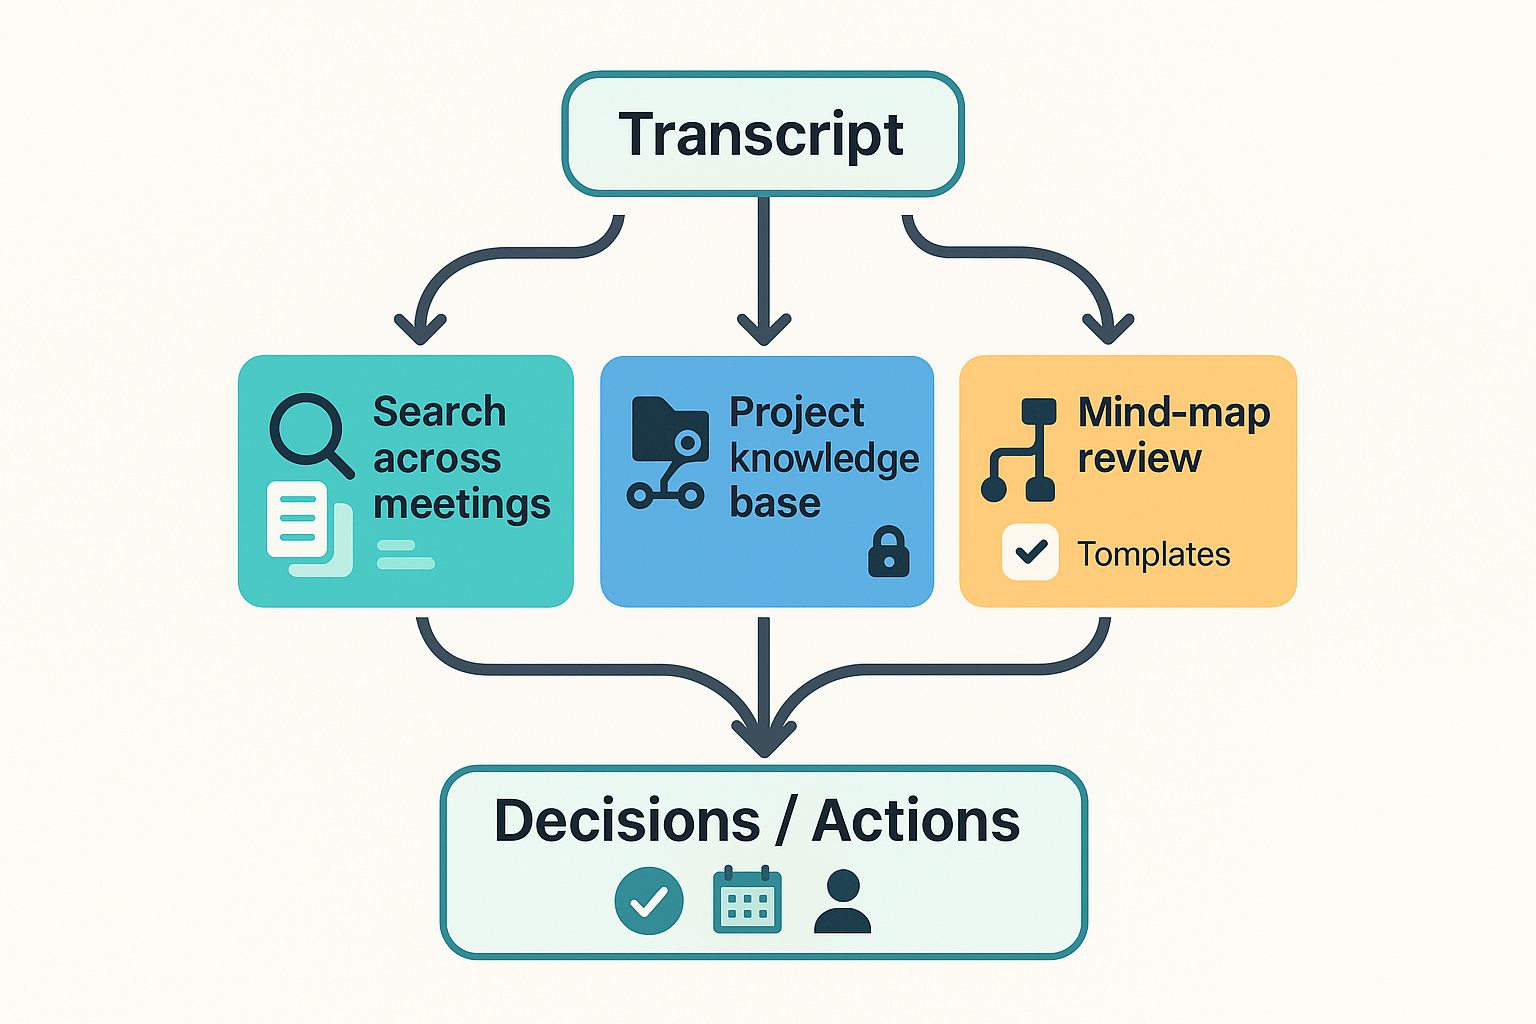
Search answers across many meetings (not one file)
A single transcript is easy to skim. The hard part is recall across weeks.
With cross meeting Q&A (question and answer), you can ask things like:
- “What did we decide about pricing, and who owns it?”
- “List open questions from customer calls this month.”
- “Which meeting mentioned the migration risk?”
Because it can work across folders and projects, you don’t have to remember which Zoom recording had the detail.
Keep a project knowledge base with clean sharing
Transcripts often live in random places: Zoom, Drive, Slack. That breaks follow ups.
TicNote Cloud keeps transcripts, summaries, docs, and next steps together in a project space. You can also share a project with role based access (Owner, Member, Guest), so the right people can review notes without resharing files every time.
Standardize notes with mind maps and templates
Recurring meetings need the same output each time, or people stop reading.
Two practical tools help here:
- Mind map review: scan the meeting structure fast, then jump to the part you need.
- Templates: use the same format for 1:1s, sales calls, and research interviews, so decisions and action items always land in the same place.
Support multilingual teams with one source of truth
If your team works in many languages, keep one source transcript for audit needs. Then generate translated notes for each stakeholder group, while preserving the original for reference.
This helps most if your Zoom plan is limited, your org is “no bot,” or you need searchable recall across months, not just one transcript.
How do you improve Zoom transcription accuracy and fix common problems?
To improve Zoom transcription accuracy, fix the audio first. Most errors come from noise and people talking at once. Start with these quick wins before you change any settings.
Accuracy checklist (do these first)
- Use a headset mic or a close mic, not laptop audio.
- Cut echo: mute extra devices, use headphones, close big rooms.
- Keep it to one speaker at a time. Overlap breaks most speech tools.
- Repeat key items: names, numbers, URLs, dates, and acronyms.
- Set the right spoken language before you start. Don’t guess.
If you’re still seeing mistakes, look for patterns. A noisy room and cross talk are the top drivers.
Troubleshooting matrix: symptom, cause, fix
| Symptom | Likely cause | Fix |
| “Live Transcript” button is missing | Account, group, or admin setting is off, or your role can’t enable it | Ask the host or admin to enable captions or transcription in Zoom settings, then rejoin the meeting |
| No VTT transcript file shows up | It was not a cloud recording, or transcription was not enabled for the recording | Confirm the meeting was recorded to the cloud and that audio transcript was turned on before the meeting |
| Transcript is in the wrong language | Language was not set, or people switch languages mid call | Set the correct language at start, and keep one main language per segment if you can |
| Processing takes a long time | Long meeting, big file, or service queue | Wait, check back later, and avoid stopping and starting many short recordings |
| Speaker names are missing | Speaker ID (diarization) limits, poor audio separation | Ask people to say their name before they speak, and use a better mic per speaker |
Fast edit pass before you share
Do a quick clean up pass so the transcript is safe to send.
- Skim for names, product terms, and jargon. Fix those first.
- If you export VTT into notes, remove extra timestamps and blank lines.
- Pull action items into a short list. Add an owner and a due date.
Before you share outside your team, do a 30 second quality check. Make sure the key decisions and numbers are right.
FAQ: Zoom meeting transcription (captions, transcripts, downloads, and privacy)
Can Zoom transcribe meetings for free, and what plan do you need?
Sometimes. It depends on your Zoom plan and what your admin allows. Many teams can use live captions, but post meeting transcripts often require cloud recording and the right account settings.
Can you get a Zoom transcript without recording the meeting?
Sometimes. If the host enables live captions and lets participants save them, you can save what appears on screen. If saving captions is not allowed, you will not get a transcript without a recording or another approved method.
Where do Zoom local recordings save, and what files do you get?
Local recordings usually save on the host’s computer in a Zoom folder. You often get an MP4 video and an M4A audio file. Some accounts also create a captions file, but it is not guaranteed.
How do you download a Zoom transcript from a cloud recording?
Go to the Zoom web portal, open Recordings, then Cloud Recordings. Pick the meeting and download the transcript file if it exists. The file is often VTT (a caption format).
How do you convert a Zoom VTT transcript to Word or Google Docs?
The fast way is copy and paste the text into a doc. For cleaner formatting, open the VTT in a text editor and remove time stamps. Then paste into Word or Google Docs and add headings, bullets, and action items.
How long does Zoom transcription take after a meeting?
It varies by meeting length and server load. Some transcripts appear in minutes. Others can take much longer, especially for long calls.
Is it legal to record and transcribe a Zoom call?
It depends on where people are located and your company policy. A safe baseline is: tell everyone, get consent, and follow retention rules. If you work with clients, ask what they allow before you record.
Do Zoom transcripts include speaker names?
Sometimes. If Zoom can identify speakers, it may label them. If not, you may see generic labels or no names at all. Clear audio and one person speaking at a time helps.
Which transcript format should you choose, VTT, SRT, TXT, DOCX, or Markdown?
Use the format that matches your goal:
- VTT or SRT: best for captions and video tools
- TXT: simplest for search and quick edits
- DOCX: best for sharing and formal notes
- Markdown: best for structured notes in docs and wikis
Try TicNote Cloud for Free if you need bot-free capture, multilingual notes, fast summaries, and a searchable knowledge base when Zoom’s native options fall short.