
TL;DR: Transcribe audio to text in Word (what to check first)
If Word is missing Transcribe or it won't process your file, you can still get a clean transcript fast by using TicNote Cloud for upload or live transcription, then pasting the text into Word. If you want to use Word Transcribe, first confirm you're signed into the right Microsoft 365 account, you're using a supported Word experience (often Word for the web), and your internet is stable.
You're trying to get work done, but the Transcribe button may be missing or stuck. That wastes time and breaks your flow. A practical fallback is to transcribe in TicNote Cloud, then bring the finished transcript into Word to edit and format.
Before you start, do a quick check:
- Signed in to the correct Microsoft account (work, school, or personal)
- Stable internet connection (transcription runs in the cloud)
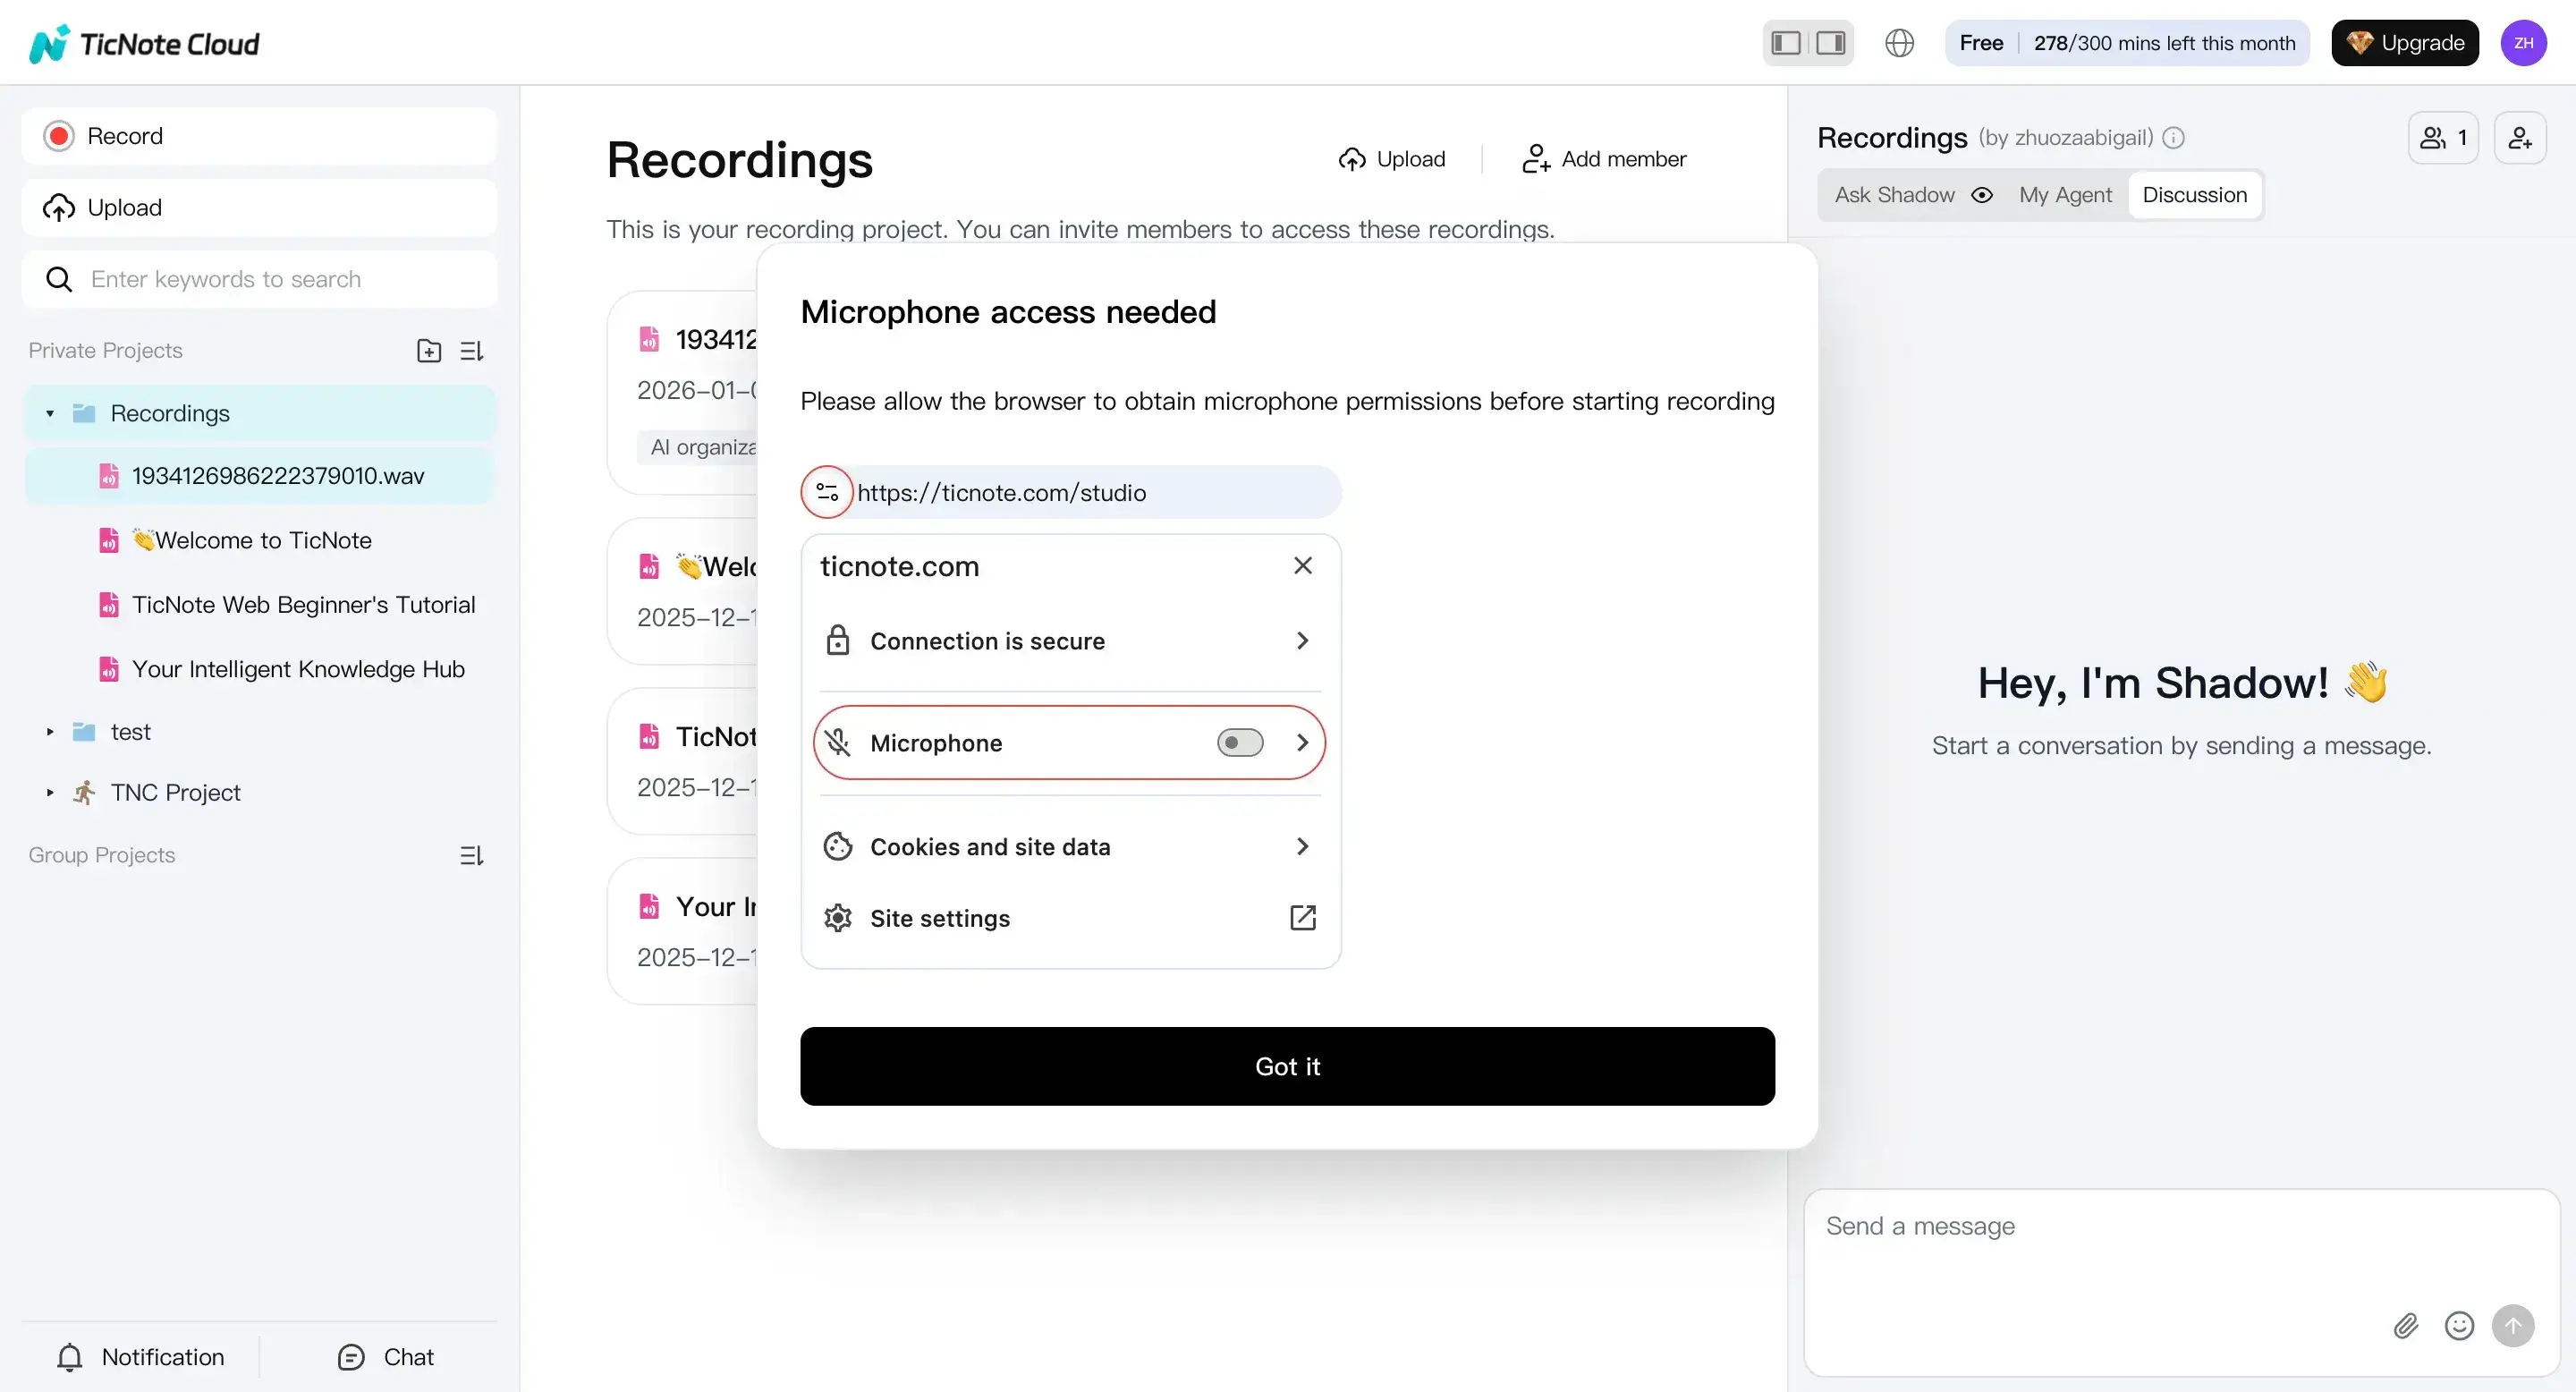
- If you'll record: mic permission is allowed in your browser/app
Fast Word steps (upload method):
- Open Word and go to Home > Dictate ▼ > Transcribe
- Choose Upload audio and select your file
- Keep the Transcribe pane open while it processes
What you get in Word:
- Transcript chunks with timestamps and playback
- Auto speaker labels (Speaker 1, Speaker 2)
- Edit options in the Transcribe pane, plus Insert for all or selected parts
How to transcribe an audio file in Word (upload method)
If you already have a recording, the upload option is the fastest way to handle: how to transcribe an audio file in Word. You'll upload your file, let Word process it in the cloud, then insert the parts you need into your document.
Step-by-step: open Word, find Transcribe, upload audio
- Open Word and open the document where you want the transcript. (Or start a blank document.)
- Go to Home.
- Select Dictate ▼.
- Click Transcribe to open the Transcribe pane.
- Choose Upload audio.
- Pick an audio or video file from your device, then confirm.
If Word asks you to sign in again, do it first, then repeat the same path. If you see a permission prompt (for example, connected to your Microsoft 365 account or storage), approve it so Word can upload and process the file.
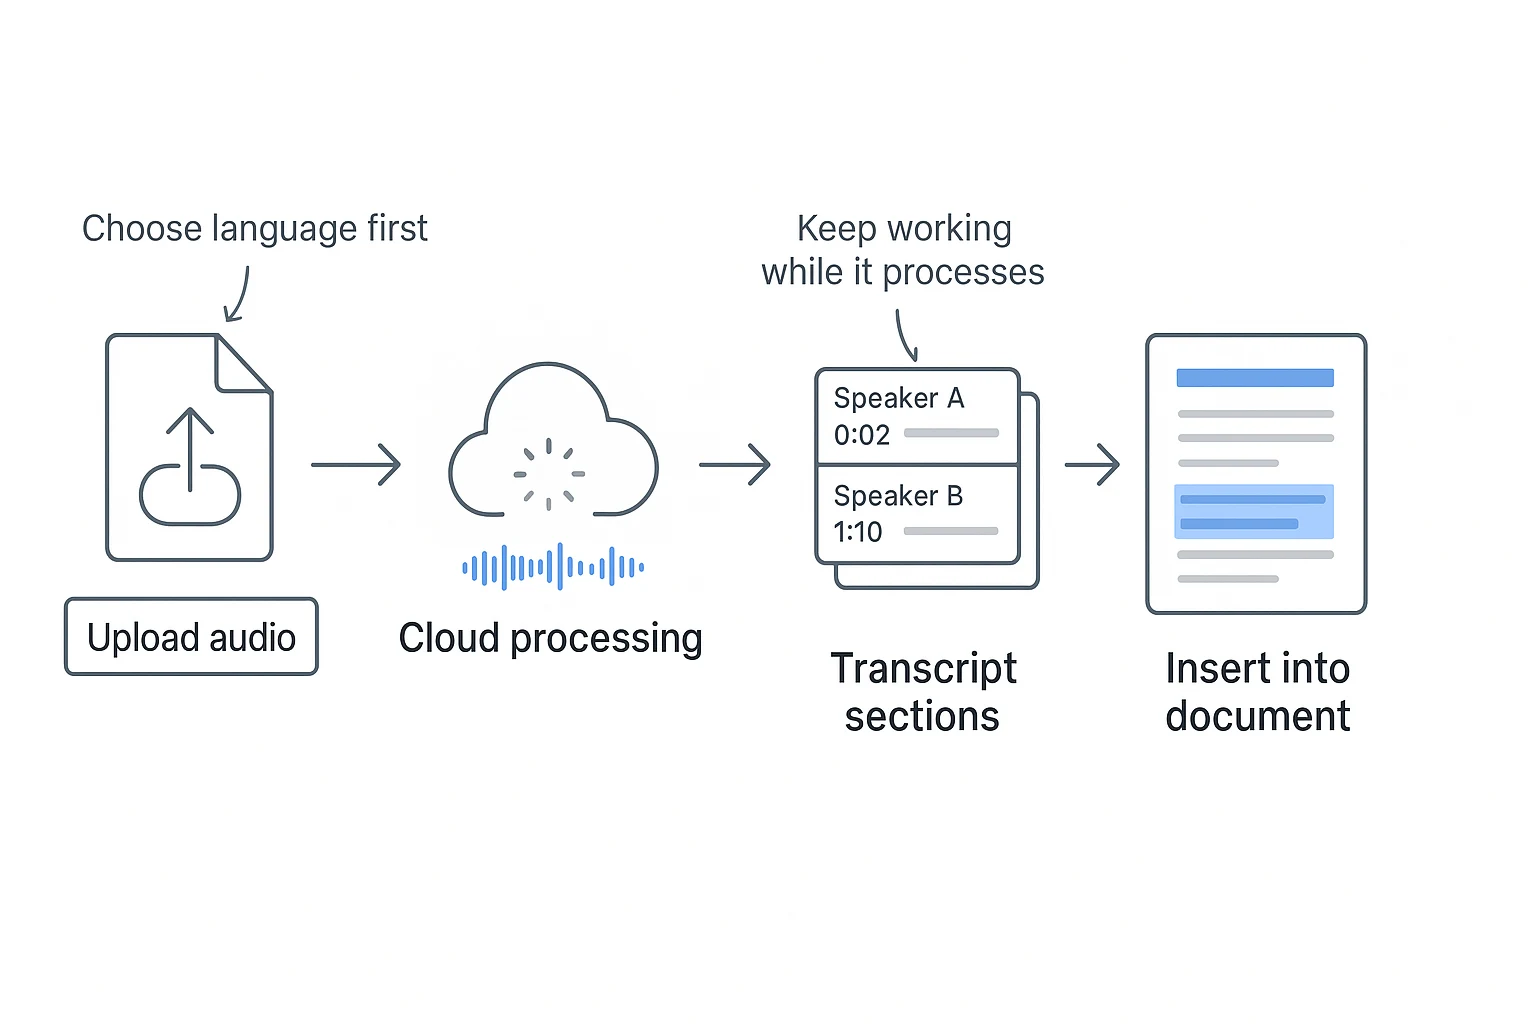
Pick the right language or locale before you start
Before you upload, set the spoken language and locale in the Transcribe pane. This matters a lot. If you pick the wrong language (or even the wrong region for the same language), you'll usually get more errors in names, numbers, and filler words.
If your file is bilingual, pick the main language you need most. Then, plan to clean up the other language by hand after the transcript is generated.
What happens during processing (and where your transcript shows up)
After you upload, Word sends the file for cloud processing. You'll see the transcript appear back in the Transcribe pane, broken into chunks you can review.
Keep the Transcribe pane open while it runs. You can still work in your document during processing.
This workflow is ideal for "meeting audio to text" tasks. Upload your recorded meeting, scan the transcript in the pane, then insert only the decisions, action items, or key quotes into your meeting minutes. For more options beyond Word, you can also follow this guide on transcribing meetings, podcasts, and research recordings to compare workflows.
Try TicNote Cloud for Free to upload a recording and turn it into clean notes faster.
What are the requirements, supported formats, and limits for Word Transcribe?
Before you try to figure out how to transcribe an audio file in Word, make sure your setup actually supports Transcribe. In most cases, Transcribe shows up in Word for the web, and you need to be signed in for it to appear.
Confirm you're on the right Word version (and signed in)
Transcribe is most commonly available in Word for the web, not every desktop install. If you don't see it, don't assume it's "gone". It can depend on:
- Your Microsoft 365 account type (work, school, personal)
- Your organization's admin settings (features can be disabled)
- Your region and tenant rollout timing
Quick checklist:
- Account: signed in to the correct Microsoft account
- App: Word for the web in a supported browser
- Permissions: OneDrive access allowed by your org
- Connection: stable internet for upload and processing
Use supported audio and video file types (and keep them simple)
For uploads, Word Transcribe supports .wav, .mp4, .m4a, or .mp3 in Word for the web, per Microsoft Support — Transcribe your recordings (Word for the web). If your file is "audio inside video" (like MP4), it still has to use a compatible encoding, or Word may fail to process it.
Also expect constraints like a file size limit or length limit. These limits can vary by account and service updates. If a long upload fails, split the audio into smaller parts.
Pre flight checklist:
- Rename the file with a plain name (letters, numbers)
- Convert to MP3 or WAV if unsure
- Trim dead air at the start and end
- Upload on a reliable connection
Understand minutes per month quotas (what counts)
"Word Transcribe minutes per month" usually means the total audio time you transcribe, whether you upload a file or record in Word. When you hit the limit, transcription can be blocked until your quota resets.
To stay within your minutes:
- Prioritize high value meetings and interviews
- Trim silence and off topic sections first
- Transcribe only the segment you need right now
Should you record in Word or upload a file?
Both options work when you want to transcribe an audio file in Word, but they fit different situations. Use Upload when you already have a clean recording. Use Record when you need to capture a live conversation and keep everything in one Word workflow.
Quick comparison: Record vs Upload
| Option | When to use | Setup needed | Risk points | Output (speakers, timestamps) |
| Record in Word | Live notes for a quick meeting, office hour, or 1:1 | Mic permission, quiet room, stable connection | Background noise, mic issues, accidental pauses | Timestamps are useful; speaker detection varies by audio quality |
| Upload audio file | You already have a recording from Teams/Zoom/phone | A supported file format and enough storage | Upload fails, long processing, wrong language | Usually cleaner results; easier to manage speakers if the audio is clear |
Decision rule: If you already have a clean file, upload it. If you need to capture a live conversation, record it.
Best use cases: lectures, interviews, meetings
- Lectures: Upload the lecture recording, then add headings and section breaks after.
- Interviews: Upload for better mic control, then rename speakers in the transcript.
- Meetings: Record if you're already in Word and want one flow. Upload if the meeting app created the recording. For a broader meeting workflow, see this guide to transcribe meetings into clean, searchable records while keeping your files organized.
Where recordings are stored (and why sharing can get tricky)
Word Transcribe saves the audio in OneDrive, typically in a Transcribed Files folder (plus the transcript inside your document). That matters for sharing: sending the Word doc doesn't always grant access to the audio file. Before you share, double-check the audio file's OneDrive permissions so others can open it if needed, or so it stays private if it shouldn't be shared.
How do you edit speaker labels, timestamps, and text in the Transcribe pane?
After you transcribe an audio file in Word, the Transcribe pane is where you clean it up fast. Your goal is simple: make speakers clear, fix key wording, and decide what to do with timestamps so the transcript is easy to read and easy to verify.
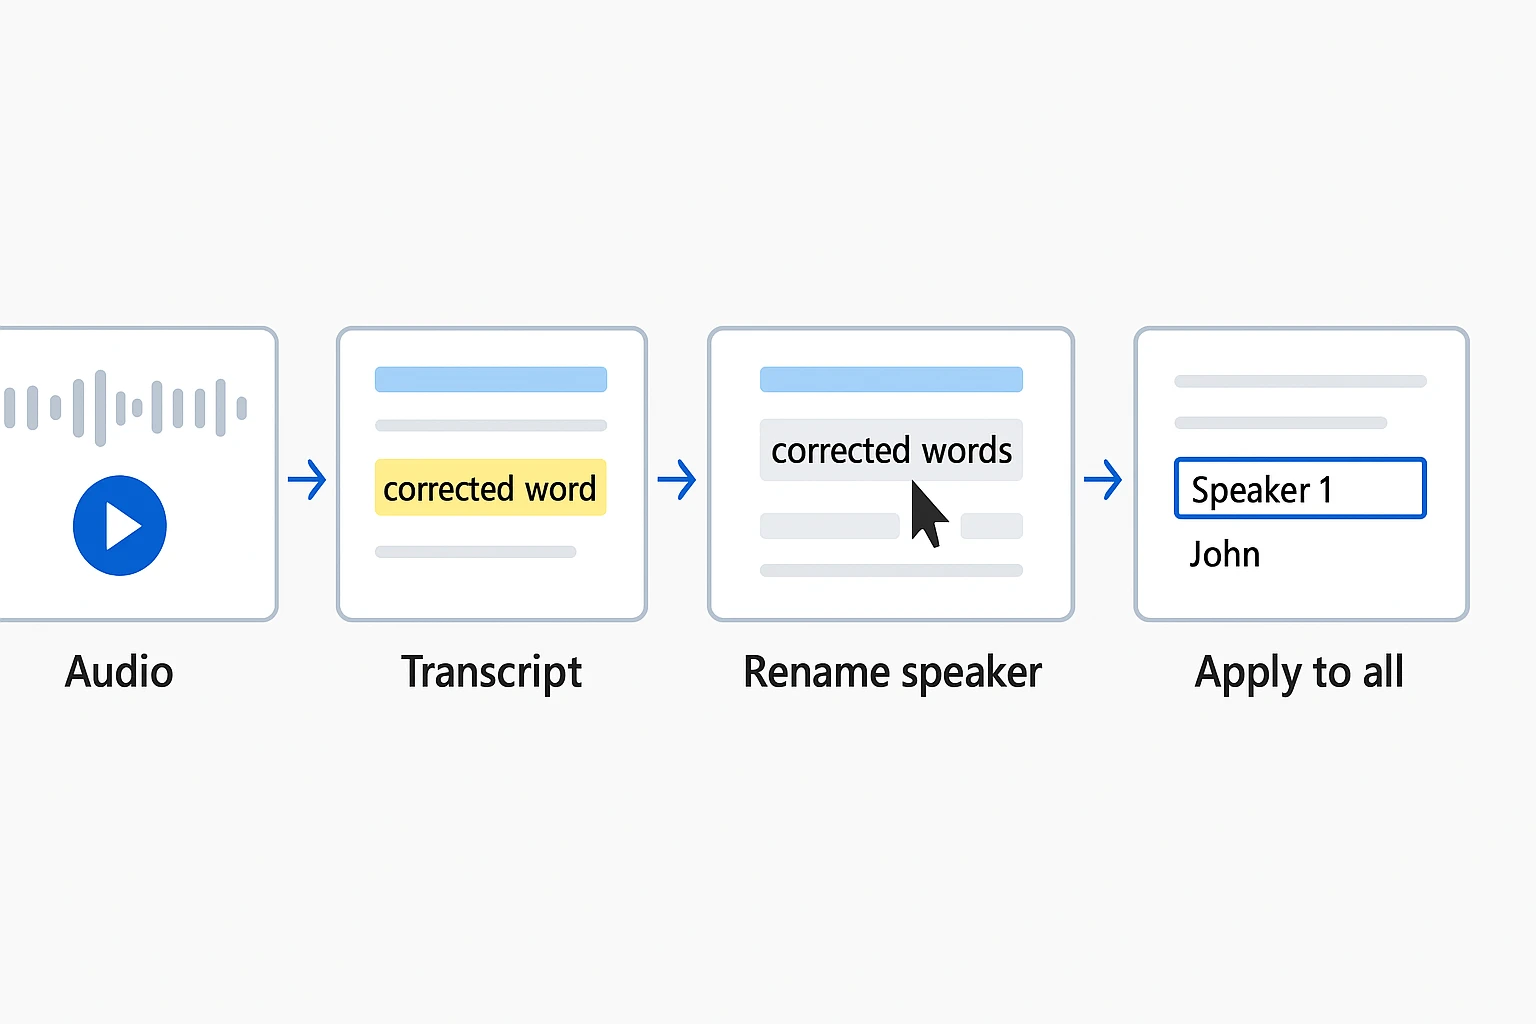
Rename speakers and keep names consistent
Word usually starts with generic labels like "Speaker 1" and "Speaker 2." Rename them as soon as you can, then apply the change across the transcript so every line stays consistent.
A quick rule that keeps notes tidy: pick one naming style early and stick to it.
- First name only (good for classes or internal meetings)
- Role + name (good for interviews: "Interviewer Sam," "Customer Dana")
- Role only (good for anonymized research)
If you also do interviews, this repeatable interview transcription workflow helps you keep speaker naming, quotes, and edits consistent.
Edit a section while listening to that exact moment
For clean fixes, work in a loop:
- Click a transcript segment in the Transcribe pane.
- Play audio from that timestamp.
- Correct the text right there.
Spend your time on high-impact items first:
- Names and titles
- Numbers, dates, and units
- Decisions and action items
- Industry terms and acronyms
Keep or remove timestamps (readability vs review)
Timestamps can help when you need to check quotes, do QA, or support legal or academic review. But they can hurt readability in a handout or a summary.
A solid compromise: keep timestamps only at topic changes (new section, new question, new decision), not on every single line.
Try TicNote Cloud for Free and turn transcripts into clean, reusable notes faster.
How do you insert, format, and export a Word transcript cleanly?
Once Word finishes transcribing, the next step is making the transcript easy to read and share. Here's how to insert the right level of detail, apply simple formatting rules, and export a clean file without breaking speaker meaning.
Pick the right insert option (full vs section)
In the Transcribe pane, you can insert either the whole transcript or just a selected chunk.
- Add full transcript: Inserts everything Word generated.
- Add section: Inserts only the highlighted part. Use this for one agenda item or a single Q&A.
You'll also see choices for how it's inserted:
- Text only: Best if you want to rewrite heavily.
- With speakers: Best default for interviews and meetings.
- With timestamps: Best when you need audit trail or quick audio reference.
Recommended default for most people: insert with speakers, without timestamps. Add timestamps when you expect to quote exact moments, handle compliance reviews, or match notes to a recording.
Format the transcript like a pro (fast style rules)
Use a few consistent rules and Word becomes searchable and scannable.
- Use Heading 2 for major topics (Agenda item, Section, Slide title).
- Use Heading 3 for subtopics (Question, Follow-up, Objection).
- Keep speaker turns consistent:
Name: sentence…and one paragraph per turn. - Mark non-speech cues in brackets:
[laughs],[crosstalk],[inaudible]. - Accessibility tip: keep paragraphs short. Avoid walls of text.
If you need a stricter approach, follow a clear verbatim formatting and QA checklist so edits don't change meaning.
Save and share (DOCX vs PDF) without surprises
- Save as .docx when others must edit. Use Track Changes and Comments if more than one person will revise it.
- Export to PDF when the transcript is final and should not be changed.
Before you share anything outside your org, double-check the original audio file's OneDrive sharing permissions so you don't expose a private recording by accident.
How can you improve transcription accuracy before and after you transcribe?
The fastest way to improve results is to improve the audio before you start, then do a short, focused cleanup after Word finishes. If you're learning how to transcribe an audio file in Word, think of it as a two-step loop: clean input, then quick QA.
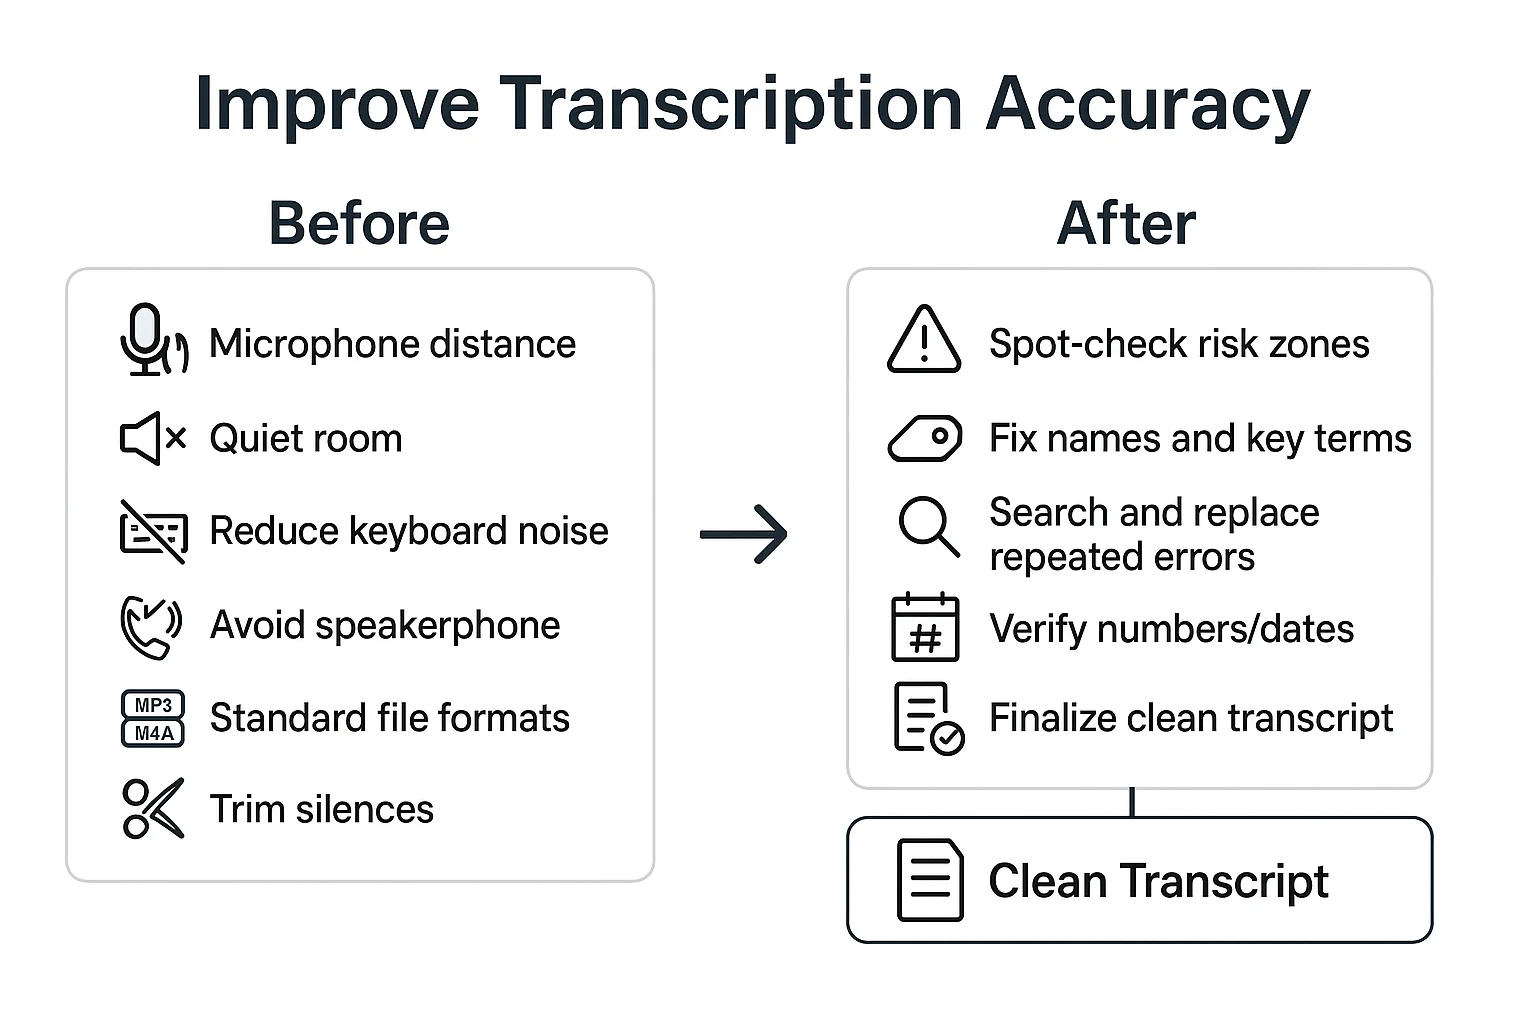
Do a quick audio prep check (before you record or upload)
Small changes here can remove most errors:
- Get close to the mic (about a hand's width). Don't speak across a room.
- Pick a quiet room. Turn off fans, HVAC, and notification sounds.
- Reduce keyboard noise. Type after the speaker finishes a thought.
- Avoid speakerphone if you can. It adds echo and can blur voices.
- If you're uploading a file, trim long silences and dead air first.
- Keep to common formats like MP3, M4A, or WAV for fewer surprises.
Set up for real meetings (laptop, group, or remote)
If you must use a laptop mic, sit close and face it. Soft surfaces help too. Close the door, and avoid big empty rooms that cause echo.
For groups, ask for turn-taking. One person talks at a time. If two people overlap, Word often merges words and assigns the wrong speaker.
For remote calls, capture the cleanest source you're allowed to record. That might mean a local recording of your mic and the call audio, with consent.
Run a 5-minute review routine (after transcription)
Don't re-listen to everything. Spot-check the "risk zones" instead:
- Introductions (names and roles)
- Numbers, dates, and addresses
- Decisions and action items
Then use Word Search to fix repeats fast (names, acronyms, product terms). Keep a tiny glossary of key terms in the doc, so your edits stay consistent across files.
What should you know about privacy, consent, and OneDrive sharing?
When you transcribe in Word, treat it like recording a meeting. Tell people you're recording and transcribing. Then follow your local law and your org policy.
Get clear consent (and know when written consent matters)
Start with plain language. Say what you're doing, why, and where the transcript will live. If someone objects, stop and switch to notes.
Be extra careful in high-stakes chats, like:
- Client and vendor calls
- HR or performance conversations
- Student info (FERPA-type data)
- Medical or benefit details
- Legal or complaint-related topics
When the risk is higher, get written consent. It's also smart when you'll share the file, store it long-term, or use quotes.
Check where Word saves transcribed files in OneDrive
Word Transcribe can store audio and transcript assets in a OneDrive folder often labeled something like "Transcribed Files." That means the audio file may have its own sharing state, separate from the Word document.
Before you share anything, review OneDrive link settings:
- Link type: "Anyone with the link" vs "Specific people"
- Expiration date for the link (if your tenant supports it)
- Whether download is allowed (if the option appears)
- Guest access rules in your Microsoft 365 tenant
If you only share the Word doc, double-check you didn't also share the audio by mistake.
Handle sensitive data and set retention rules
Keep only what you need. After transcription, remove irrelevant sections and redact sensitive fields (addresses, IDs, health details). Store the final transcript in an approved location, not a personal drive, if policy requires it.
Set simple retention basics:
- Owner: who is responsible for the file
- Duration: how long you keep audio and transcript
- Deletion: when and how you remove them
Compliance needs vary by industry and region. If you're unsure, align with your admin, legal, or privacy team before you transcribe sensitive recordings.
Step-by-step: turn transcripts into summaries, translations, and reusable notes (example workflow)
If Word gets you the transcript, an add on workflow can get you the next layer fast. Here's a simple example using TicNote Cloud alongside Word, so you can go from audio to a clean transcript, then to summaries, translations, and reusable notes.
Web workflow: upload or record, then transcribe and export
1) Upload a file or record a talk
Start in the TicNote Cloud web studio. Create or open a project, then use Upload to add your audio or video.
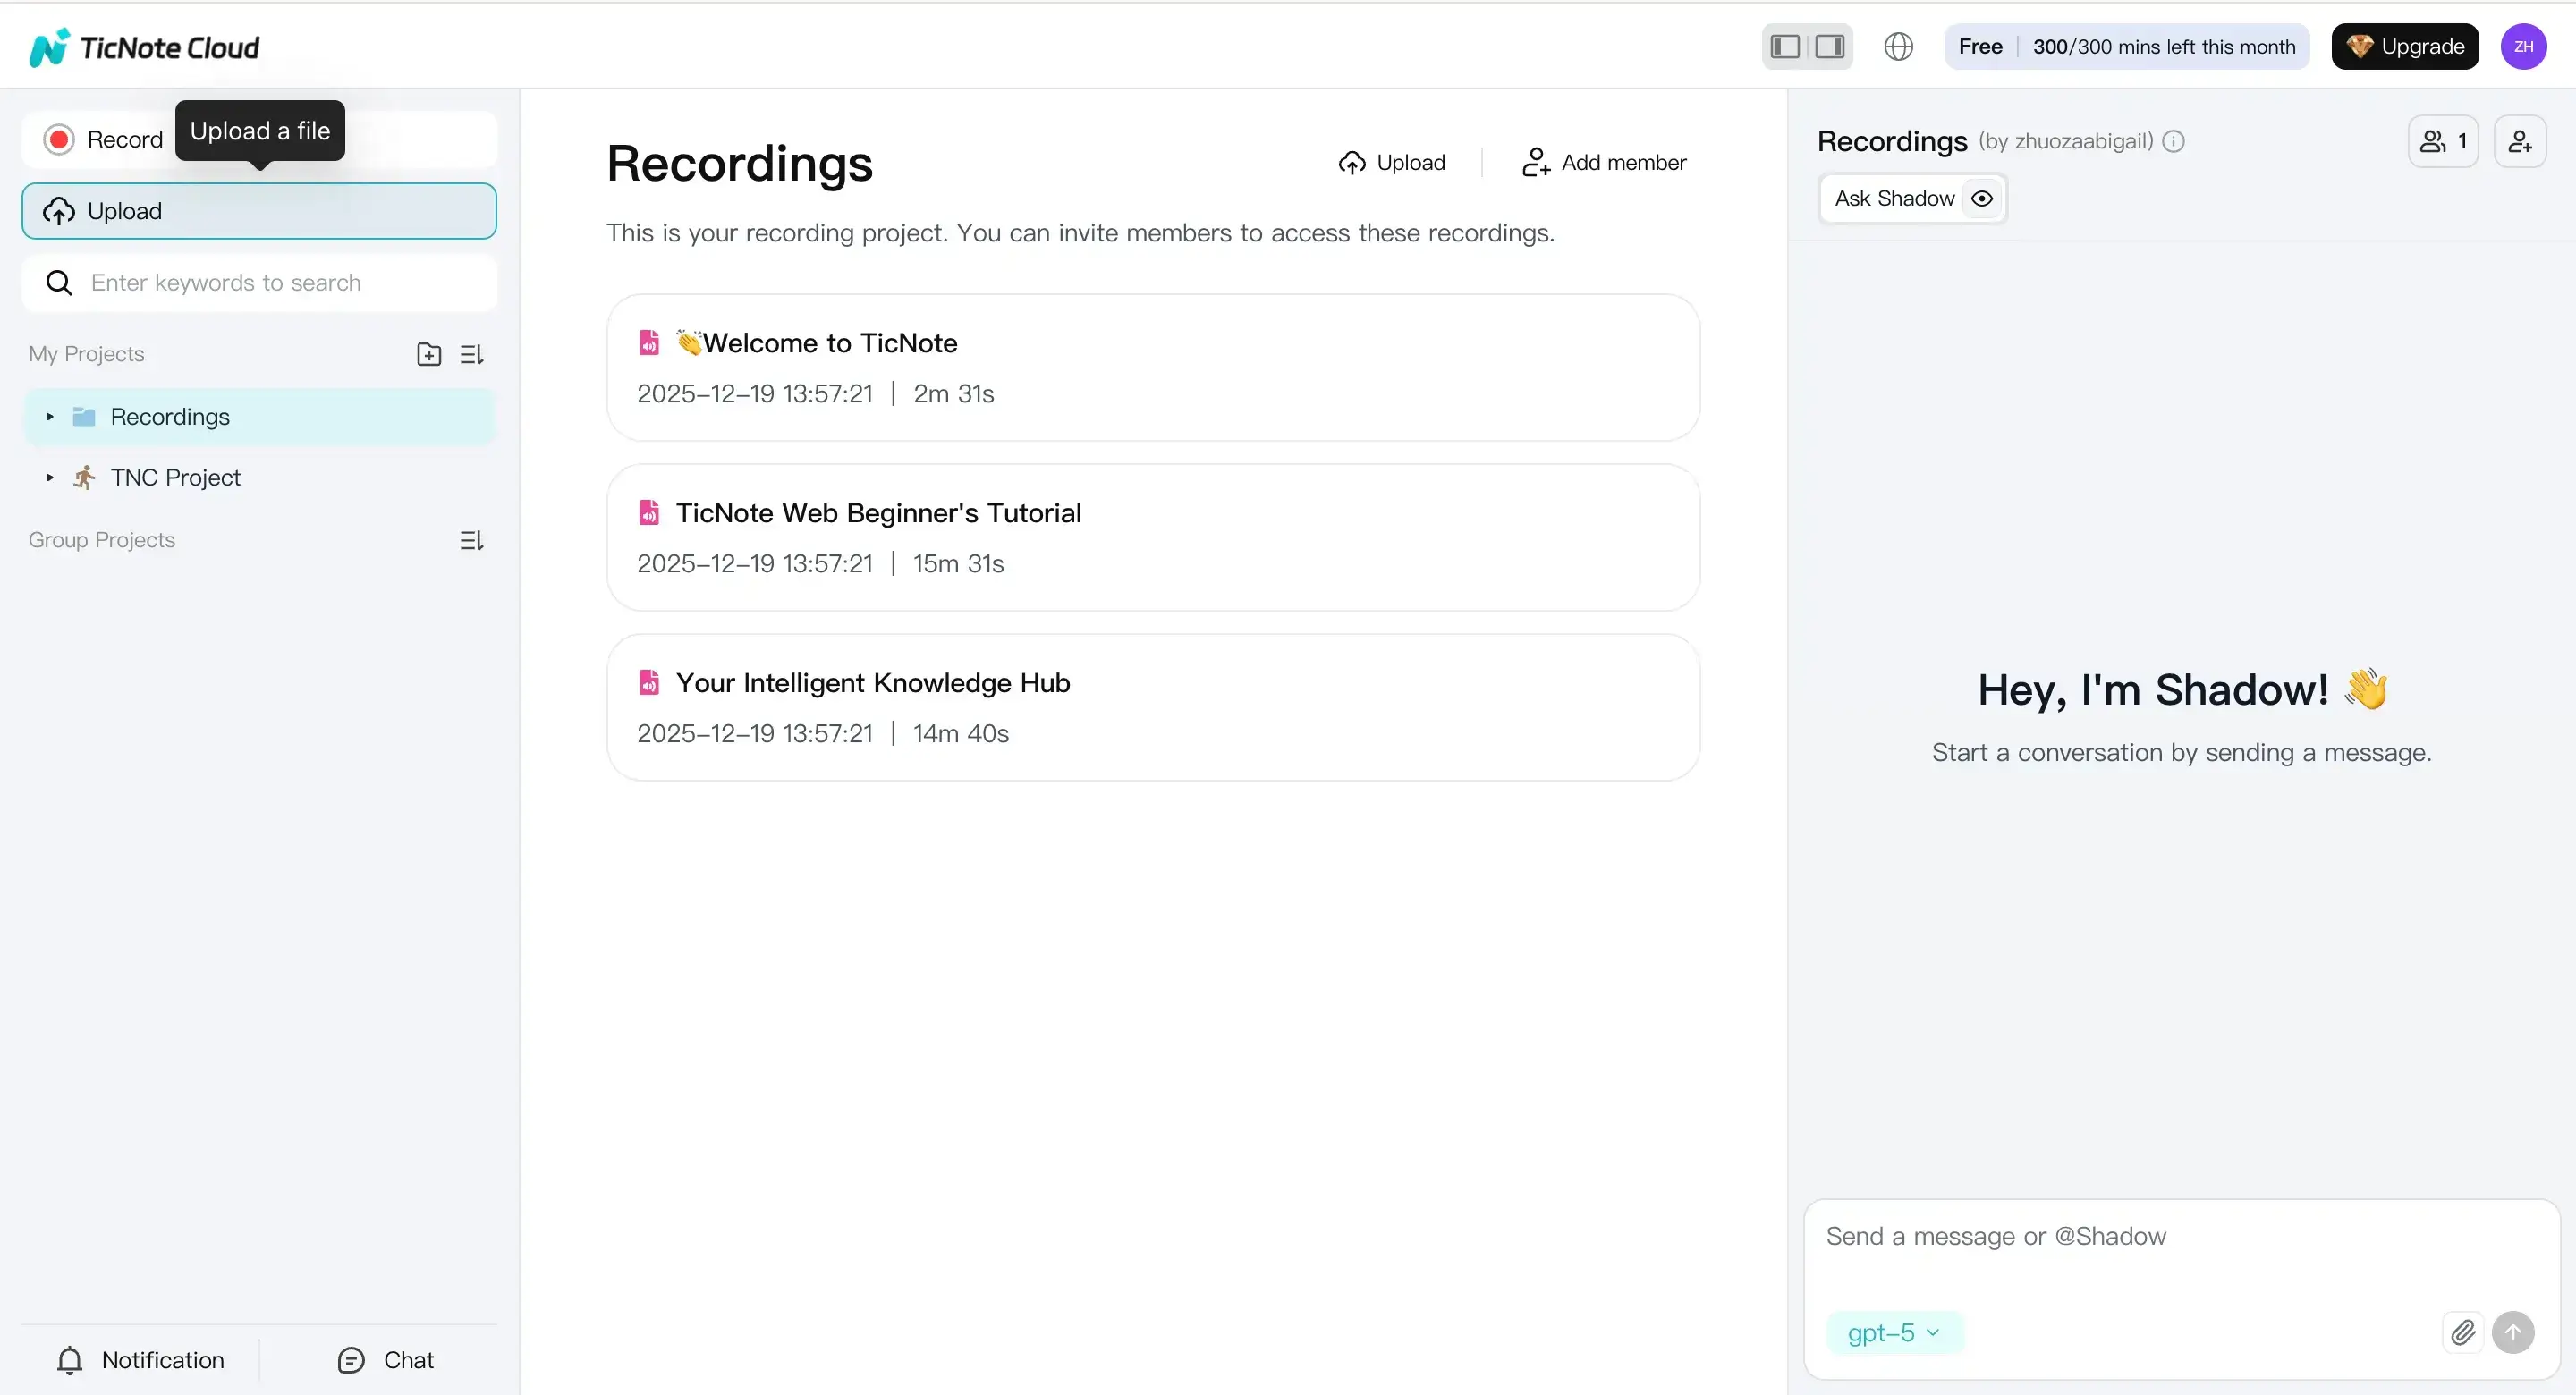
If you don't have a file yet, click Record and capture the talk live. If your browser prompts you, allow mic access so recording works.
2) Prepare settings before you generate the transcript
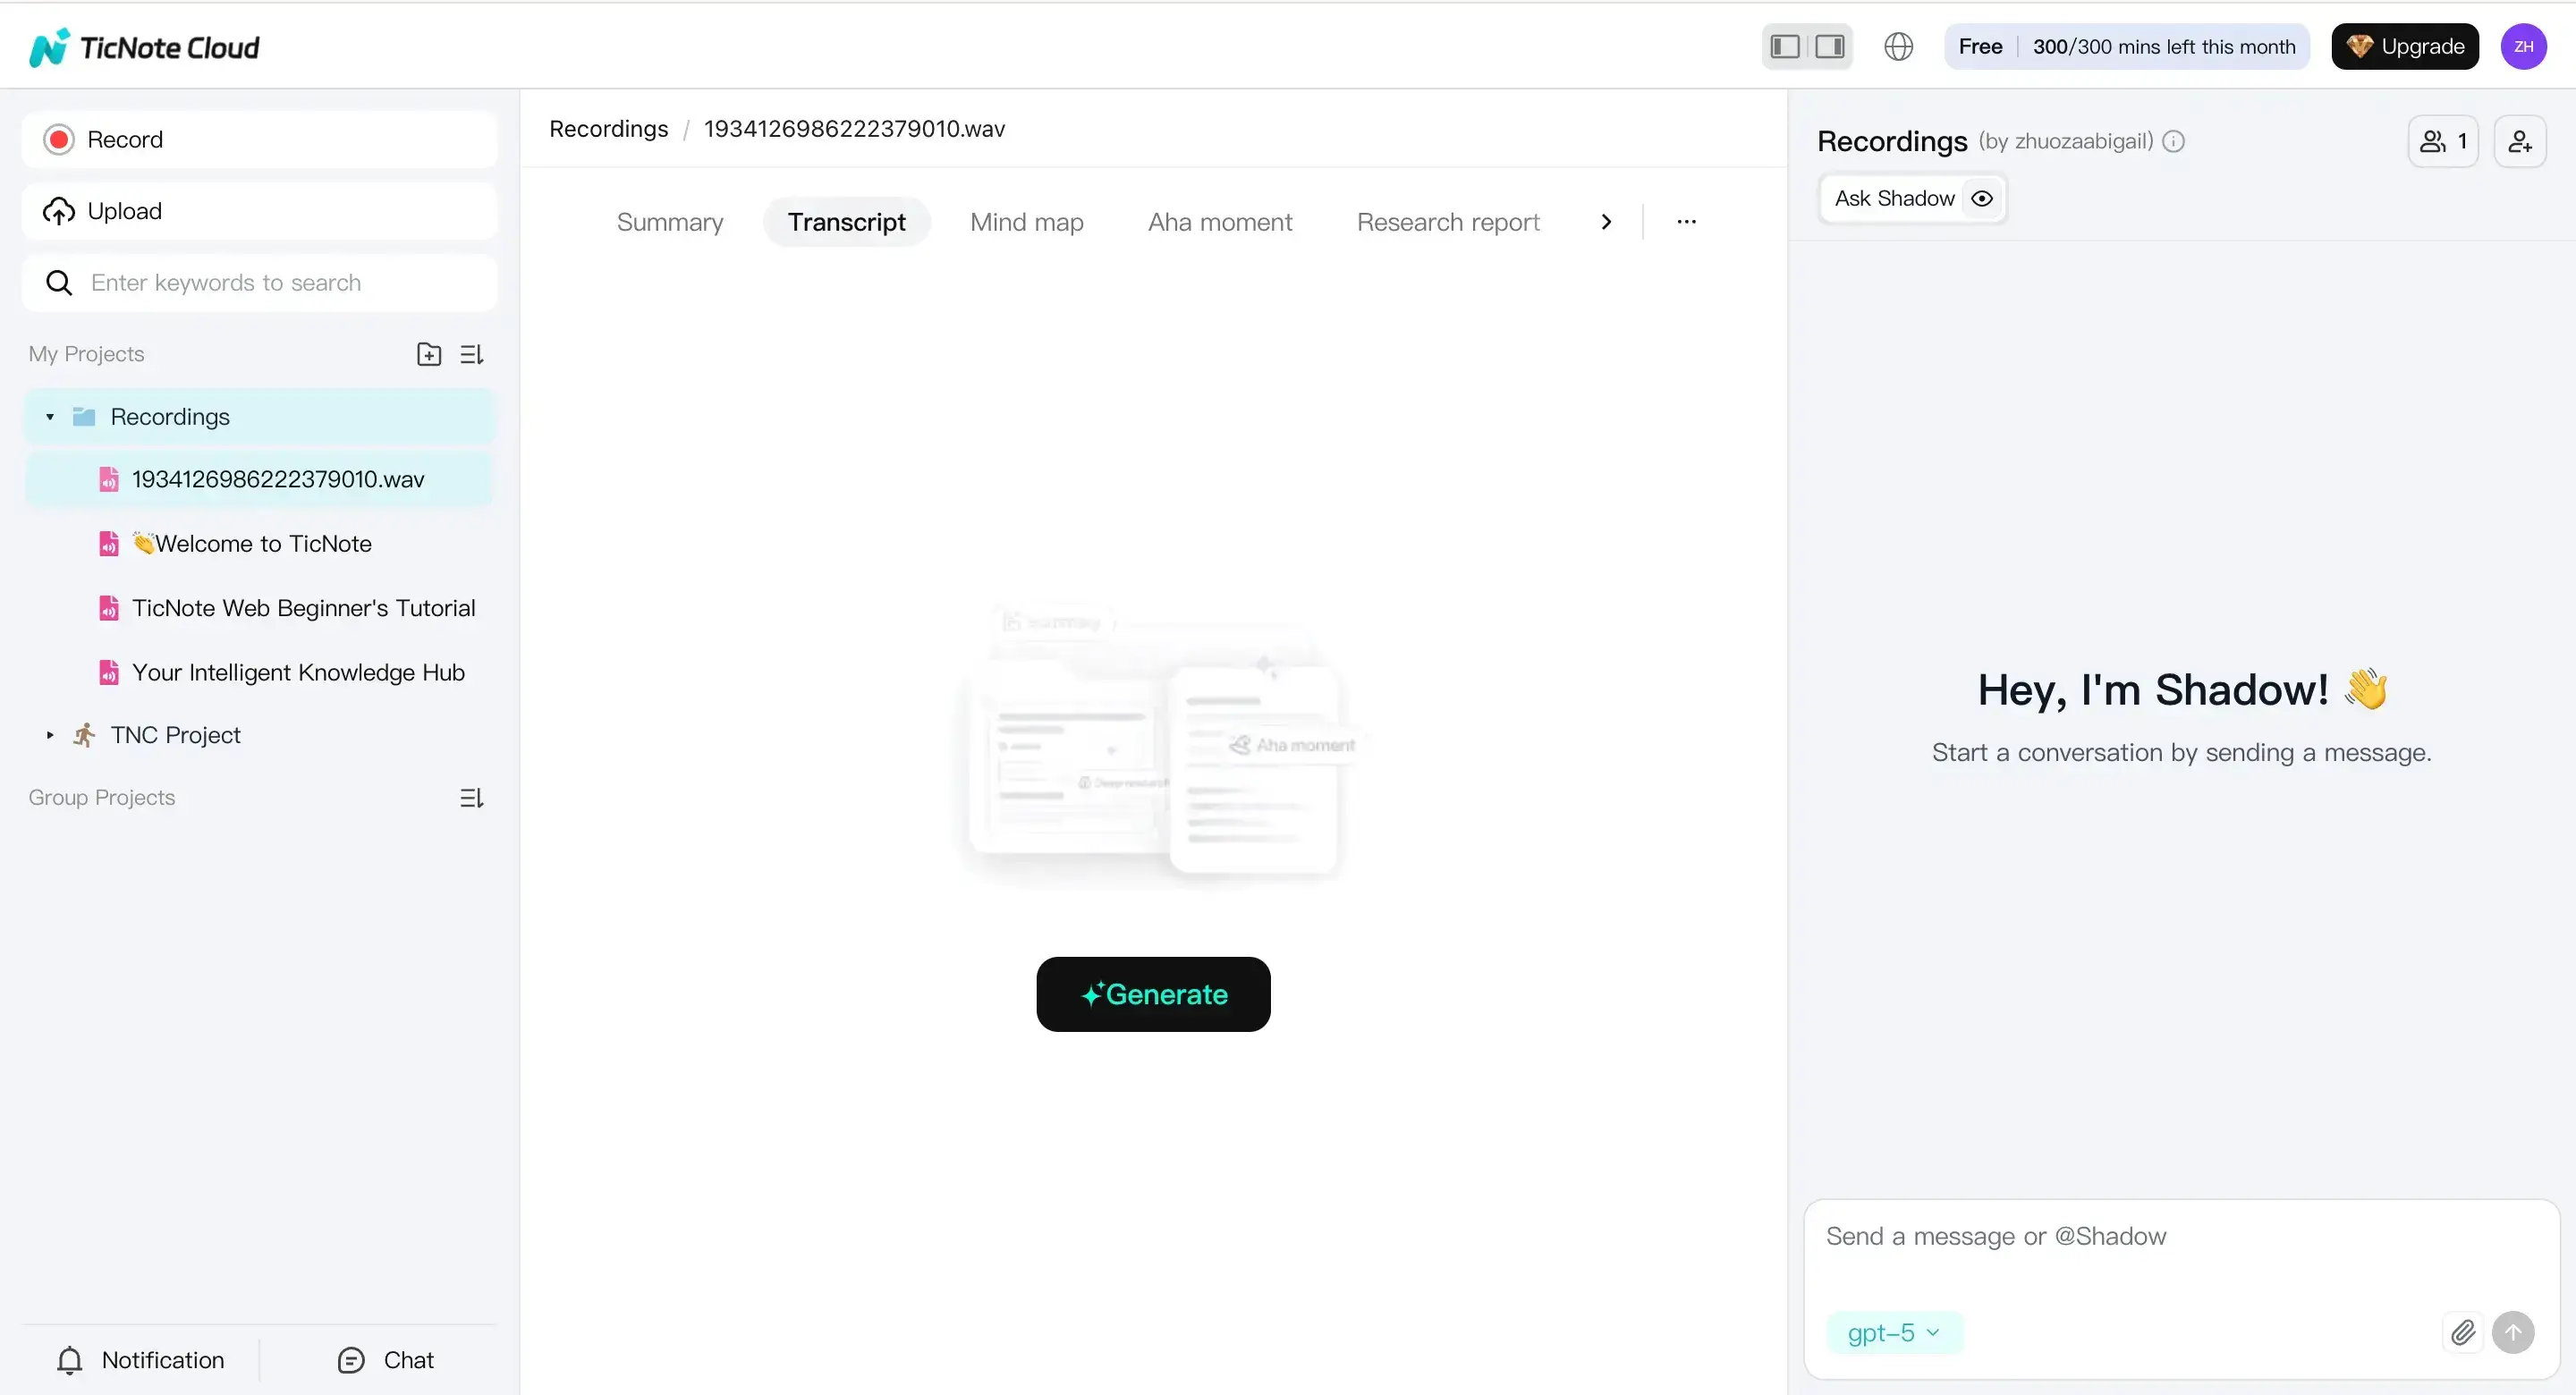
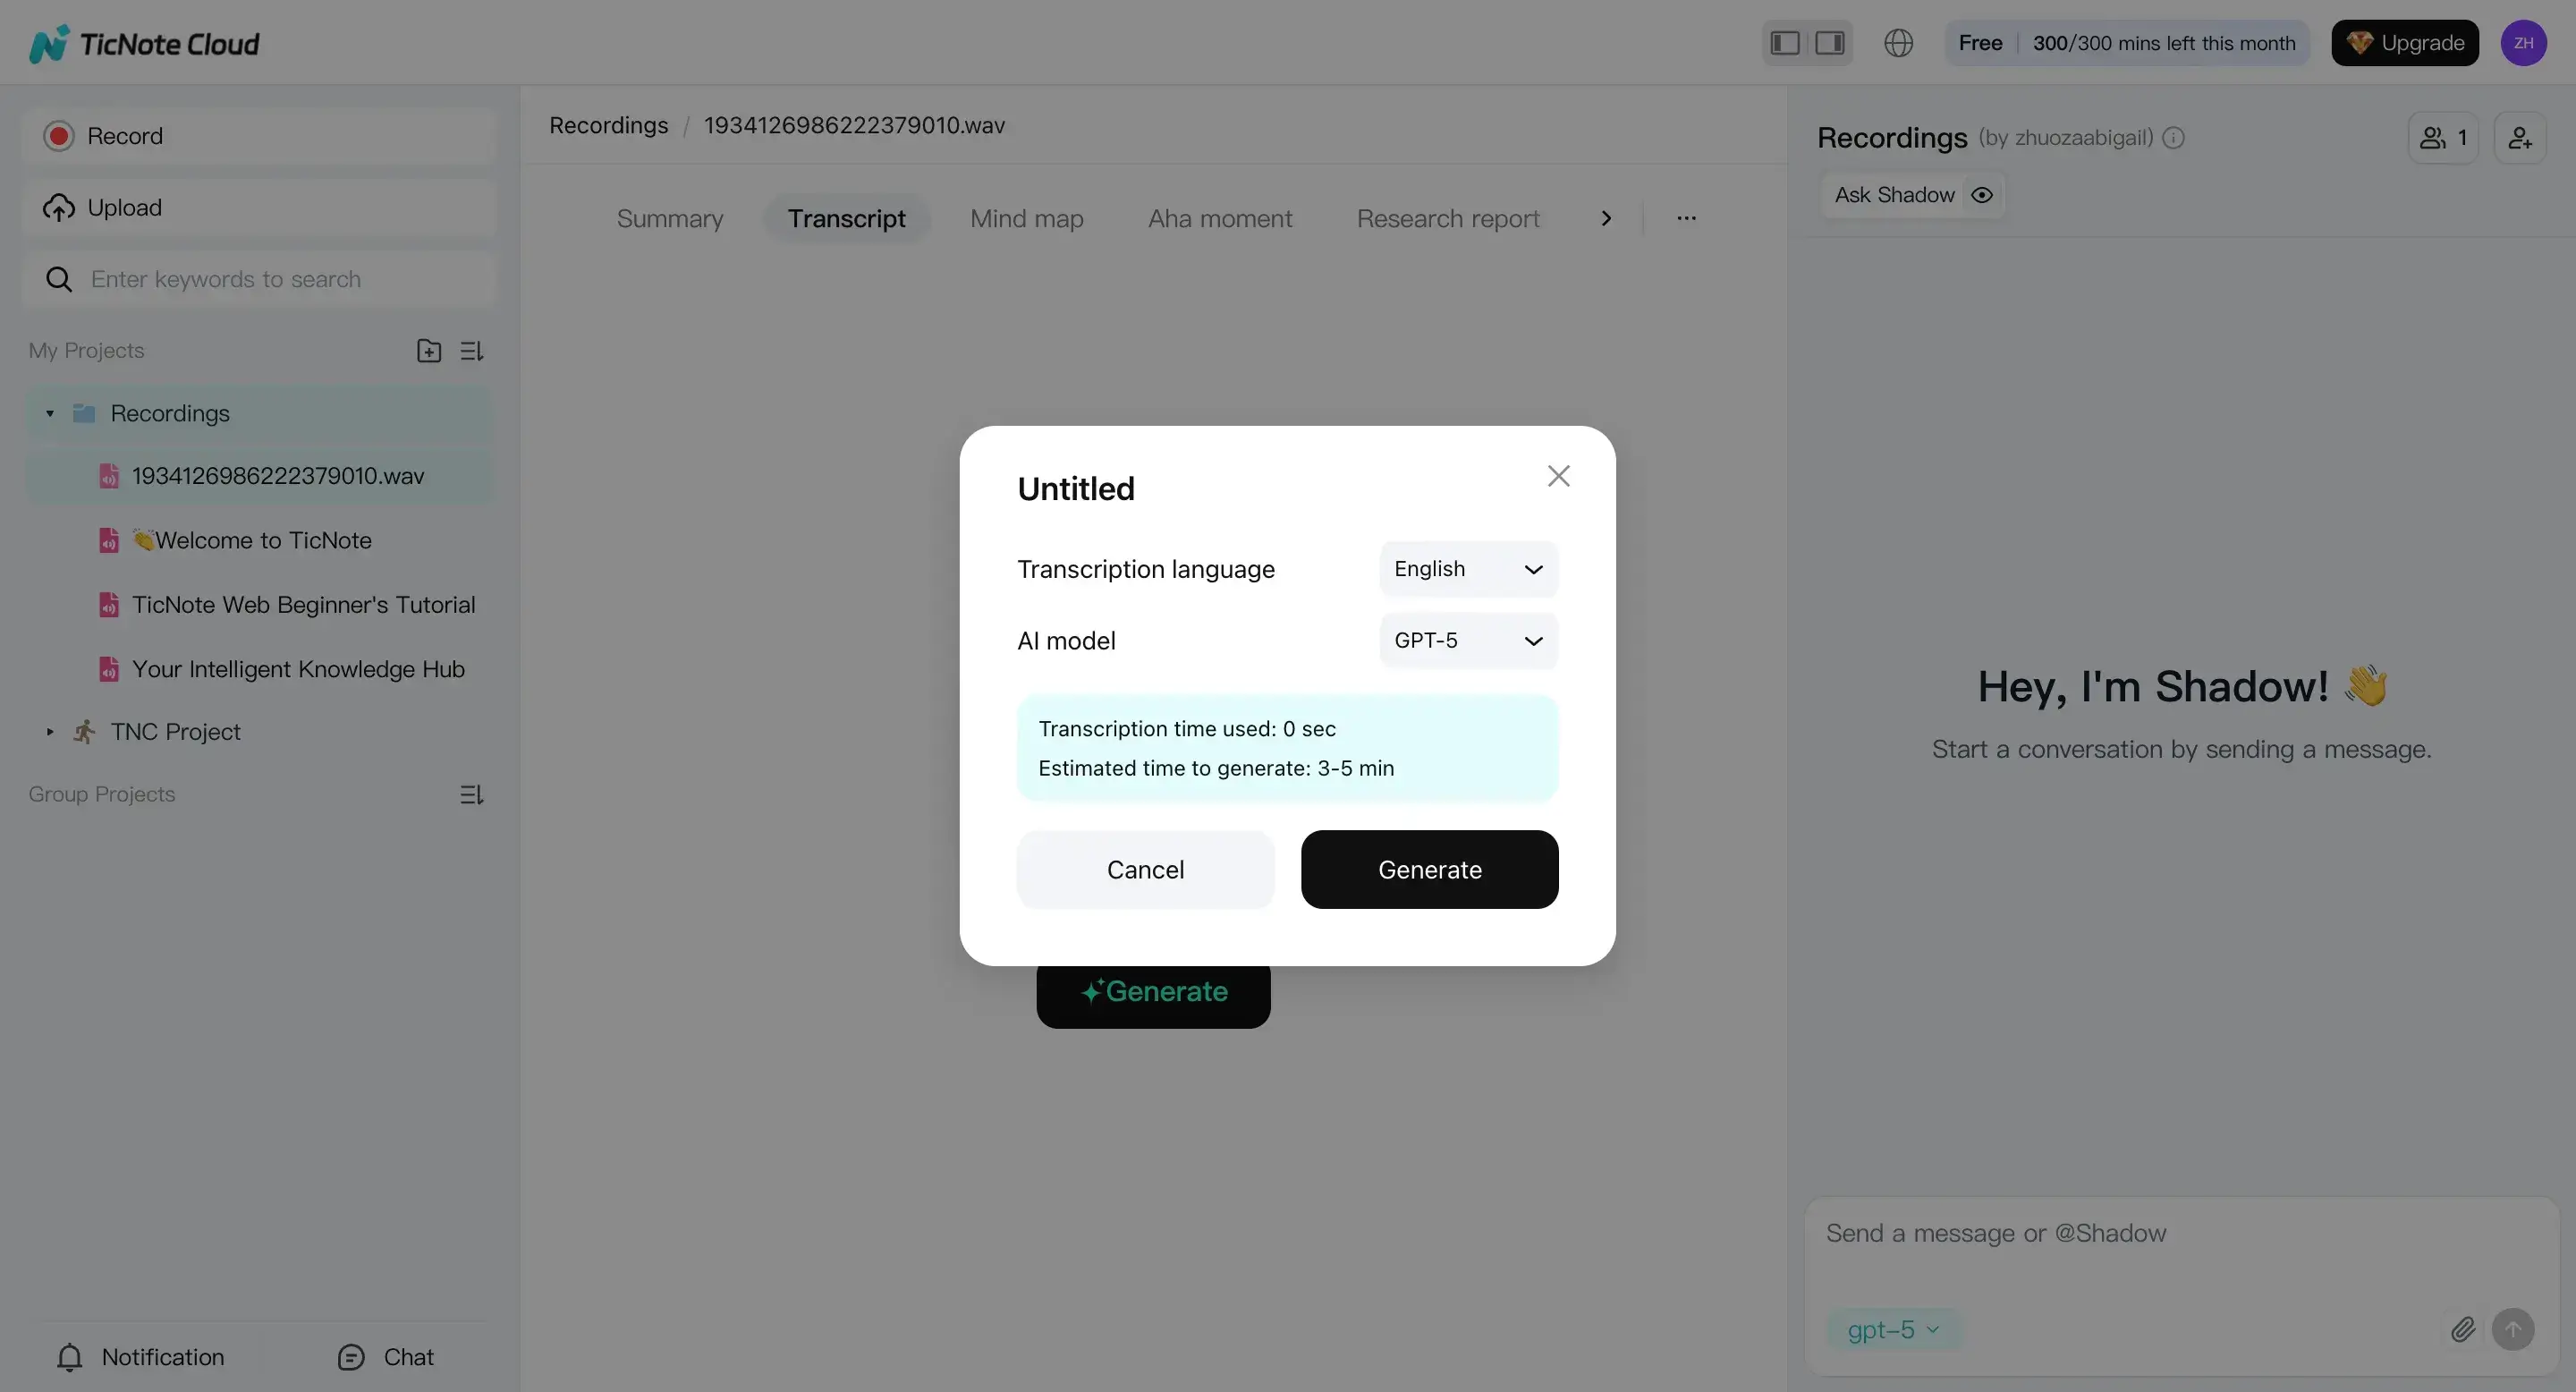
Pick the file in the left panel. Open the Transcript tab, then click Generate.
In the pop up, set the spoken language and the AI model options your workspace allows. Also decide your goal now: a clean transcript you'll paste into Word, a meeting summary, or a translation for sharing.
3) Review and improve outputs (keep edits grounded)
Once it finishes, scan the transcript for the parts that matter most first. Fix names, numbers, dates, and action items by checking them against the audio.
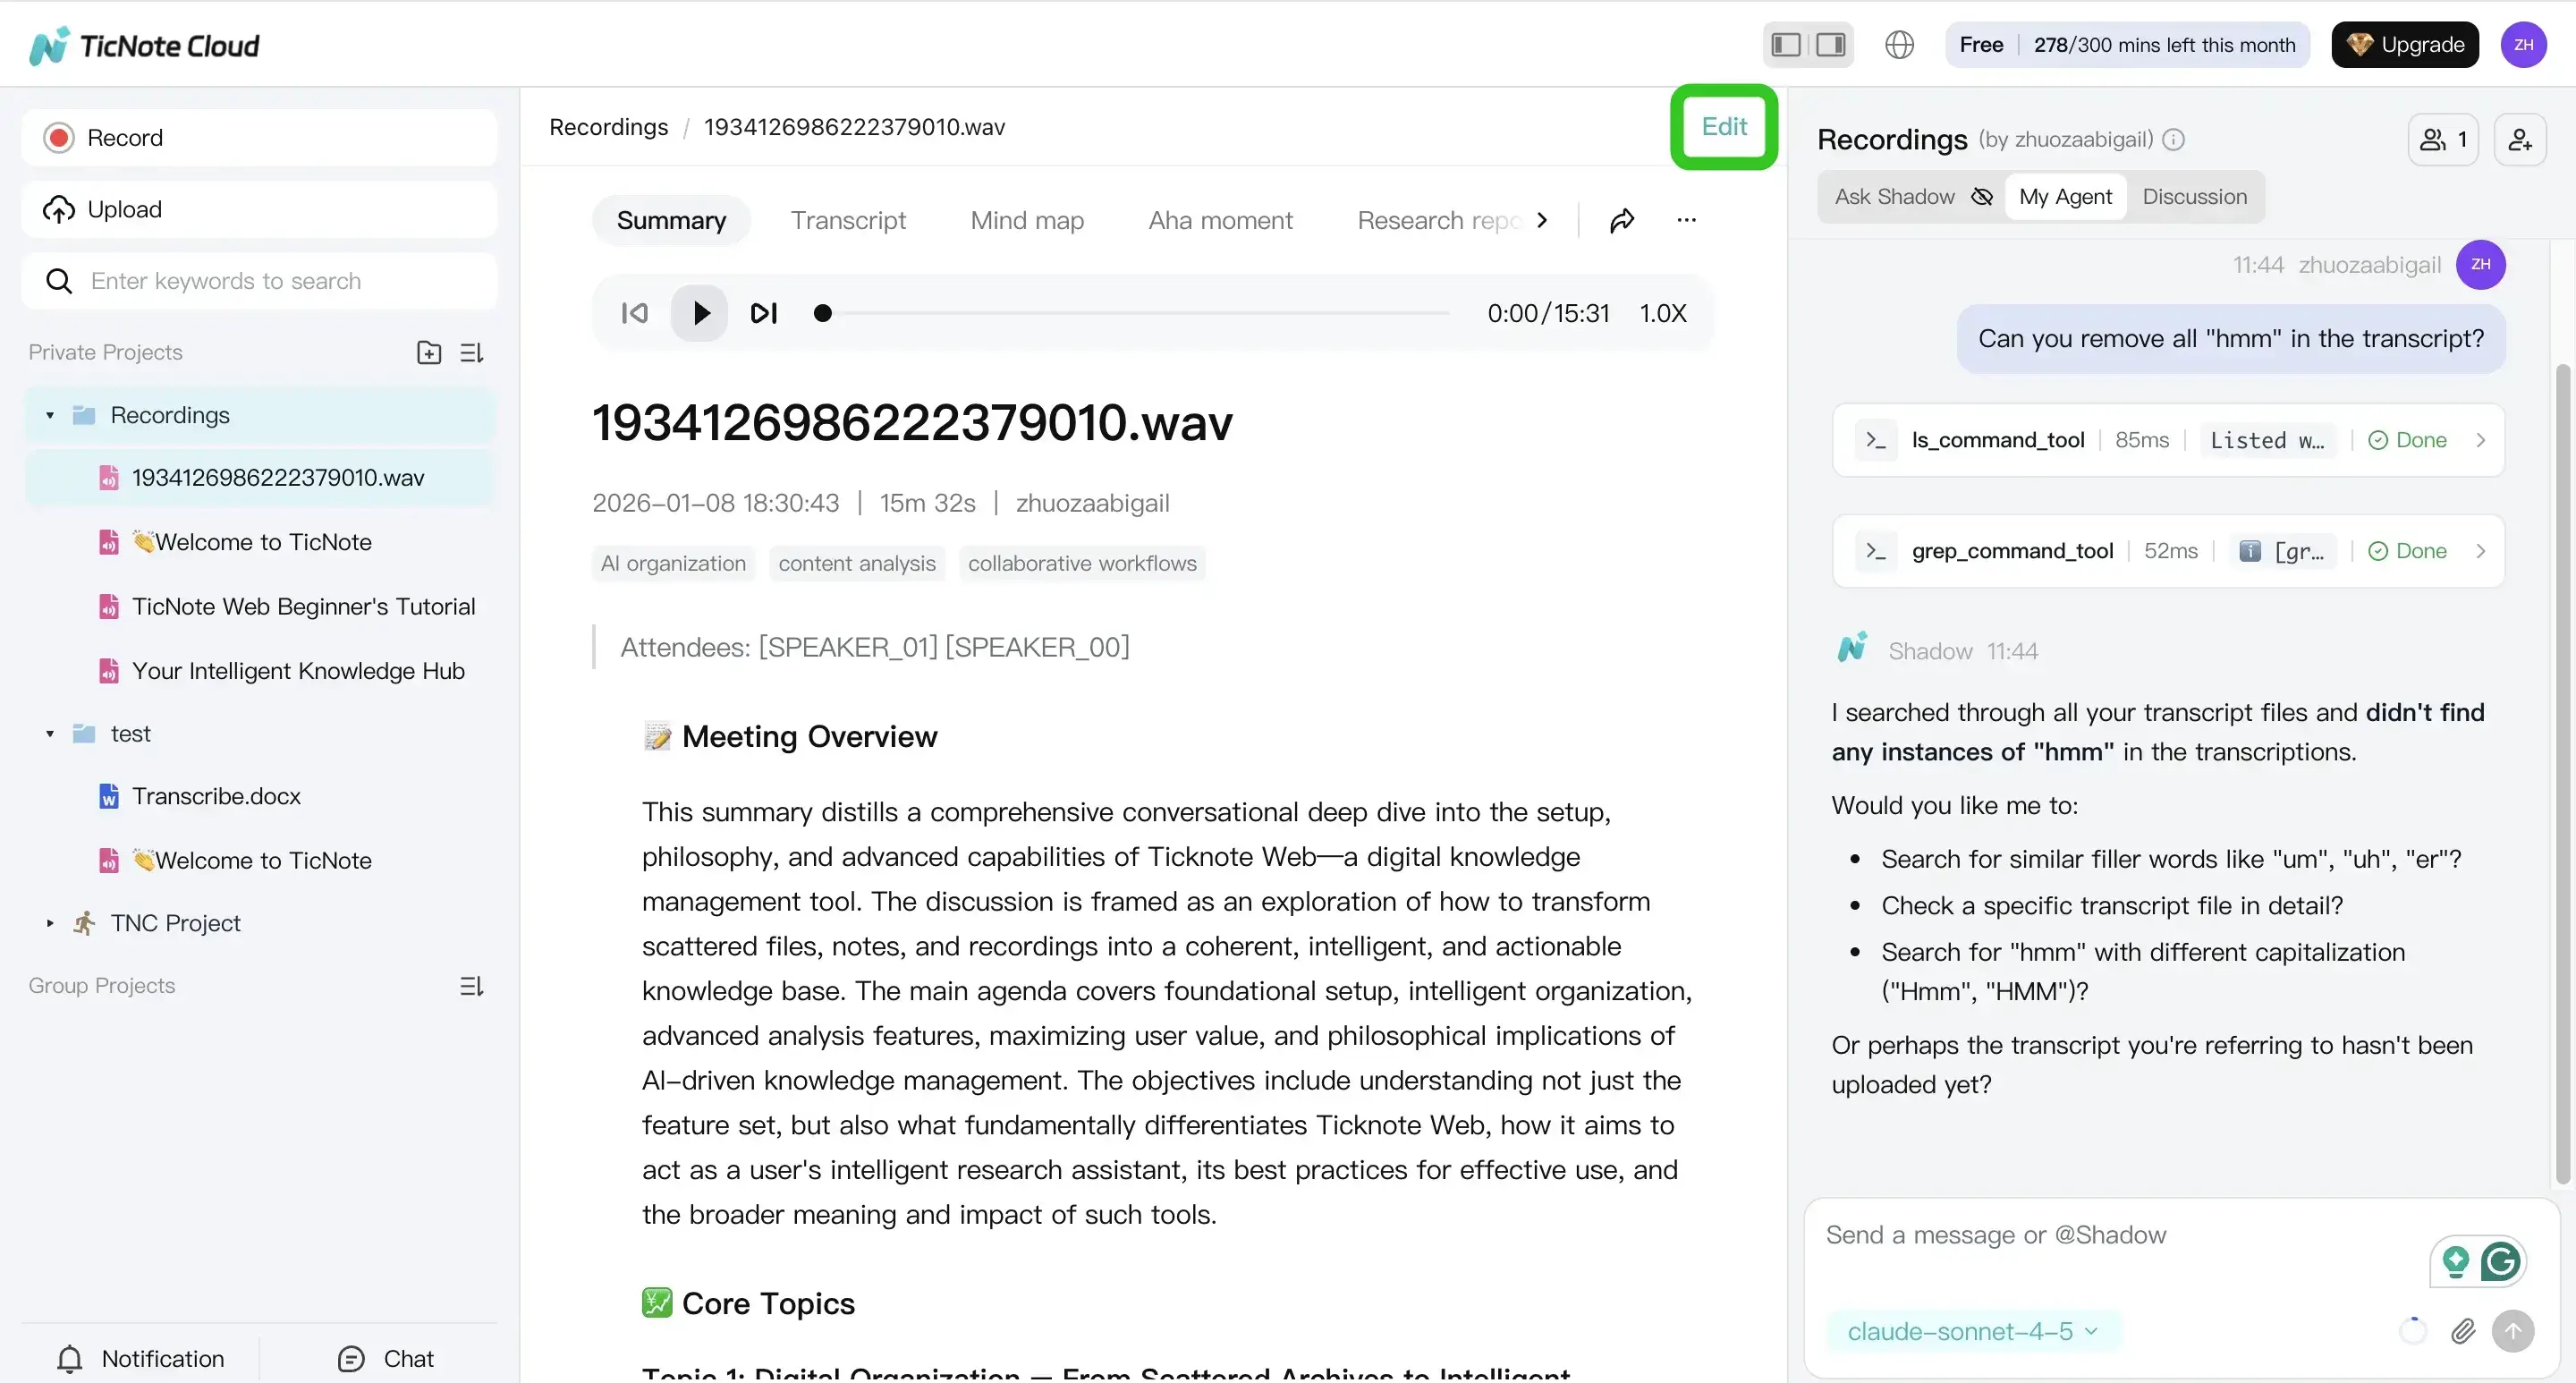
Then use Shadow AI to create add ons you won't get from Word alone, like:
- A structured summary (decisions, actions, owners)
- A mind map for quick review
- A translated version for a multilingual team
4) Export and bring results back into Word
When you're ready, open the file menu and export the transcript.
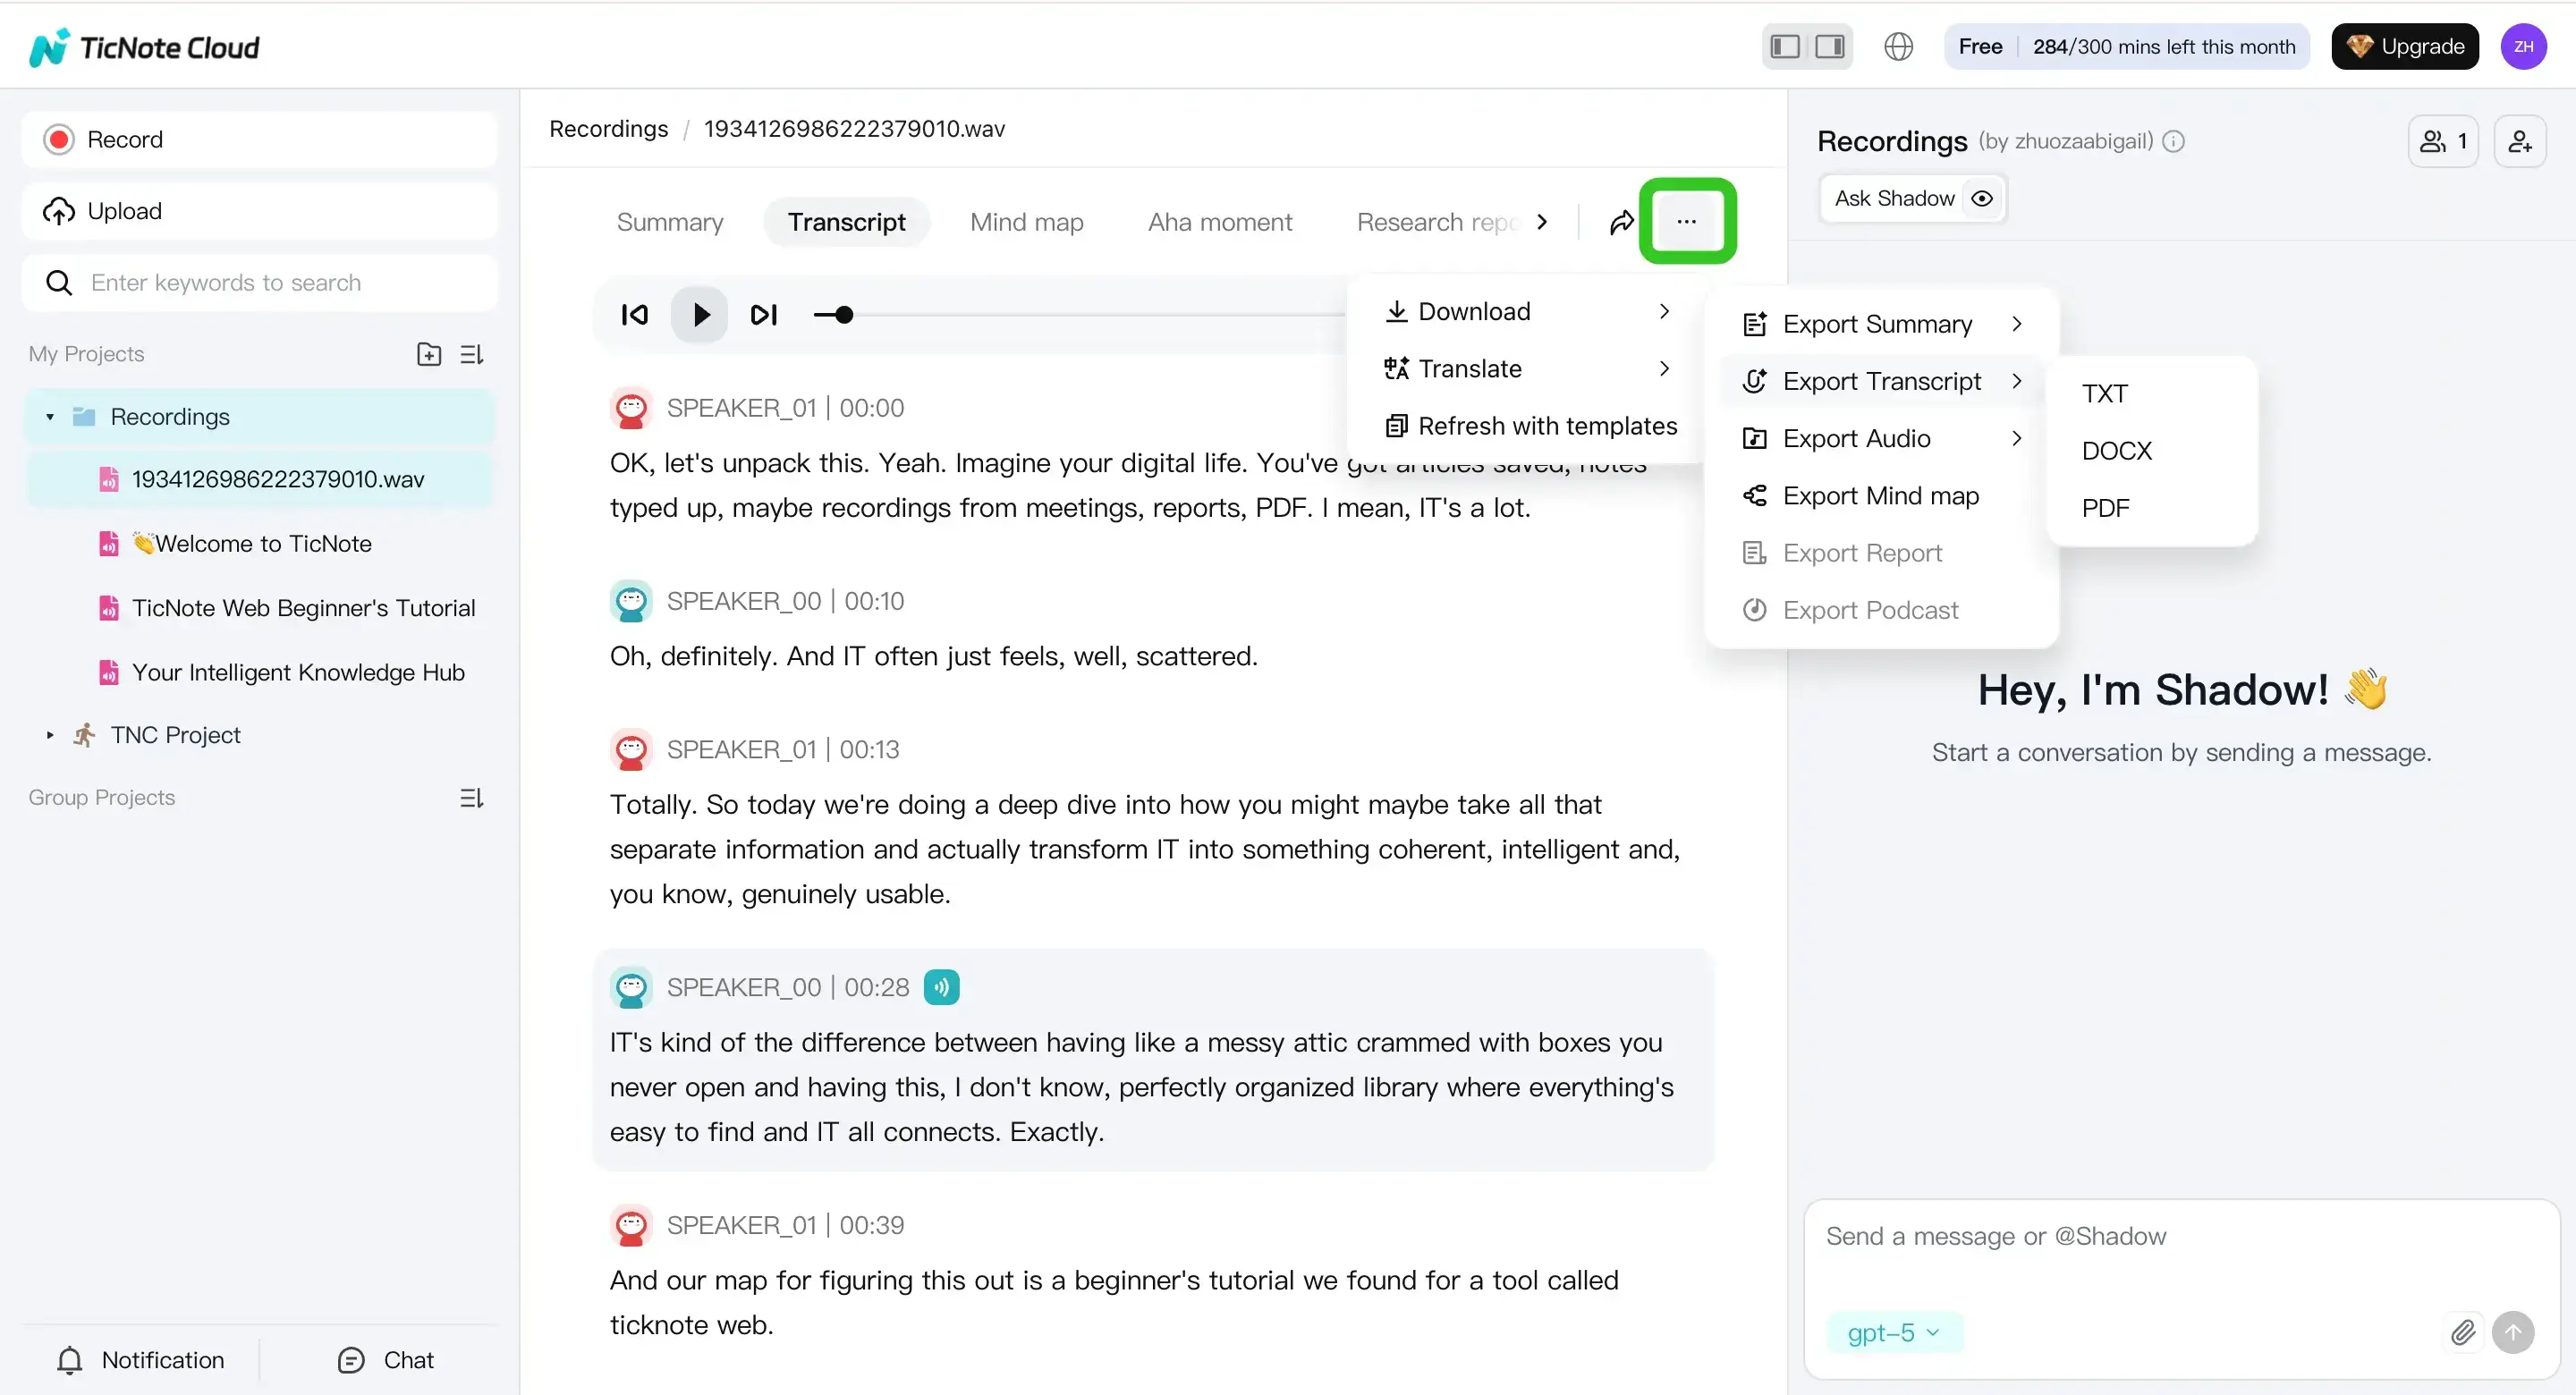
For Word cleanup, export Transcript (TXT), then paste into Word and apply your style rules (speaker names, spacing, and headings). If you're sharing notes, export a Summary (DOCX, PDF, or Markdown) based on where it will live.
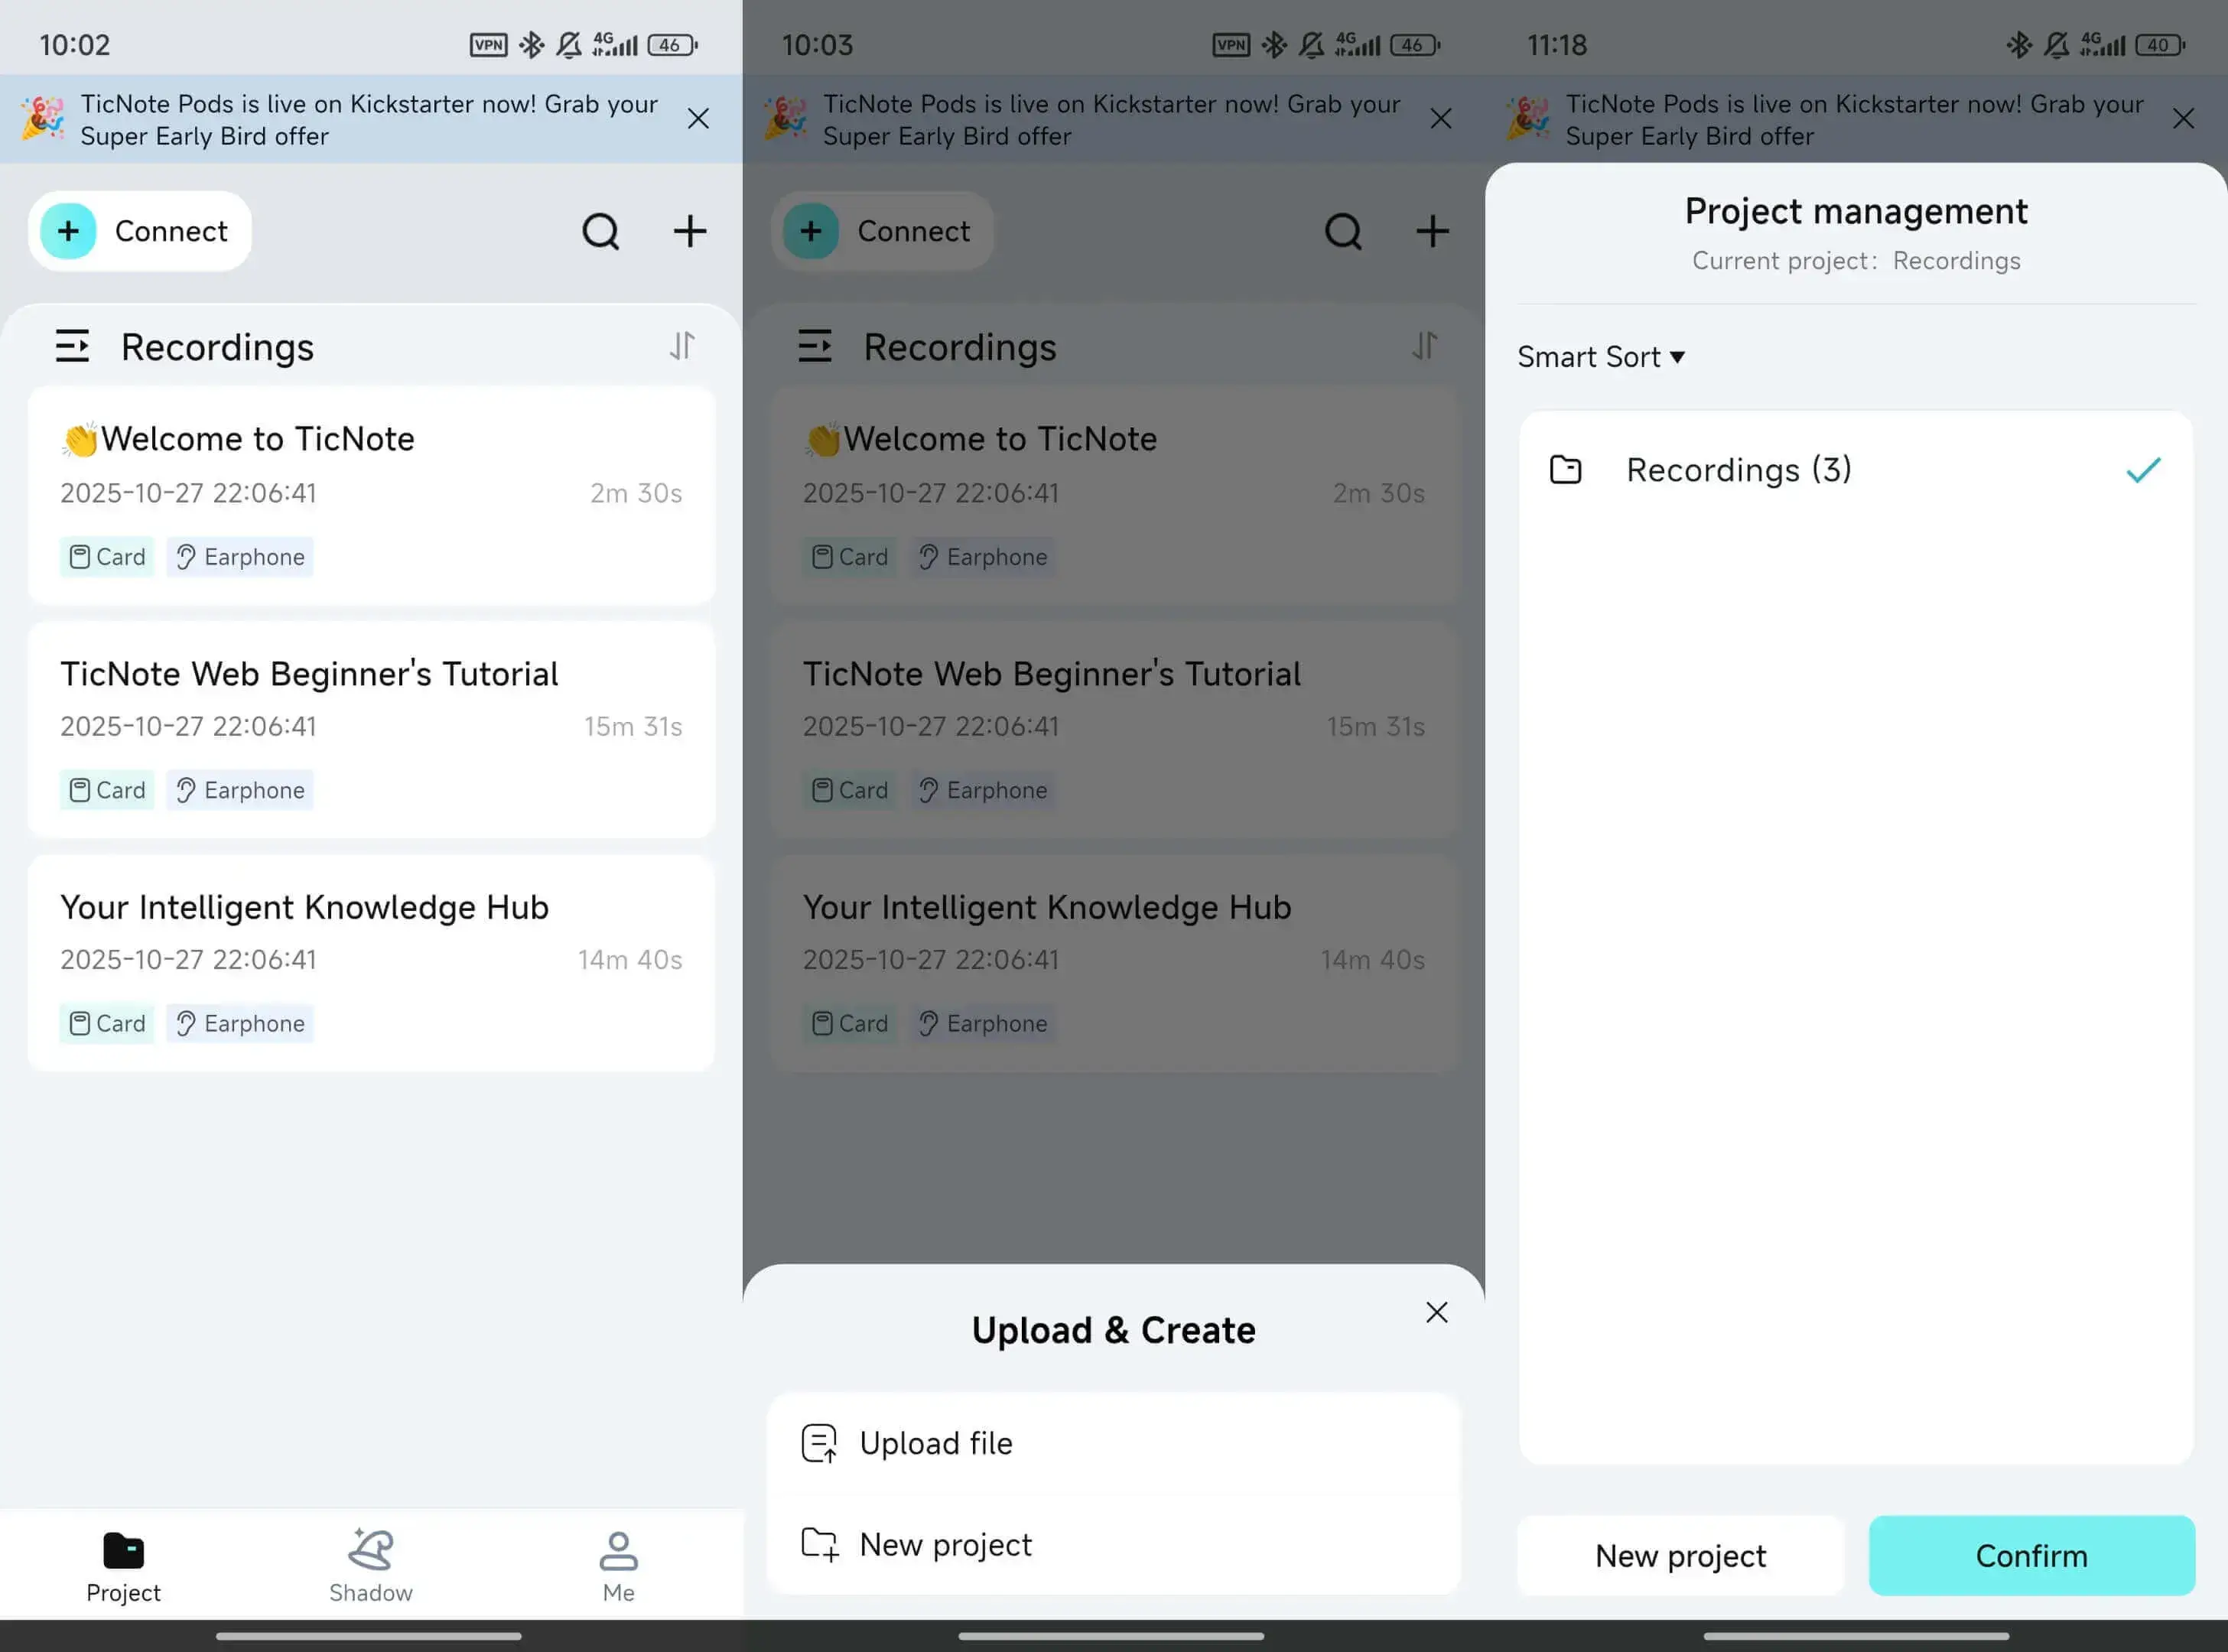
App workflow: quick capture when you're away from your laptop
On mobile, you can upload or record into a project, generate the transcript, then export for final formatting in Word.
When Word is enough vs when this workflow helps
Use Word alone when you only need a transcript and you're within Microsoft 365 limits.
Consider an add on workflow when you also need:
- Faster summaries and action lists
- Translation for sharing across languages
- Reusable organization (project spaces) instead of loose files
- Cross file Q and A for research and follow ups
