

TL;DR: The fastest ways to transcribe Google Meet (and save the text)
To quickly learn how to transcribe Google Meet and keep a clean text file, try TicNote Cloud for free when native transcripts are missing or locked. If you do have Meet transcripts, start them during the call, then file the saved doc right after. If you only have captions, treat them as live help, not a saved record.
You miss key decisions because the words vanish after the call. Then you waste time replaying a recording just to find one action item. A practical fix is a no-bot workflow like TicNote Cloud that captures speech and gives you exportable text and summaries.
- If you have native Meet transcripts: During the call, go to Activities → Transcripts → Start transcription. After the meeting, open the transcript from the email or Calendar event, then move it into a "keep" folder for retention.
- If you only have captions: Use them for accessibility and live follow-along. Don't expect a saved transcript file unless you run a separate workflow.
- If you have a recording: Find the Meet recording in Drive, transcribe the video or audio, then do a quick QA pass on names, numbers, and action items.
- If you need a no-bot workflow: Use a recorder and transcriber that does not join the call, but still exports TXT or doc-ready formats (Markdown, DOCX, PDF).
How to transcribe Google Meet with built-in transcripts (step-by-step)
Google Meet's built-in transcript feature is the simplest way to get a saved, searchable text file without uploading audio later. If you're eligible, you can start it in a few clicks during the call, then open the delivered link after the meeting ends.
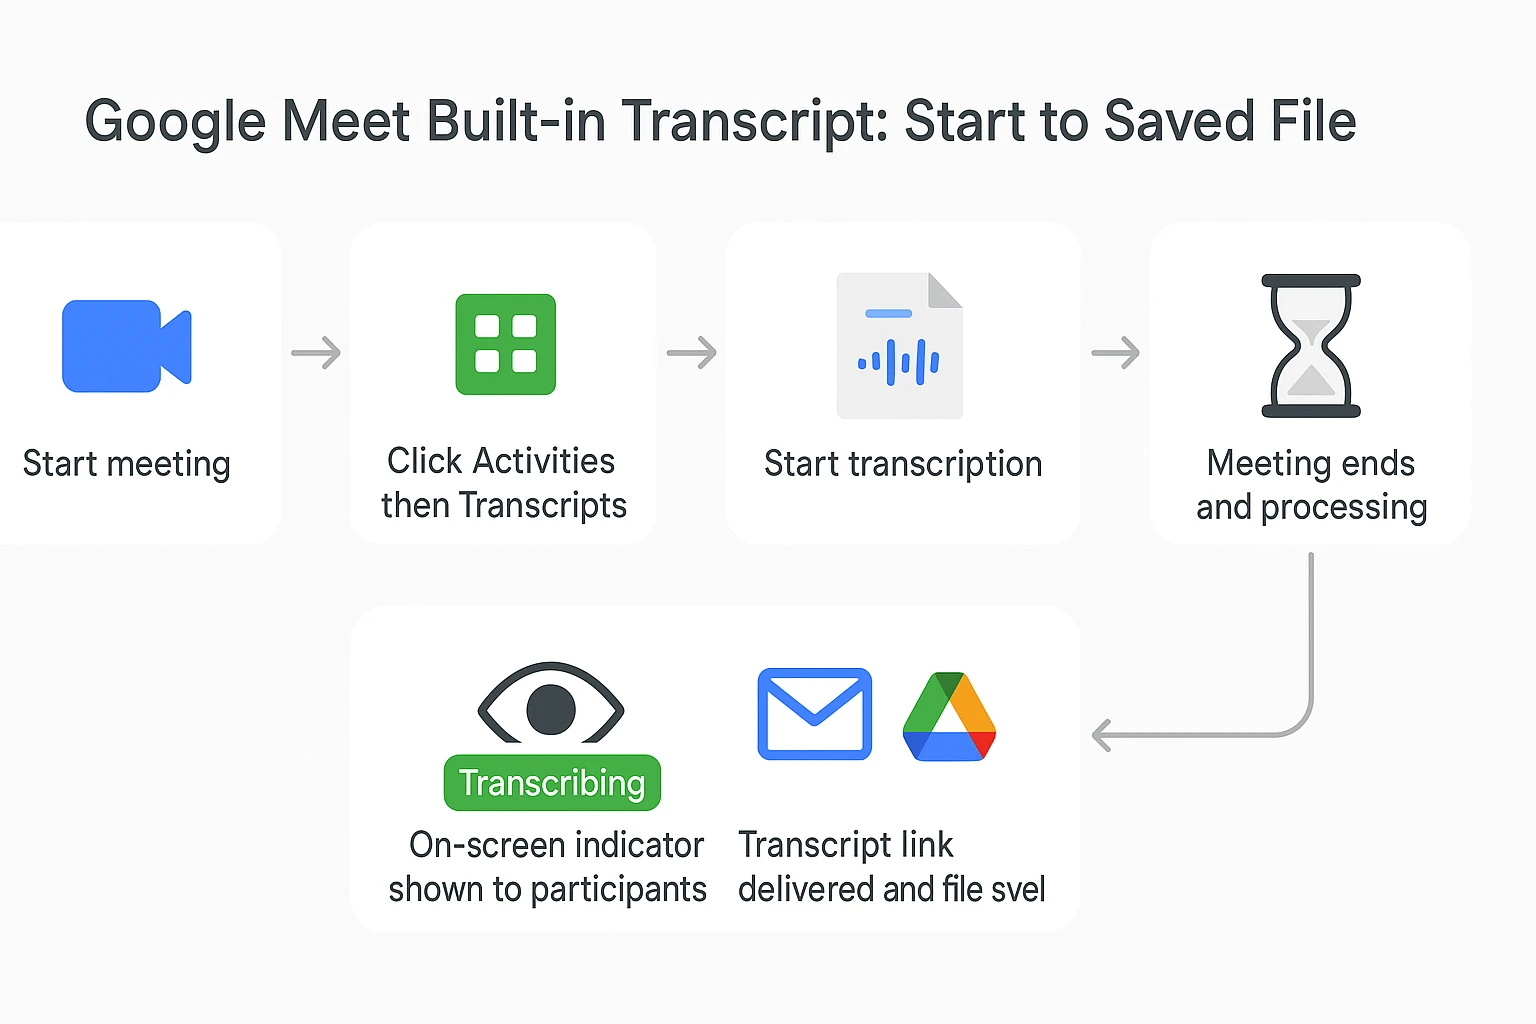
Start transcription during the meeting (Activities → Transcripts)
First, join the meeting on a computer in a web browser. The desktop web app is where Meet's meeting controls are usually most complete.
Then, start the transcript:
- In the meeting, click Activities.
- Choose Transcripts.
- Click Start transcription.
Once it's running, treat it like a "notes are being taken" signal for the room. A little structure makes a big difference in accuracy:
- Ask people to say their name before they speak (especially in large calls).
- Reduce crosstalk (two people talking at once) when possible.
- Keep microphones consistent (avoid switching devices mid-call).
- If you can, have speakers face their mic and slow down slightly.
What participants will see (notifications and indicators)
When transcription is turned on, participants should see an on-screen notice or indicator that transcription is active. That's intentional. It helps with trust and sets expectations.
In practice, you'll want to reinforce that with quick meeting etiquette:
- Tell people you're transcribing for notes and follow-ups.
- Remind attendees to speak one at a time for clearer output.
- If sensitive topics come up, pause transcription and confirm consent.
What happens after the meeting (processing time and delivery)
Google Meet processes the transcript after the meeting ends. Short meetings may show up quickly, but longer meetings can take more time to finish processing.
The output is typically a document-style transcript you can open from the link you receive. It's designed to be skimmable, with structure such as speaker turns and time cues, so you can find decisions, questions, and action items faster than replaying audio.
Who gets the transcript link (host vs person who started it)
In most organizations, the transcript link is delivered through the meeting's context, not as a public file. Common delivery paths include:
- An email notification with the transcript link.
- Access from the Google Calendar event associated with the meeting.
Access can depend on roles and who started transcription:
- If you're the meeting host or a co-host, you may have more consistent access.
- If someone else turned transcription on, that person may receive the primary link or ownership-like access first.
- Regardless, sharing is still permission-based, so some attendees may not be able to open the transcript unless they're allowed.
Mini checklist (save it, don't lose it)
- Start transcript (Activities → Transcripts)
- Confirm the "transcription on" indicator
- End the meeting
- Open the delivered transcript link
- Move, store, or share it based on your team's process
What are the requirements and admin settings for Google Meet transcription?
If you're trying to figure out how to transcribe Google Meet and the option is missing, it's usually not you. It's eligibility. Transcripts are plan-gated in Google Workspace, and they also depend on admin policies, meeting type, and who's hosting.
Workspace edition and eligibility basics
Google Meet transcription isn't available on every Workspace plan. Even when your company "has Google Meet," transcripts may be turned off at the org or OU (organizational unit) level.
If you're unsure, ask your Google Workspace admin to confirm two things:
- Your Workspace edition includes Meet transcripts
- The transcription feature is enabled for your user group
Host role and meeting context limits
In most setups, the host (and sometimes a co-host) is the one who can start a transcript. If you're a participant, you might not see "Transcripts" at all until the host starts it, or you may never see it if your org restricts it.
Meeting context can also change what appears:
- Organizer domain: meetings organized by another domain can block features
- Internal vs external: some orgs allow transcripts only for internal meetings
- Scheduled vs ad hoc: Calendar-created meetings are more likely to follow the expected policy and save paths
Admin console controls to check (Meet and Drive)
If you're the admin, treat this as a quick checklist. Transcripts can fail even when Meet has the toggle on, because saving depends on Drive.
- Meet settings: verify transcription is allowed for the right OU or group
- Drive permissions: users must be allowed to create files and write to Drive
- Sharing rules: strict sharing can limit who can access the transcript later
- Storage and retention: if Drive storage is full or the account is suspended, saving and access can break; retention rules may delete files after a set period
Language and region caveats (and what "accuracy" means)
"Supported languages" has three practical parts:
- Your Meet and Workspace UI language
- The language people actually speak in the call
- How clean the audio is (mics, overlap, accents, noise)
Also, supported doesn't always mean accurate. Mixed-language meetings, fast cross-talk, and heavy jargon can reduce quality. If you need better results, a workflow that lets you clean audio and run a dedicated transcript pass often helps. This is where a more controlled process, like a recording plus a transcription workflow, can be more reliable. For a simple, repeatable approach, see this guide on building a clean meeting transcription workflow.
If your plan or policies don't allow transcripts, jump to the recording-based method and the alternative workflow sections next.
Captions vs transcripts vs recordings: what's the difference in Google Meet?
If you're trying to figure out how to transcribe Google Meet, it helps to know what you're actually getting: live captions (on-screen text), a saved transcript file (a document you keep), or a recording (a video you can transcribe later). They sound similar, but they solve different problems.
Live captions (what you see)
Captions are real-time text on your screen. They're mainly for accessibility and live understanding. In most cases, captions aren't saved as a file you can search later, so they're great in the moment but not ideal for follow-ups.
Saved transcript file (what you keep)
A transcript is a file created for the meeting after it ends. It's useful for searching decisions, writing recaps, and documenting action items. It's often grouped into time blocks and may include speaker labels, but it can still need cleanup if there's cross-talk, accents, or weak audio. Some teams also find editing and exporting a bit rigid compared to a normal doc.
Recording file (what you can transcribe later)
A recording is the meeting's video and audio saved to Google Drive. It doesn't automatically give you text, but it's the most reliable fallback. If you have the recording, you can transcribe it later using a separate tool or workflow, which also helps when native transcript access isn't available.
When each option is best
| Option | Live visibility | Saved output | Who can access | Best use-case |
| Live captions | Yes | No (usually) | Each viewer who turns it on | Accessibility and live comprehension |
| Native transcript | No | Yes (text file) | Typically the organizer and allowed users | Fast documentation when your plan supports it |
| Recording | No | Yes (video/audio file) | People with Drive access | Universal backup for consistent transcription later |
If you need help turning any recording into clean text, this guide on transcribing a video with a clean export workflow lays out practical options.
Where do Google Meet transcripts save, and how do you keep/share them?
After you transcribe Google Meet with native transcripts, the next question is simple: where did it go, and who can see it? Google Meet usually saves the transcript as a Google Docs file tied to the meeting, then links it back to the meeting details so you can find it again.
Find the transcript in Google Drive (owner, location, naming)
Here's a quick mini map for "where to find Google Meet transcript in Drive":
- Who owns it: Usually the meeting organizer's Google Drive (the account that started the transcript). In some orgs, the owner can vary based on host controls and policy.
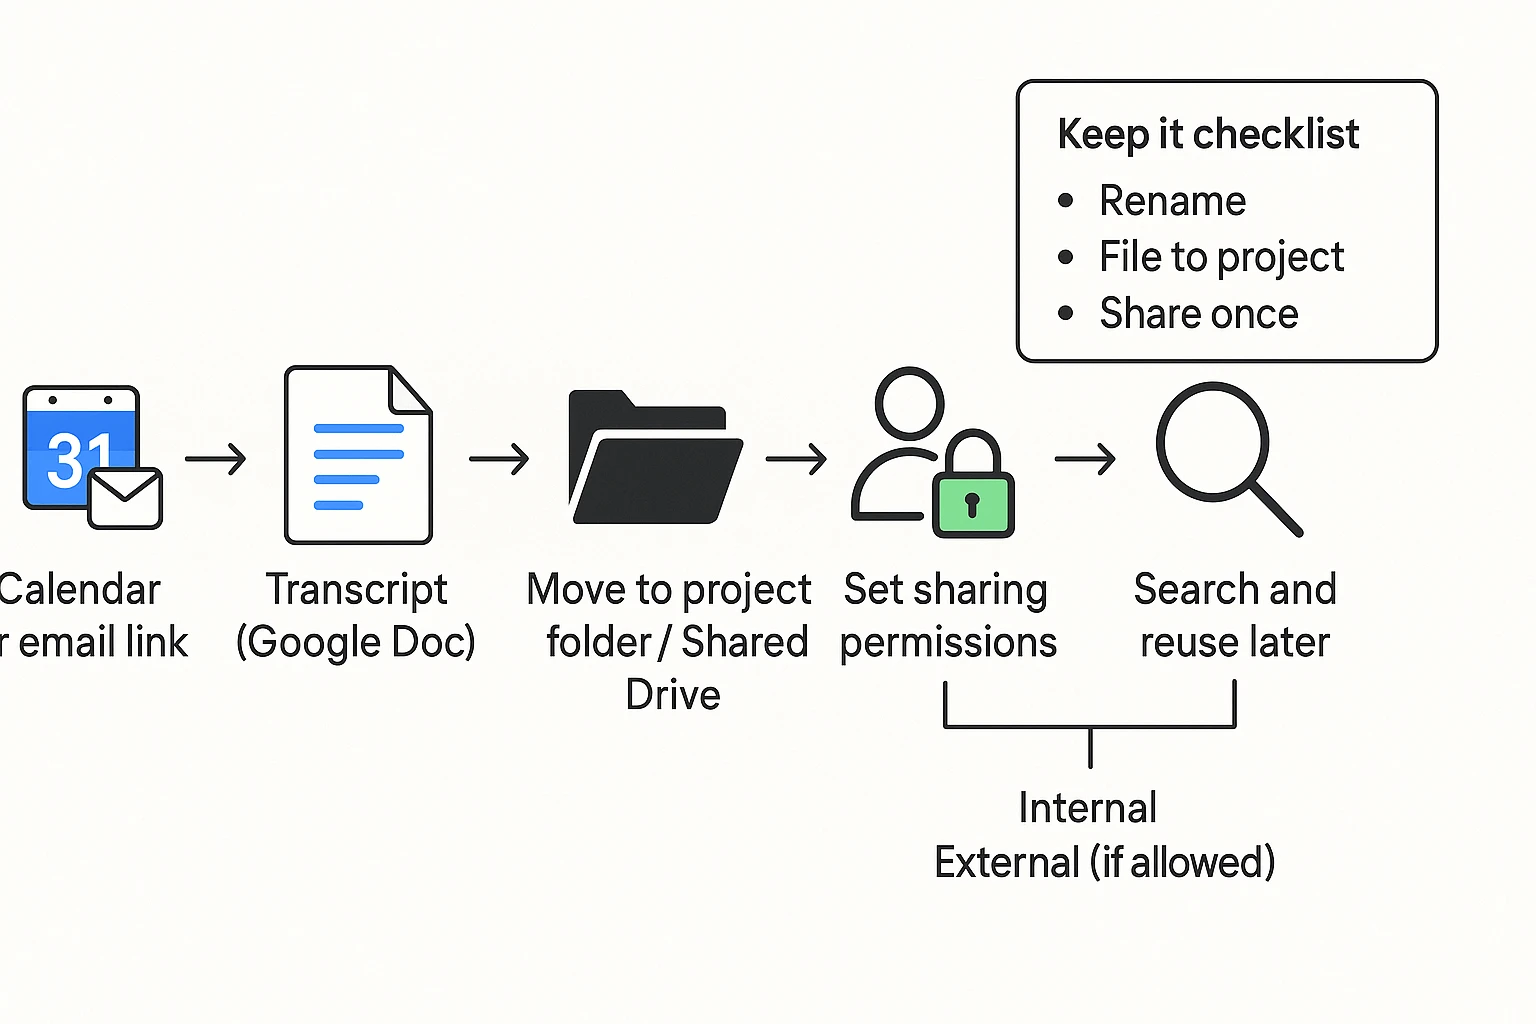
- Where it shows up: Look in Google Drive, and also check the Google Calendar event for the meeting. Many users find the transcript link from the event details after the meeting.
- How it's named and how to search: It's typically a Google Doc with the meeting name and date. If you can't spot it, use Drive search and filter for Type: Docs, then search terms like the meeting title, "transcript", or the date.
Fix "request access" and share the right way
If someone can click the transcript link but sees "Request access," it's almost always a permissions mismatch. The link exists, but the Doc is still private to the file owner, a specific Drive, or a restricted domain.
Use one of these clean sharing patterns:
- Internal attendees (same Google Workspace domain): Share the Doc to the meeting group or specific attendees, or set link sharing to "Anyone in your organization with the link" if allowed.
- External guests: Share directly to the guest emails, but only if your admin policy allows external sharing.
- Best practice: Store transcripts in a shared folder or Shared Drive for the project, then share the folder once. That avoids one off access requests for every meeting.
Keep it longer: retention and organization checklist
Transcripts don't help much if they're hard to find later. In practice, teams also lose access when files stay in personal Drives, people leave, or meeting clutter builds.
Keep it checklist:
- Move the Doc into a project folder right after the meeting.
- Rename it with a consistent pattern (example:
Project | Meeting name | YYYY-MM-DD). - Store it in a Shared Drive if your org uses one, so access stays stable.
Edit and export: what's easy vs what's hard
What's easy:
- Edit the transcript in Google Docs.
- Add comments, highlight decisions, and assign follow ups in your usual doc workflow.
What's harder:
- Keeping every meeting in the same summary format.
- Searching across many meetings for the same topic.
- Producing structured exports consistently (for example: a clean action list plus a reusable template).
Callout: If your team needs standardized summaries and repeatable exports, the alternative workflow section will show a simple, reliable path.
How do you transcribe a Google Meet recording if you don't have native transcripts?
If Google Meet transcripts aren't available on your account, you can still get a searchable text file by recording the meeting (if allowed) and transcribing the recording afterward. This method works well for sales calls, classes, and team syncs when you need shareable notes, action items, and a clean follow-up.
1) Record the meeting (when recording is allowed)
Recording access can depend on your Google Workspace plan, your admin's Meet settings, and whether you're the host (or a co-host). Before you hit record, tell everyone what's happening.
A simple script you can reuse:
- "I'm going to record and transcribe this meeting so we can share notes and action items afterward. Let me know if you prefer to opt out."
2) Export or locate the video or audio file
After the meeting, find the recording file in Google Drive (often in your Drive, or a shared location your org uses). Open it once to confirm it plays and the audio is clear.
For faster transcription, an audio-only file can help. Keep it tool-agnostic:
- If your video editor offers it, export "audio only" (commonly M4A, MP3, or WAV).
- If you can't export, you can still transcribe the original video file.
3) Upload to a transcription tool and review the draft
Most tools follow the same flow: upload, pick language, generate, then edit.
What to review first (this saves time later):
- Speaker names (or at least Speaker 1, Speaker 2 consistency)
- Acronyms and product terms
- Numbers, dates, prices, and deadlines
- Action items and owners
If you want a full workflow, this guide on transcribing meeting audio step by step covers common formats and review patterns.
4) Quick quality check before you share
Do a fast QA pass so you don't forward mistakes:
- Listen to 60 to 90 seconds in three spots: start, middle, end.
- Search for "???" or obvious garbled lines.
- Confirm key decisions and next steps are captured.
Optional internal SOP snippet (copy/paste):
- File name:
YYYY-MM-DD Team Name - Meeting Topic (Client/Project) - Storage: Save final transcript in the same folder as the recording, plus your project's "Meeting Notes" folder
- Sharing: Share transcript link with the same people as the recording, then lock edits after review
Try TicNote Cloud for Free to transcribe your Meet recording and export a clean TXT transcript.
Troubleshooting: why can't I see "Transcripts," or why is the transcript wrong?
When Google Meet transcription fails, it's usually one of two things: you're not eligible to generate a saved transcript, or the audio and language mix makes the text messy. Use the quick checks below to find the fastest fix, then switch to a recording-based method when you need a dependable backup.
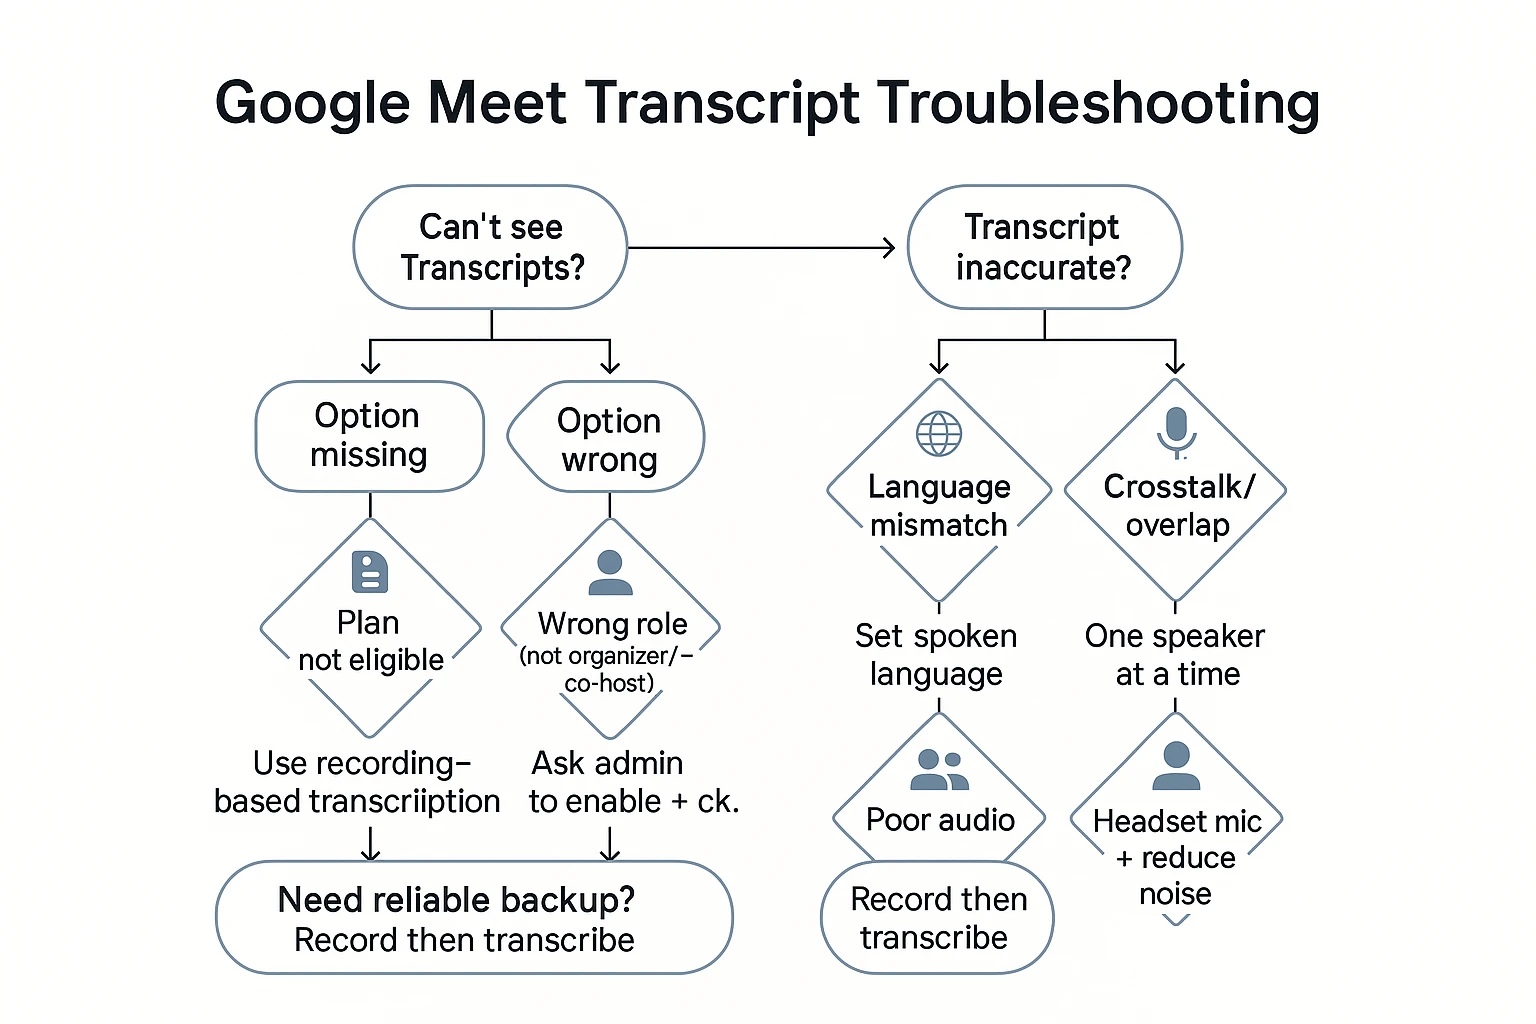
If "Transcripts" is missing: use this decision tree
Start here:
- Not on an eligible plan
- If your Workspace edition doesn't include transcripts, the option won't appear.
- Fastest fix: record the meeting and transcribe the recording after.
- Wrong role or meeting type
- Only the right people can start it. If you're a guest or not the organizer, you may not see it.
- Fastest fix: ask the organizer to start transcripts, or make you a co-host.
- Admin policy disabled (most common in orgs)
- Your admin can turn transcription off, even if the plan supports it.
- Fastest fix: ask your admin to enable Meet transcription and confirm your Drive sharing permissions.
If the transcript text is wrong: check language first
Google Meet transcription supported languages can be a hidden issue in real calls. If the spoken language doesn't match the selected language, accuracy drops fast.
- Confirm what language people are actually speaking. Accents and code-switching (mixing languages) can confuse the model.
- Set expectations in multilingual meetings. If accuracy matters for names, deals, or grades, use a recording-based tool and clean it after.
If speaker labels are wrong: stop crosstalk
Speaker labeling (diarization, meaning "who said what") breaks when:
- People talk over each other.
- Voices sound similar.
- One mic captures a whole room.
Quick fixes that help right away:
- Ask people to pause before replying.
- Use "raise hand" or call on people by name.
- Repeat key decisions and action items once, clearly.
Audio tips that improve transcription results
Small changes can make a big difference:
- Use a headset mic when you can. Avoid speakerphone echo.
- Reduce noise. Close loud rooms, mute when not speaking.
- Keep your computer stable. Too many tabs can cause audio glitches.
- Say names and numbers slowly once, then confirm spellings in chat.
Troubleshooting matrix (symptom → cause → fastest fix)
| Symptom | Likely cause | Fastest fix |
| "Transcripts" menu is missing | Plan not eligible | Record, then transcribe the file |
| "Transcripts" missing for you only | You're not organizer/co-host | Ask organizer to start it |
| "Transcripts" missing for everyone | Admin disabled the feature | Ask admin to enable transcription |
| Transcript is in the wrong language | Spoken language mismatch | Set the right language before starting |
| Lots of errors in names/numbers | Fast speech, poor mic | Slow down; use headset; confirm in chat |
| Wrong speaker labels | Overlapping talk, shared mic | One speaker at a time; call out names |
If you're testing other fallback options, this guide to ChatGPT audio transcription limits and alternatives can help you pick a method that matches your file size, privacy needs, and accuracy goals.
When Google Meet transcription falls short
Google Meet's built-in transcription is tied to Workspace editions and admin settings. Here's where it breaks down in practice:
- No Workspace Business Standard or above = no transcription. Free Google accounts and many Workspace plans don't get access. If your org isn't on the right tier, the option simply doesn't appear.
- No speaker labels in the exported transcript. The DOCX file Google saves to Drive lists utterances in sequence but doesn't reliably identify who said what — making it harder to attribute action items.
- Transcription stops if the host leaves. If the host drops off, transcription ends, regardless of whether the meeting continues.
- No AI summaries or action item extraction unless your org uses Gemini for Workspace (add-on pricing).
- Retention is controlled by Drive settings, not by you. Auto-purge policies set by your IT admin can delete transcripts without notice.
A complementary approach
For teams that hit these limits — or who need transcription across Meet, Zoom, and Teams in one place — TicNote works as a recording layer alongside Google Meet. It handles multilingual transcription, speaker labels, and AI summaries without requiring a Workspace upgrade.
For a full comparison of tools, see best AI transcription tools for meetings.
Privacy and compliance: what should you do before recording or transcribing?
Before you transcribe Google Meet, treat it like a data collection step. Set expectations, get the right consent, and control who can access the text. A little setup now prevents awkward surprises later.
Use a simple consent and notice checklist
Internal meetings often follow company policy, so notice may be enough. External or client calls usually need clear, explicit consent.
- Say it up front: recording, transcription, purpose, who will see it.
- Confirm consent (especially for external): ask for a verbal "yes" and pause.
- Offer an option: "If anyone prefers, we can turn it off and take manual notes."
- Document the decision: add one line in the agenda or meeting notes.
Handle sensitive data with a "minimal necessary" rule
Transcripts can capture more than you intend. Try to avoid saying sensitive items aloud when possible, and tighten what you keep.
- Avoid reading out IDs, payment details, health information, passwords, or private addresses.
- If something sensitive is said, redact it in the saved transcript or summary.
- Keep only what you need for follow-ups, decisions, and required records.
Lock down storage, access, and retention
Transcripts should be shared only with the people who need them.
- Restrict access to the project team. Don't use open links.
- Use a shared drive or approved project space if policy requires it.
- Set a retention habit: review after 30 to 90 days, then archive or delete.
One-sentence disclosure you can read at the start
Pick one and keep it consistent.
- Internal: "I'm turning on transcription so we can capture decisions and action items."
- External: "With your consent, I'll record and transcribe this call to create accurate notes; we'll store it securely and share only with attendees."
How to transcribe Google Meet without native access (example workflow)
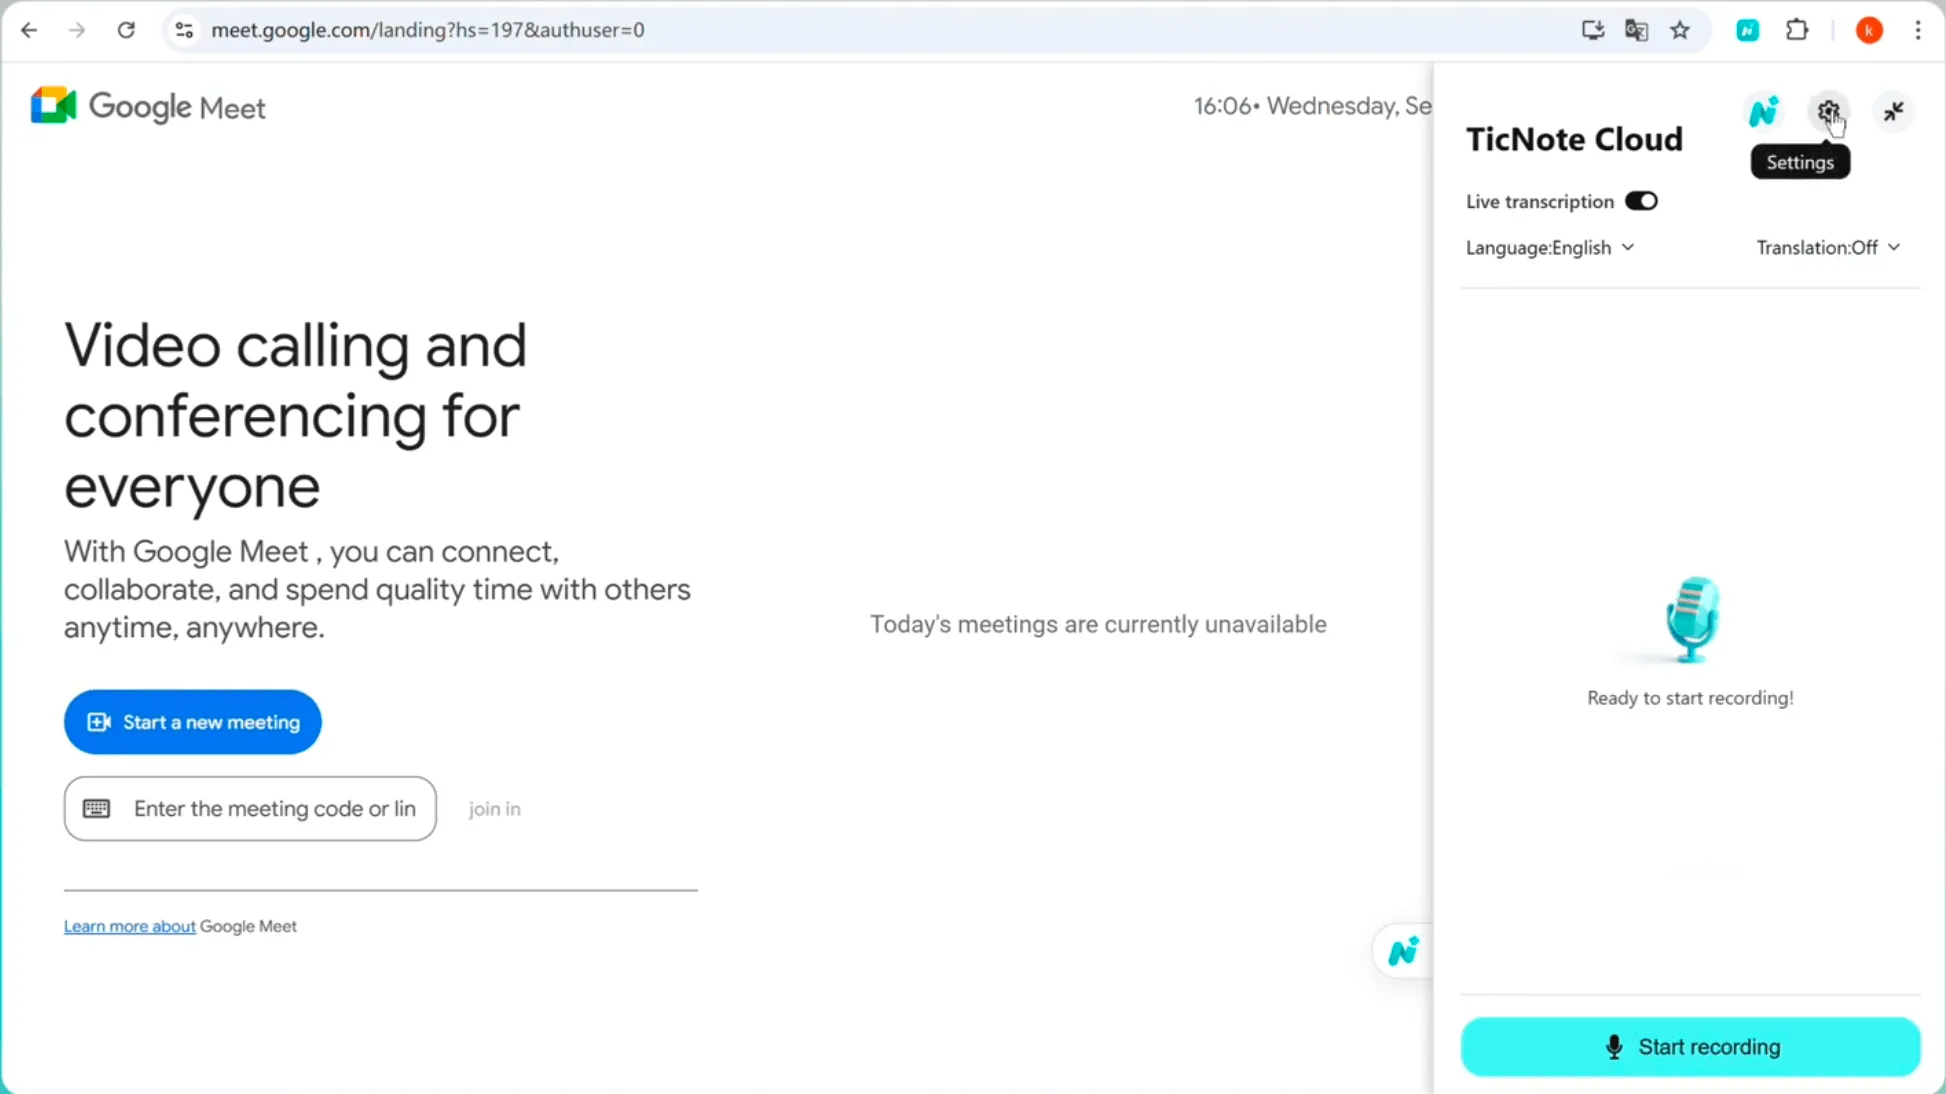
If you can't use Google Meet's built-in transcripts, you can still get a searchable transcript by recording your own audio and transcribing it after. Below is a simple no-bot workflow using TicNote Cloud, which records from your device without joining the call, so it fits "no extra attendee" policies while still giving you clean text you can save and share.
Step 1: Capture audio from a Meet call (Chrome extension)
Start by setting up the extension once, then you can reuse it for every meeting.
- Install the Chrome extension
Search for TicNote Cloud in the Chrome Web Store and install it.
On the extension page, choose Add to Chrome.
- Sign in and keep it handy
Pin the extension so it's one click away during calls.
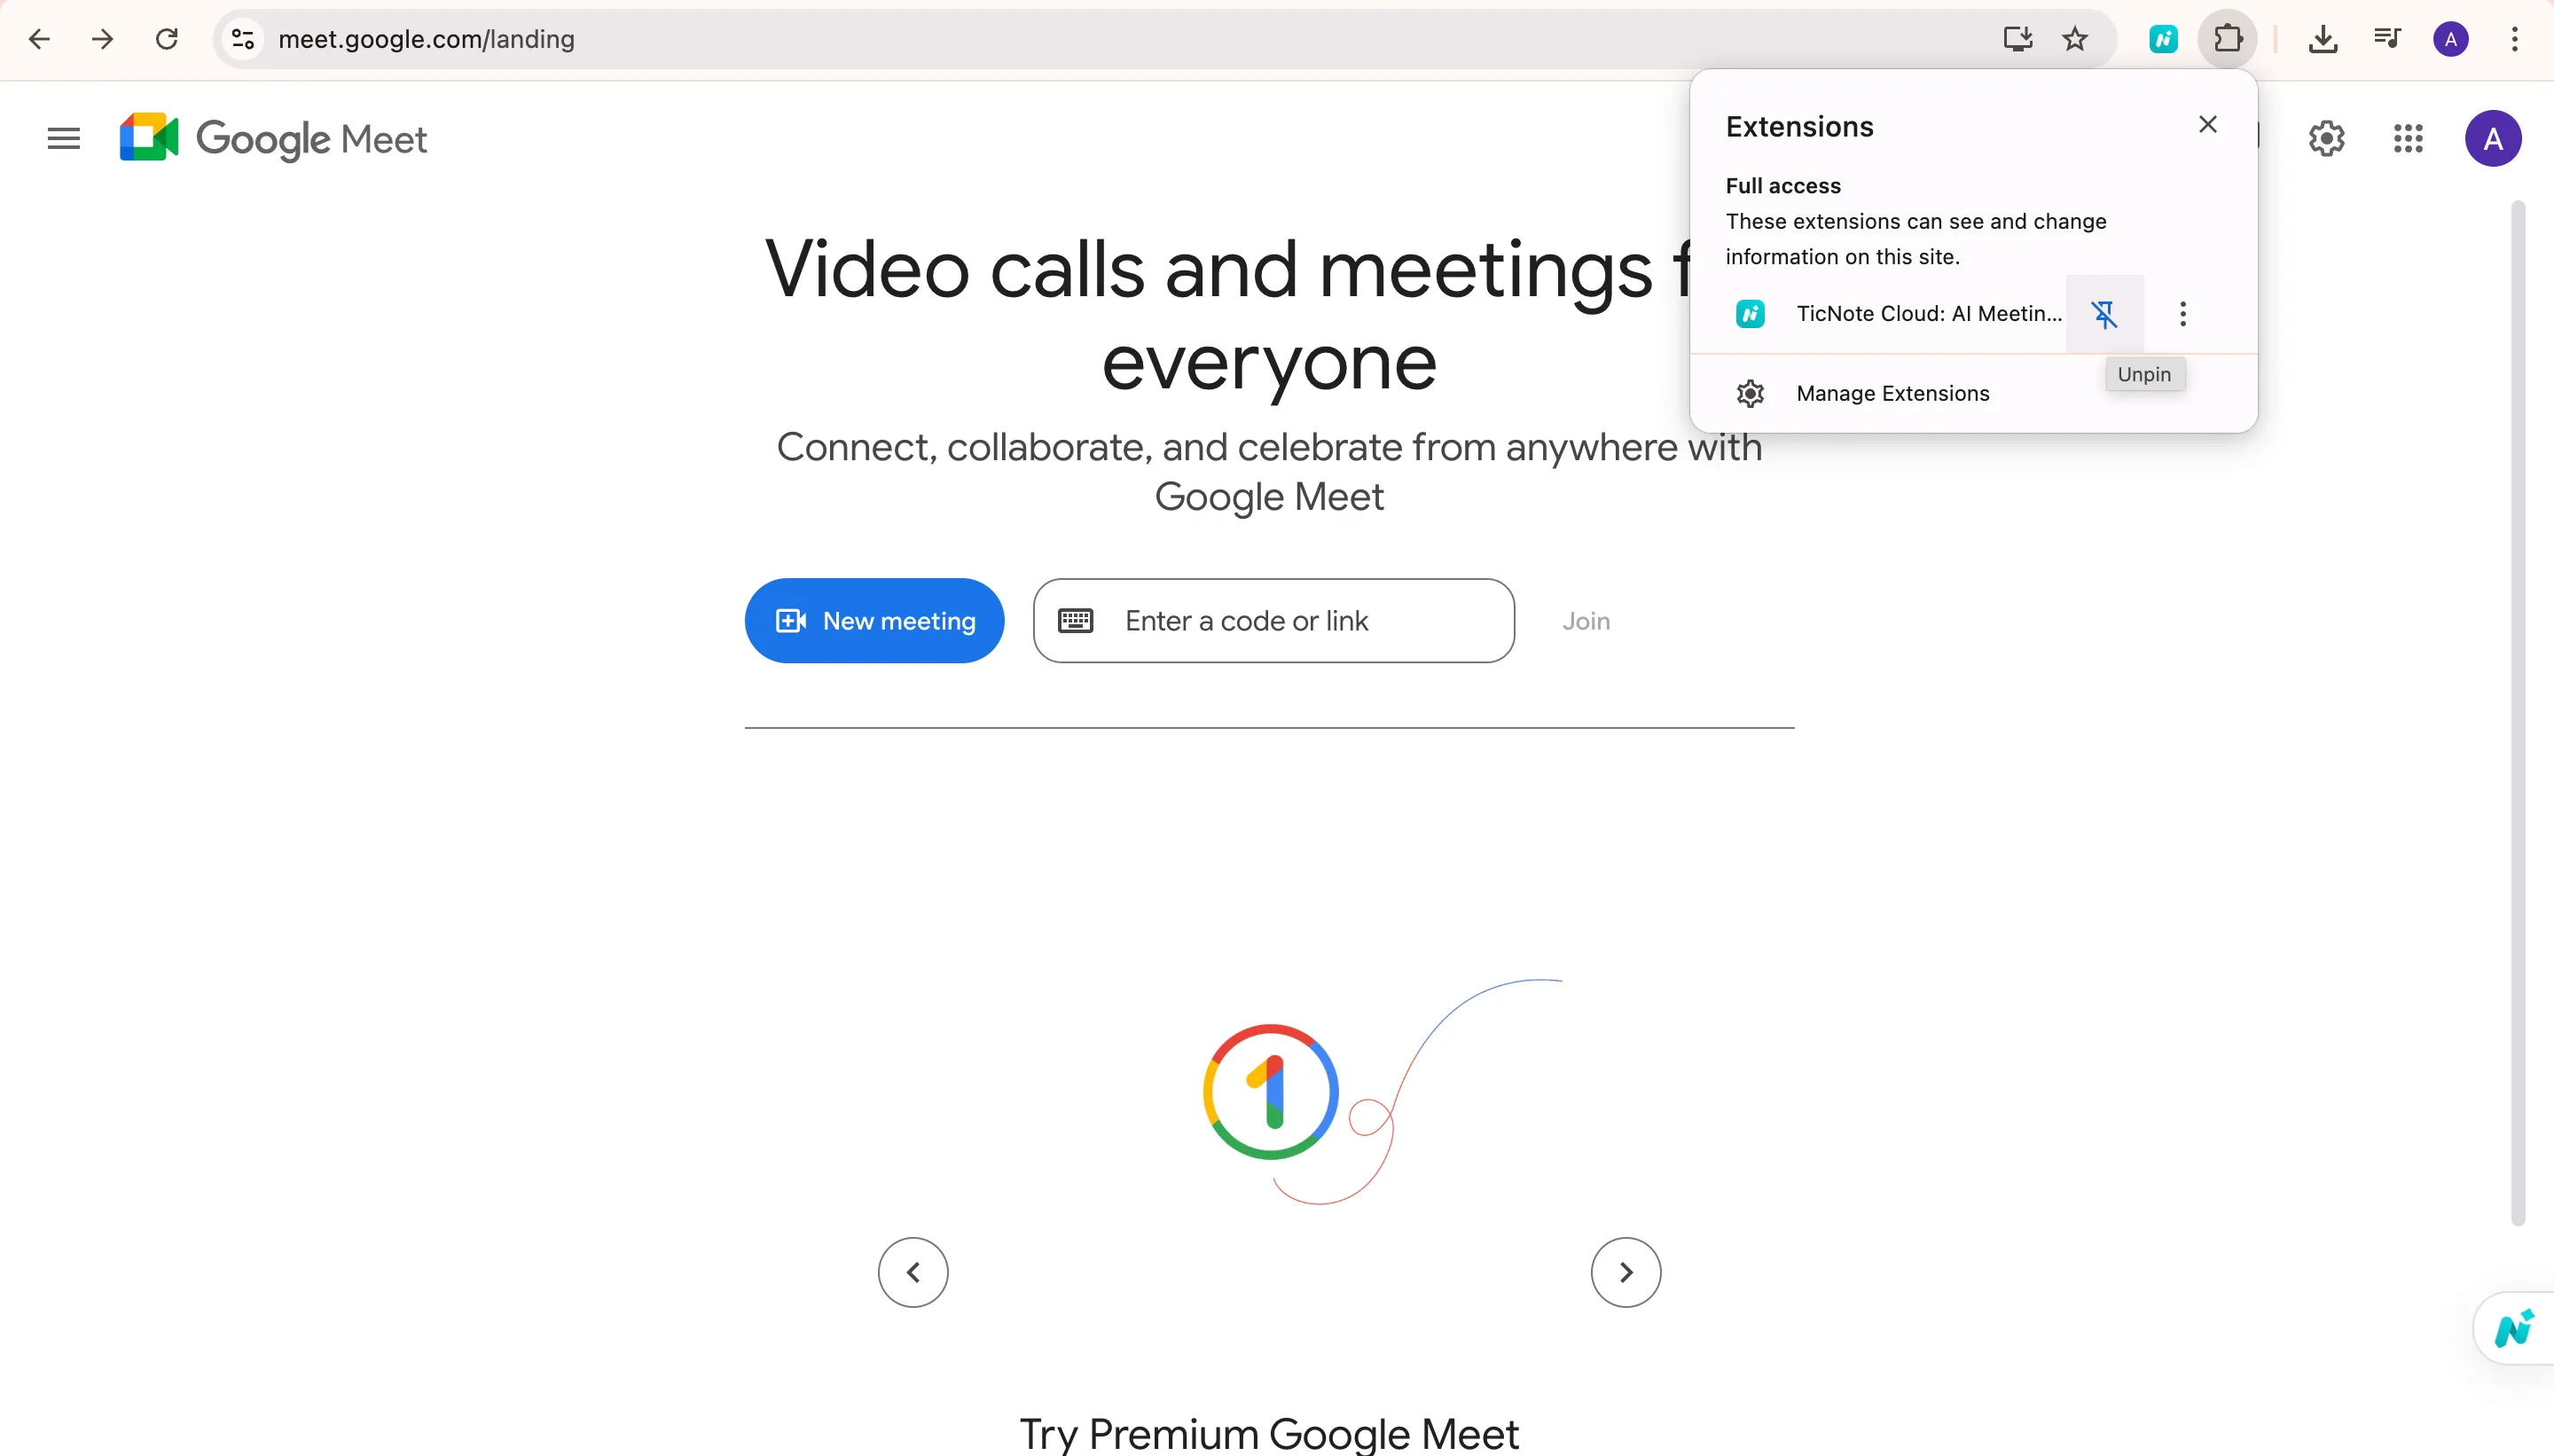
Then sign in from the extension panel.
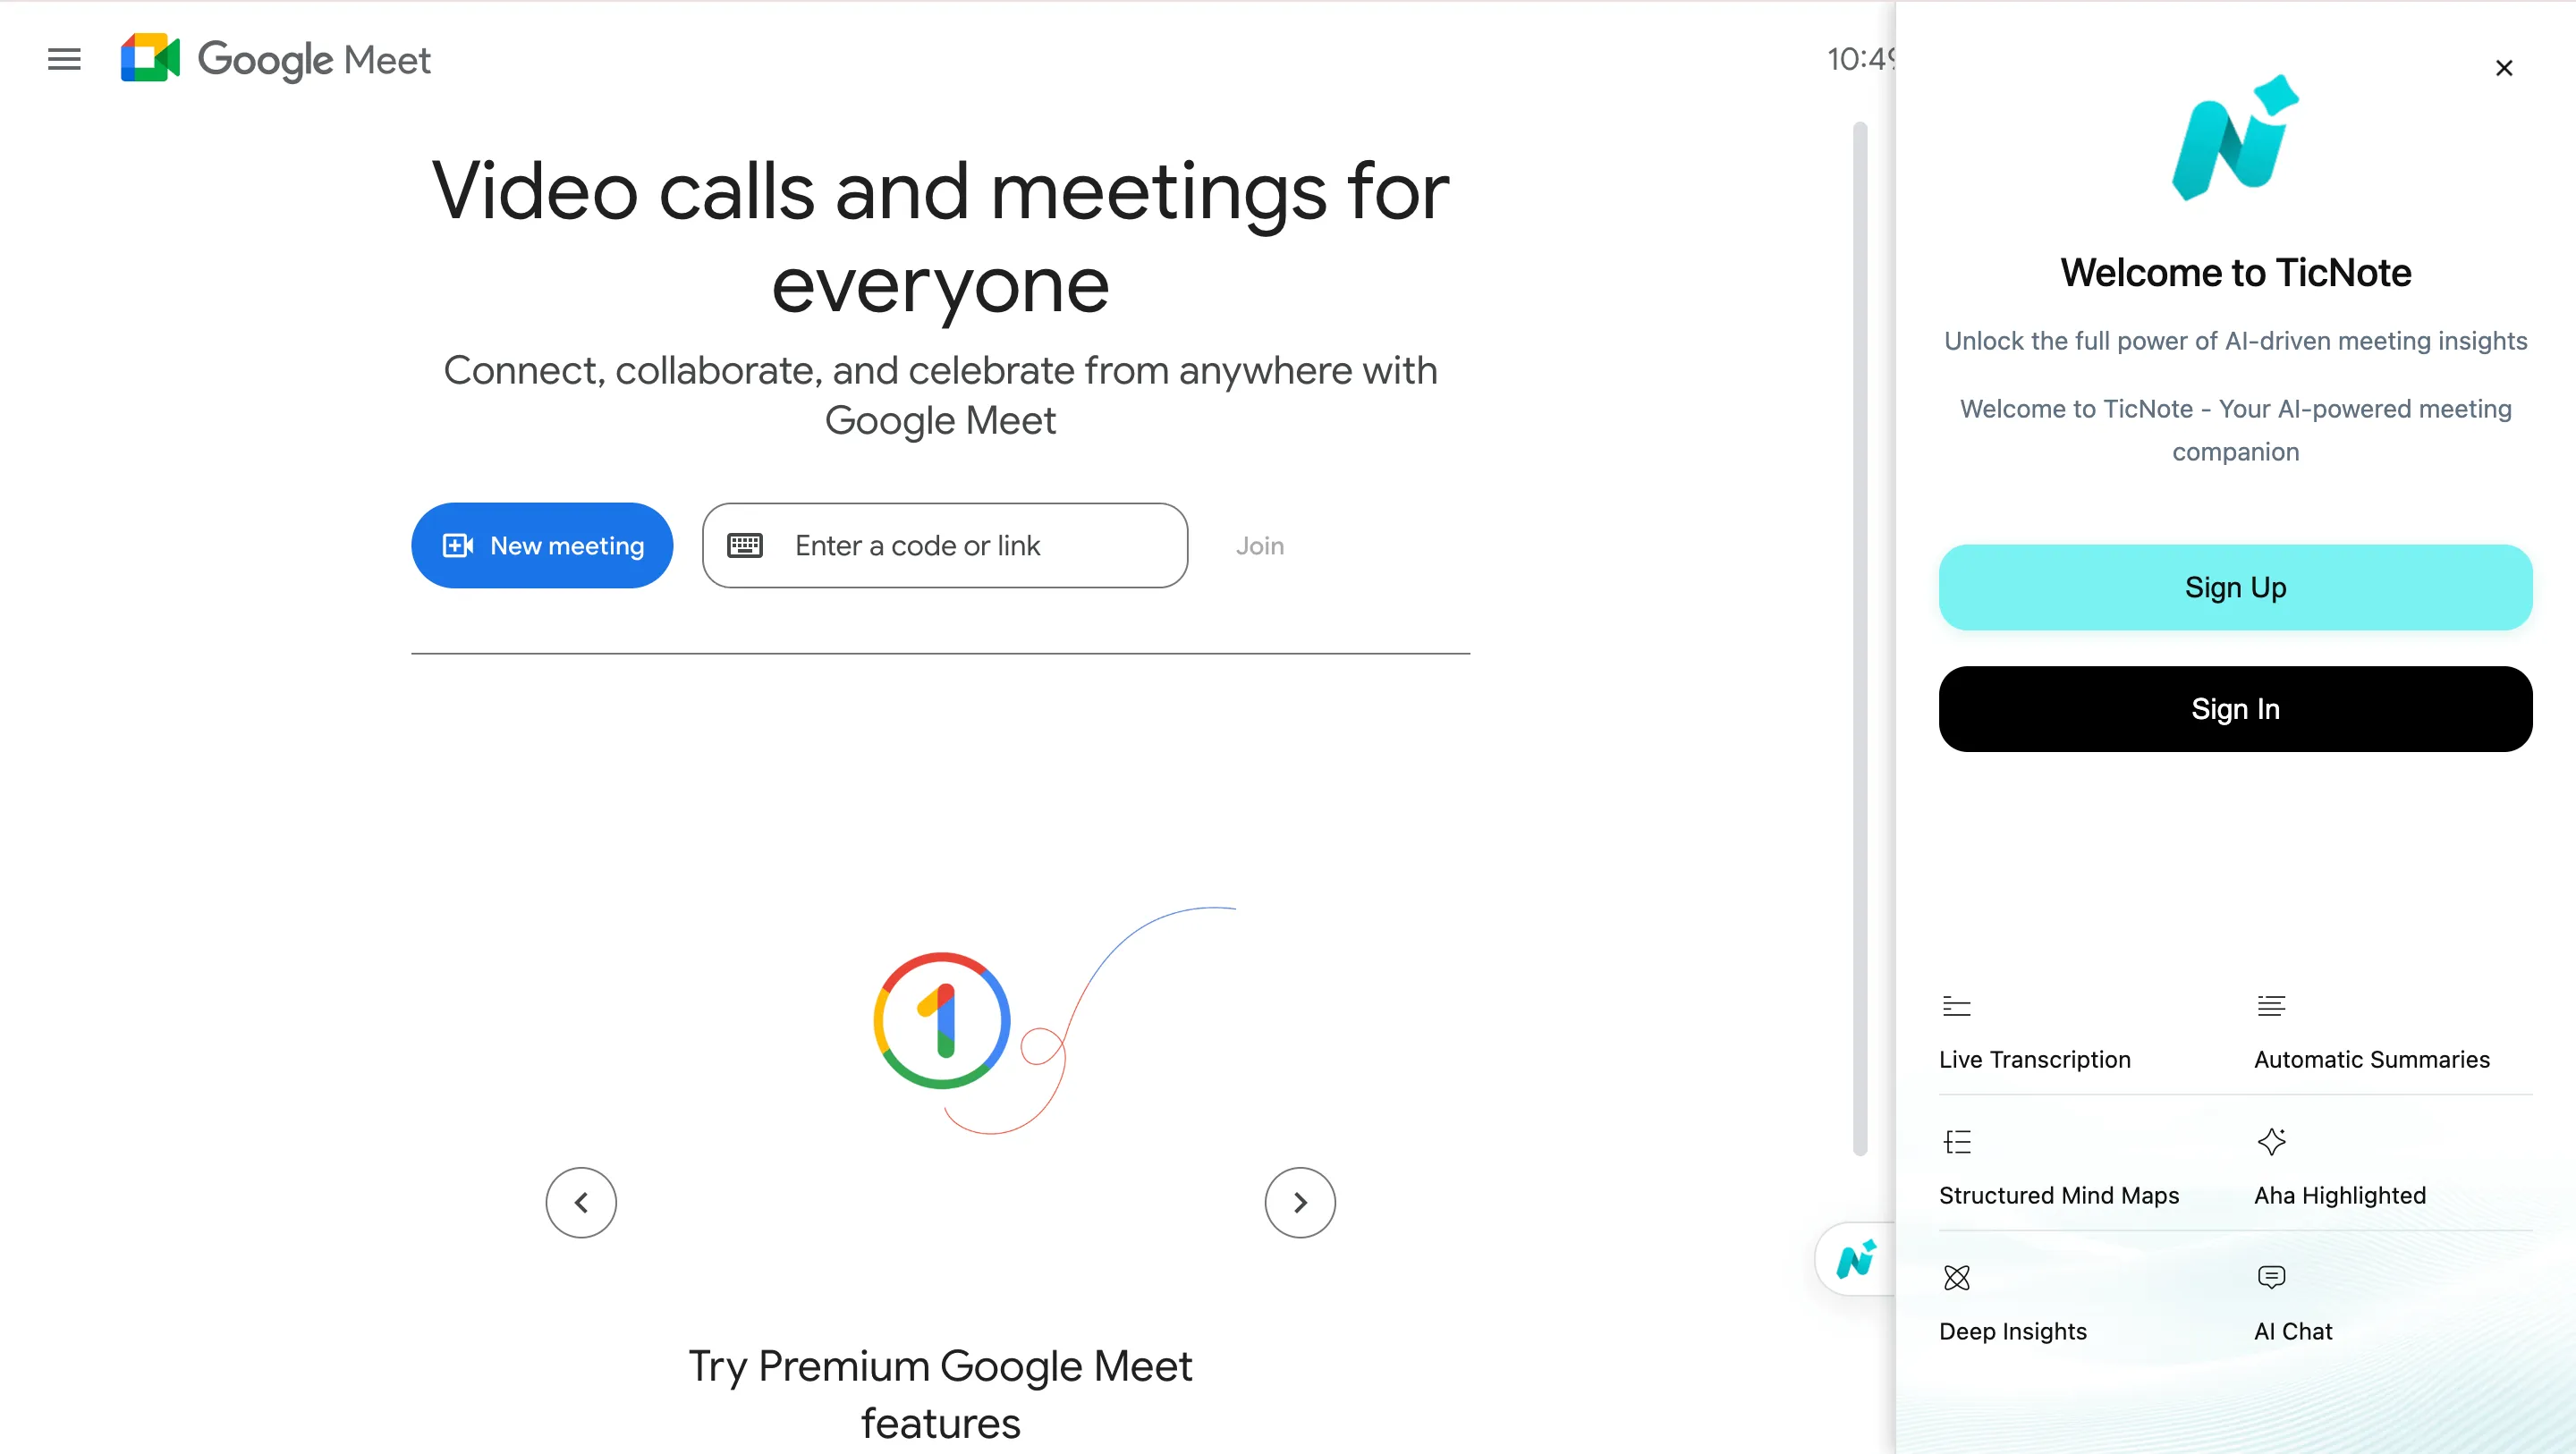
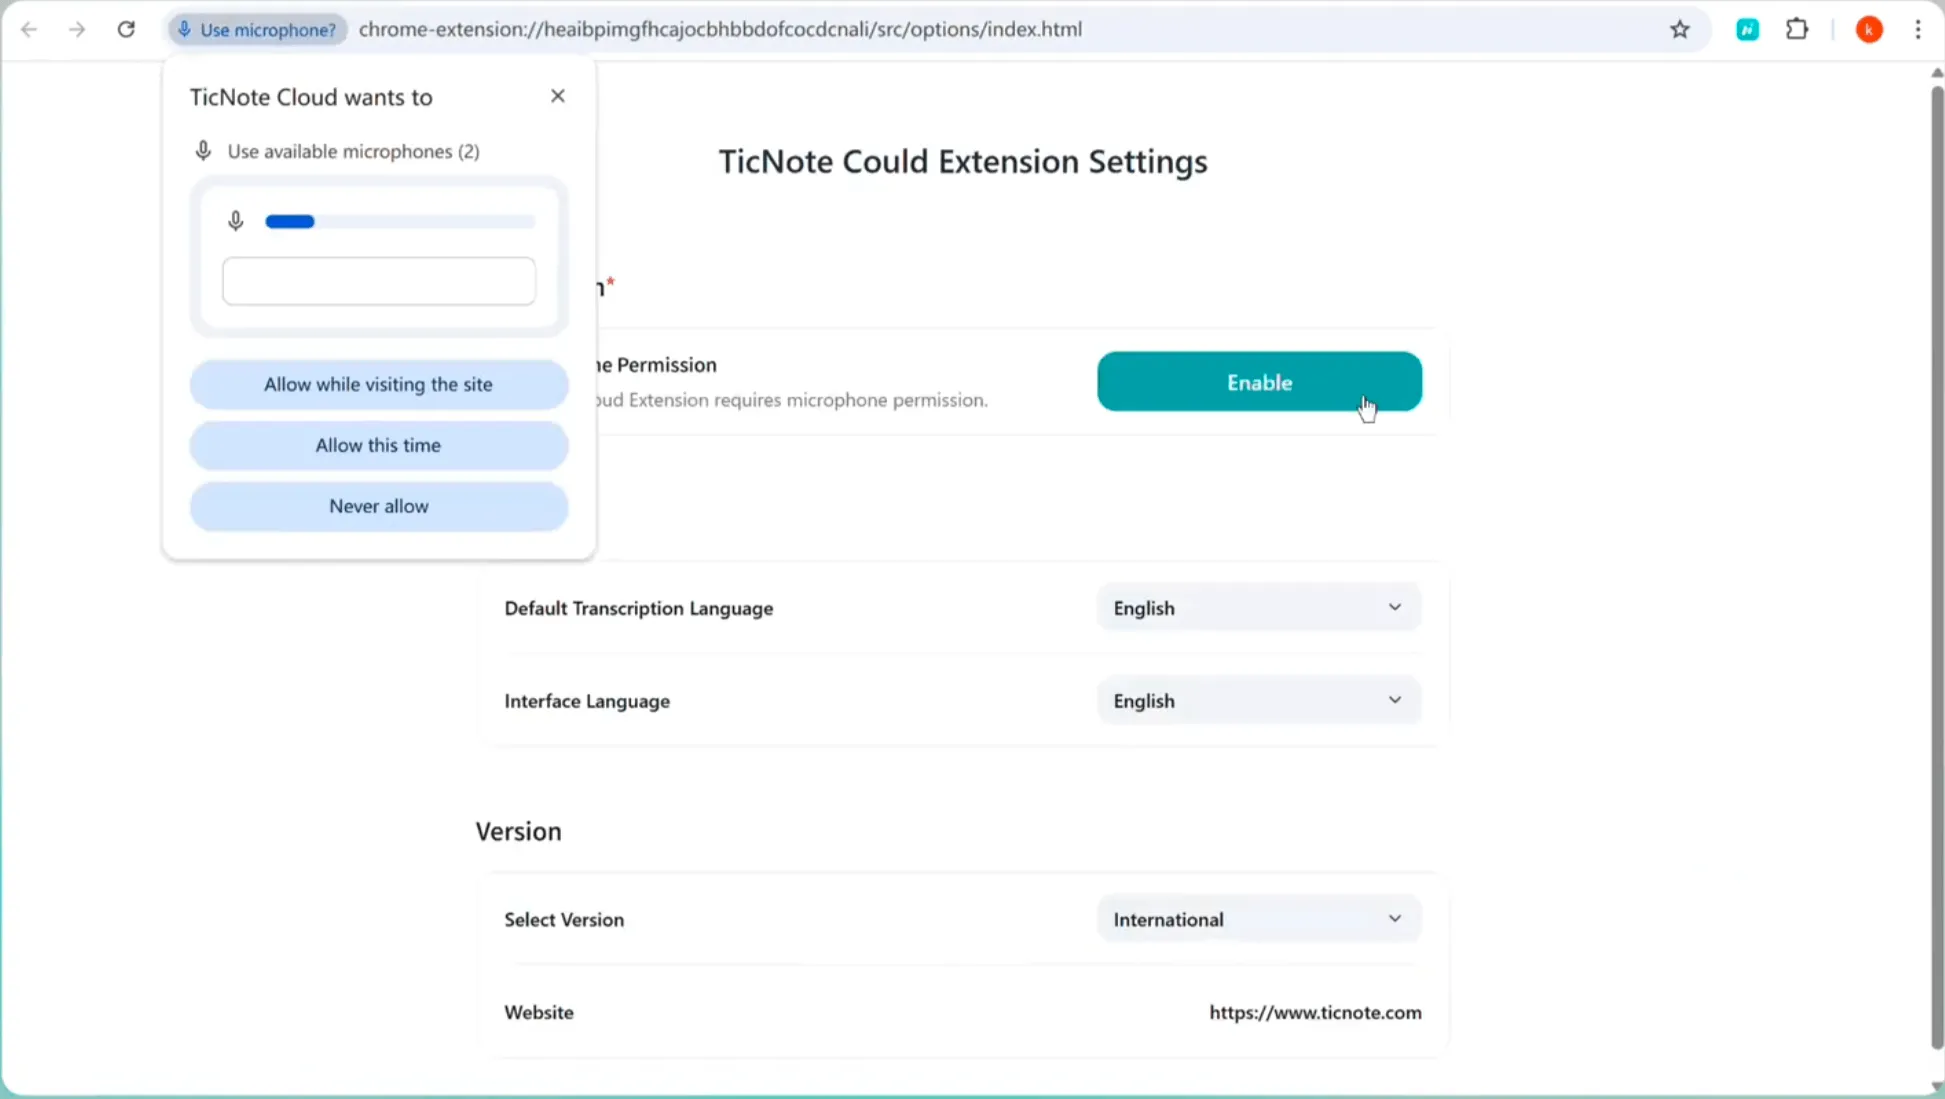
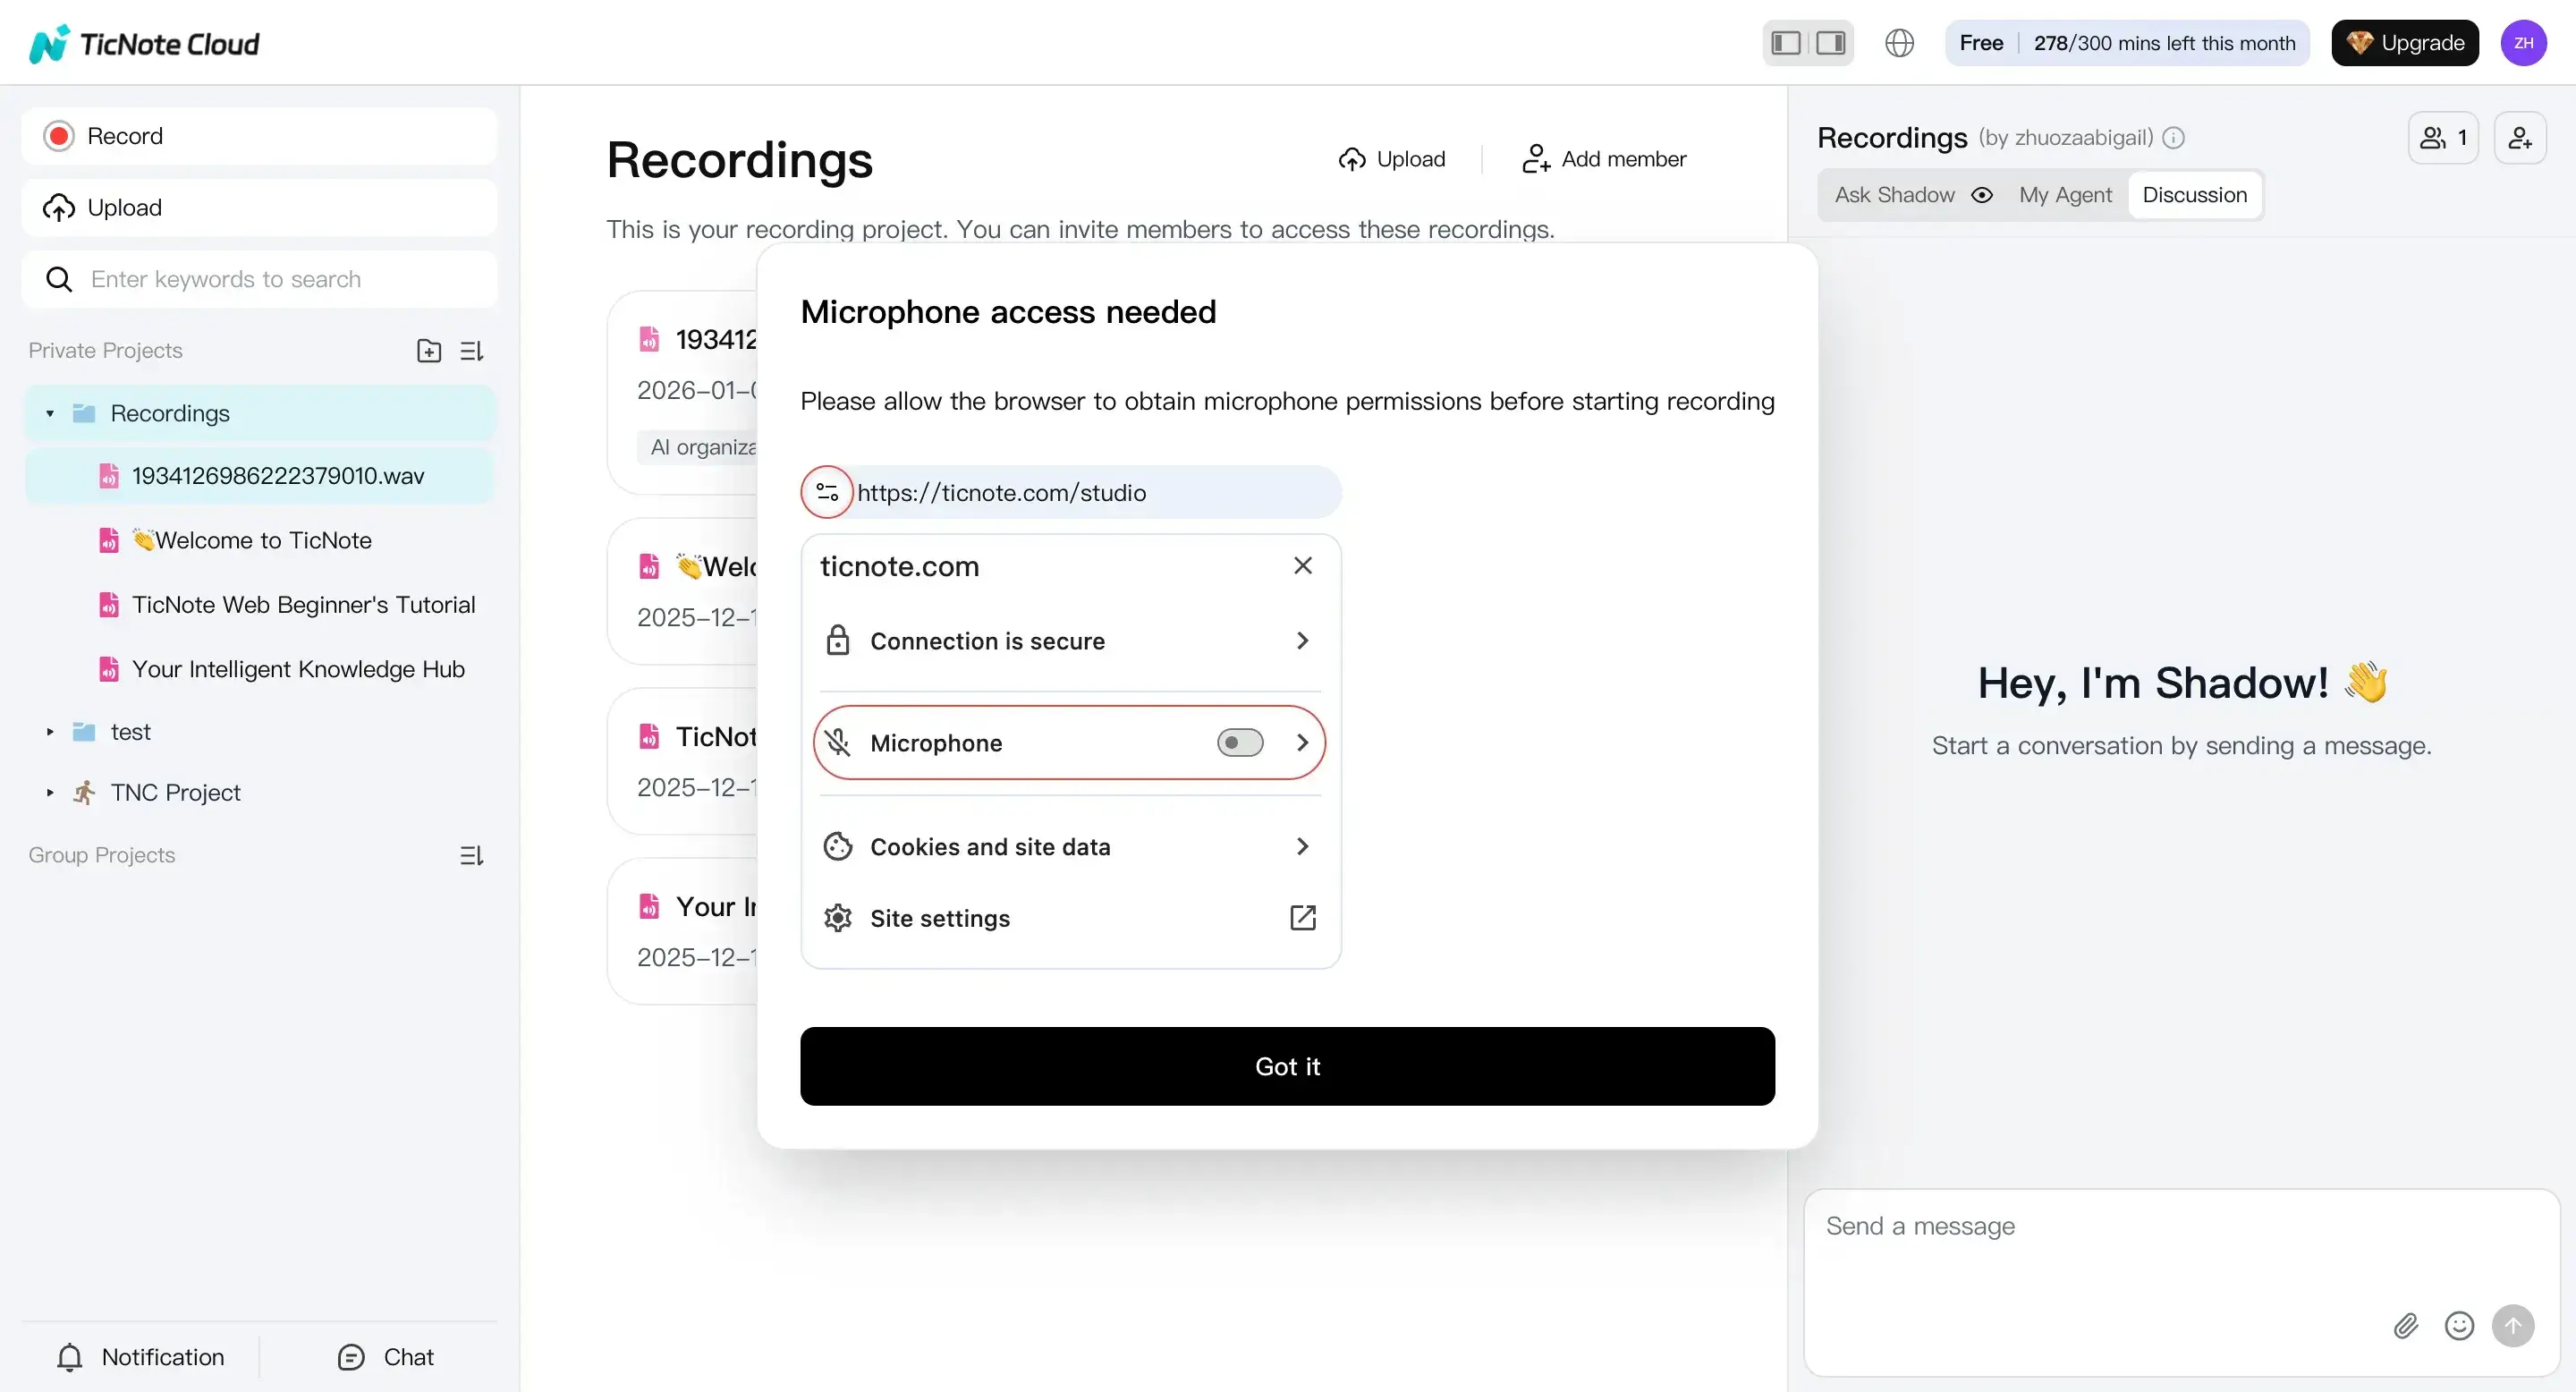
- Allow microphone access (this matters)
Open the extension menu, go to Settings, and enable microphone access so it can capture your audio clearly.
When Chrome prompts you, allow microphone access for the page.
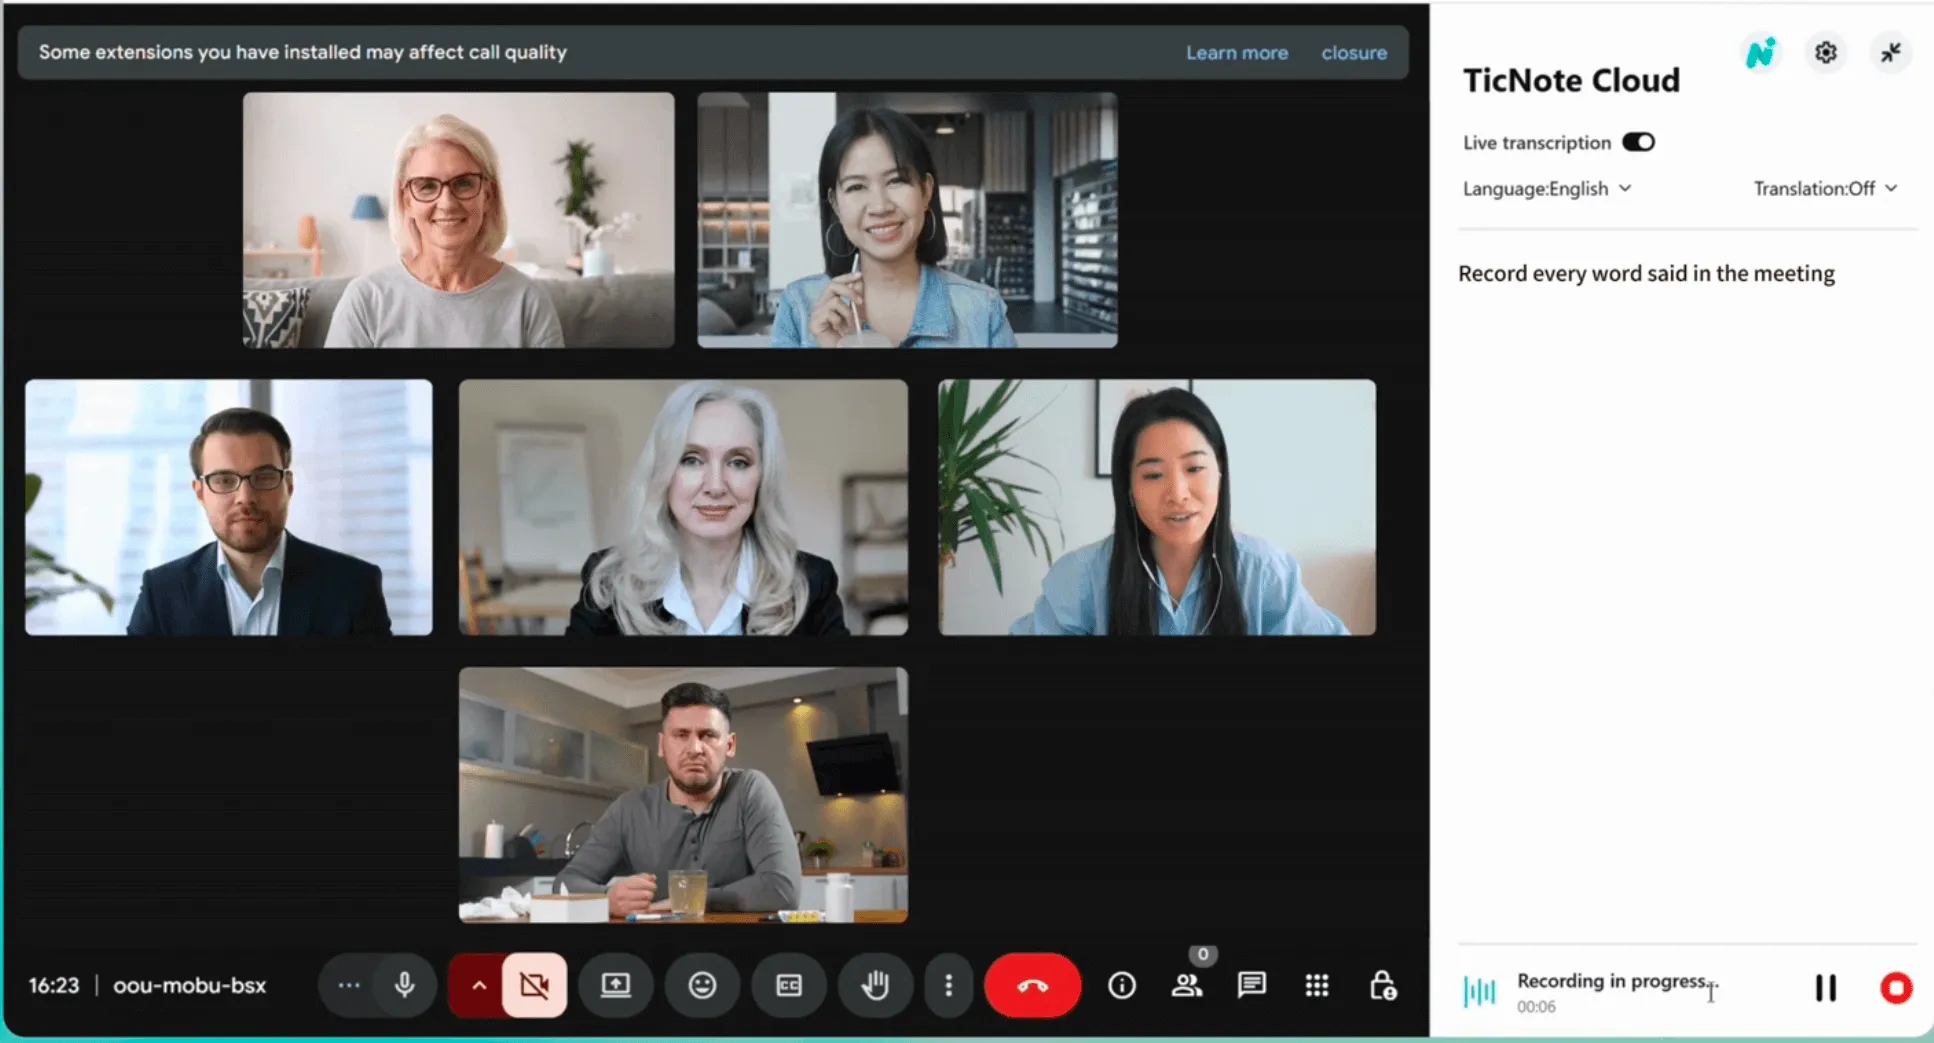
- Record the meeting audio
Join your Google Meet as usual. When the meeting starts, click Start recording in the extension. Stop it when the call ends.
After you finish, head to the web studio to view the file and create your transcript.

Step 2: Transcribe in Web Studio (full workflow)
Now you'll turn that recording into text inside TicNote's Web Studio.
- Upload the file into a project
In Web Studio, create a project for the client, class, or team. Then click Upload to add your recorded file.
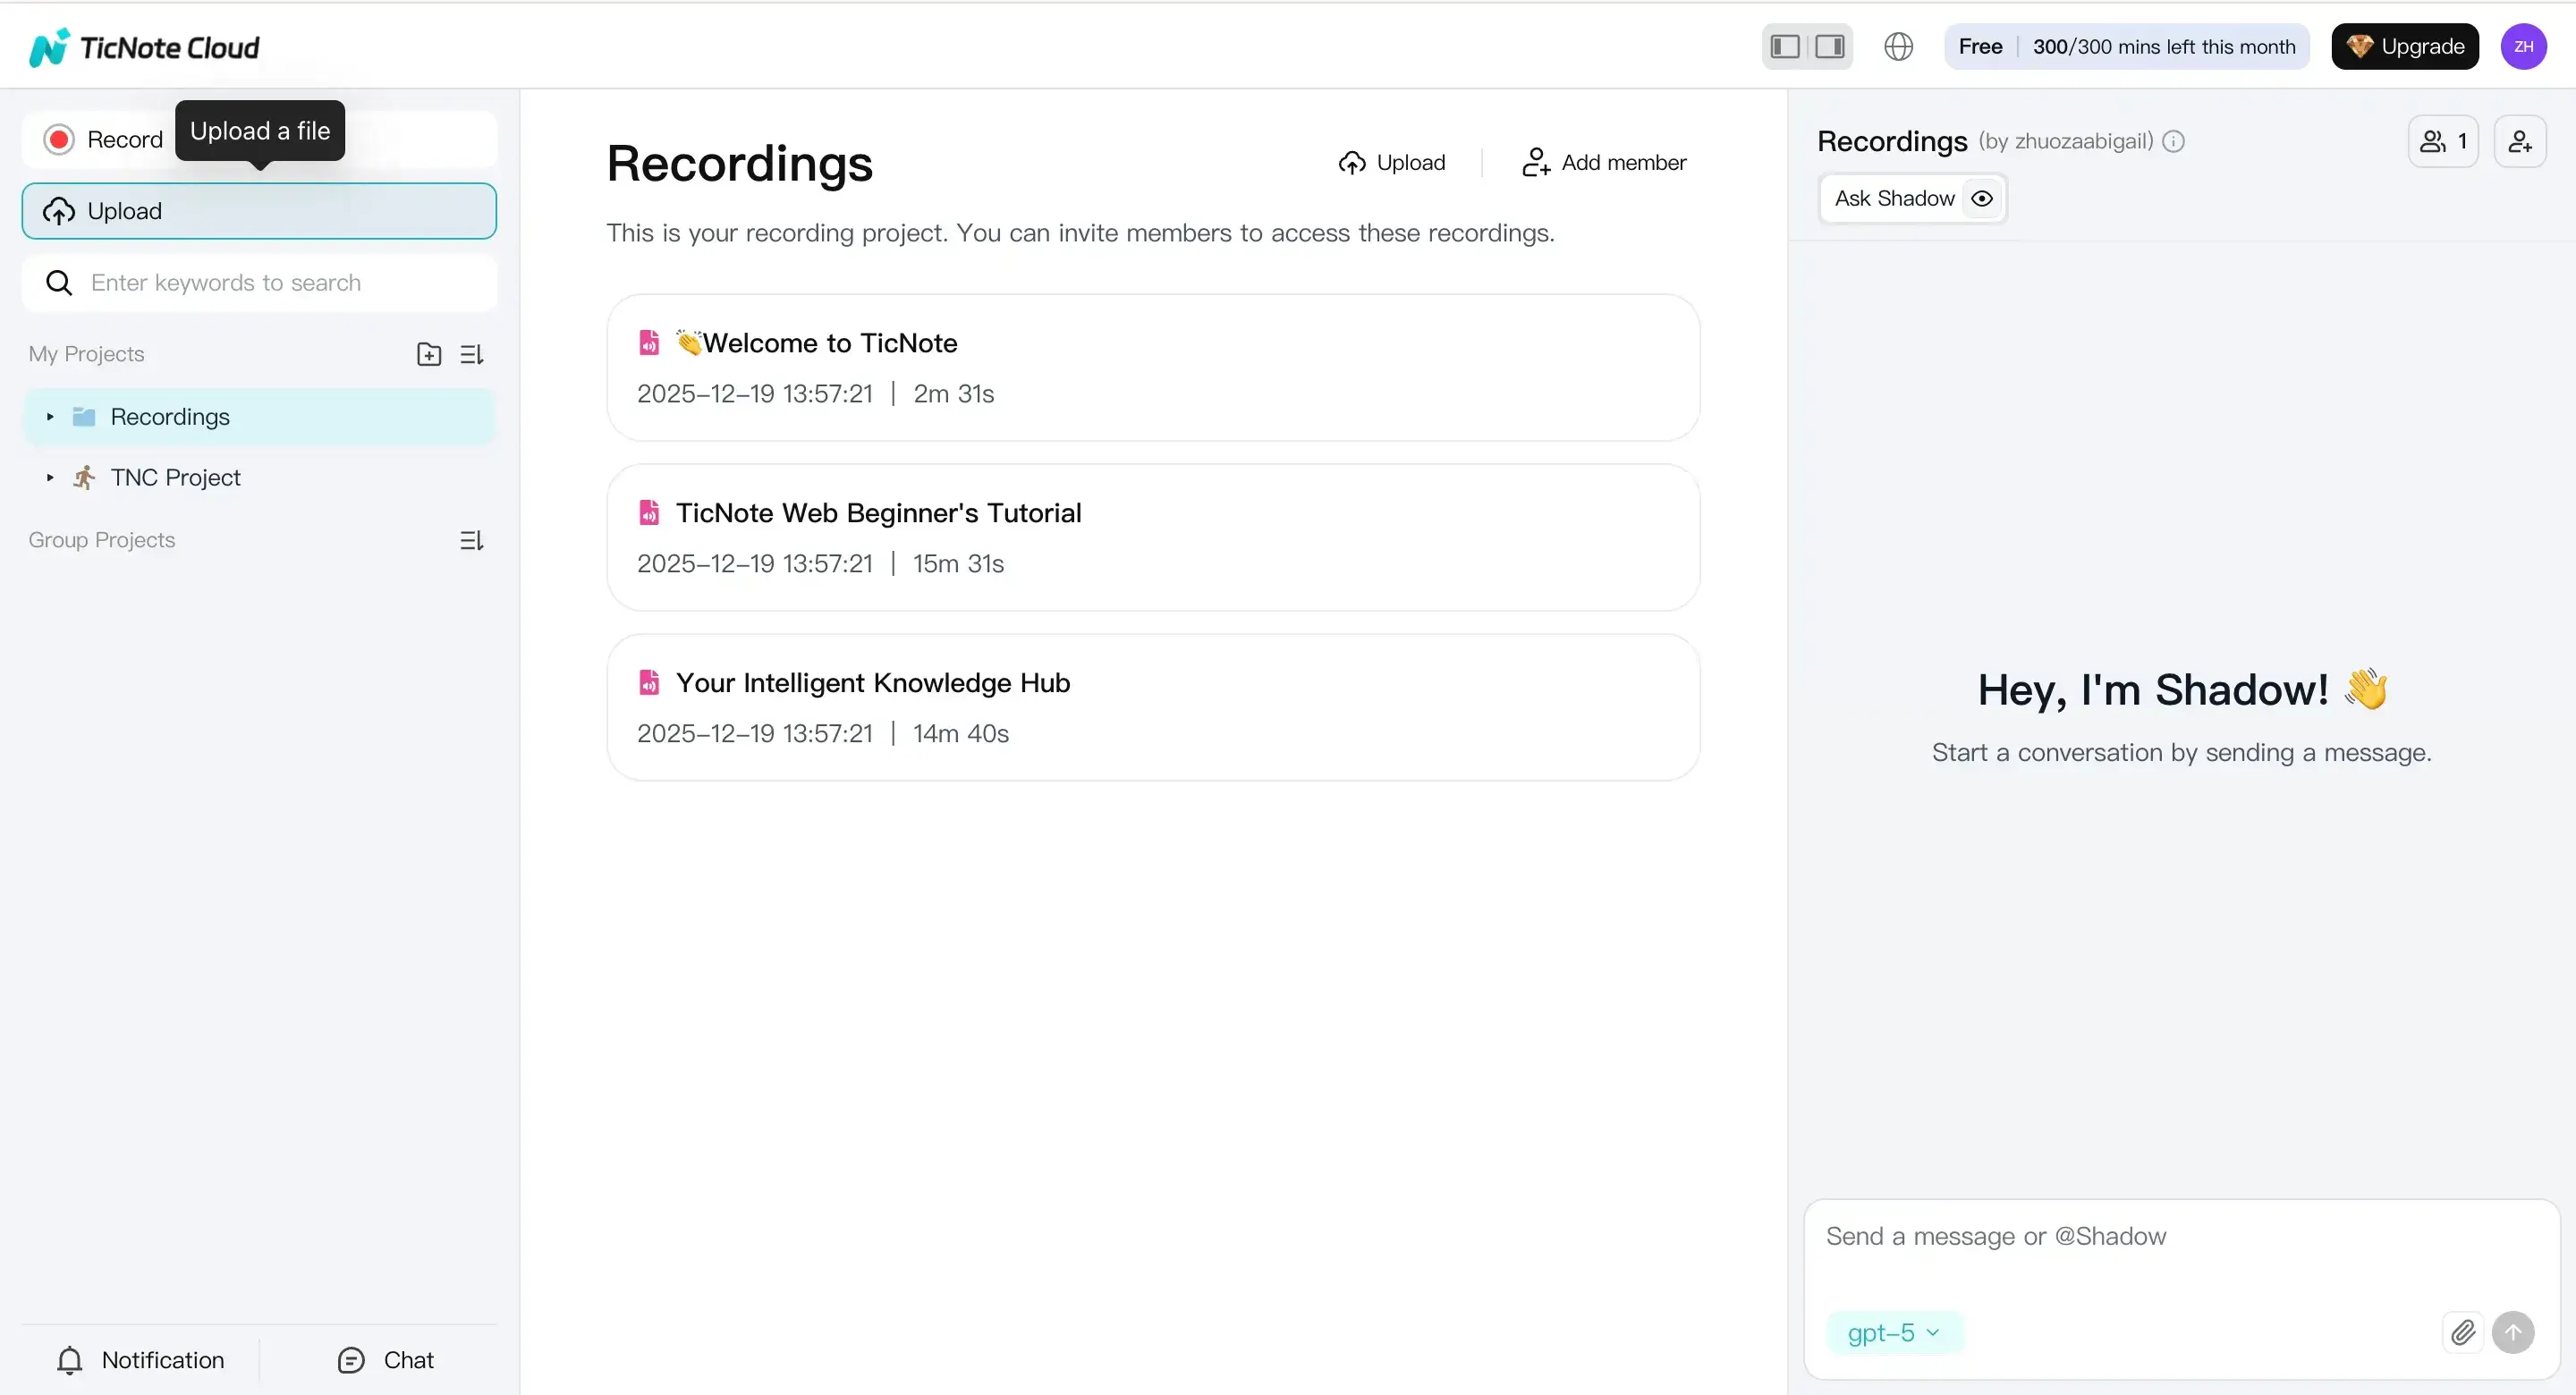
If you ever need a quick capture outside Meet, you can also use the Record button in Web Studio. Just make sure mic access is enabled first.
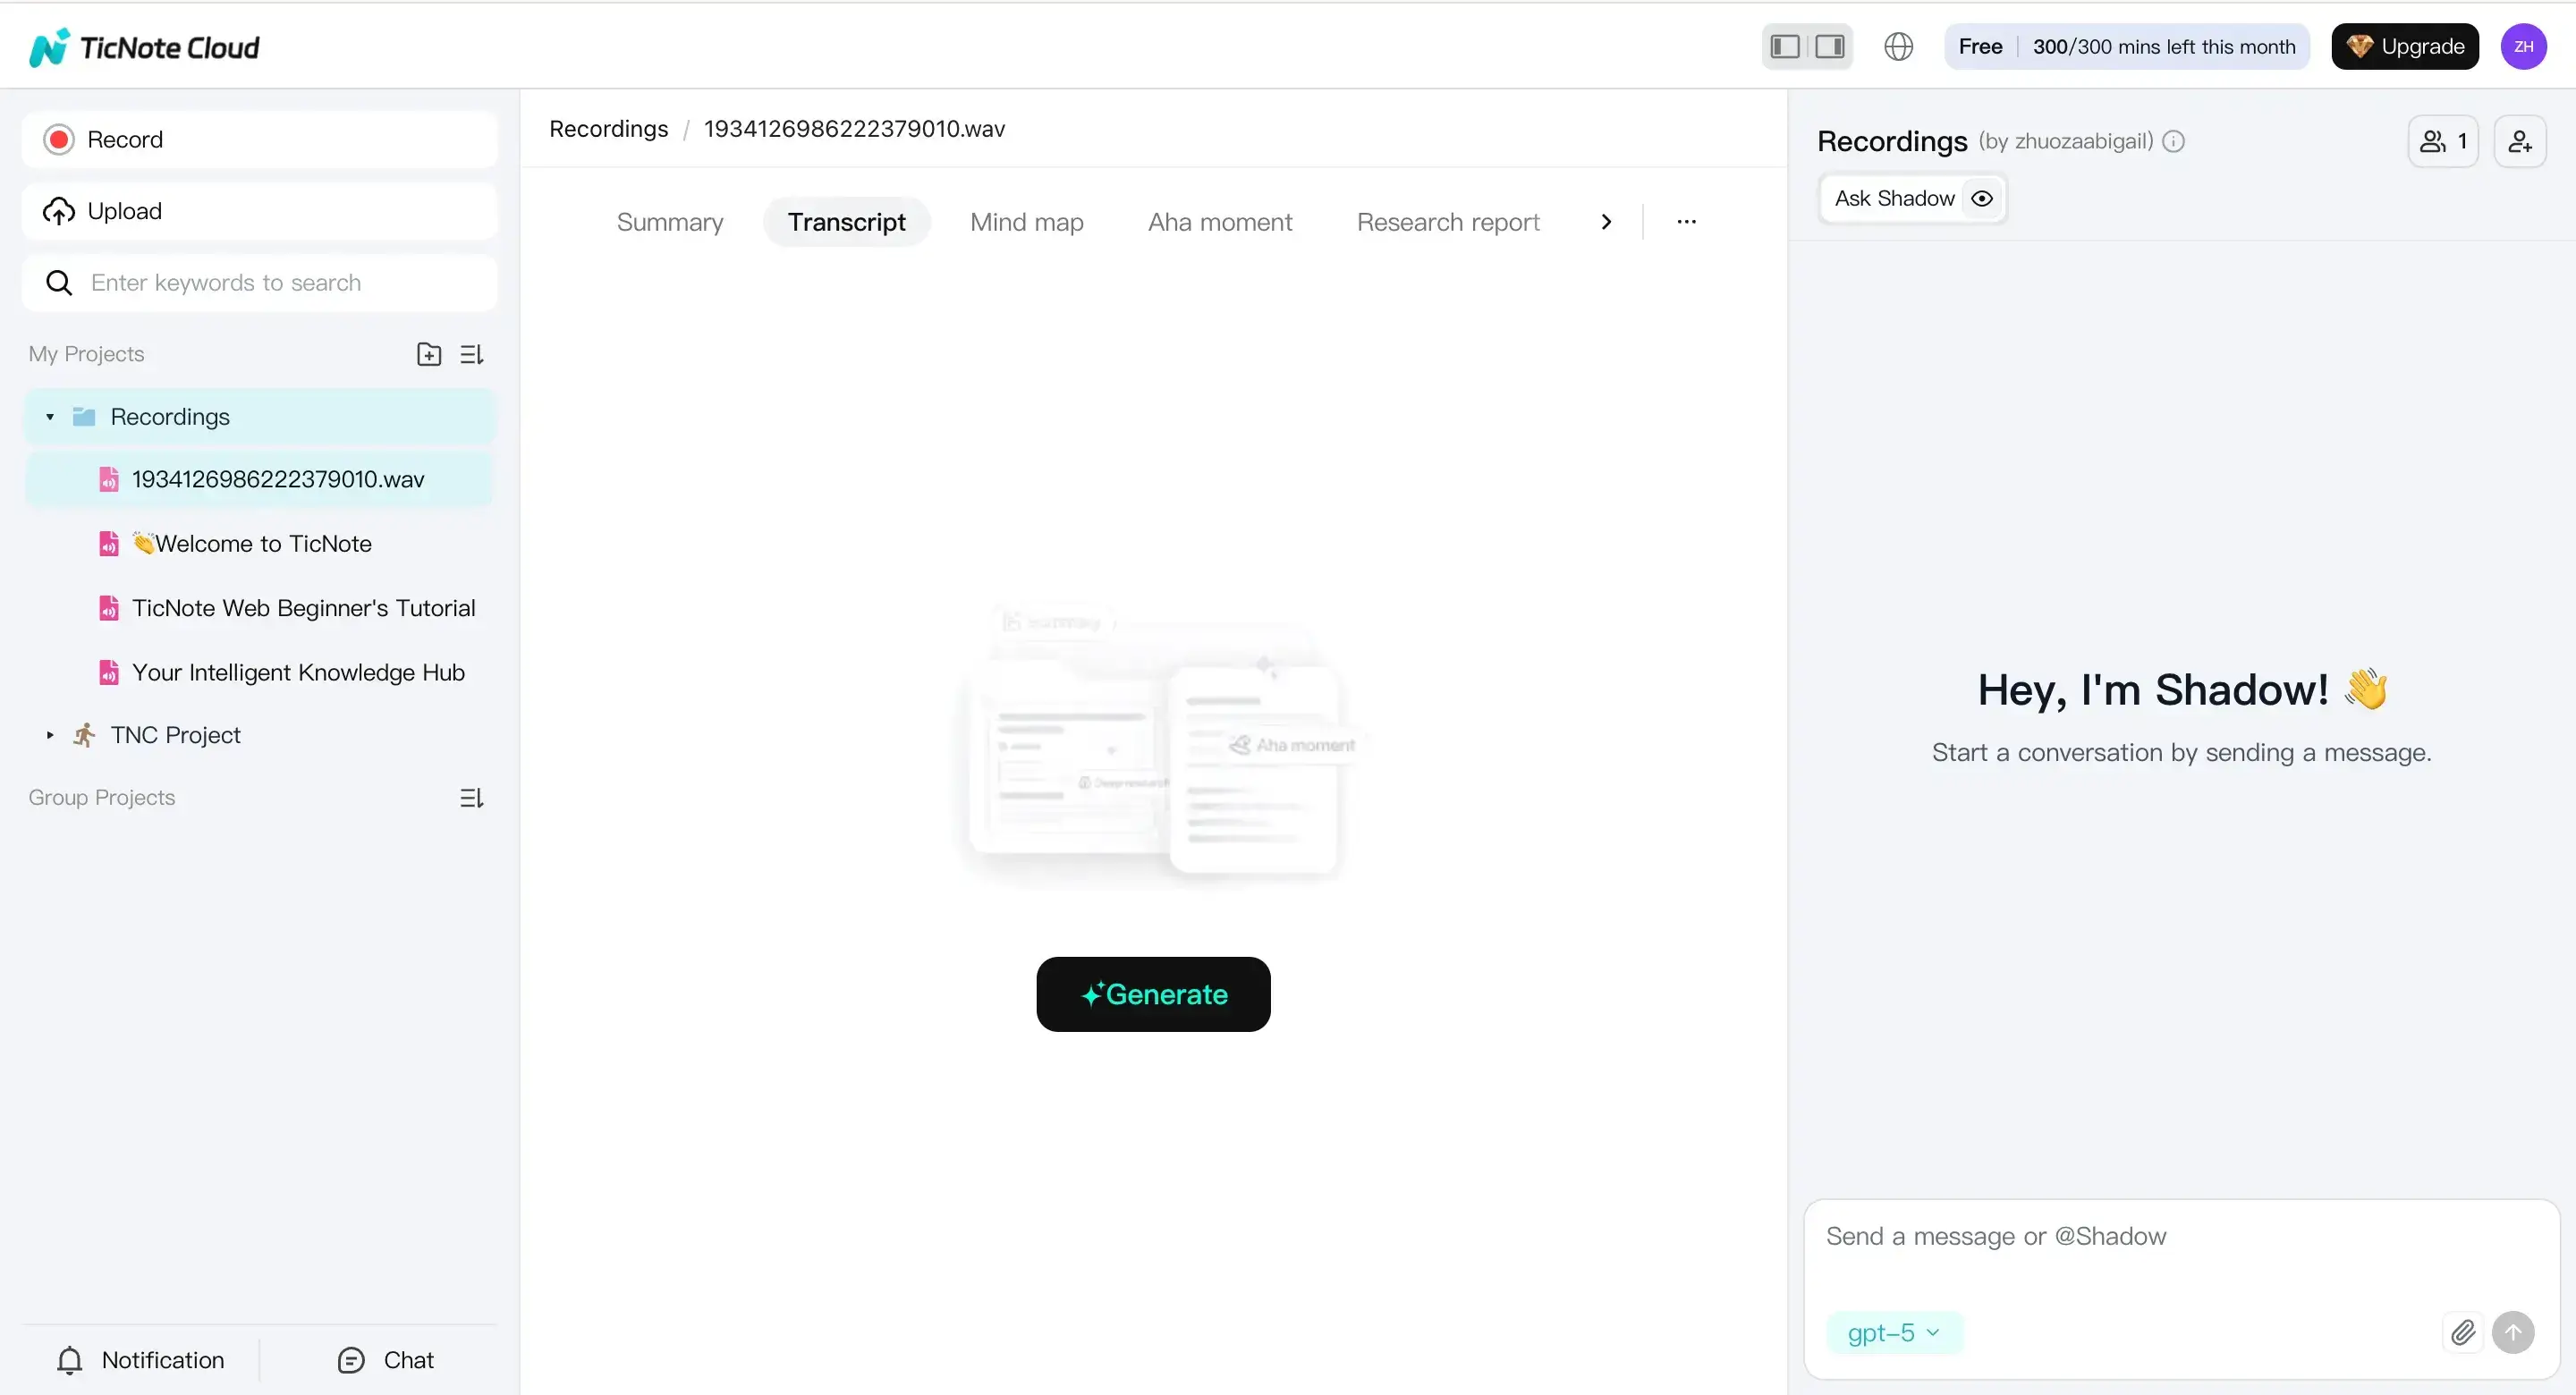
- Generate the transcript
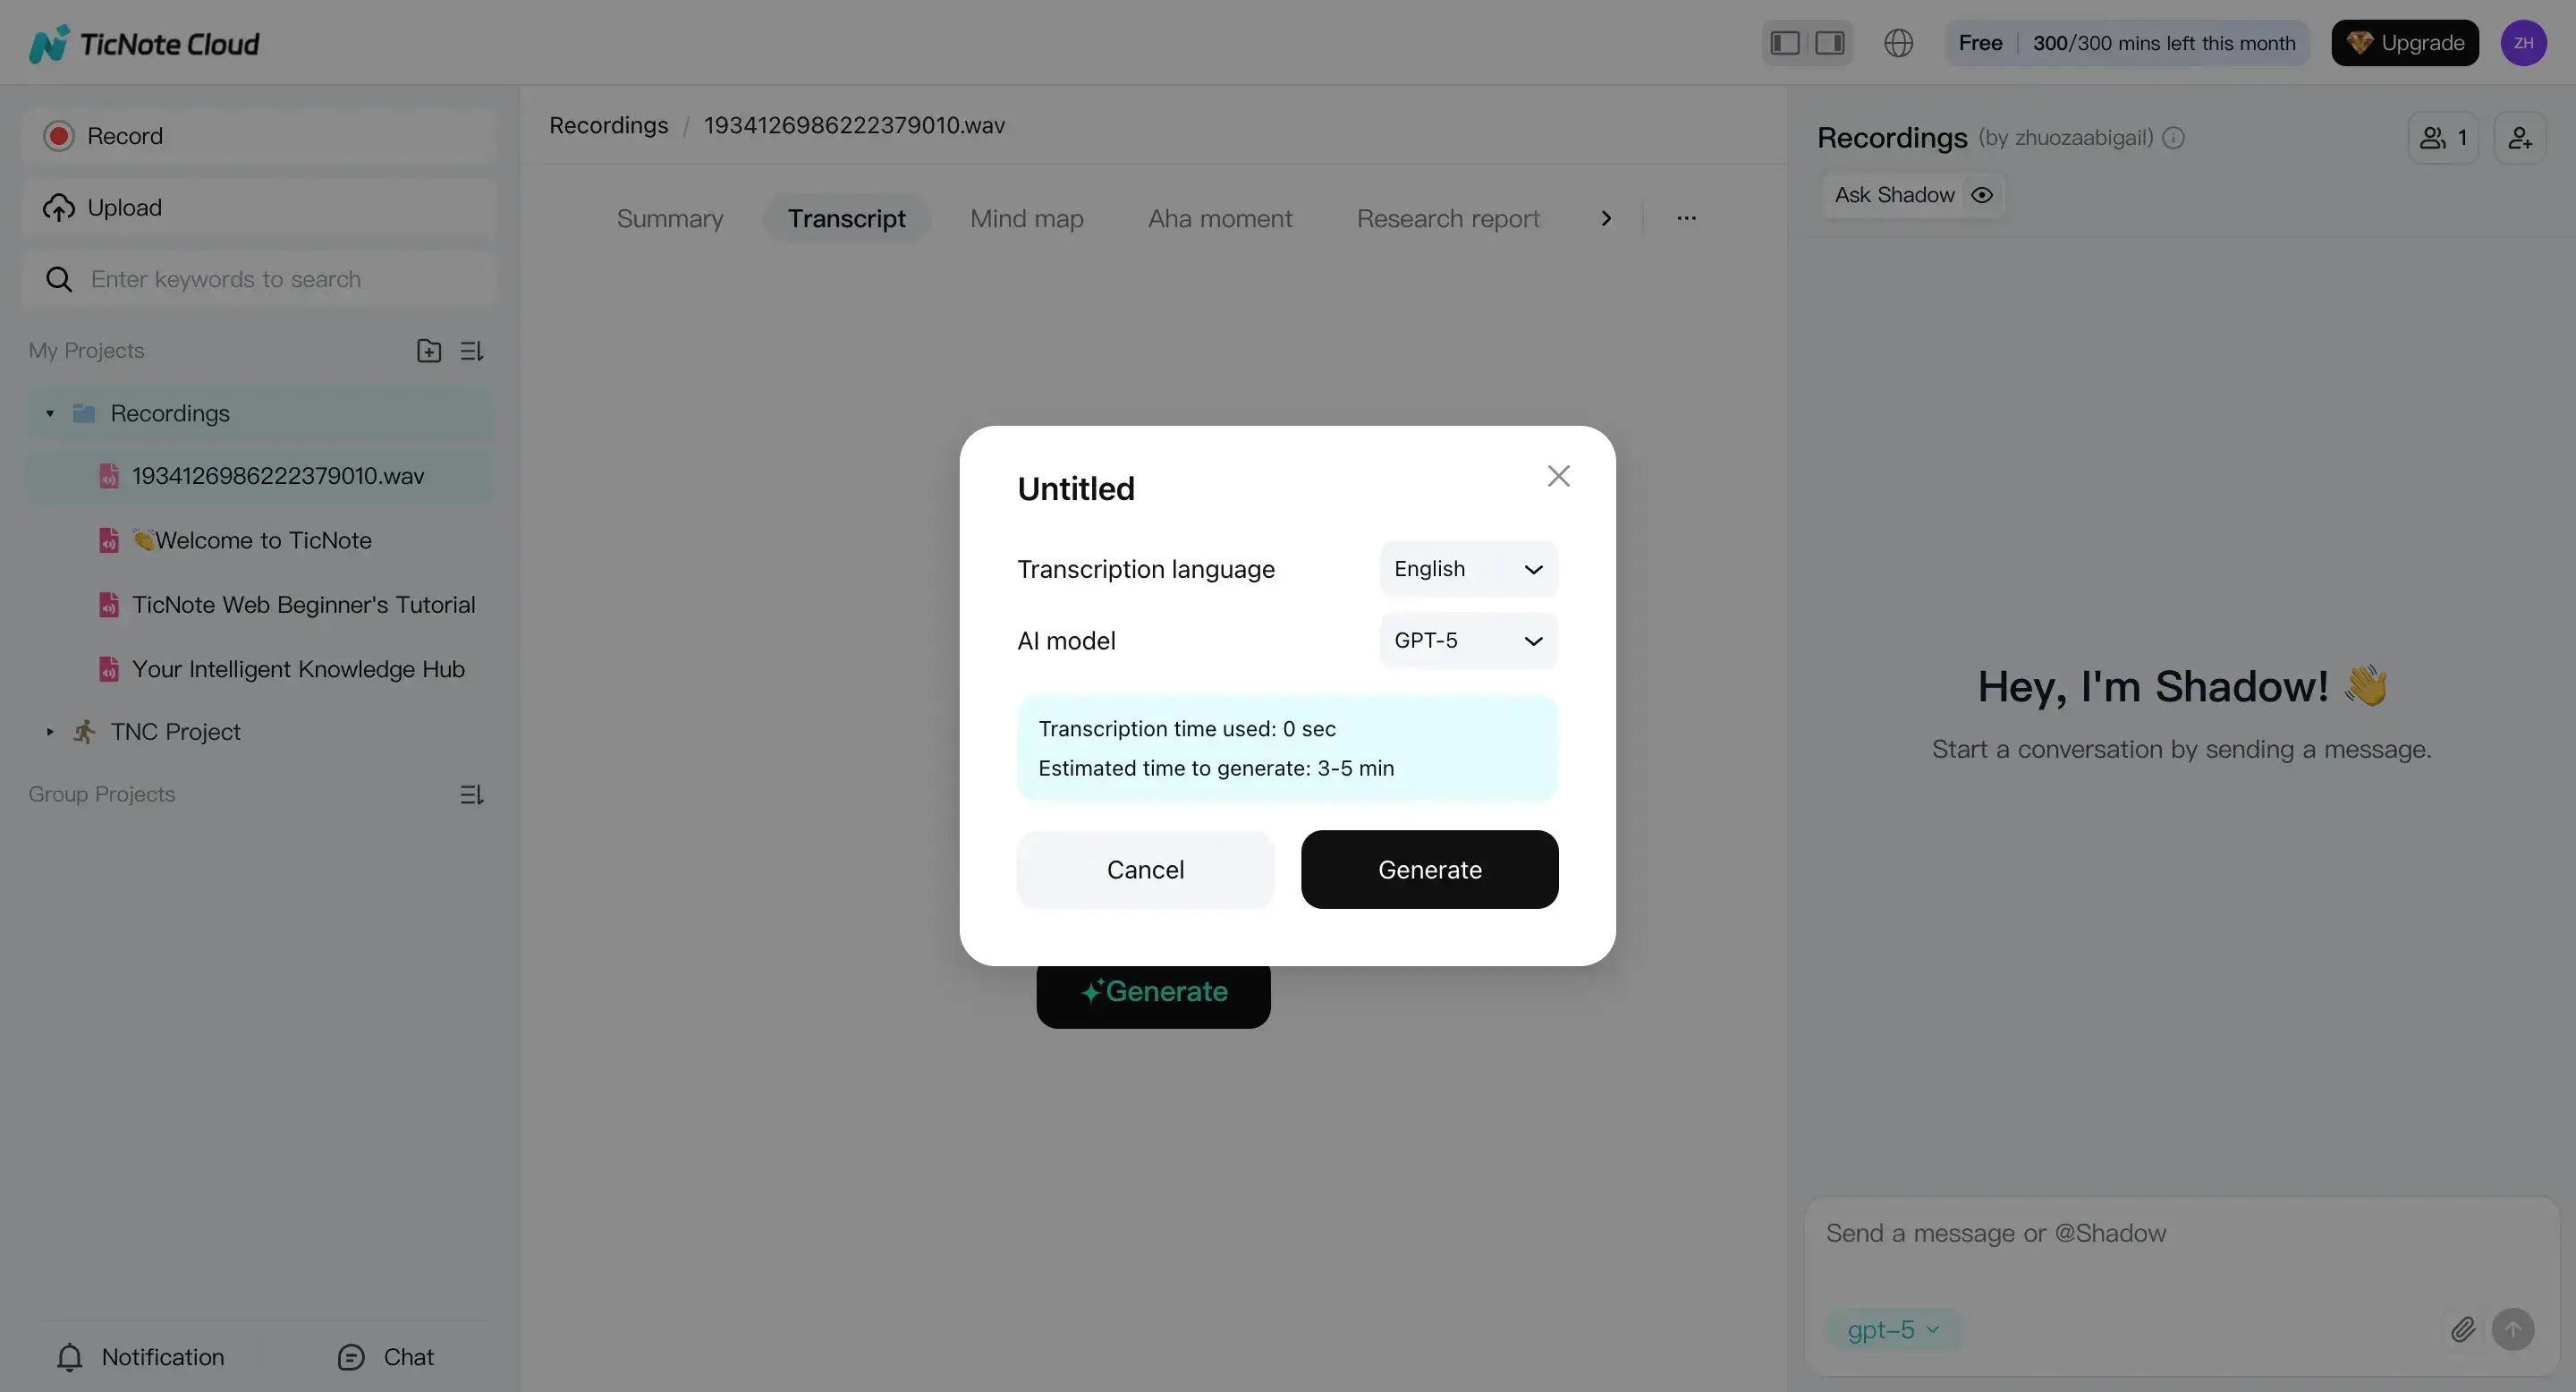
Select the file in the left panel, open the Transcript tab, and click Generate.
In the popup, pick the language and an AI model option that best matches your meeting style, then confirm.
Step 3: Review, clean up, and create deliverables
Raw transcripts are useful, but a quick cleanup makes them ready for sharing.
Focus your edits on the high-impact areas:
- Names and speaker labels
- Acronyms and product terms
- Numbers, dates, and commitments
- Action items (who does what, and by when)
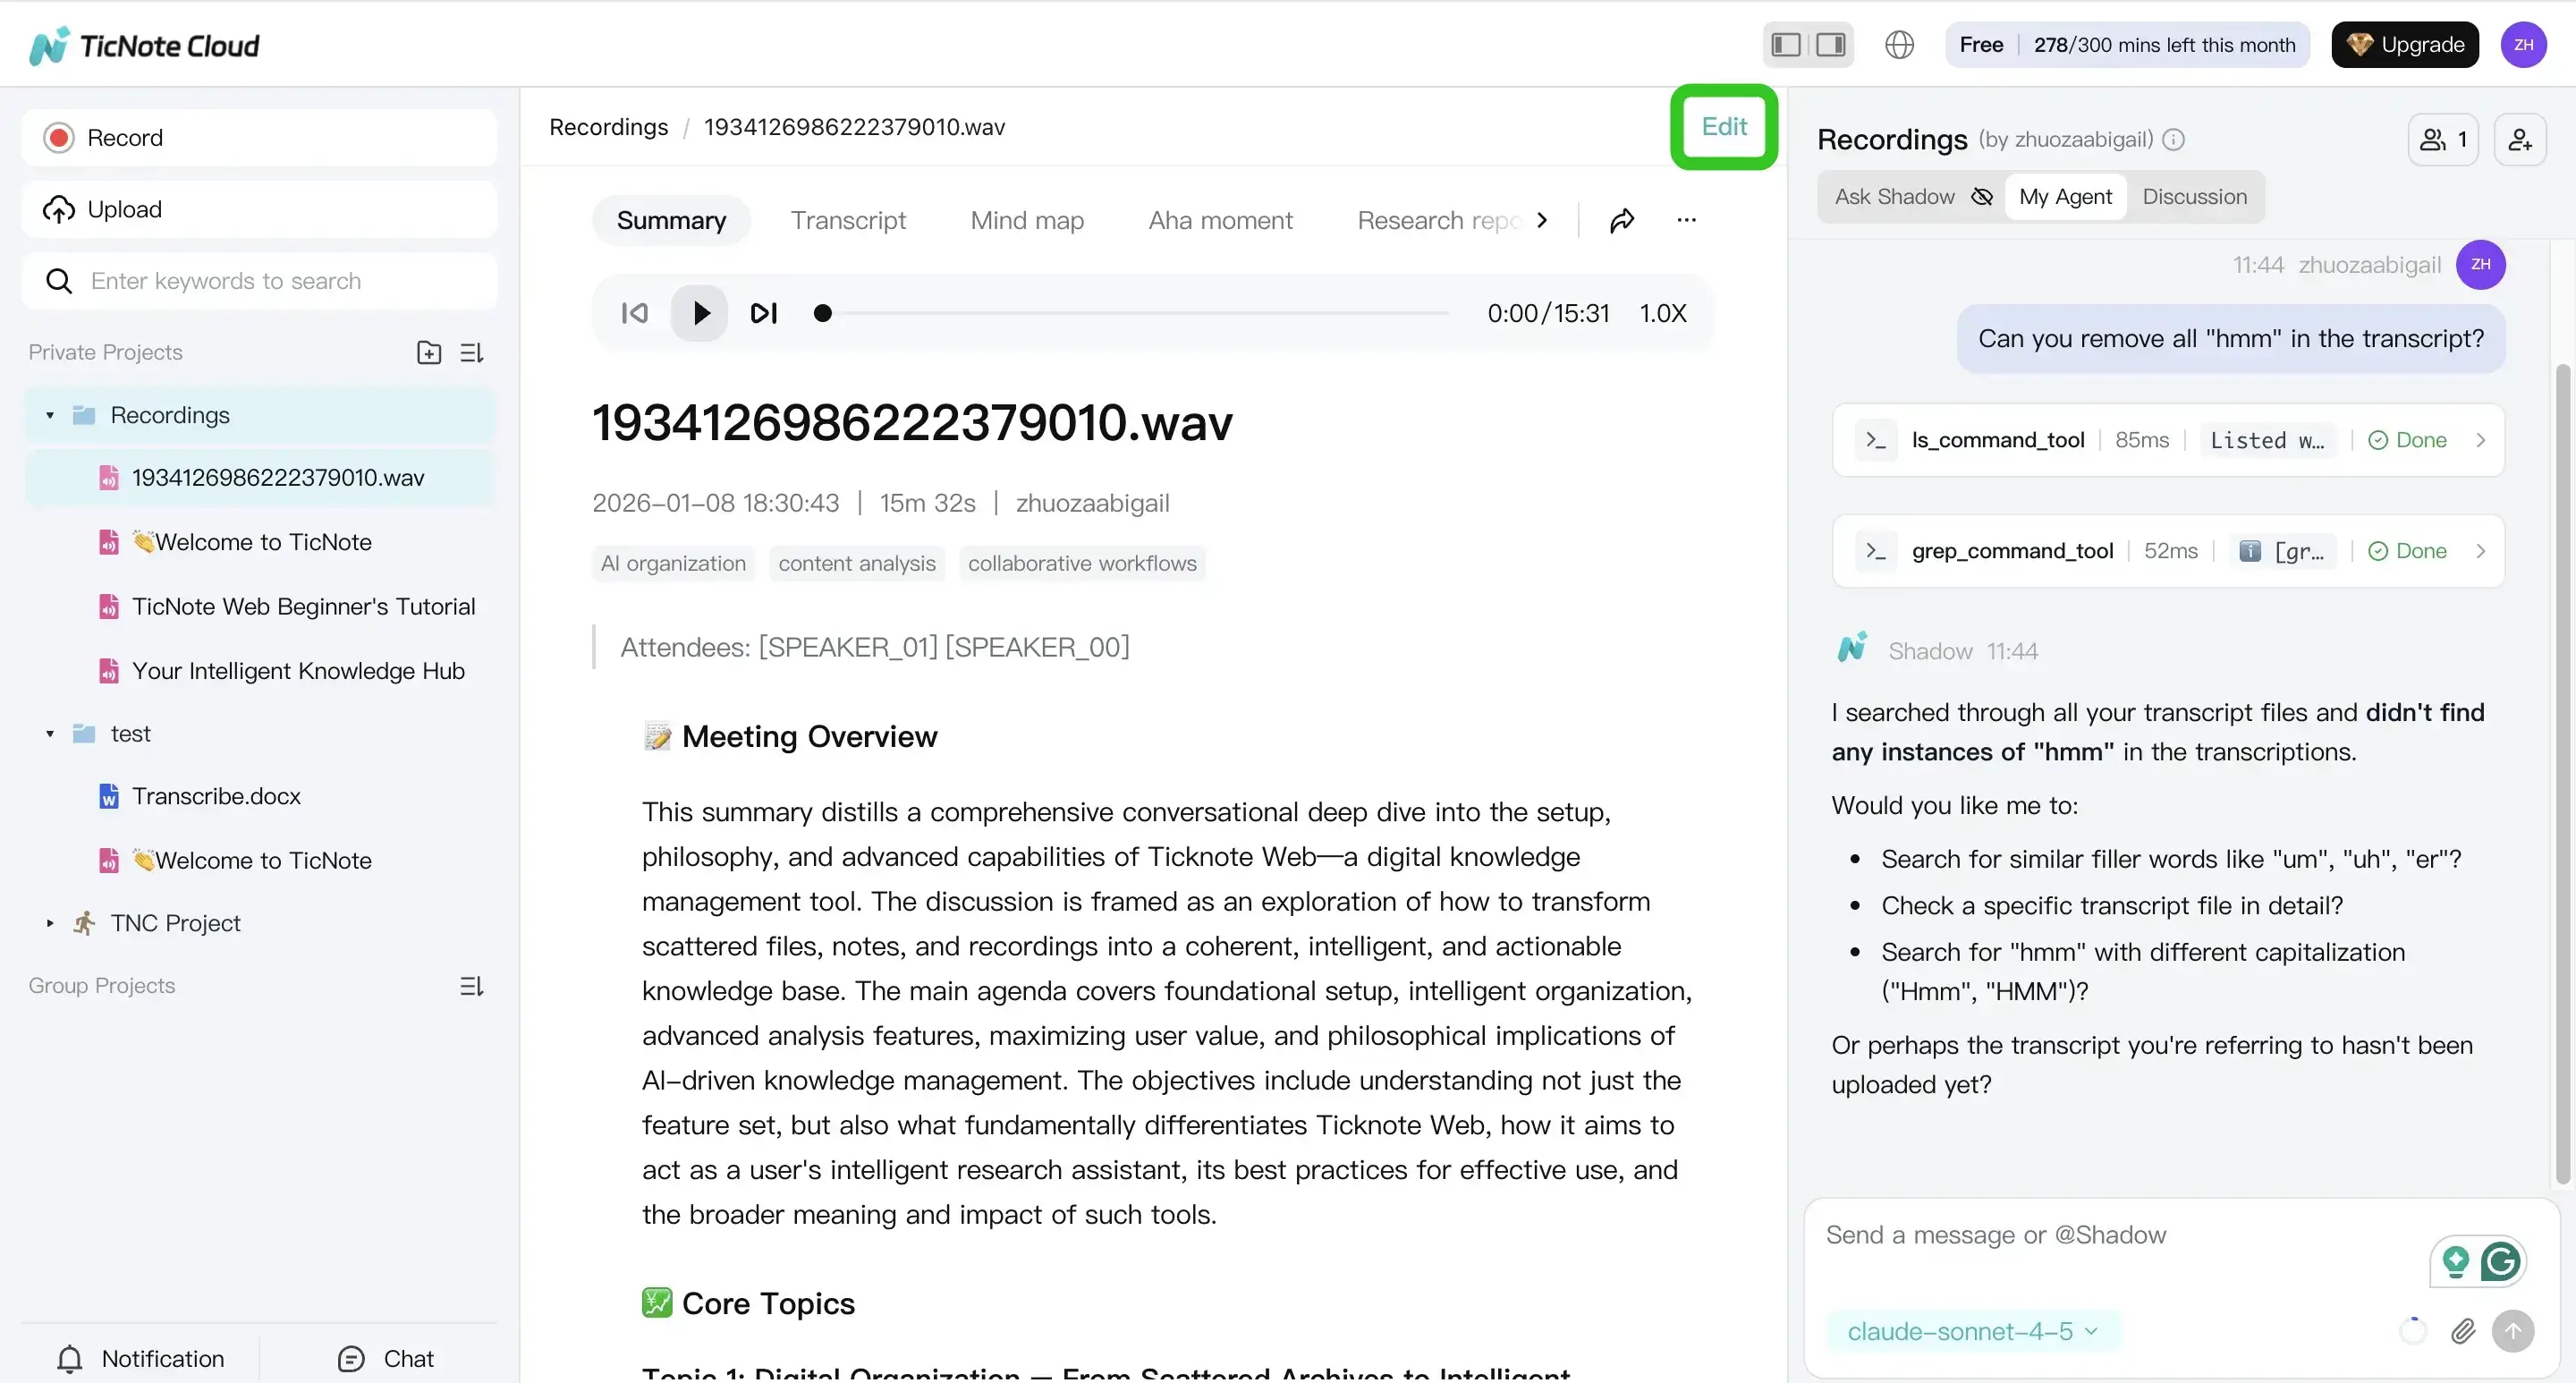
You can edit directly in the transcript view, or ask Shadow AI to help with cleanup and structure.
From there, turn one transcript into several deliverables your team will actually use:
- Structured notes (agenda, discussion, decisions, tasks)
- A short AI summary for follow-ups
- Translation for multilingual teams
- A mind map for fast review
To keep things searchable later, save the transcript, summary, and mind map in the same project space. That way, Shadow AI can answer questions across multiple meetings, so you can find decisions and owners without re-reading everything.
Step 4: Export and share
Once the transcript and outputs look good, export what your team needs.
- Transcript export: TXT
- Summary exports: Markdown, DOCX, or PDF
- Mind map exports: PNG or Xmind
In Web Studio, open the three dots menu, choose Download, then Export Transcript to pick the format.
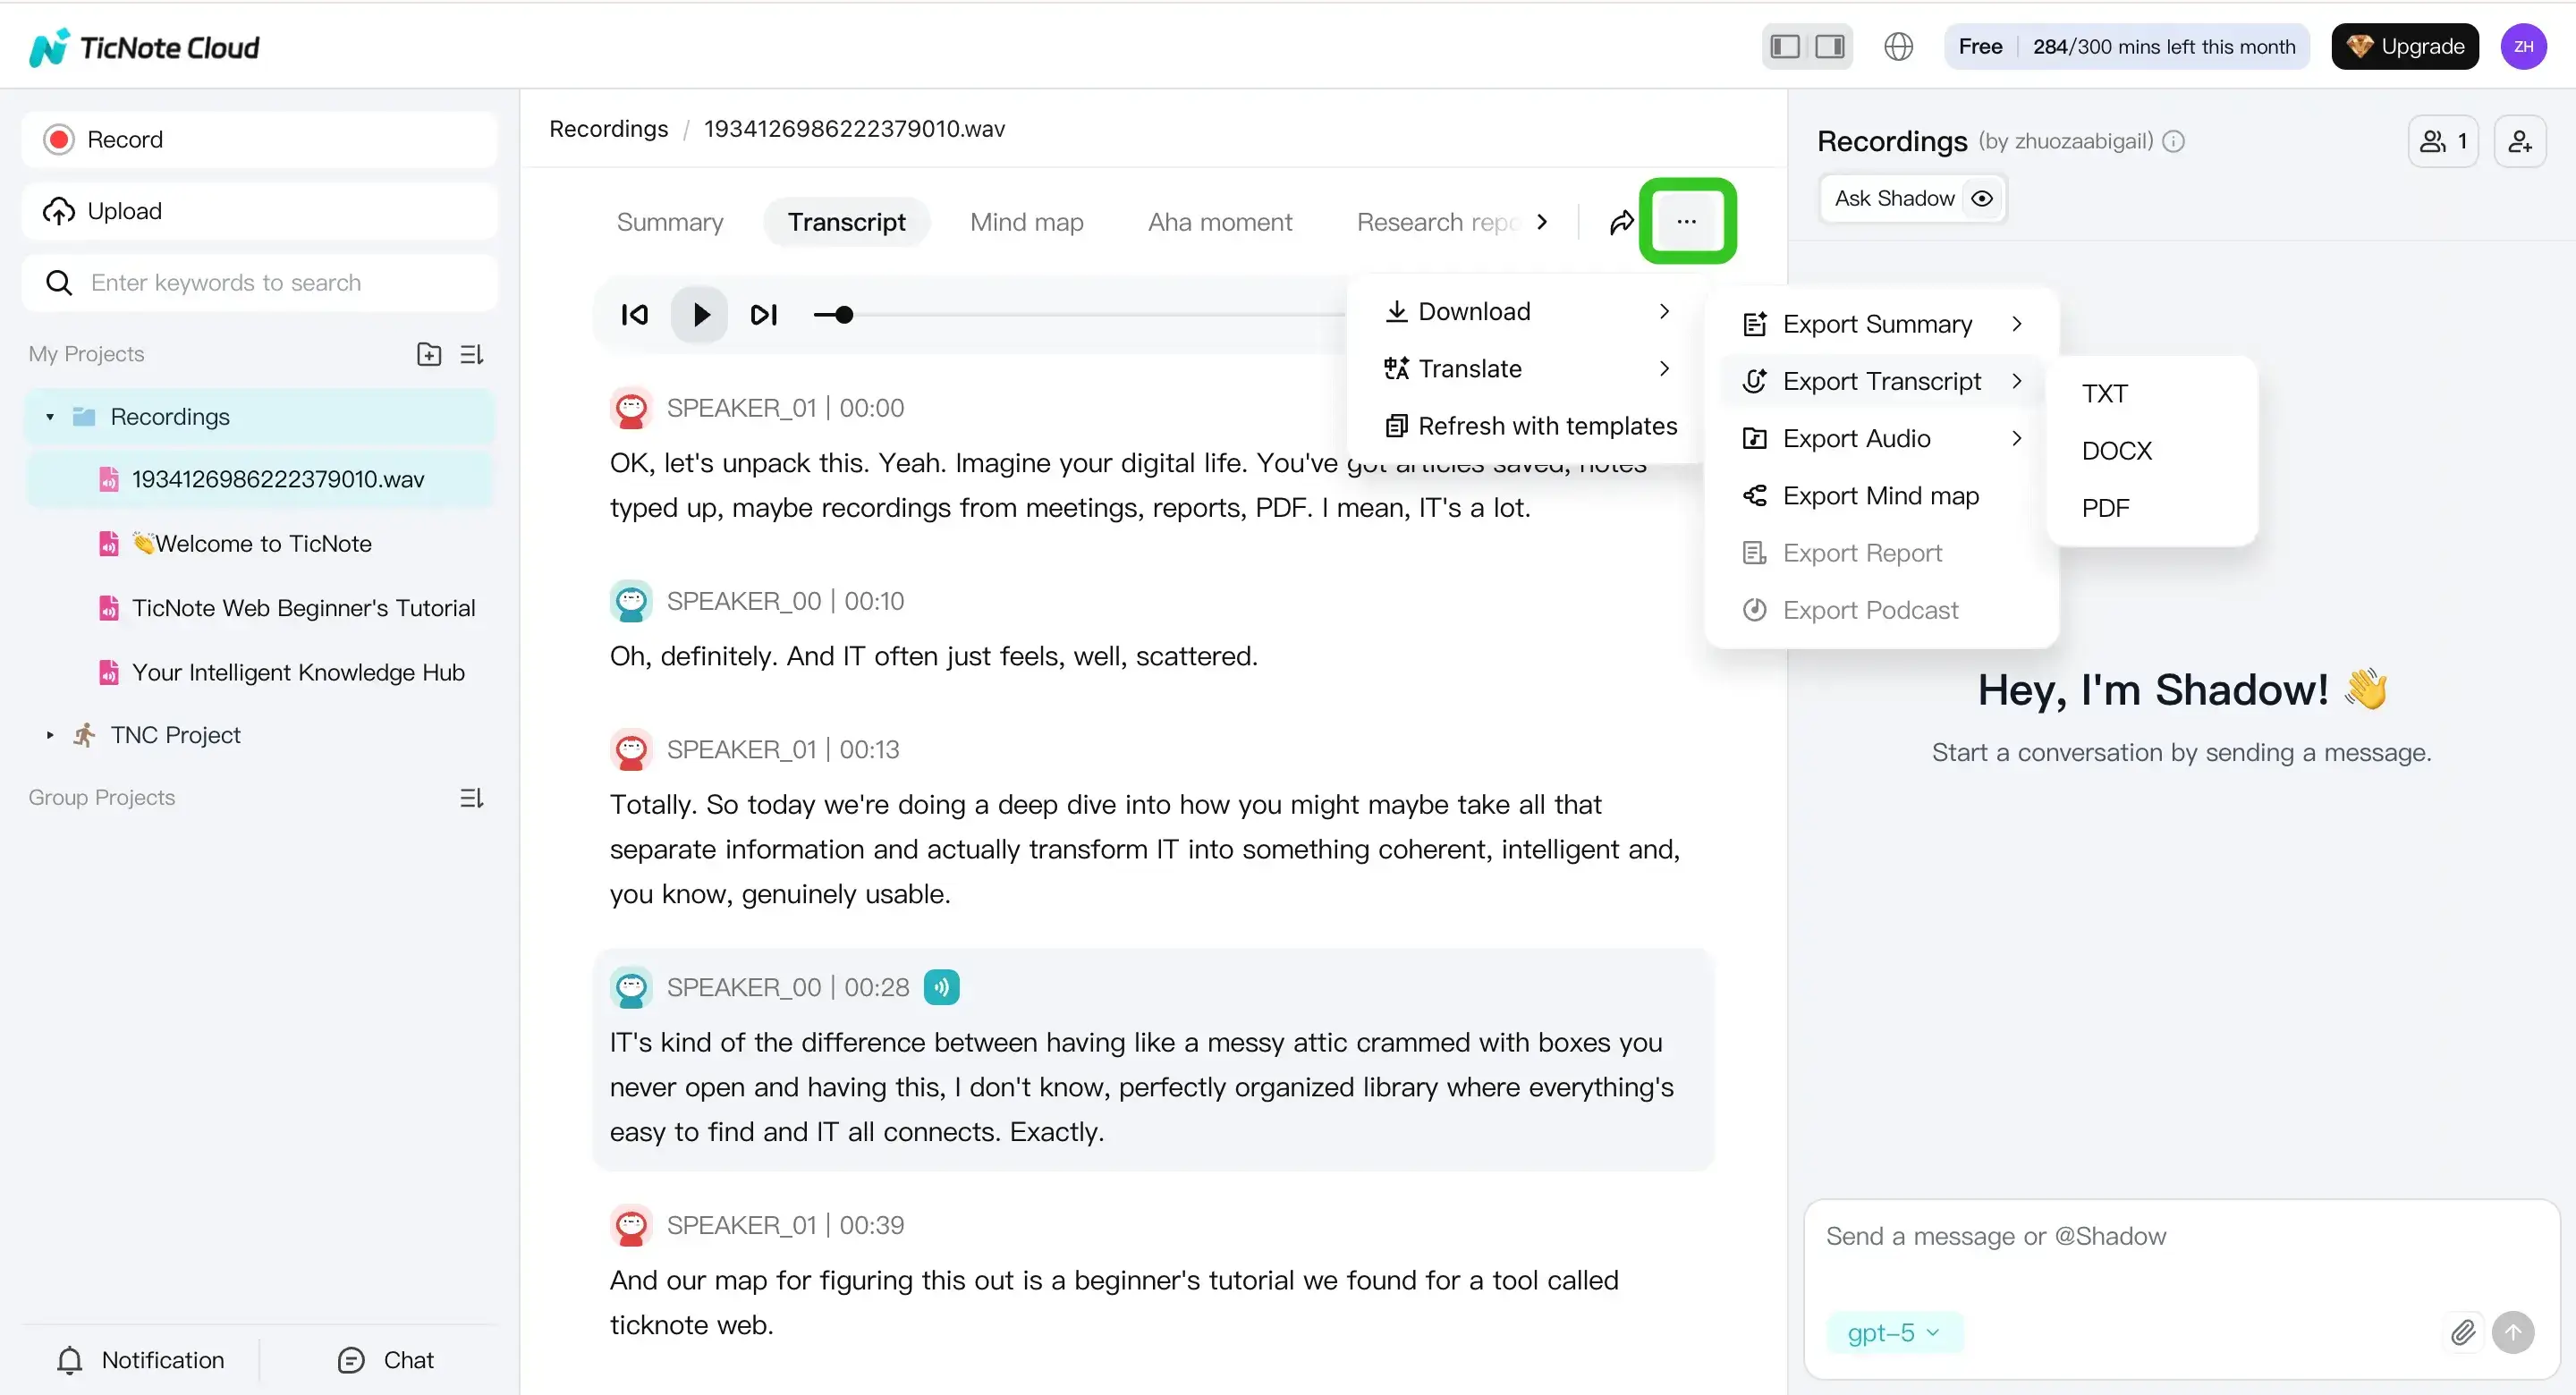
When you share, stick to least access. Share the project only with the people who need it, and keep sensitive meetings in a restricted project.
Try TicNote Cloud for Free to record a Meet call and export a clean transcript.