

TL;DR: Get a clean video transcript
To transcribe a video fast and end with a clean transcript, use AI transcription, like TicNote Cloud. You can not only get a clean transcript, but also it is signed by speakers. If the video is clean, you'll mostly fix small errors. If it's noisy, plan for spot checks and a few re-listens.
If your source is YouTube, this step-by-step guide shows the fastest options to transcribe a YouTube video using built-in tools or transcription apps.
- Best for speed: AI transcription with built-in editing and easy exports. You get text in minutes, then polish and download.
- Best for budget: Built-in dictation or voice typing. It's cheap, but you'll spend more time cleaning.
- Best for sensitive videos: Offline tools or vetted human transcription. It's slower and costs more, but you control access.
Rule of thumb: If you also need summaries, translation, and searchable notes, pick an AI workflow that keeps transcripts, edits, and outputs in one project.
How to transcribe a video with TicNote Cloud (upload, transcribe, export)
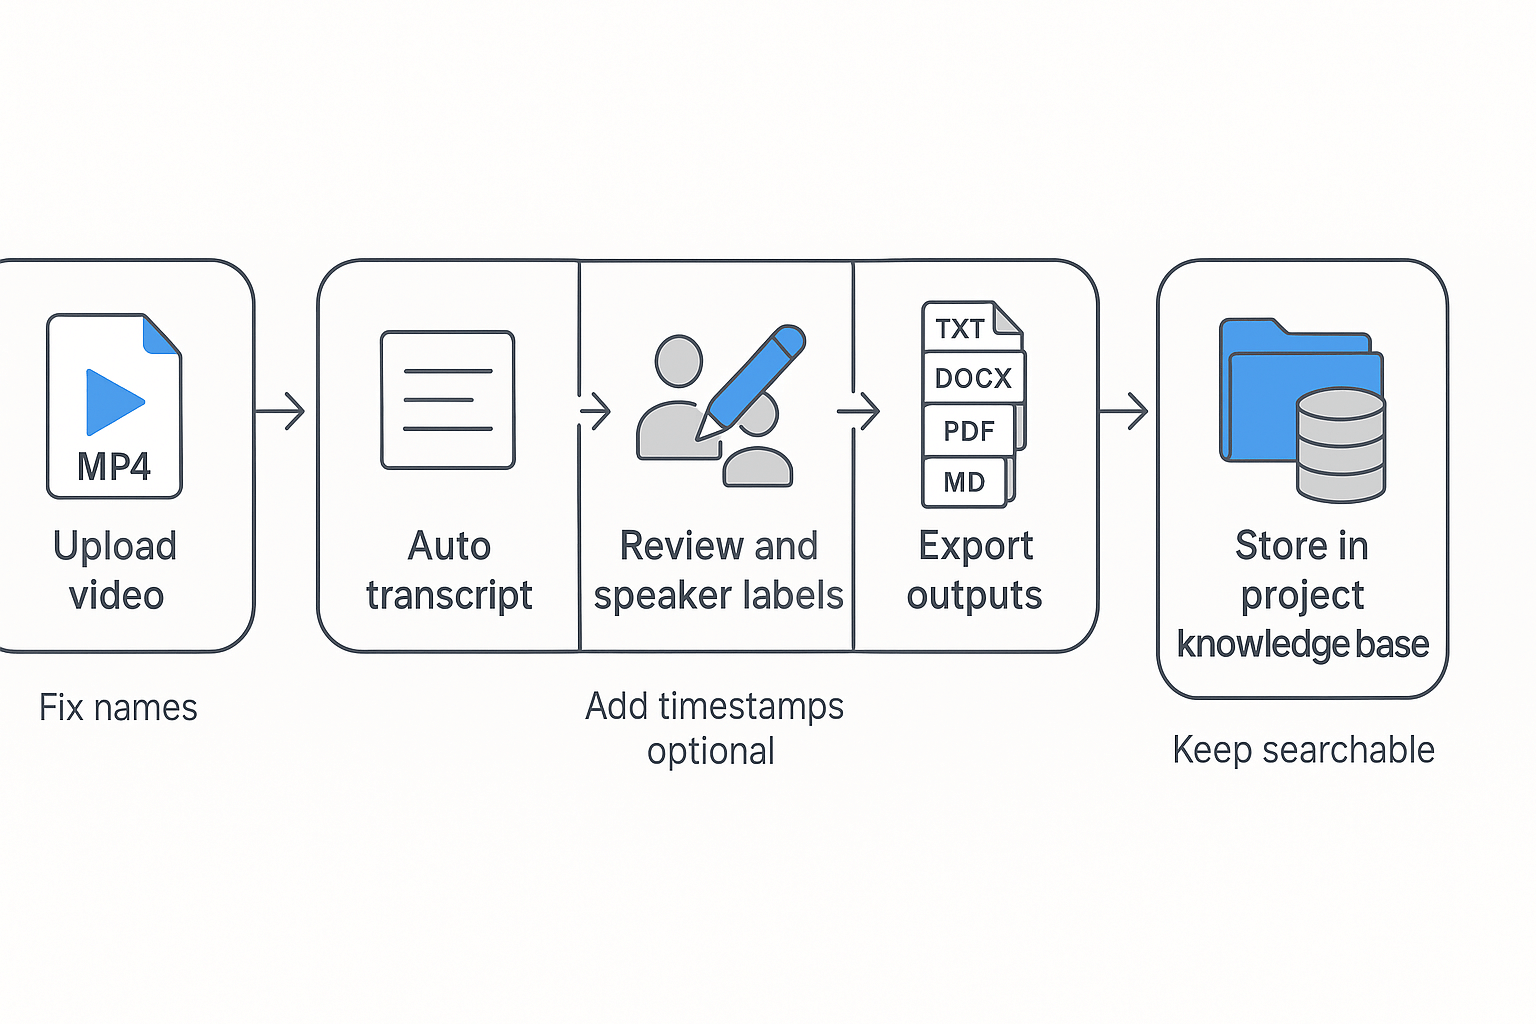
To transcribe a video with TicNote Cloud, you upload the video, run post transcription, do a quick cleanup pass for names and key terms, then export a transcript or summary in the format you need. It's a fast, end-to-end flow from video to a clean document you can reuse in docs, captions, or a team wiki.
You've got a video, but turning it into usable text is a time sink. If you skip review, small errors stack up fast, especially with names. You can try TicNote Cloud for Free to get the first draft transcript, plus a summary, then polish only what matters.
Before you start: pick the right file and set audio expectations
Most people get better results by planning for "good enough" audio. You don't need a studio mic, but you do need clear speech.
Here's what to check first:
- Common file types: MP4 and MOV are the most common video uploads. Audio-only files like MP3, M4A, and WAV also work for many workflows.
- Length and size reality check: long videos take longer to process. If your file is hours long, plan for a first pass, then a quick edit pass.
- What "good audio" means:
- One main speaker is close to the mic
- Low background noise (fans, music, traffic)
- Minimal overlap (people not talking over each other)
- Steady volume (no whispering, no clipping)
If your source is audio only, this companion guide on how to transcribe audio helps you choose the best setup and cleanup steps for voice recordings, meetings, and podcasts.
Step by step: video to transcript you can actually use
Follow this simple workflow. It's designed to cut editing time.
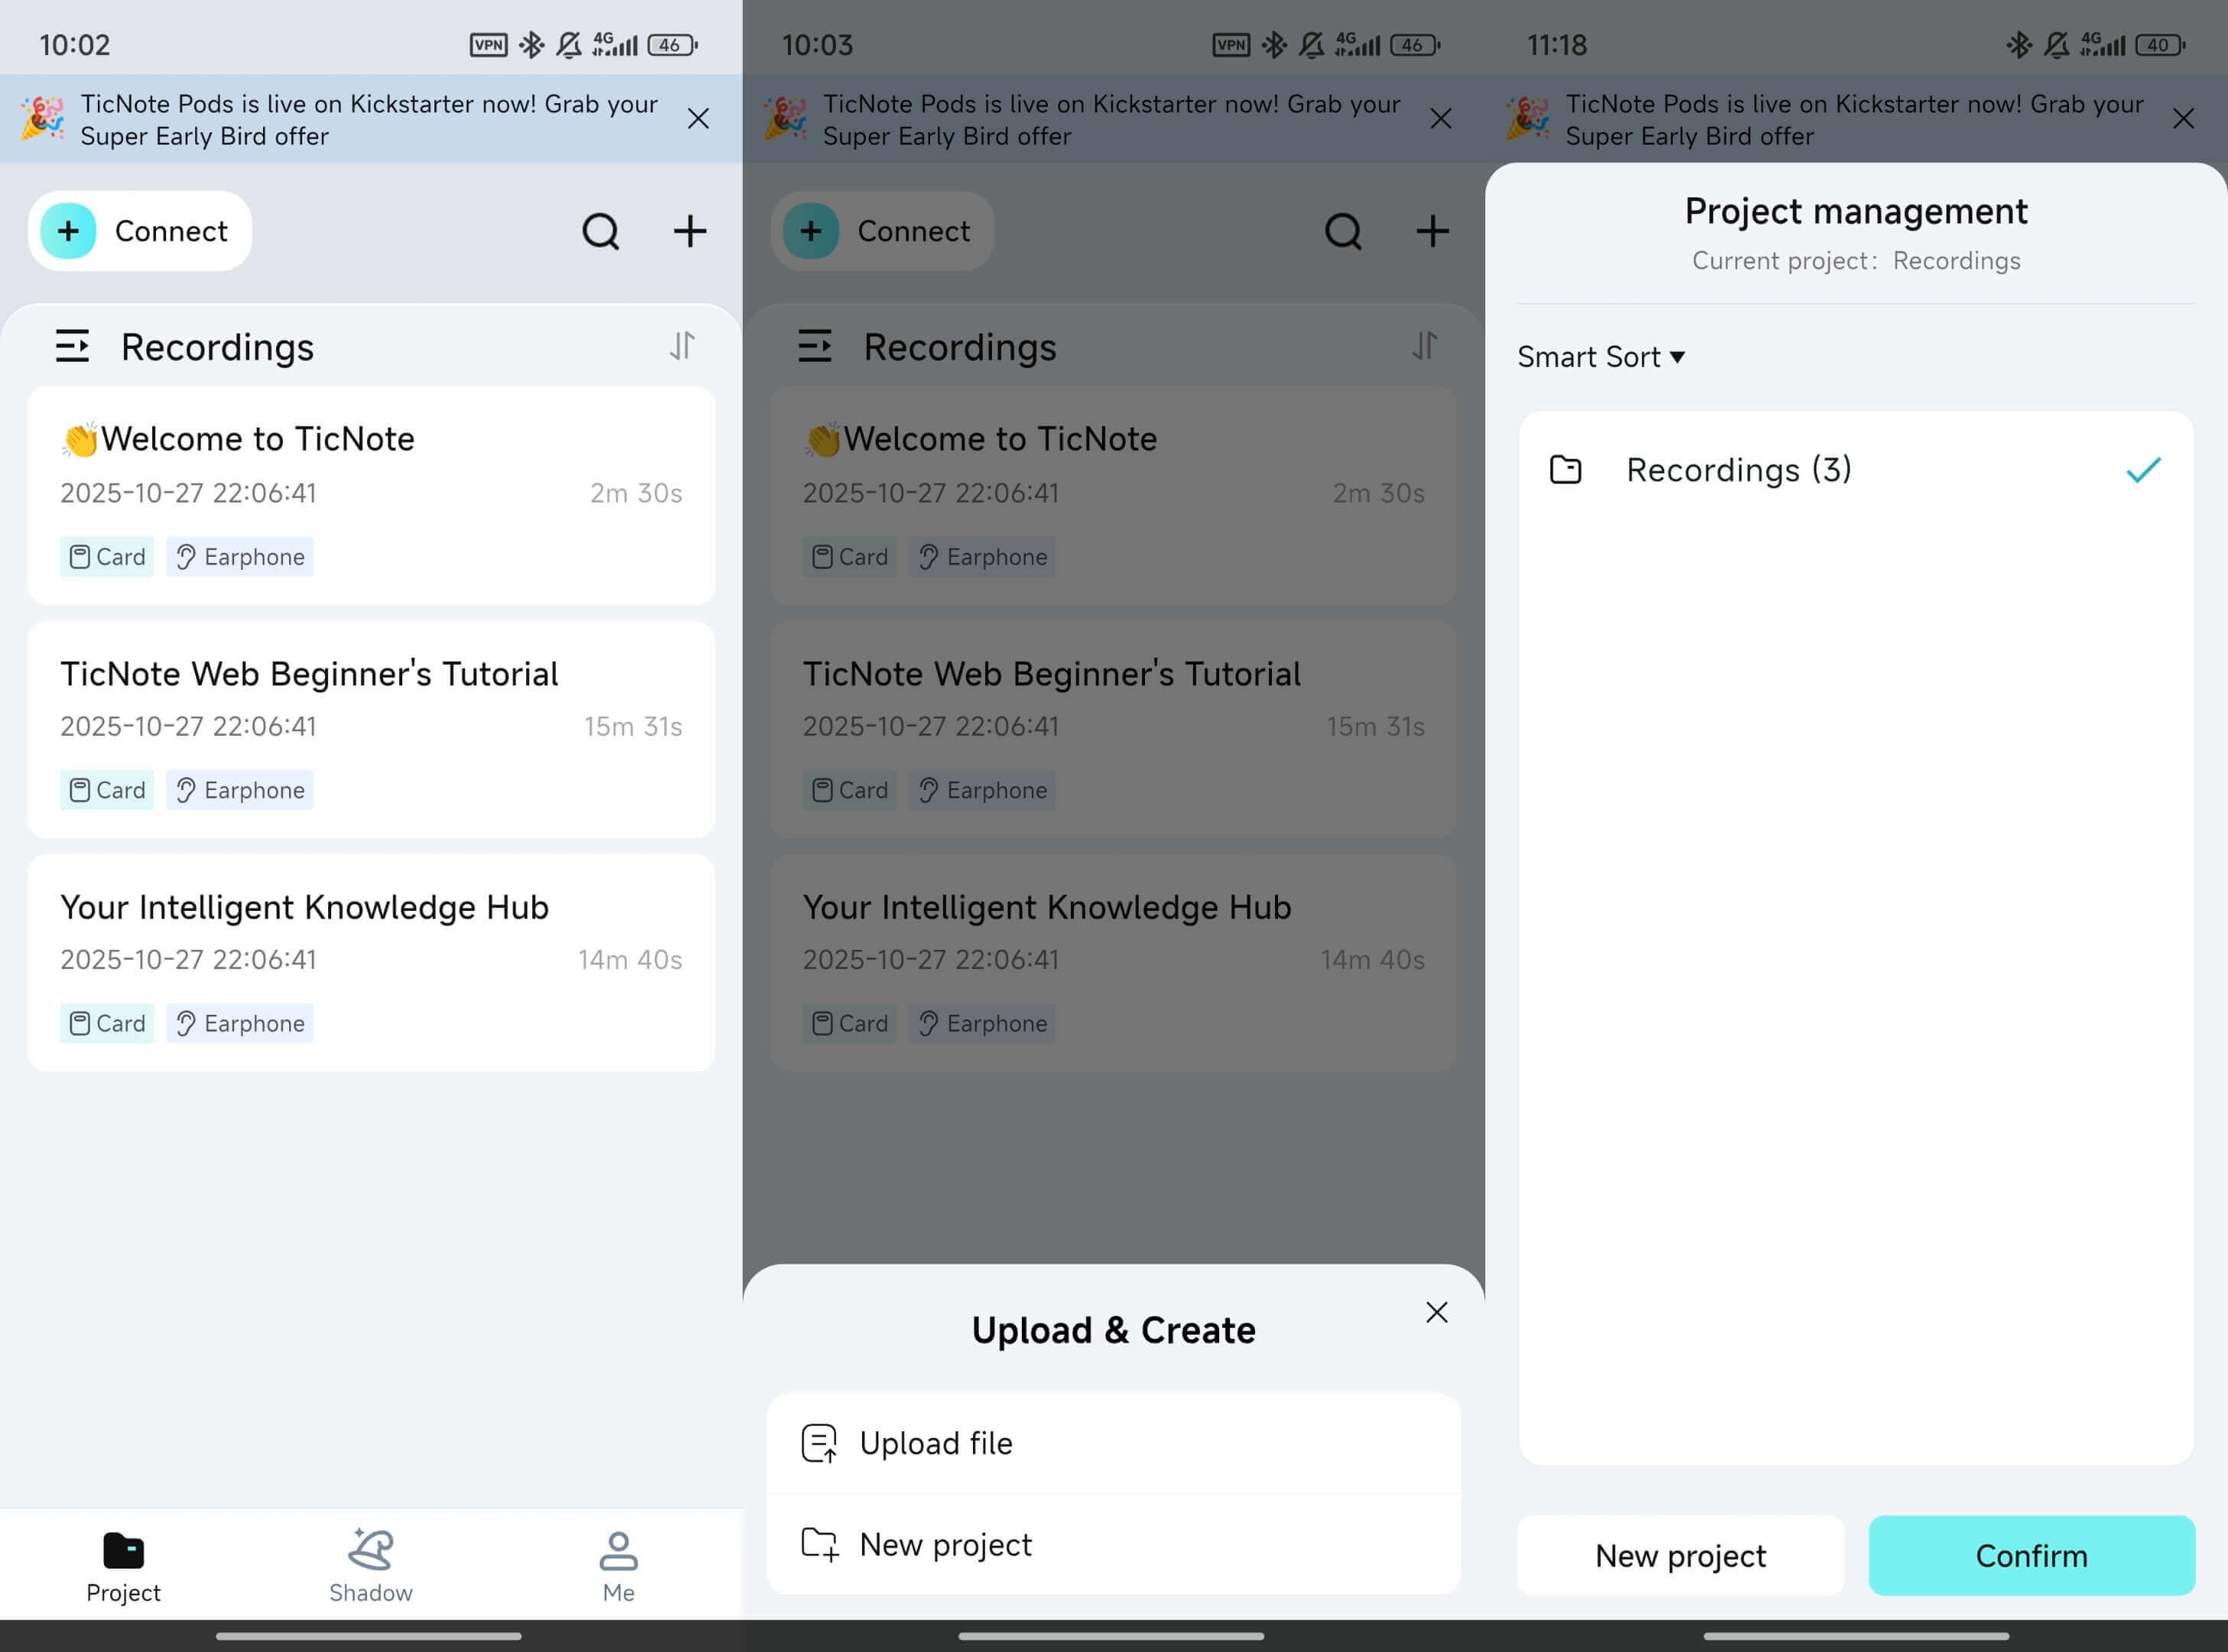
- Upload your video to TicNote Cloud
Create or open a project in TicNote Cloud Web Studio, then upload your video file using the upload button at the top of the interface. Uploaded files appear in the project list on the left, keeping everything organized by client, course, or topic.
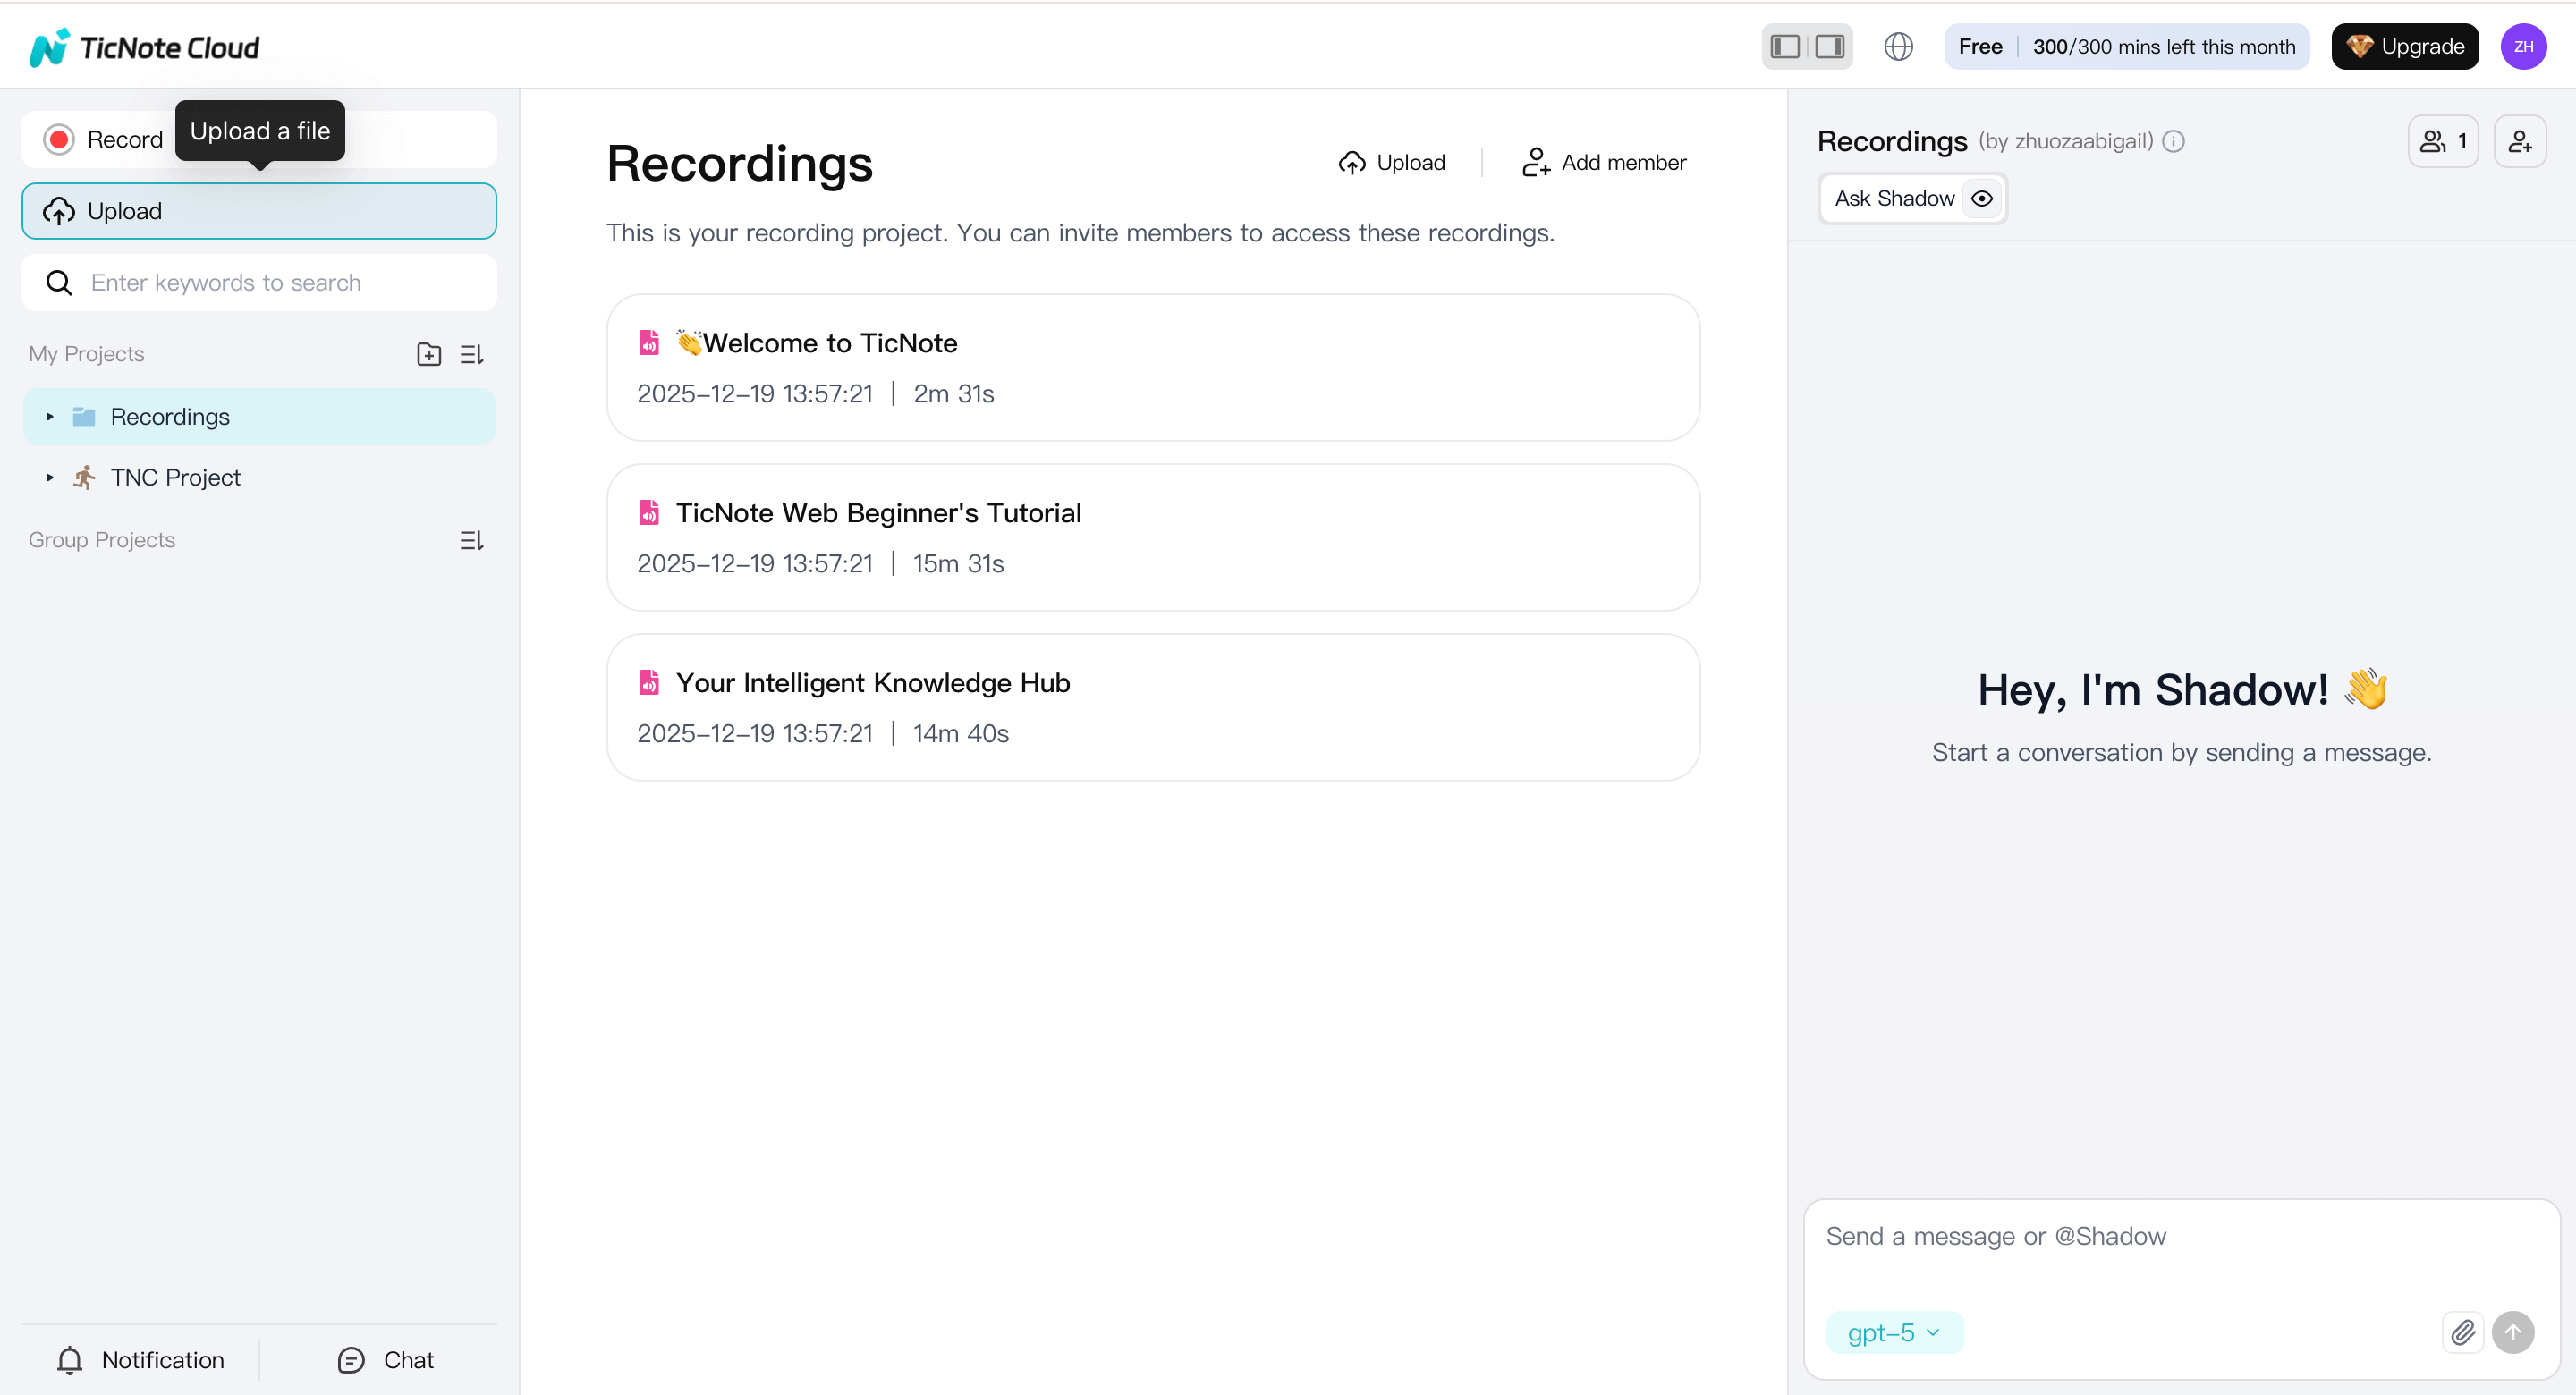
Use clear file names like "Webinar Jan 2026" or "Sales Call – ACME" so transcripts stay easy to identify later.
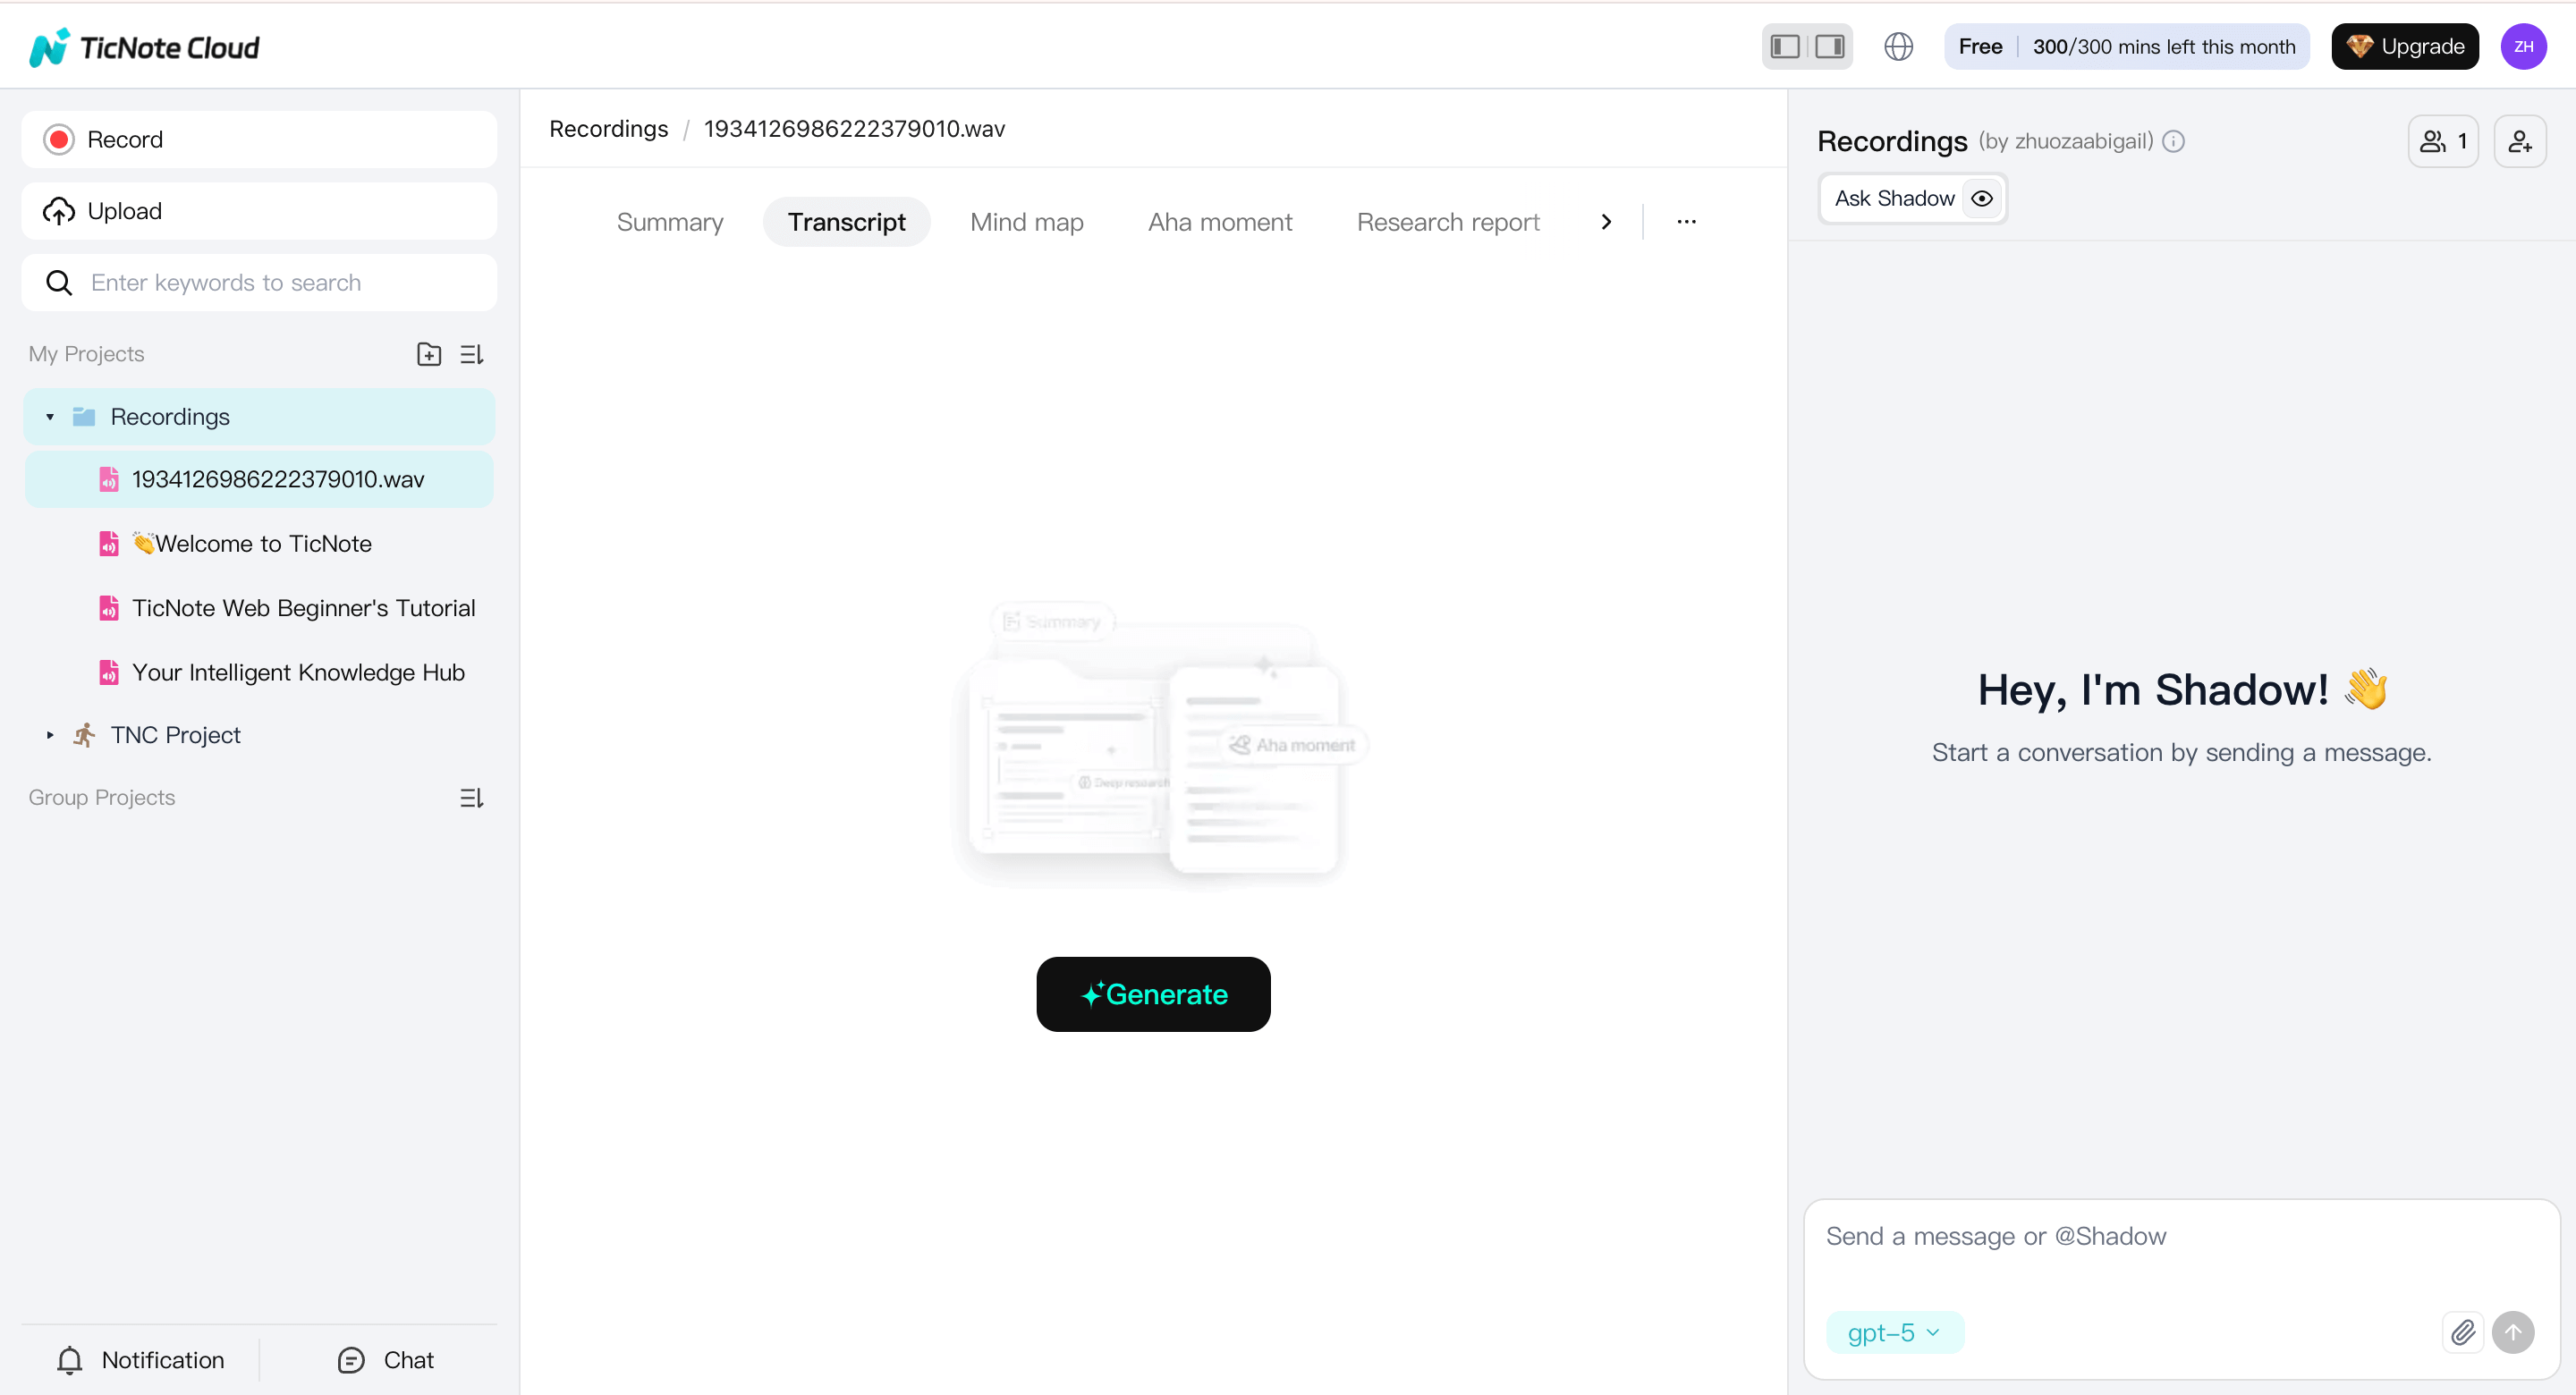
- Start post-transcription
Select the uploaded video from the left panel, switch to the Transcript tab, and start generating the transcript. This creates the first draft you'll review and refine.
- Choose language and AI model
Before transcription runs, pick the spoken language and the AI model that best matches your content. Once confirmed, TicNote Cloud processes the video and generates the transcript automatically.
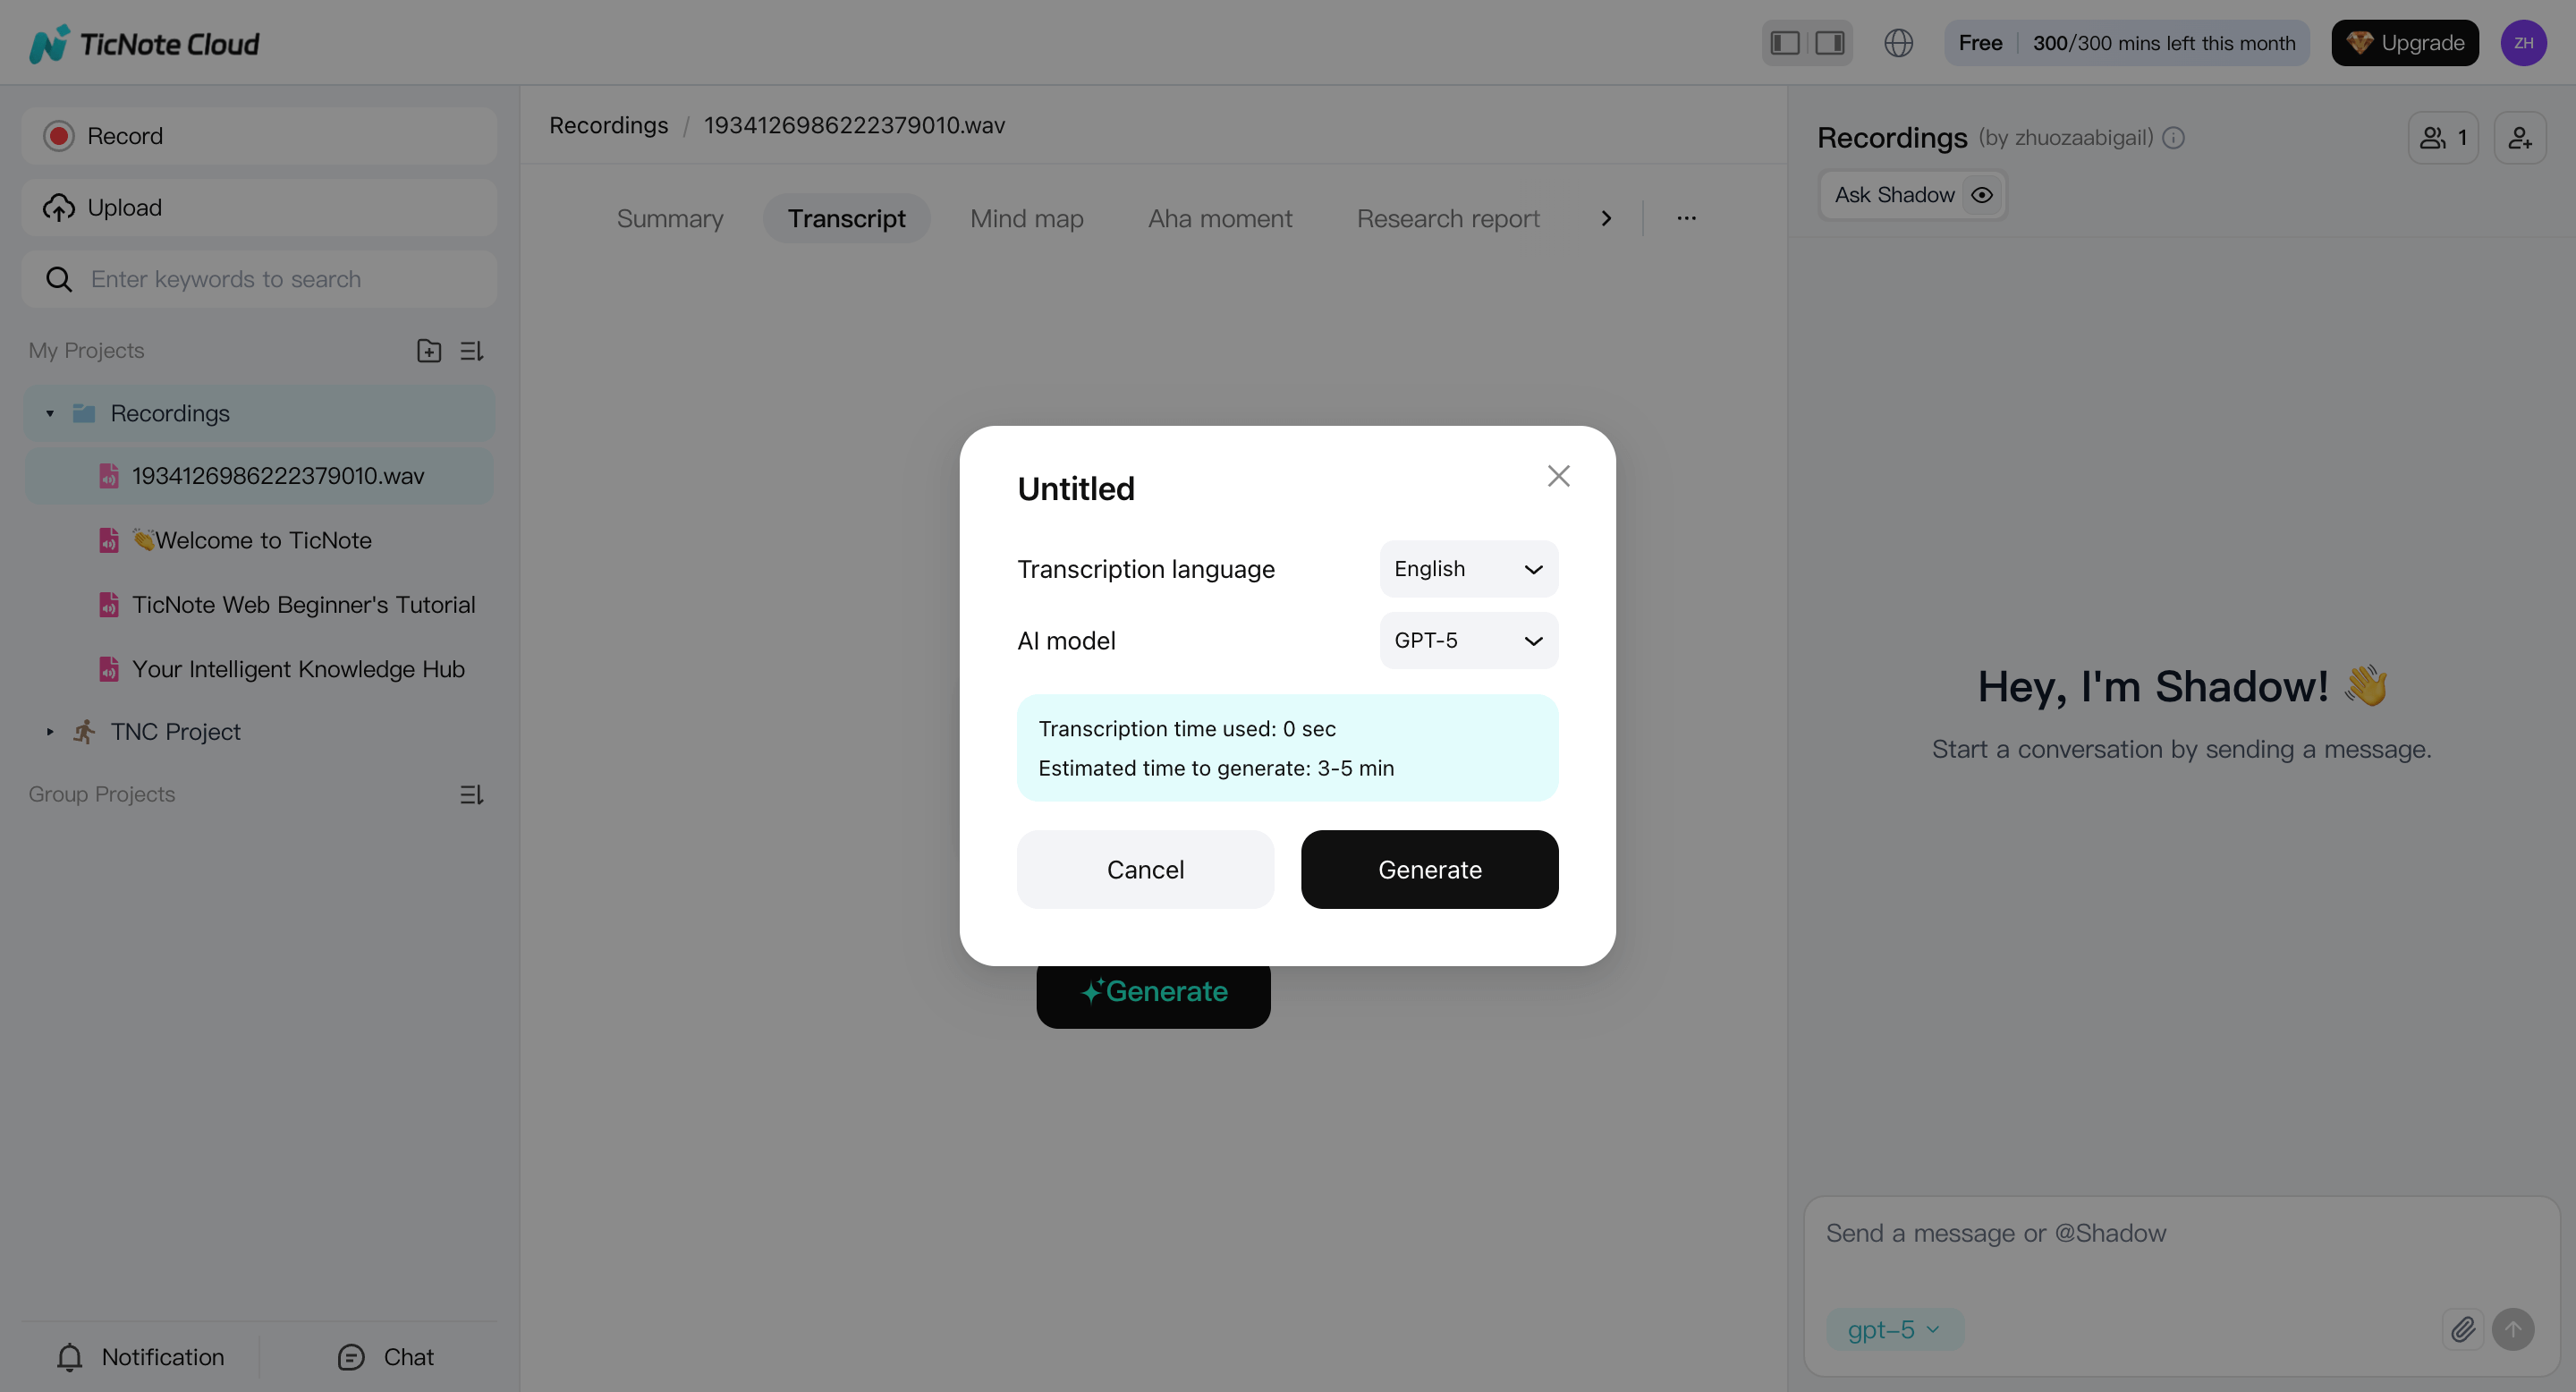
If the video includes multiple speakers, make a quick note of who's who—you'll handle labels during review.
- Review for names, terms, and obvious errors
When the transcript is ready, scan it inside the editor:
- Fix proper nouns first: people, brands, tools, places
- Correct repeated errors once, then search for the same term
- Spot-check tricky sections like accents, numbers, and acronyms
This pass usually takes far less time than manual transcription from scratch.
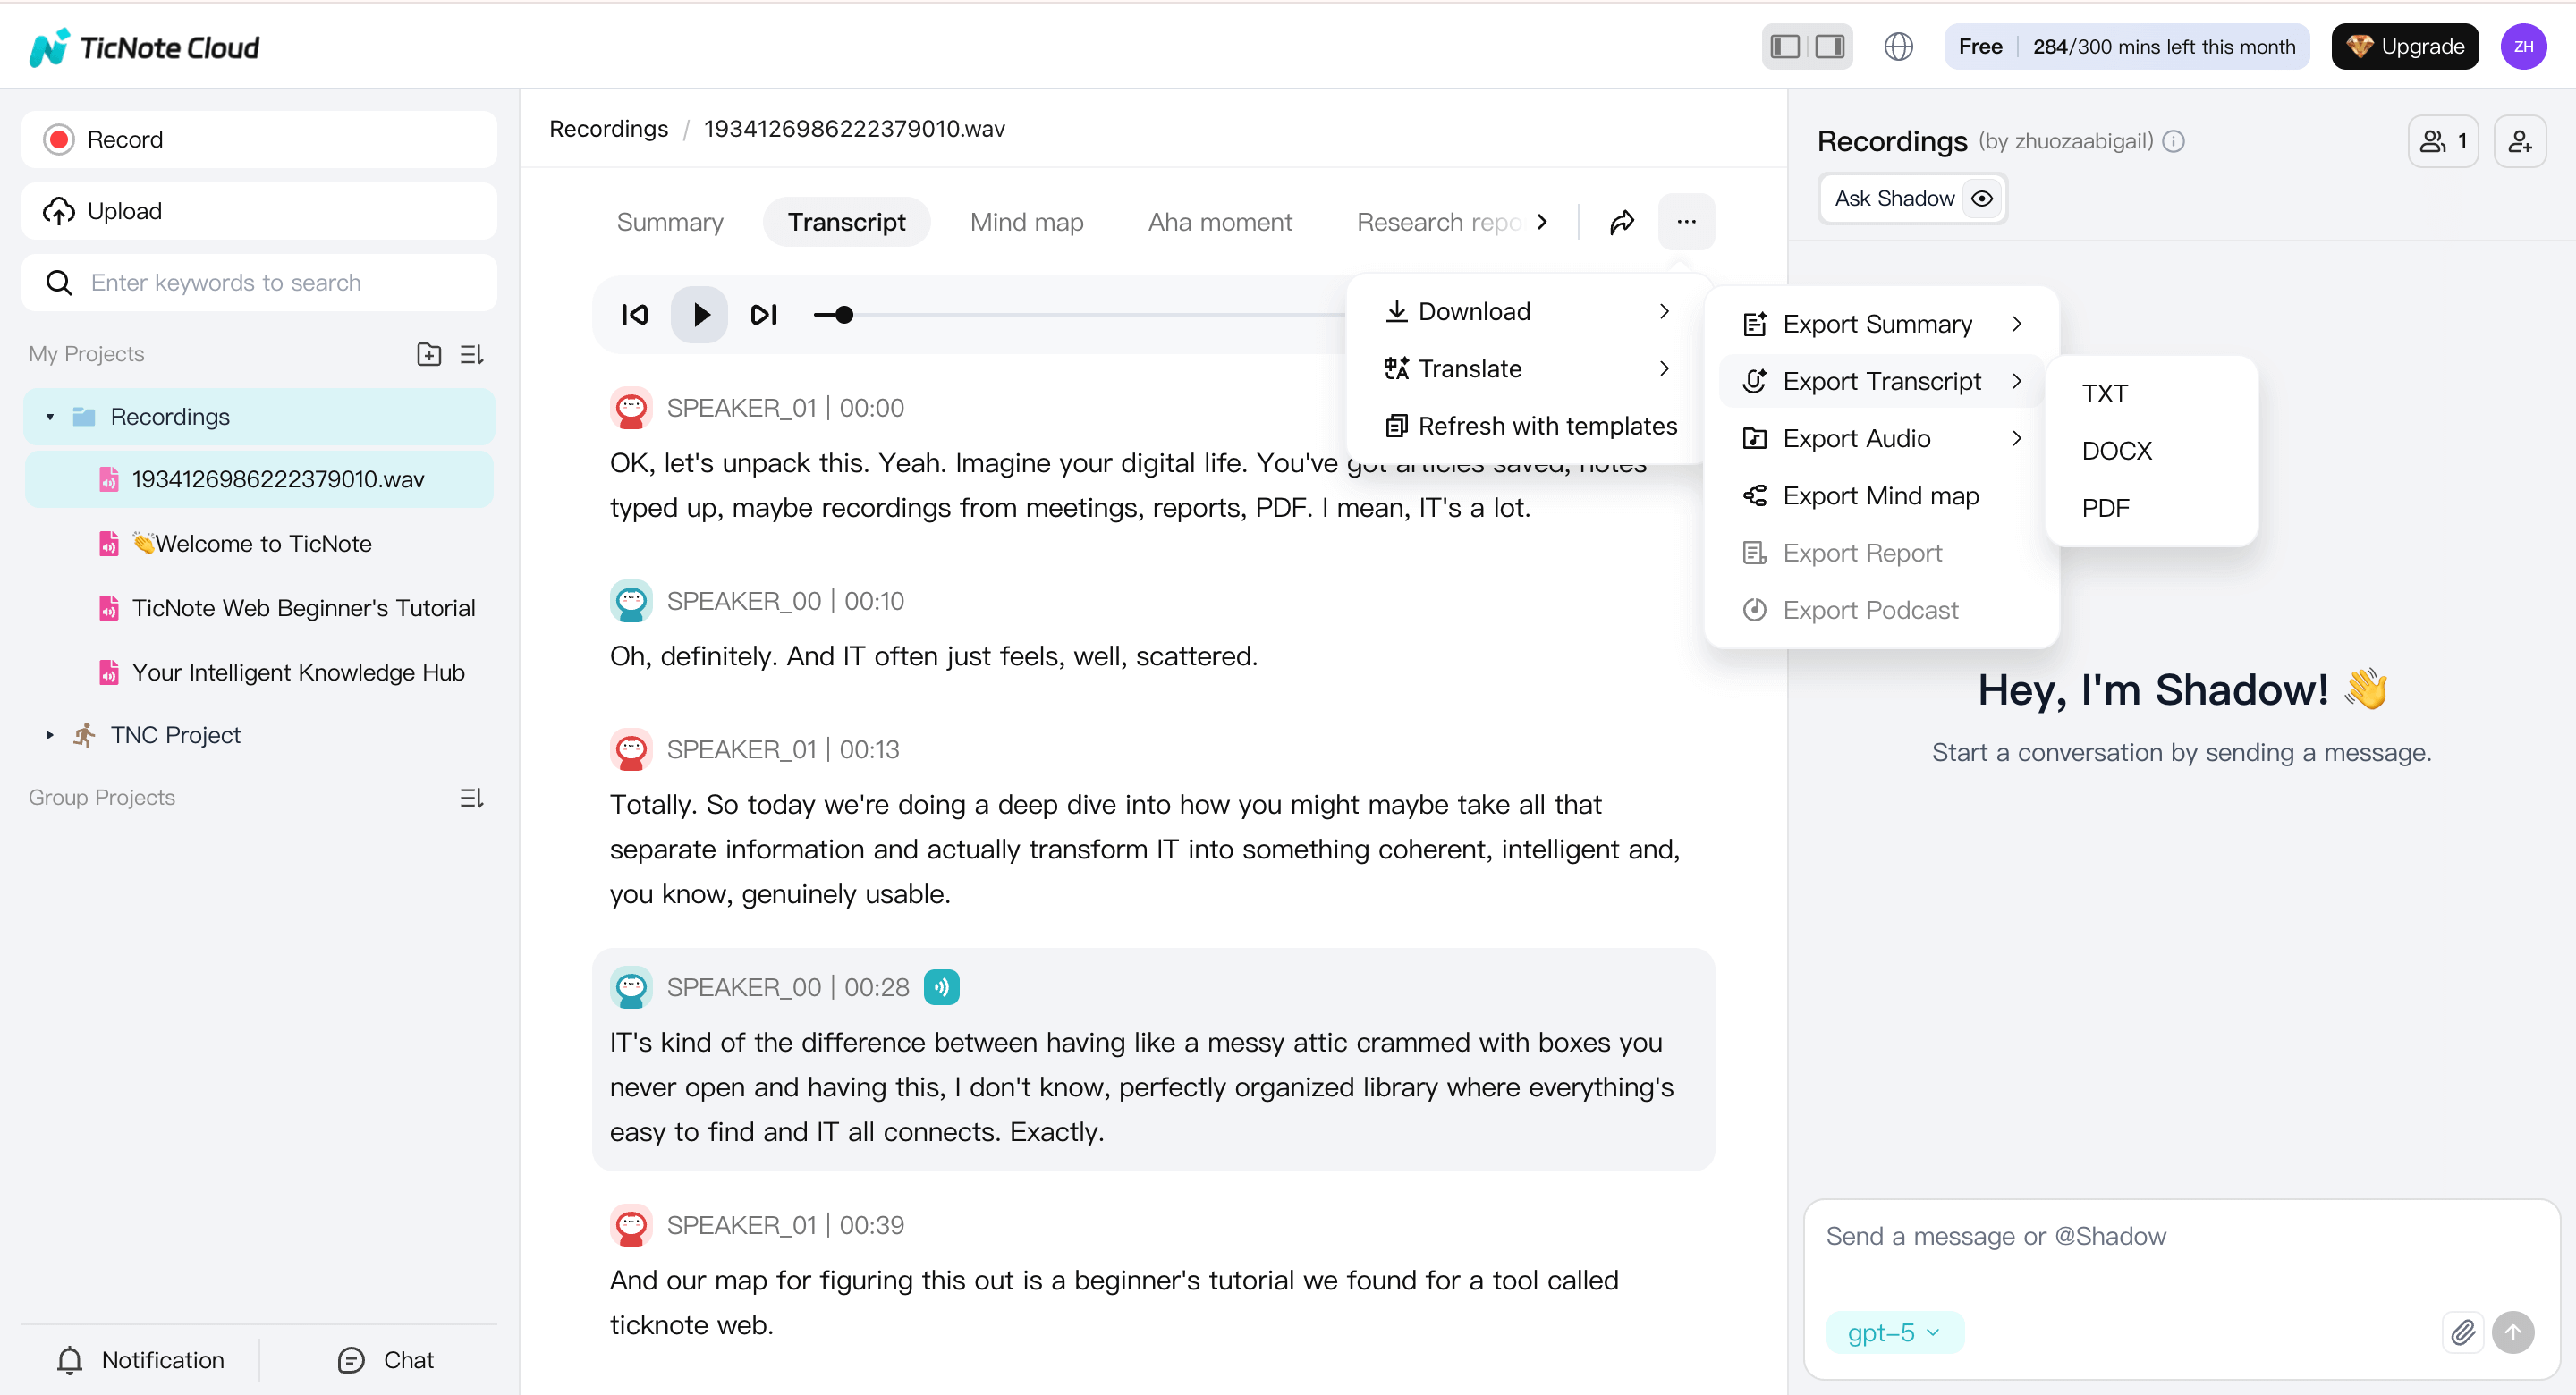
- Export the right format (and keep it searchable later)
Once the text looks clean, export based on what you'll do next:
- Export TXT for a raw transcript you can paste anywhere.
- Export DOCX, PDF, or Markdown for notes and summaries you can share.
- Save everything back into the project so it stays searchable later. That way, you can find quotes, decisions, and topics across files without digging through folders.
If you want a simple reuse flow, do this next: export a TXT transcript for editing, then export a Markdown summary for your doc or CMS.
Optional: transcribe video on the TicNote App (mobile workflow)
If you're working from your phone or tablet, the TicNote App follows the same logic with a mobile-first flow.
Upload your video to a project, start transcription, adjust language and detail settings if needed, then generate the transcript. You can review and edit the text directly in the app and export it in multiple formats from the top menu.
Use the app when you need quick turnaround on the go, then switch to the web editor later for deeper cleanup or exporting multiple formats.
TicNote Cloud-only workflow features that are hard to replace elsewhere
Most transcription tools stop at "here's the text". TicNote Cloud is built to turn that transcript into a reusable knowledge asset inside a project.
What you get that isn't standard everywhere:
- Project-based knowledge base: keep videos, transcripts, summaries, and related docs together, not scattered.
- Shadow AI chat across files: ask questions across one file, a folder, or the whole project, and get grounded answers.
- Built-in translation: translate transcripts and notes into many languages when you need a second version.
- Mind map output: turn long transcripts into a visual outline for review and planning.
- Flexible exports: transcript as TXT, summaries as Markdown, DOCX, or PDF, plus mind map formats.
Try TicNote Cloud for Free and generate your first video transcript plus a shareable summary in minutes.
5 ways to transcribe video to text: accuracy, cost, and speed compared
To transcribe a video, you can pick from five real-world methods: an AI tool that transcribes from an upload, a human service, built-in voice typing, a "play audio into mic" hack, or fully manual typing. The best choice depends on what you need most: speed, accuracy, privacy, or polished outputs like captions, summaries, and translations.
You don't just need words on a page; you need a clean transcript you can use. If you choose a method that's fast but messy, you'll lose time fixing it. A workflow tool like TicNote Cloud can cut rework by turning an upload into a transcript, then into a summary and translated versions.
Here's the key detail: Evaluating Open-Source ASR Systems: Performance Across Diverse Audio Conditions and Error Correction Methods (2025) found that transcription accuracy varies significantly with accent, gender, overlapping speech, and background noise. So "best" is really "best for your audio and risk level."
| Method | Speed | Typical accuracy | Editing effort | Privacy fit | Outputs |
| 1) TicNote Cloud (upload + AI) | Fast | High for clear audio, drops with noise | Low to medium | Good for most business use | Transcript, summaries, translation, exports, searchable workspace |
| 2) Human transcription service | Slow | Very high when you pick a good vendor | Low after delivery | Depends on vendor contract | Transcript, sometimes captions, often custom formatting |
| 3) Built-in dictation, voice typing | Medium | Medium, depends on mic and pacing | Medium to high | Good, often stays on device or OS account | Plain text notes, limited structure |
| 4) "Play audio into mic" workaround | Medium | Low to medium | High | Risky, hard to control routing | Rough text only |
| 5) Fully manual typing | Very slow | High if you're careful | Very high | Best, nothing leaves your machine | Anything you format, but you do all work |
Estimate the true cost in 2 minutes
Don't compare tools only by price per minute. Use this quick formula:
- Total cost = (transcribe time + edit time) × your hourly rate + vendor or tool cost
A simple rule of thumb helps:
- AI upload: you might spend most of your time editing.
- Human service: you spend less time editing, but you pay more per minute.
- Manual typing: you pay in time, even if it's "free."
When human transcription is worth it
Choose a human service when mistakes are expensive:
- Legal or compliance records
- Medical or safety training
- Broadcast-grade content
- Heavy accents, lots of crosstalk (people speaking over each other)
- Poor audio you can't fix
You'll pay more, but you'll often get cleaner speaker labels and formatting.
When AI is "good enough" (and how to get it clean)
AI transcription is usually the fastest path for meetings, lectures, webinars, and internal training, as long as you do a quick quality pass. Use this mini checklist:
- Listen to the first 60 seconds: if it's hard for you, it's hard for AI.
- Fix names and key terms first (people, products, locations).
- Correct numbers, dates, and commitments (prices, deadlines, action items).
- Add speaker labels if the transcript will be shared.
- Remove filler only if you need a reading version.
TicNote Cloud only: transcripts that turn into a knowledge base
Most transcription tools stop at "here's the text." TicNote Cloud goes further: it can generate summaries, translate into 120+ languages, and let you search and chat across your transcripts inside project workspaces. It also exports usable formats like TXT for transcripts and Markdown, DOCX, or PDF for summaries, so you can move the result into docs, LMS, or client folders.
If you need searchable transcripts plus summaries and translation, try TicNote Cloud for free.
Make your transcript more accurate (even with poor audio)
To get a more accurate transcript, fix the audio first, then do quick prep, then edit only what matters. This workflow works no matter which tool you use, and it helps you avoid redoing the whole file. If you're trying to learn how to transcribe a video fast, this is the path that saves the most time.
Bad audio creates wrong words and extra edits. That turns a 10 minute job into an hour. You can Try TicNote Cloud for Free to transcribe, then target edits with search, speaker labels, and exports that are easy to clean. The same workflow applies when you need to transcribe Facebook video to text for posts, ads, or archived content.
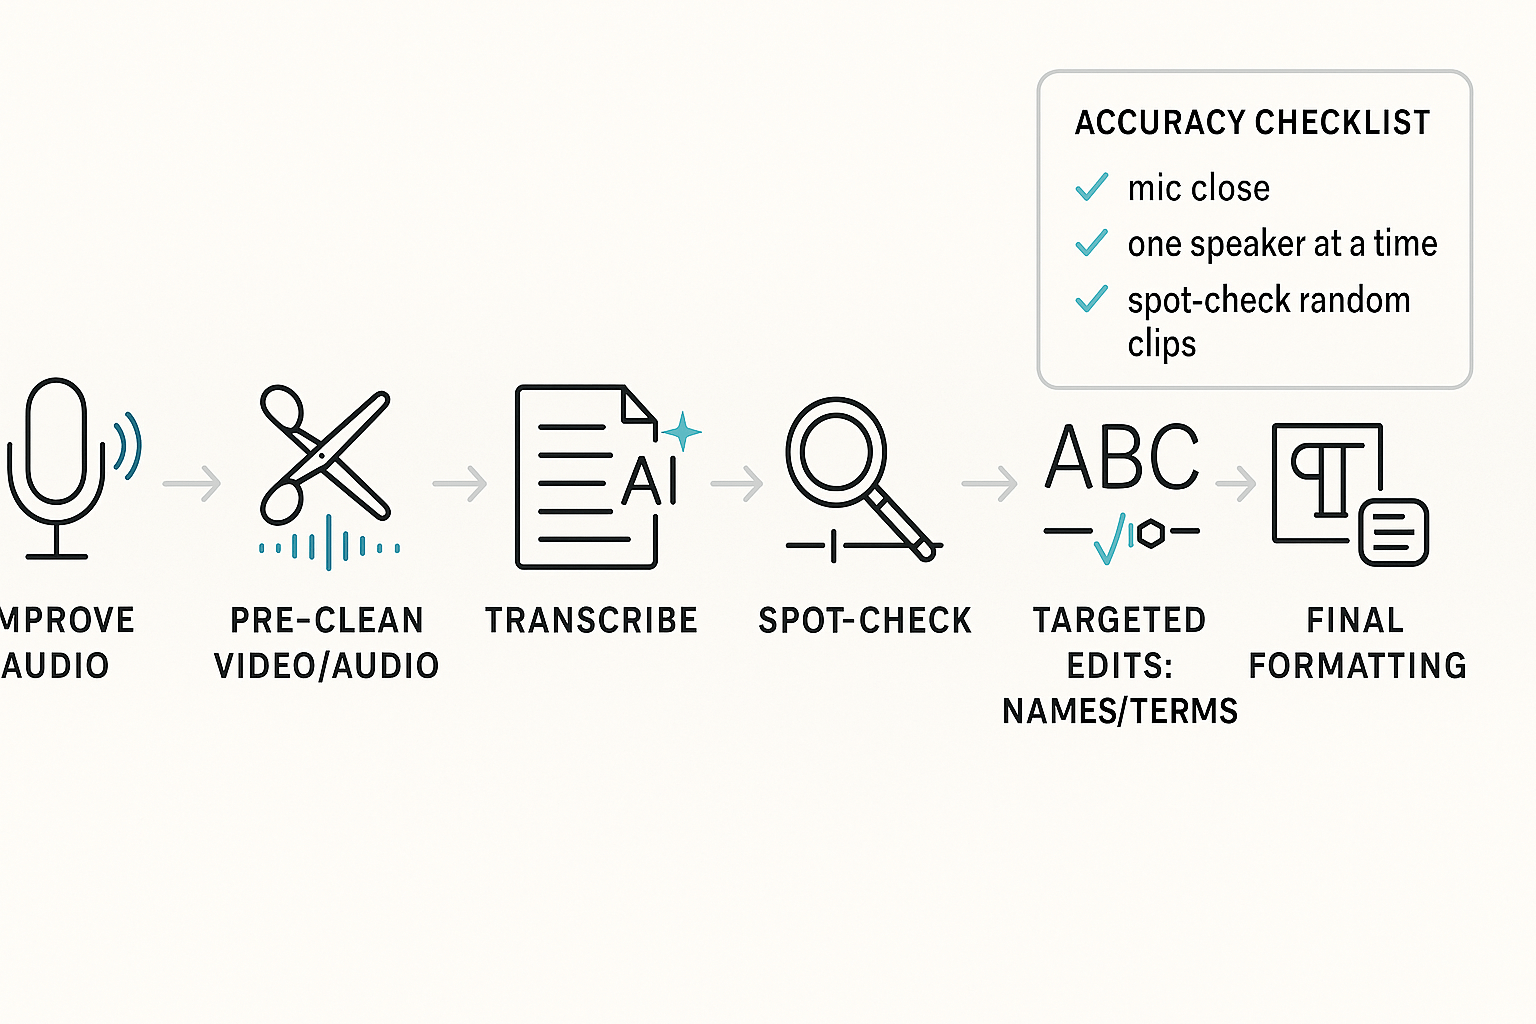
1) Fix the input (biggest accuracy win)
Do these before you hit record when you can:
- Put the mic close: 6 to 12 inches is a good target.
- Keep distance steady, don't lean in and out.
- Cut echo: soft rooms help, close doors, add a blanket if needed.
- Ask for one speaker at a time, even on calls.
- Use headphones on meetings to prevent speaker bleed.
2) Quick clean-up before you transcribe
A few small edits make the model hear better.
- Trim long silences at the start and end.
- Normalize volume (make quiet parts louder, loud parts lower).
- Split long videos into chapters, like 10 to 20 minutes.
- If you can, isolate voices (separate tracks or "voice focus").
3) When words are wrong: edit smart, not hard
Don't re-listen to everything. Do targeted checks.
- Make a "must be right" list: names, brands, product terms.
- Run search and replace for repeat errors.
- Replay only at checkpoints: intros, demos, key decisions.
- Spot-check 3 random clips for quality: 30 to 60 seconds each.
If you hear many misses, fix audio and re-run. If it's mostly good, edit only the must-hit terms.
Real-life poor audio tips (when you can't re-record)
- Heavy accents: add the person's name and key terms to your must-hit list.
- Cross-talk: split the clip, then label speakers after the fact.
- Bad Wi Fi calls: ask for the local recording, or use the host track.
Advanced transcription tips: speaker labels, timestamps, and formatting rules
To make a clean transcript, lock three things: speaker labels, timestamps, and simple formatting rules. When these are consistent, your video text is easy to scan, quote, and search. It also makes it faster to edit clips, write summaries, or hand notes to a team.
Messy labels and random timestamps slow you down later. You waste time guessing who said what and where it happened. If you want a faster workflow, Try TicNote Cloud for Free to transcribe, then standardize speaker names and exports in one place.
Label speakers so the transcript stays stable
Pick one naming rule and stick to it across every file:
- Use Role + Name: "Host, Maya", "Client, Jordan", "Instructor, Dr. Lee".
- If you don't know the name, use "Speaker 1", "Speaker 2", and keep it consistent.
- If a speaker's role changes, don't rename them mid-file. Add a note once: "Jordan (now Acting PM)".
- If two people share a role, add a short tag: "Sales, Ana", "Sales, Ben".
Add timestamps only where they help
Timestamps are useful when you need to find moments fast. Common cases: training review, legal checks, and video editing.
Keep it simple:
- Add a timestamp at each topic change.
- Also add one every 2 to 5 minutes.
- Use one format everywhere, like [00:12:34].
Formatting rules that make transcripts readable
Good formatting improves meaning, not just looks.
- Use short paragraphs, 1 idea per block.
- Punctuate for meaning. Add commas and periods where pauses change intent.
- Light cleanup is fine: remove repeated fillers like "um", "uh", "you know" when they add no meaning.
- Don't "fix" facts. If it's unclear, mark it.
- For gaps, use a clear tag with time: [inaudible 00:12:34] or [crosstalk 00:12:34]. Never guess.
Expert best practice: Edit for clarity, not perfection. Keep the speaker's meaning, note anything you can't hear, and avoid rewriting someone's words just to make them sound smoother.
Try TicNote Cloud for Free to generate a transcript, apply consistent labels and timestamps, and export clean text you can reuse in docs, captions, and team notes.
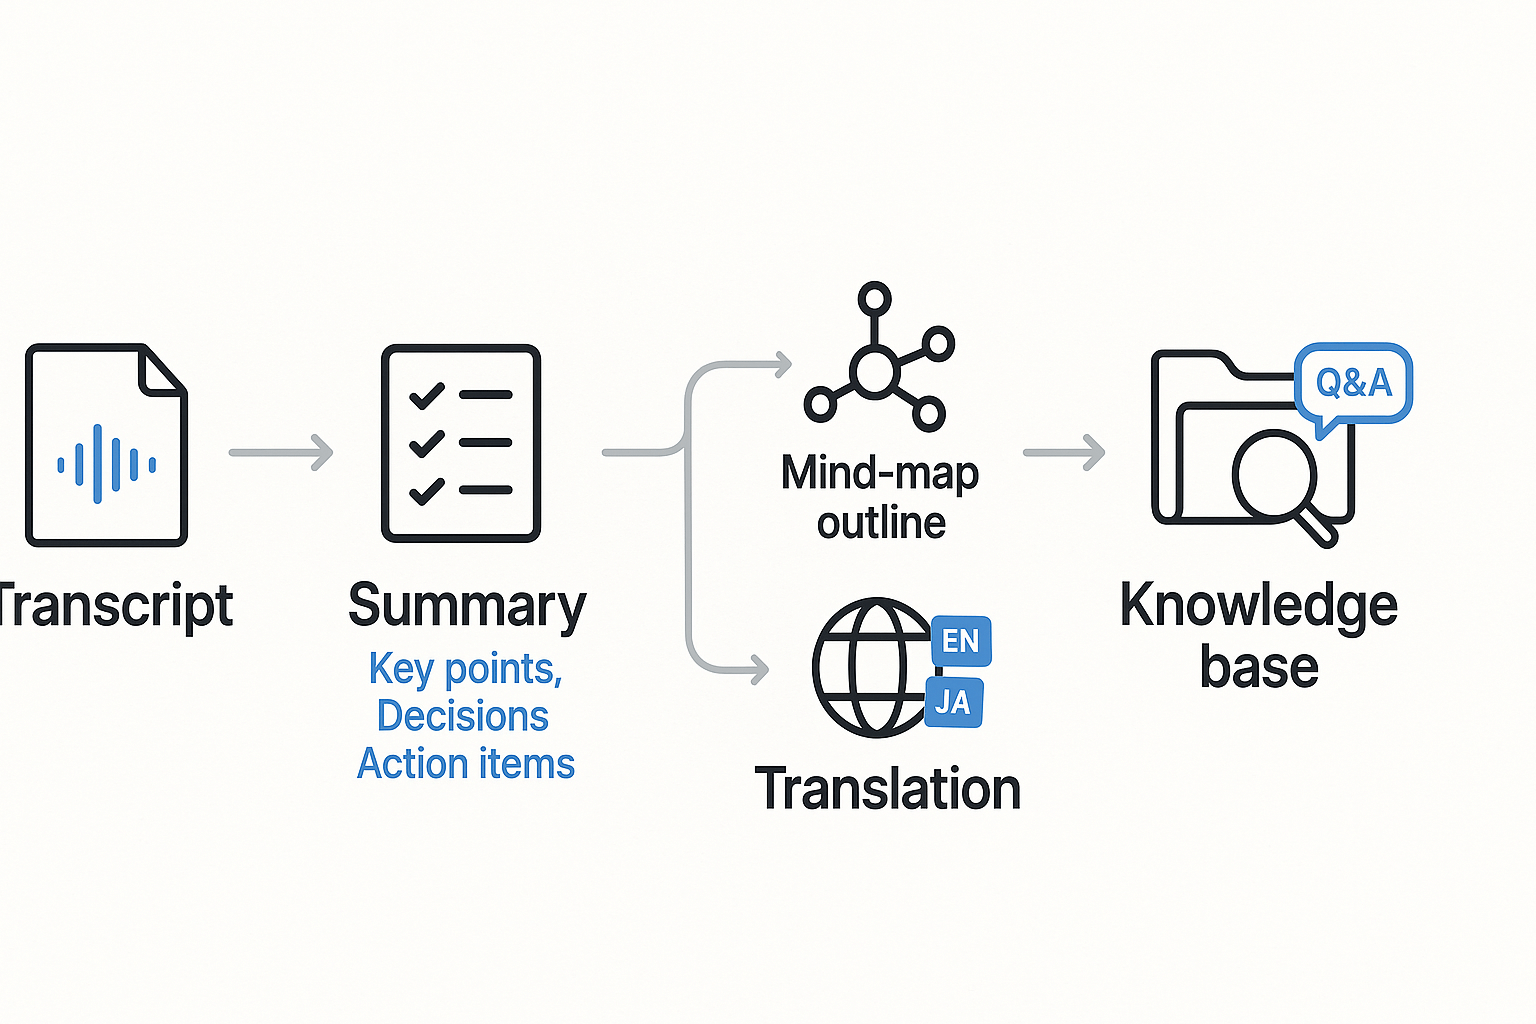
Turn the transcript into usable work: summaries, translation, and a searchable knowledge base
To get real value from a transcript, turn the text into clear outputs people can use, a decision-safe summary, a translated version for teammates, and a searchable place to find answers later. That is the difference between "how to transcribe a video" and how to ship work from it.
You get the transcript, then the real work starts: cleaning, pulling actions, and rewriting for others. If you skip this step, decisions get lost and follow ups slip. With TicNote Cloud, you can turn one transcript into structured notes, translations, and search across files in one place.
1) Create a decision-safe summary people can act on
A good summary is not a shorter transcript. It is a clear record that matches how teams work.
Use this simple outline:
- Agenda or goal (1 to 2 lines)
- Key points (bullets, grouped by topic)
- Decisions (what was decided, by whom)
- Action items (task, owner, due date)
- Open questions (what is still unclear)
In TicNote Cloud, start with an AI notes template that matches your meeting type. Then review the "Decisions" and "Action items" lines first. If those are wrong, fix them before you share.
2) Translate for global teams without breaking names and terms
Machine translation can fail on names, product terms, and acronyms. The fix is a tiny glossary.
Before you translate, make a short "keep list":
- People names and roles
- Product names and feature terms
- Deal stage terms, KPIs, and acronyms
Then translate the transcript or the summary. After that, spot check the keep list items.
3) Build a searchable knowledge base for future questions
Once your transcript lives in a project folder, you can search it like documentation. Better yet, you can ask questions across videos later with Shadow Q&A, like "What did we promise this client?" or "Which lesson covered topic X?" You can also generate a mind-map-ready outline for fast review.
If you also need an audio-first workflow, this guide on [transcribing audio for meetings and research](How to Transcribe Audio: Step-by-Step Workflows for Meetings, Podcasts & Research) pairs well with the same reuse steps.
Quick vignette: sales call to follow up in 10 minutes
A rep records the call, uploads it, and gets the transcript. They generate a summary with decisions and action items, then translate the summary for a regional teammate. Finally, they share the action list, and save everything in the deal project so anyone can ask questions later.
Accessibility and compliance: captions vs transcripts (and what to publish)
If you're learning how to transcribe a video, publish the right text for the job: transcripts are full text you can read, closed captions are timed text on the video, and subtitles usually focus on translation. For accessibility, captions matter most because they sync with the audio and include key sounds. For SEO and reuse, a clean transcript is the best base.
Struggling to keep captions accurate and in sync? Small errors can confuse viewers and create risk for teams. With TicNote Cloud, you can generate a transcript fast, then clean it once and reuse it for captions, summaries, and translations.
Pick the right deliverable
- Transcript: A readable document, great for notes, searching, and quoting.
- Closed captions (CC): Timed text for the same language, includes sound cues.
- Subtitles: Timed text, often for another language, may skip sound cues.
For many public sites, captions are not optional. Understanding Success Criterion 1.2.2: Captions (Prerecorded) states that WCAG 2.0 Success Criterion 1.2.2 requires captions for all prerecorded audio content in synchronized media at Level A.
Accessibility checklist you can apply today
- Use clear speaker IDs, like "Alex:" and "Jordan:".
- Add sound cues when needed, like "[laughter]" or "[door slams]".
- Keep caption lines short and easy to scan.
- Don't "clean up" meaning, the published text must match the speech.
When to get a legal or accessibility review
Ask for a review if you publish for a public institution, a regulated industry (health, finance), or formal training. Also, review ifthe content includes safety steps, policies, or claims.
Privacy and sensitive videos: what to check before you upload
Before you transcribe a video, check where the file goes, who can see it, and how long it stays there. A transcript can include names, faces, and private talk. So treat it like any other sensitive work file. If you can't answer the questions below, don't upload yet.
Problem: You need a transcript fast, but the video is sensitive. Agitate: One wrong setting can expose a client call or HR meeting. Solution: Use a tool built for private work, and start with Try TicNote Cloud for Free when you want a private-by-default workspace.
Run a 60-second privacy mini-audit (any tool)
Ask these before you upload:
- Data location: Where is it stored, and in which region?
- Encryption: Is it encrypted in transit and at rest?
- Retention: How long is audio, video, and text kept?
- Access control: Who can access projects, and how do roles work?
- Model training: Is your content used to train models?
- Deletion: Can you delete files, and is deletion permanent?
- Export risk: Can you control who can download exports?
Also check notices and consent. The GDPR mandates that individuals be informed about the storage duration of their personal data at the time of collection, per European Commission (2024).
Reduce exposure before you upload
Use simple guardrails:
- Remove or mute sensitive parts if you can.
- Split work by client, team, or topic in separate projects.
- Share the smallest set of people, then review permissions.
- Don't upload restricted content without written approval.
TicNote Cloud privacy notes (what's different)
TicNote Cloud is privacy-by-design and private by default. It states your data is not used to train AI models. For enterprise needs, confirm storage, retention, and access controls in a security review.
Try TicNote Cloud for Free to keep sensitive transcripts organized in a project-based workspace with controlled sharing.